
| This content applies solely to Connected Underwriting Life, which must be purchased separately from the Appian base platform. |
IntroductionCopy link to clipboard
Now that you have installed the Case Document Summary add-on module, you must incorporate the application with your CU Life Workbench Base application to utilize. This guide walks you through the required incorporation steps, including:
- Display the AI Summary in the Document record view.
- Incorporate the Document Summary module in the Create Case Process.
- Incorporate the Document Summary module in the Mark Requirement As Received Process.
Required incorporationCopy link to clipboard
These steps are required to incorporate the Case Document Summary add-on module with the CU Life Workbench.
Step 1: Display AI Summary in the Document Record ViewCopy link to clipboard
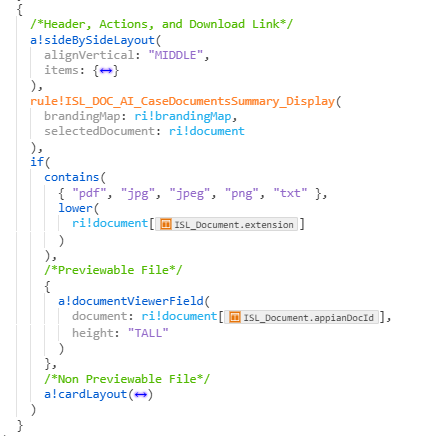
To set up the Case Document Summary module with the CU Life Workbench, you need to modify the ISL_UTIL_DocumentViewer interface to display the AI doc summary.
- Log in to the target environment as a deployment user.
- Navigate to Appian Designer.
- Navigate to the Insurance Life Underwriting (ISL) application.
-
Navigate to the ISL_UTIL_DocumentViewer interface object:
-
Add ISL_DOC_AI_CaseDocumentsSummary_Display above the interface Document Viewer Field Logic.
-
Add the Document Summary module to the Create Document process modelCopy link to clipboard
Next, you need to add the Document Summary to the Create Document process model.
- From Appian Designer, search for and open the ISL_Document_Create process model.
-
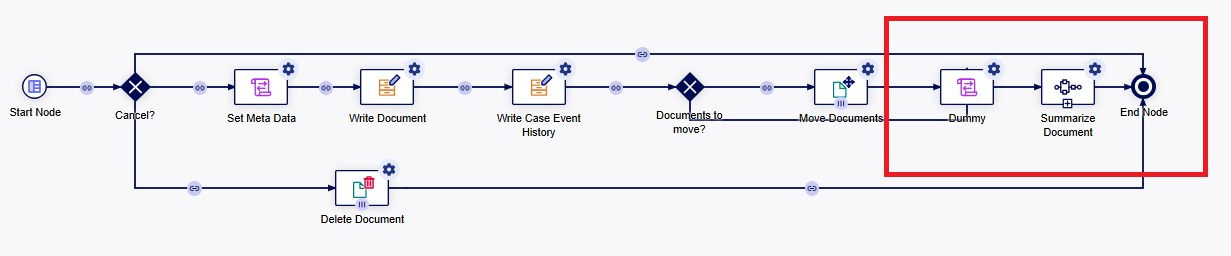
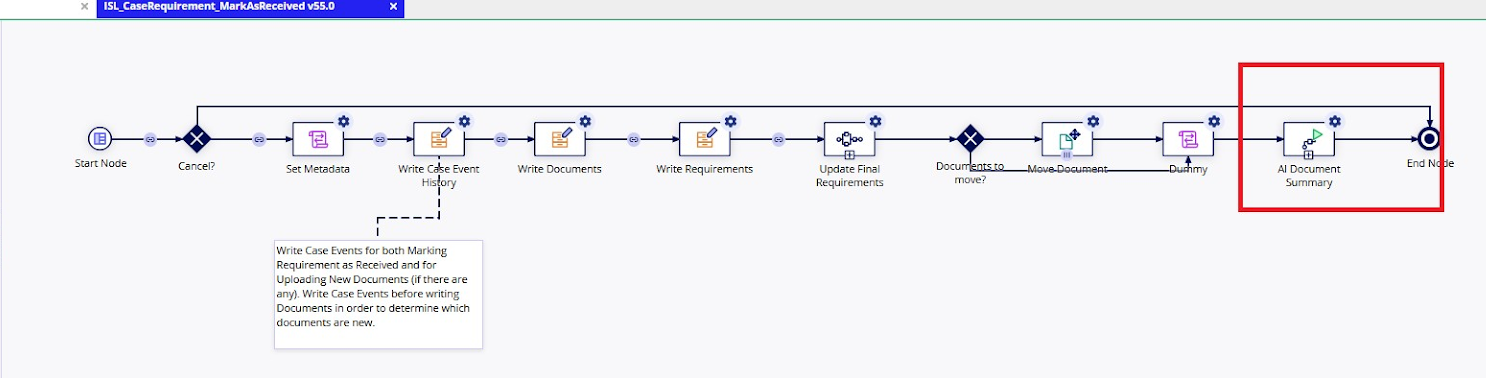
Before the End node, add a synchronous subprocess node labeled Summarize Document as shown:
- Open the new subprocess node, and go to Properties.
-
Navigate to the Setup tab and select the following settings as shown:
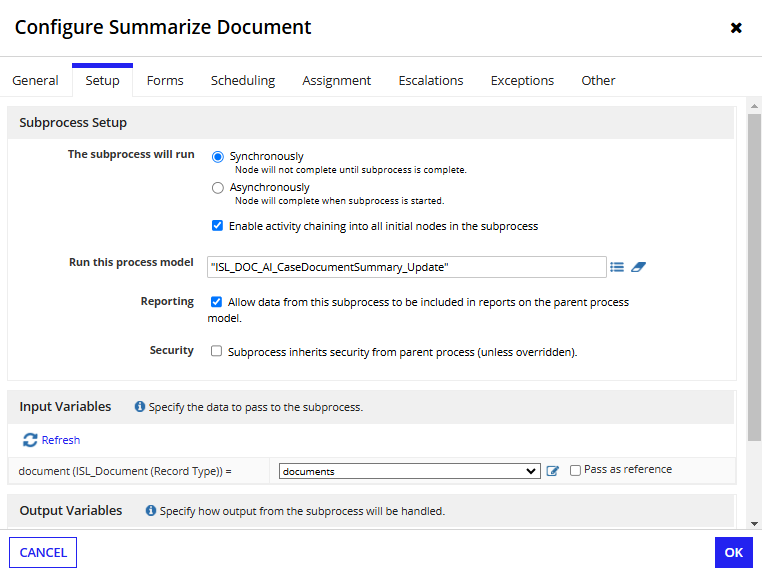
- In the Subprocess Setup section, select Synchronously and the Enable activity chaining into all initial nodes in the subprocess checkbox.
- In the Run this process model field:
- Select ISL_DOC_AL_CaseDocumentSummary_Update as the process to run.
- To include data from this subprocess in the parent process model reports, select the Reporting checkbox.
- In the Input Variables section, enter
documentsin the document (ISL_Document (Record Type)) field .
-
Navigate to the Properties > Other tab and configure the Multiple Instances of the Summarize Document subprocess as shown:
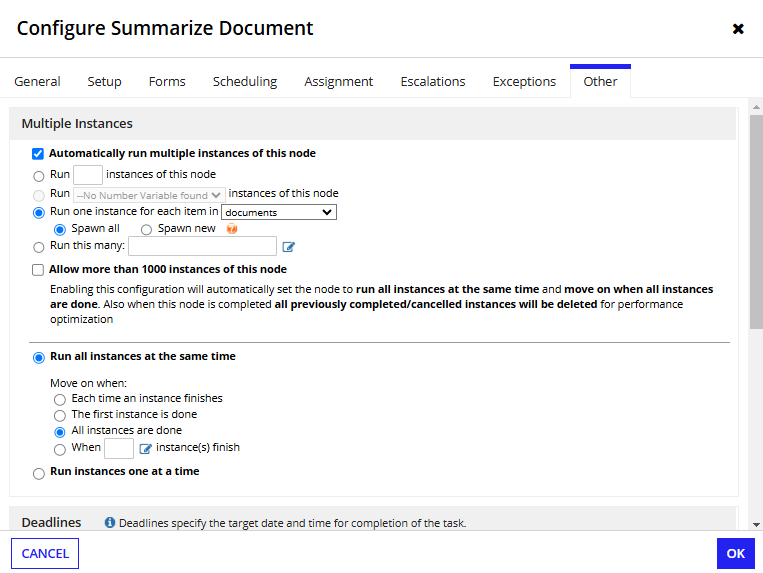
- Select the Automatically run multiple instances of this node checkbox.
- Select Run one instance for each item in and Documents in the dropdown.
- Select Spawn all.
- Select Run all instances at the same time.
- Select All instances are done to move on when done.
- Click OK.
-
From the File menu, click Save & Publish, then Exit.
-
Step 2: Incorporate the Document Summary module in the Create Case ProcessCopy link to clipboard
In this step, you will add the Document Summary node to the ISL_Case_Create process model.
- From Appian Designer, search for and open the ISL_Case_Create process model.
-
Add a start process node labeled Summarize Document before the End node.
- Process Model:
cons!ISL_DOC_AI_PM_CASE_DOCUMENT_SUMMARY_UPDATE -
Process Parameters:
1 2 3 4 5 6 7 8 9 10 11 12
{ document: a!localVariables( local!documents: a!flatten( pv!case['recordType!{d81cdd0e-c54d-4b8e-beec-b7ae37fefe7f-isl}ISL_Case.relationships.{341720e1-0b79-4f0c-ac48-789ee3fbeae3-isl}documents'] ), if( a!isNullOrEmpty(local!documents), local!documents, /*can't index if the documents is null*/local!documents[tp!instanceindex] ) ) }Copy -
In the new subprocess node, go to Properties > Other and configure the Multiple Instances of the Configure AI Document Summary subprocess as shown.
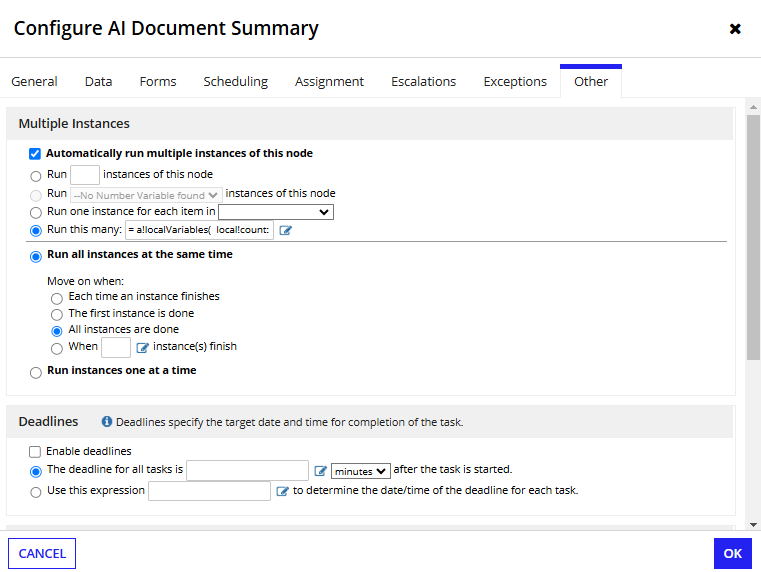
- Select the Automatically run multiple instances of this node checkbox.
-
Select Run this many and Documents, then click the expression editor and enter the following code:
1 2 3 4 5 6 7 8
a!localVariables( local!count: count( a!flatten( pv!case['recordType!{d81cdd0e-c54d-4b8e-beec-b7ae37fefe7f-isl}ISL_Case.relationships.{341720e1-0b79-4f0c-ac48-789ee3fbeae3-isl}documents'] ) ), /*the model errors out if the count is zero*/if(tointeger(local!count) = 0, 1, local!count) )Copy - Select Run all instances at the same time.
- Select All instances are done to move on when done.
- In the Deadlines section, select The deadline for all tasks is and leave the associated field empty as shown.
- Select Minutes in the dropdown menu.
- Click OK.
- From the File menu, click Save & Publish, then Exit.
- Process Model:
Step 3: Incorporate the Document Summary module in the Mark Requirement As Received ProcessCopy link to clipboard
- From Appian Designer, search for and open the ISL_CaseRequirement_MarkAsReceived process model.
-
Add a start process node labeled Summarize Document before the End node.
- Open the newly created process node and go to the Data > Input tab.
- Under New Input, select Process Model.
- Under Field Properties, enter
cons!ISL_DOC_AI_PM_CASE_DOCUMENT_SUMMARY_UPDATEin the Value field. -
Under New Input, select Process Parameters and enter the following code in the Value field:
1 2 3 4 5 6 7 8 9 10 11
= { document: a!localVariables( local!documents: a!flatten( pv!caseRequirement['recordType!{3fc25321-de51-427b-936d-862710494d15}ISL_CaseRequirement.relationships.{c4982e11-63fc-4e25-bad9-869982db127d}requirementDocMap.relationships.{3f075e87-4766-450c-9773-3f2252104196}document'] ), if( a!isNullOrEmpty(local!documents), local!documents, /*can't index if the documents is null*/local!documents[tp!instanceindex] ) )}Copy
-
In the new subprocess node, go to Properties > Other and configure the Multiple Instances as shown.
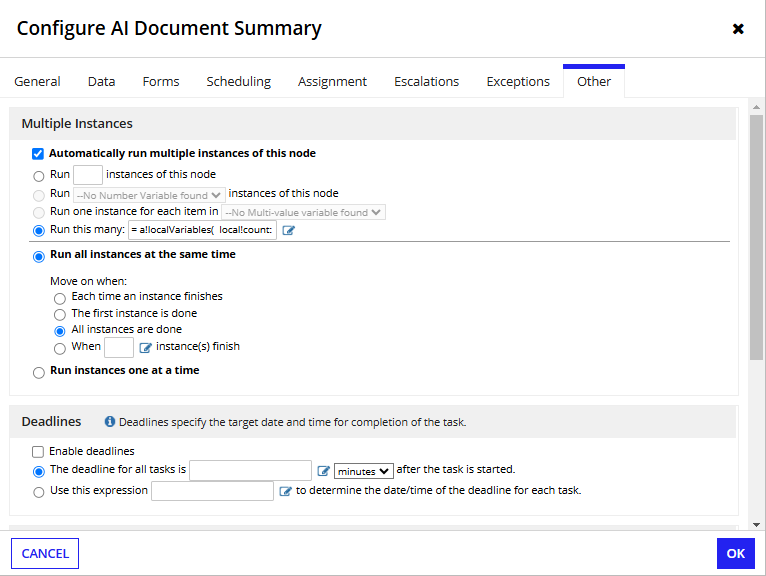
- Select the Automatically run multiple instances of this node checkbox.
-
Select Run this many, then open the expression editor and enter the following code:
1 2 3 4 5 6 7 8
= a!localVariables( local!count: count( a!flatten( pv!caseRequirement['recordType!{3fc25321-de51-427b-936d-862710494d15}ISL_CaseRequirement.relationships.{c4982e11-63fc-4e25-bad9-869982db127d}requirementDocMap.relationships.{3f075e87-4766-450c-9773-3f2252104196}document'] ) ), /*the model errors out if the count is zero*/if(tointeger(local!count) = 0, 1, local!count) )Copy - Click OK.
- From the File menu, click Save & Publish, then Exit.
- Open the newly created process node and go to the Data > Input tab.
Step 4: Incorporate the Document Summary module in the Complete Task ProcessCopy link to clipboard
Finally, complete the steps in this section only when configuring the Tasking add-on module.
- From Appian Designer, search for and open the ISL_TSK_CaseTask_RecordAction_Complete process model.
-
Add a start process node labeled Summarize Document before the End node as shown.
- Open the newly created process node and go to the Data > Input tab.
- Under New Input, select Process Model.
- Under Field Properties, enter
cons!ISL_DOC_AI_PM_CASE_DOCUMENT_SUMMARY_UPDATEin the Value field. -
Under New Input, select Process Parameters and enter the following code in the Value field:
1 2 3
{ document: pv!completedTaskDocuments[tp!instanceindex] }Copy
-
In the new subprocess node, go to Properties > Other and configure the Multiple Instances as shown.
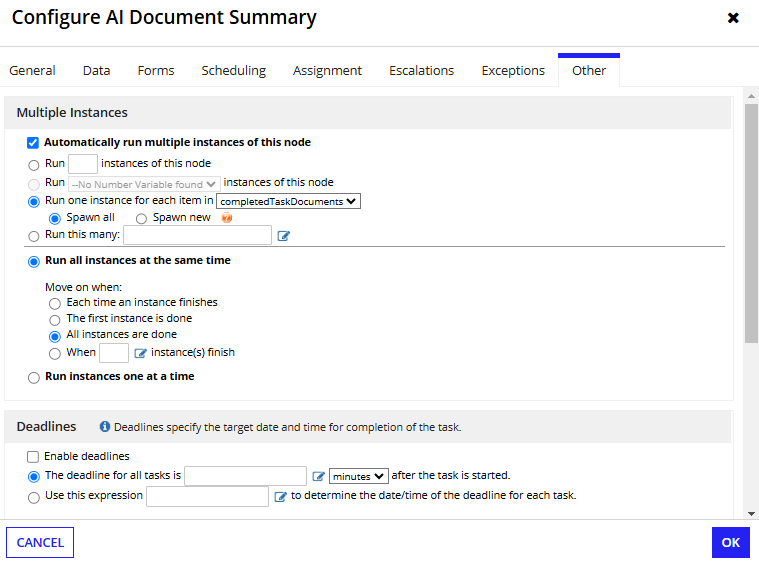
- Select the Automatically run multiple instances of this node checkbox.
- Select Run one instance for each item in and completedTaskDocuments in the dropdown.
- Select Spawn all.
- Select Run all instances at the same time.
- Select All instances are done to move on when done.
- Select Run one instance for each item in and completedTaskDocuments in the dropdown.
- Select the Automatically run multiple instances of this node checkbox.
- In the Deadlines section, select The deadline for all tasks is and leave the associated field empty as shown.
- Select Minutes in the dropdown menu.
- Click OK.
- From the File menu, click Save & Publish, then Exit.
- Open the newly created process node and go to the Data > Input tab.