IntroductionCopy link to clipboard
After installing the Case Creation via Email module, you need to set it up before using it with the Case Management Studio Base application. This guide walks you through the setup steps, including:
- Set up the email poller.
- Surface the Triage Emails page.
- Add the Emails view on the Case record.
- Add the Emails section on the Case Summary.
- Add the Email Triage actions to the Case Audit framework.
- Customize the email sent upon triage.
- (Optional) Update the time interval for polling emails.
- (Optional) Add automation to pre-populate the case type of the email.
Step 1: Set up the email pollerCopy link to clipboard
The Case Creation via Email module needs to connect to a Microsoft email account in order to pull in incoming emails to the triage experience. Follow the steps below for each desired environment (Dev, Test, Production, etc.) to create a new Microsoft email account and share its credentials with Appian.
Creating an accountCopy link to clipboard
To create an inbox for inbound email polling:
- Navigate to MicroSoft Azure and create a new account in Azure AD with the desired username that matches the desired email address.
- Note: A global admin may be required to do this.
- Navigate back to Microsoft Azure and log in with your new account.
- In the Search field, enter App Registrations and follow the instructions to create a new registration.
- Once the application is created, navigate to the API permissions page.
- Select + Add a permission.
- Select Microsoft Graph.
- Select Application Permissions.
- Select Mail.ReadWrite.
- Add permission.
- Select + Add a permission.
- Navigate back to the API permissions page.
- Select Grant Admin Consent for Appian.
- Note: A global admin may be required to do this.
- Select Grant Admin Consent for Appian.
- Navigate to the Certificates & Secrets page.
- Select + New Client Secret.
- Add a description and select an expiration.
- Save the Value for your records.
- Note: This value will be input as secret in Appian Third-Party Credentials.
- Select + New Client Secret.
Appian polling configurationsCopy link to clipboard
- Login to the desired Appian environment.
- Navigate to the Admin Console.
- Click IMPORT > UPLOAD and choose the
CaseCreationViaEmailv1.0.0-AdminConsole.zipfile that was downloaded in step 1 of the Case Creation via Email Installation Guide. - Select Include related import customization file.
- Click UPLOAD.
-
Select the
CaseCreationViaEmailv1.0.0-AdminConsole.propertiesfile that was downloaded in step 1 of the Case Creation via Email Installation Guide.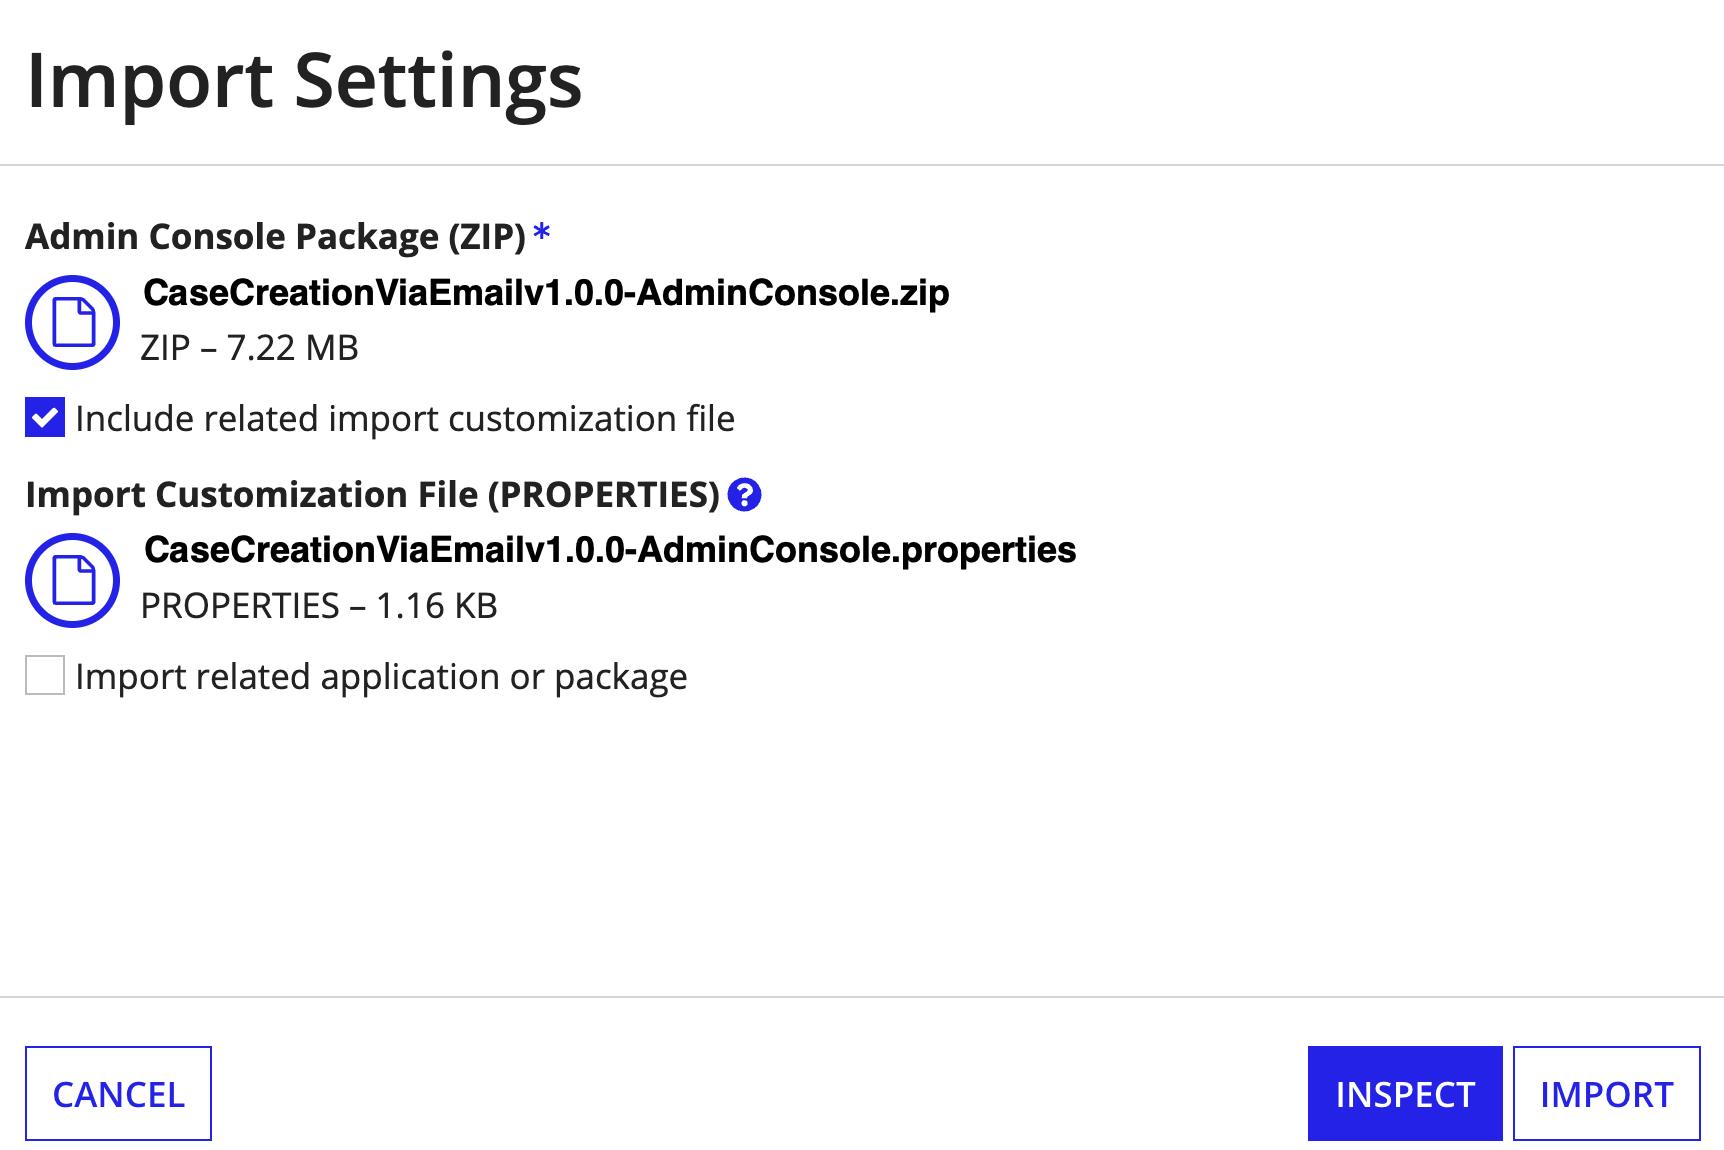
- Click INSPECT to ensure that there will be no complications on import.
- Click IMPORT and review the import results to ensure there are no errors.
- Click IMPORT > UPLOAD and choose the
- Navigate to Third-Party Credentials in the Admin Console and verify the item labeled
cmgt-mail-poller-msgraphexists.- Click
cmgt-mail-poller-msgraphand provide the Azure secret, tenet, and applicationID configured when enabling a polling inbox.- Note: Do not modify
customMailPollerTableNameandcustomMailPollerDocTableNameunless you intend to modify the Appian Poller table names (not recommended).
- Note: Do not modify
- Click SAVE.
- Click
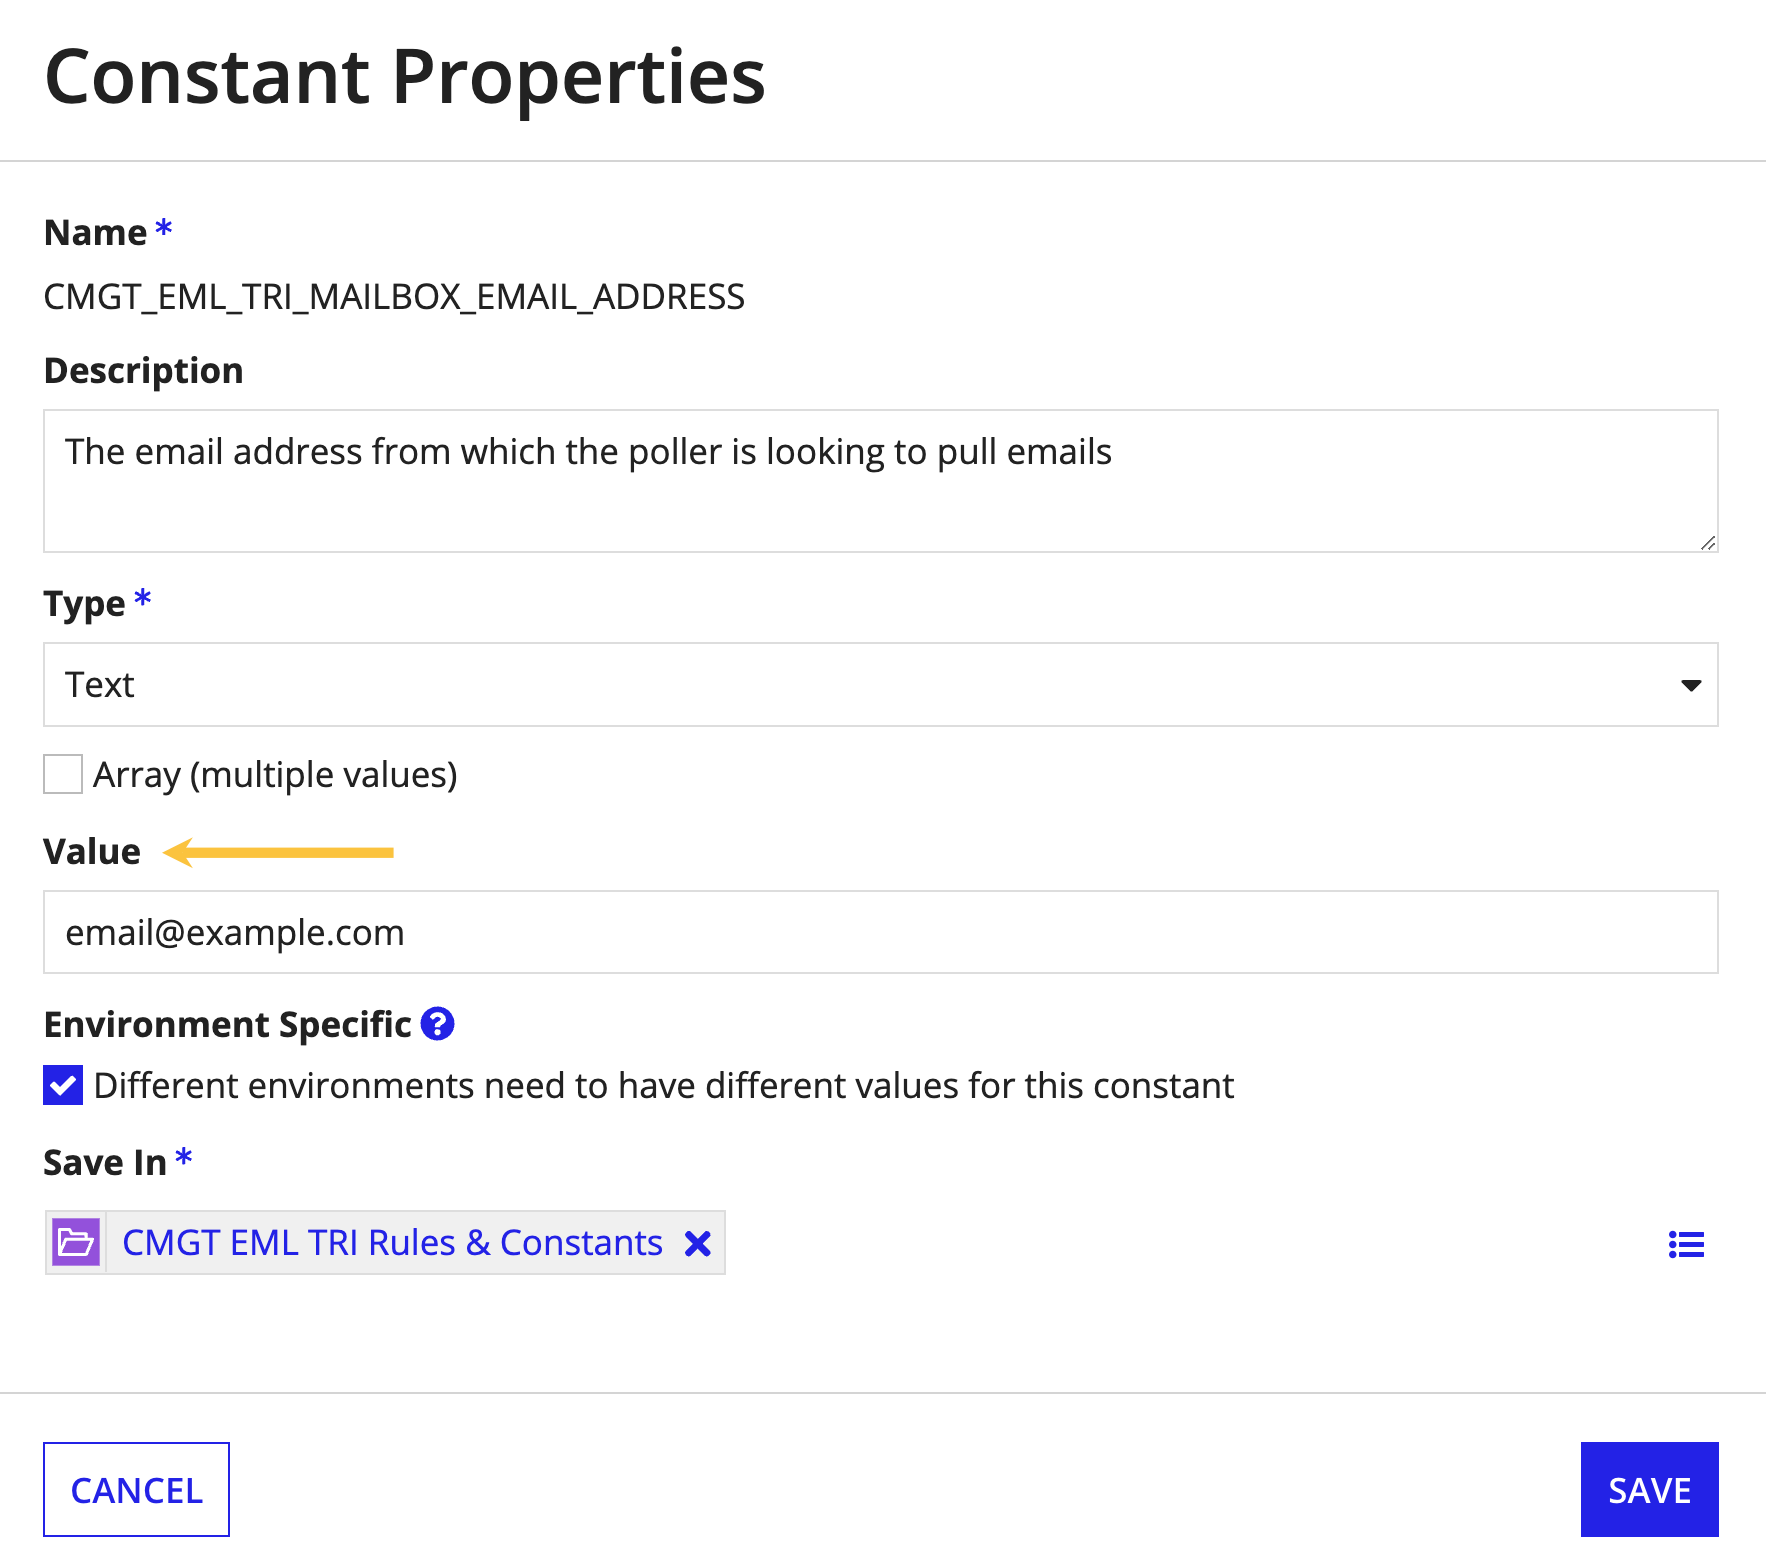
- Navigate to Appian Designer and use the global search to find and open the CMGT_EML_TRI_MAILBOX_EMAIL_ADDRESS constant.
-
Update this constant to match the full email address that will be polled (i.e., test@microsoft.com).
-
Click SAVE.
-
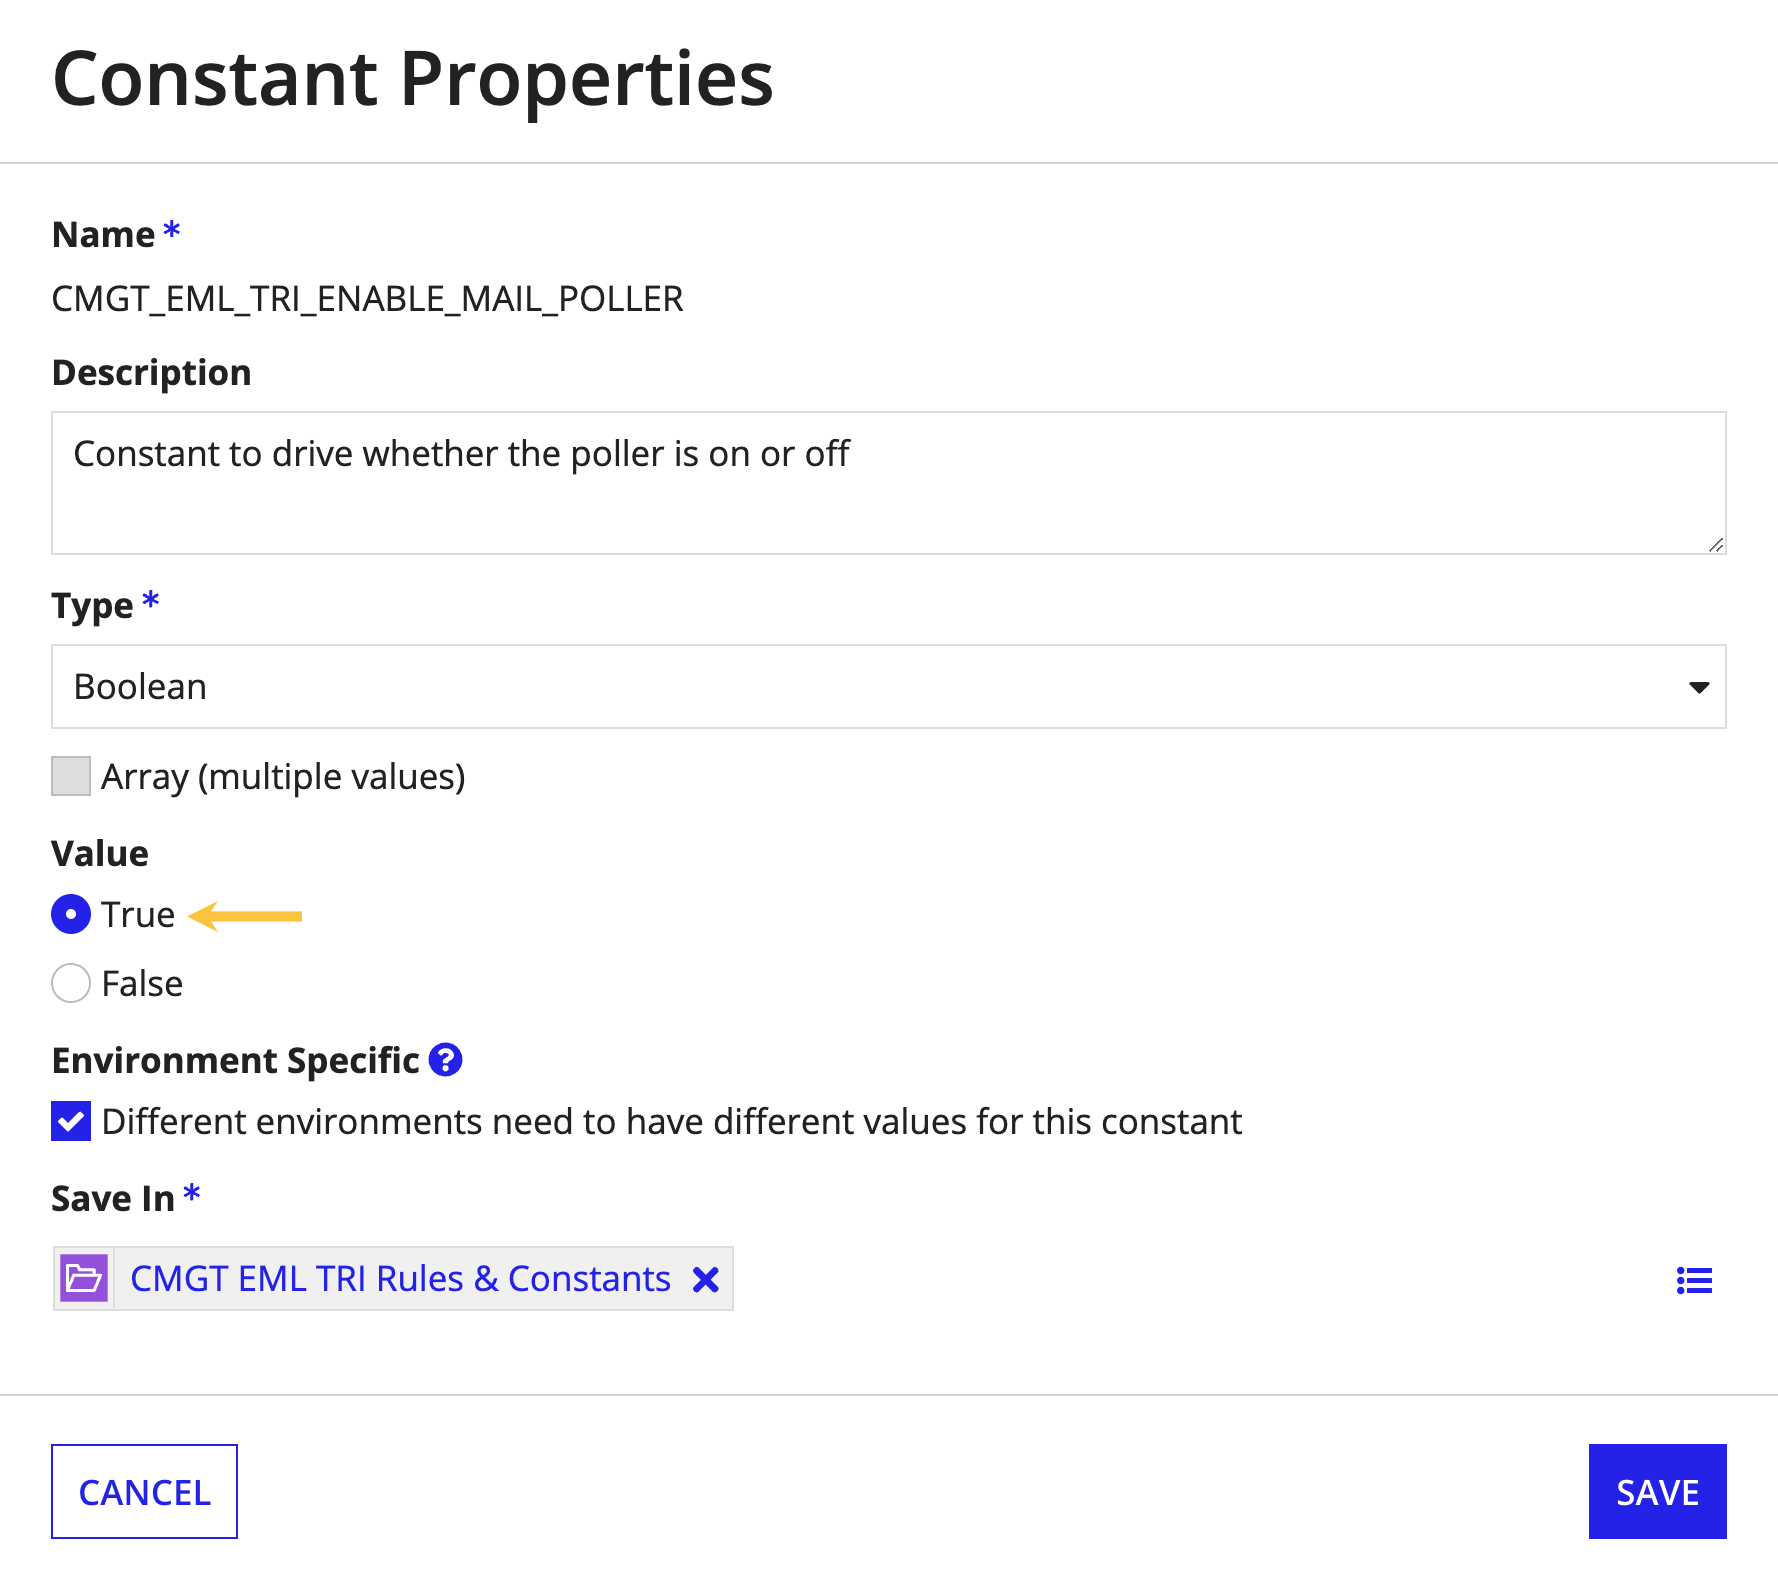
- Navigate back to Appian Designer and use global search to find and open the CMGT_EML_TRI_ENABLE_MAIL_POLLER constant.
- Set the Value to True if not set already.
- Note: Use this constant when you want to turn poller operations on or off.
- Set the Value to True if not set already.
For additional support on the Microsoft Email Poller, visit the MSGraph Email Poller on Appian Community.
Step 2: Surface the Triage Emails pageCopy link to clipboard
After setting up the email poller, you need to surface the Triage Emails page in Case Management Studio. This will allow case managers to see incoming emails and triage them accordingly. The Triage Emails page can be accessed in one of two ways:
- As a page within a page group on the Workspace site.
- As a standalone site.
Both options restrict the Triage Emails page to case managers by default. For the standalone site option, no additional setup steps are required. If you choose this option, you can move on to step 3. If you choose option 1, follow the steps below:
- Login to the target environment.
- Navigate to the Appian Designer.
- Navigate to CMGT Case Management Studio Base application.
- Search for and open the CMGT_WorkspaceSite site object.
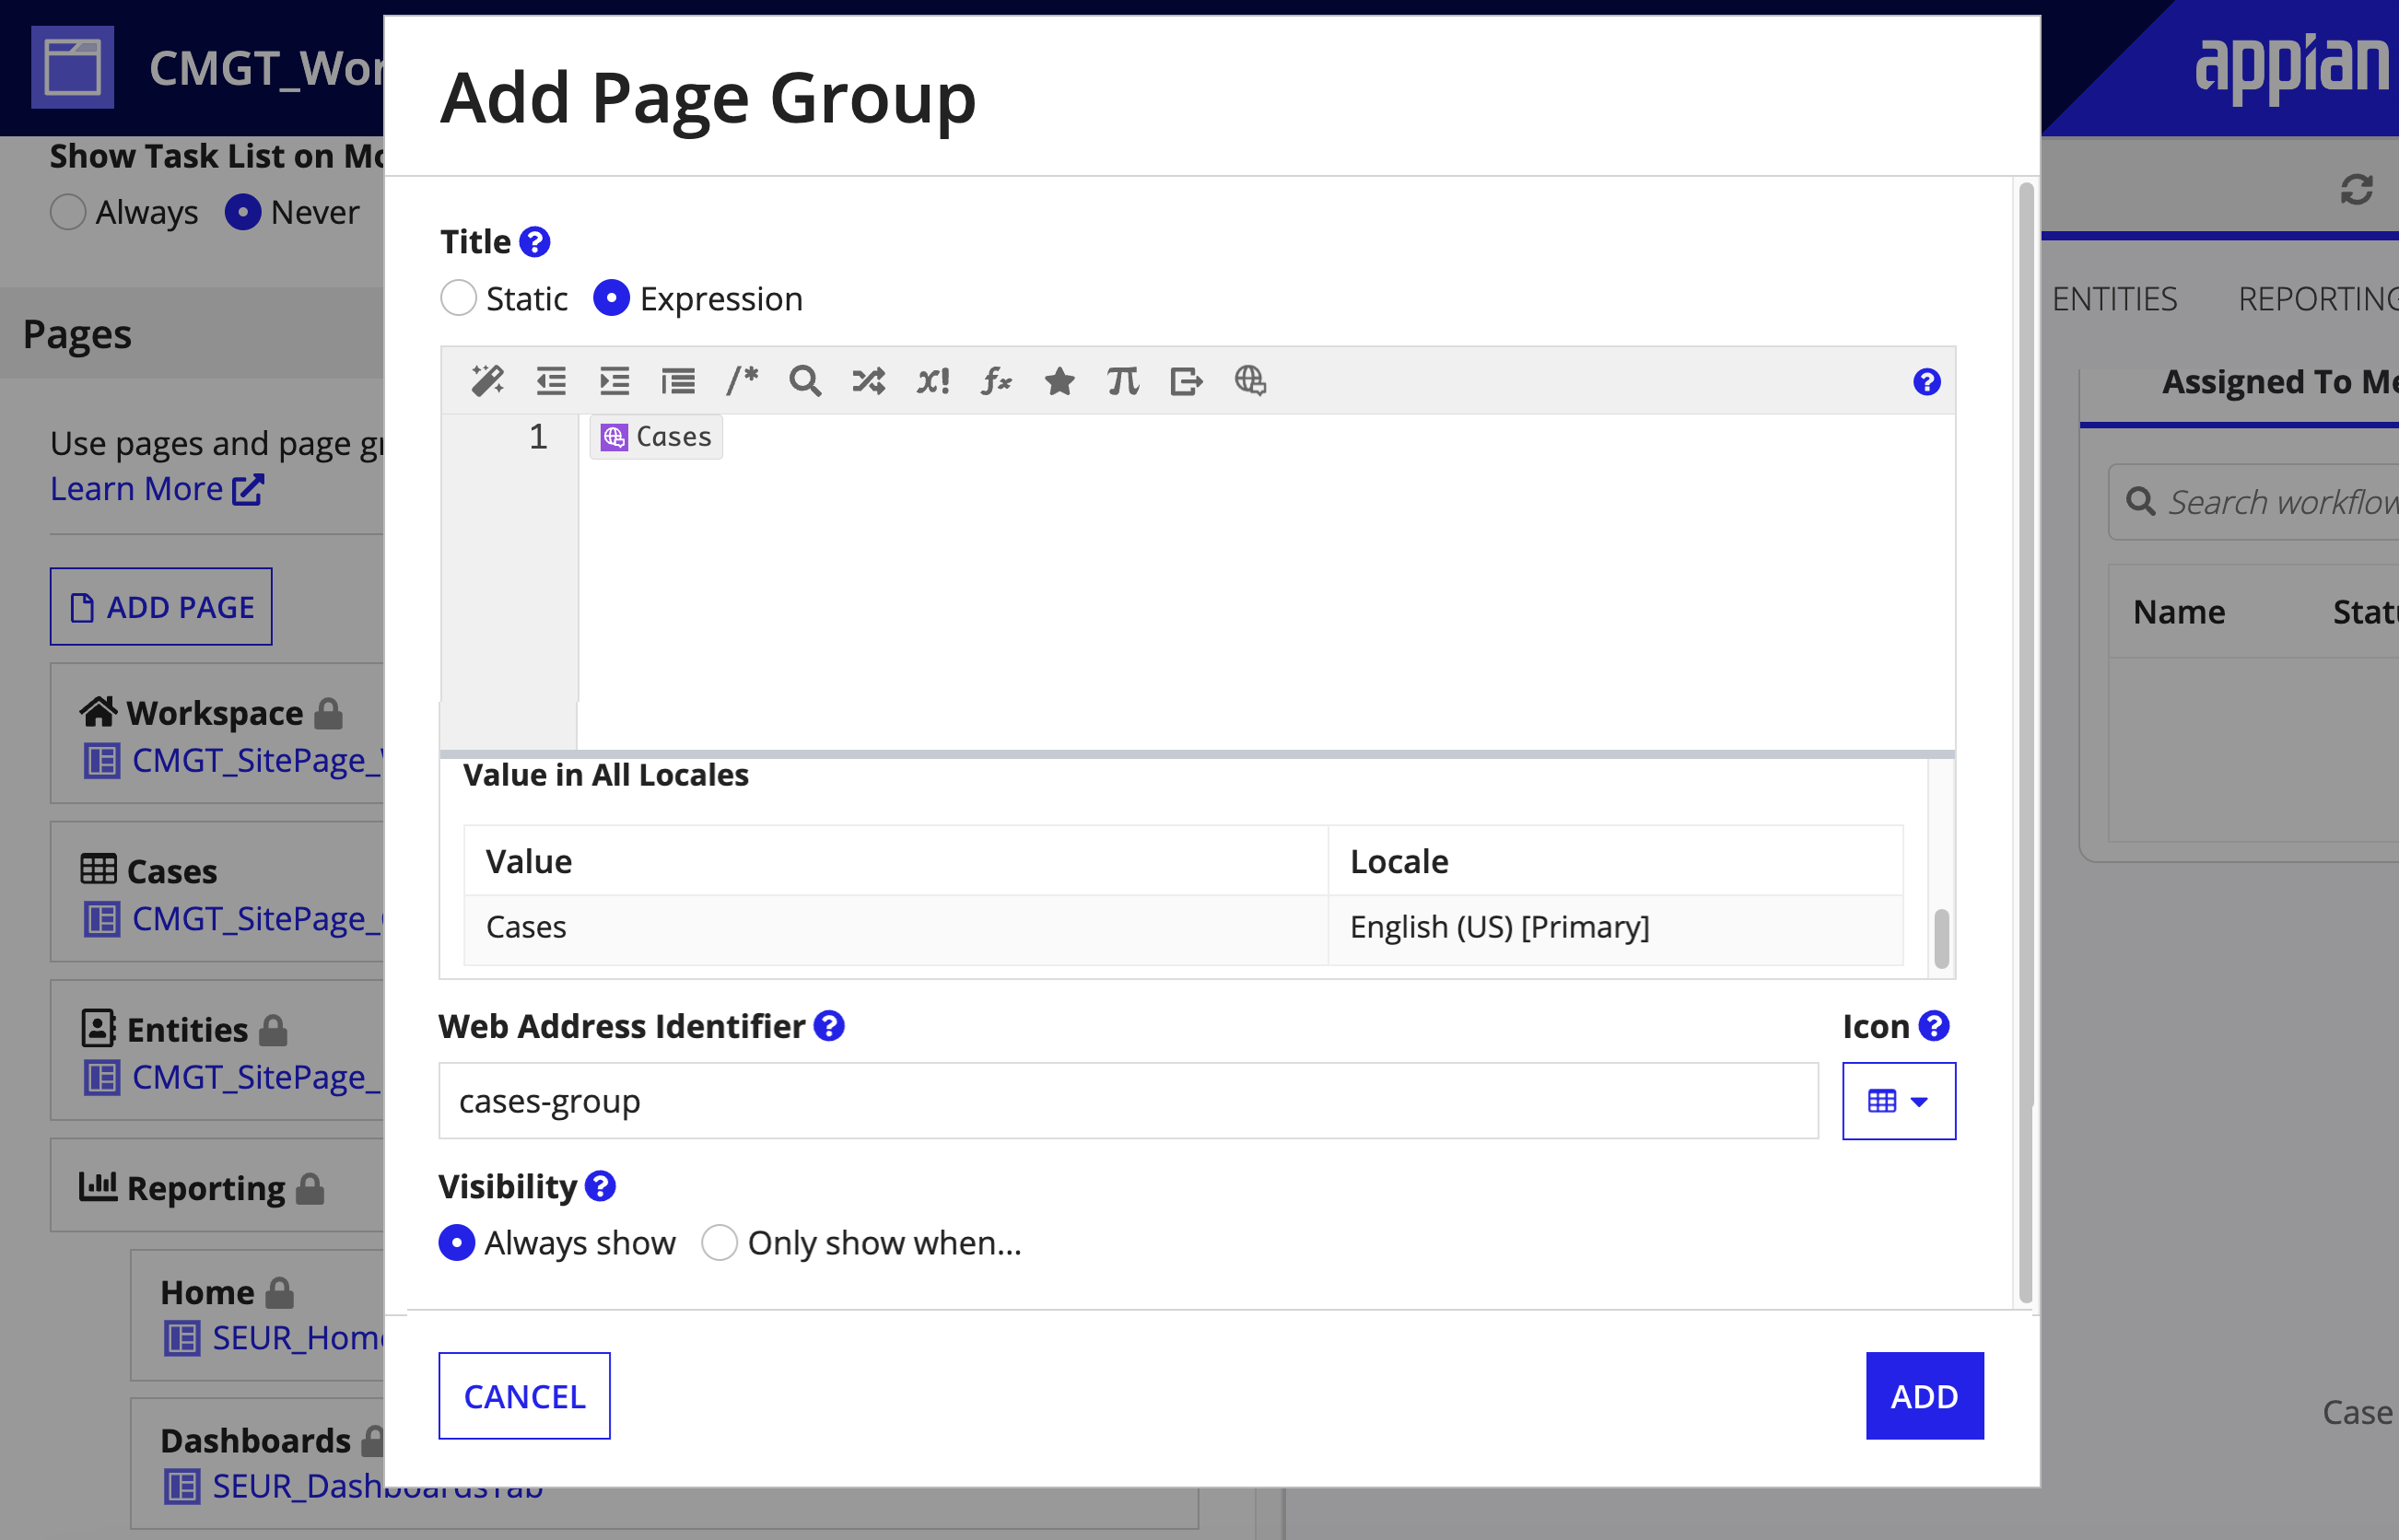
- In the Pages section, click Add Page Group.
- In the Title field, select Expression.
-
Copy and paste the following code snippet into the expression editor.
1
'translation!{765a2893-6d2c-4330-8d7a-ac85f4a6f417}CMGT_BaseTranslations.{c750f1f2-e7b8-4b75-b1b3-017fc218be26}Cases'
Copy - In the Web Address Identifier field, enter
cases-group. - In the Icon field, select the Table icon.
-
In the Visibility field, select Always show.
- Click ADD.
- In the newly created Cases page group, click the Add Page link to add the Cases page.
- In the Title field, select Expression.
-
Copy and paste the following code snippet into the expression editor.
1
'translation!{765a2893-6d2c-4330-8d7a-ac85f4a6f417}CMGT_BaseTranslations.{c750f1f2-e7b8-4b75-b1b3-017fc218be26}Cases'
Copy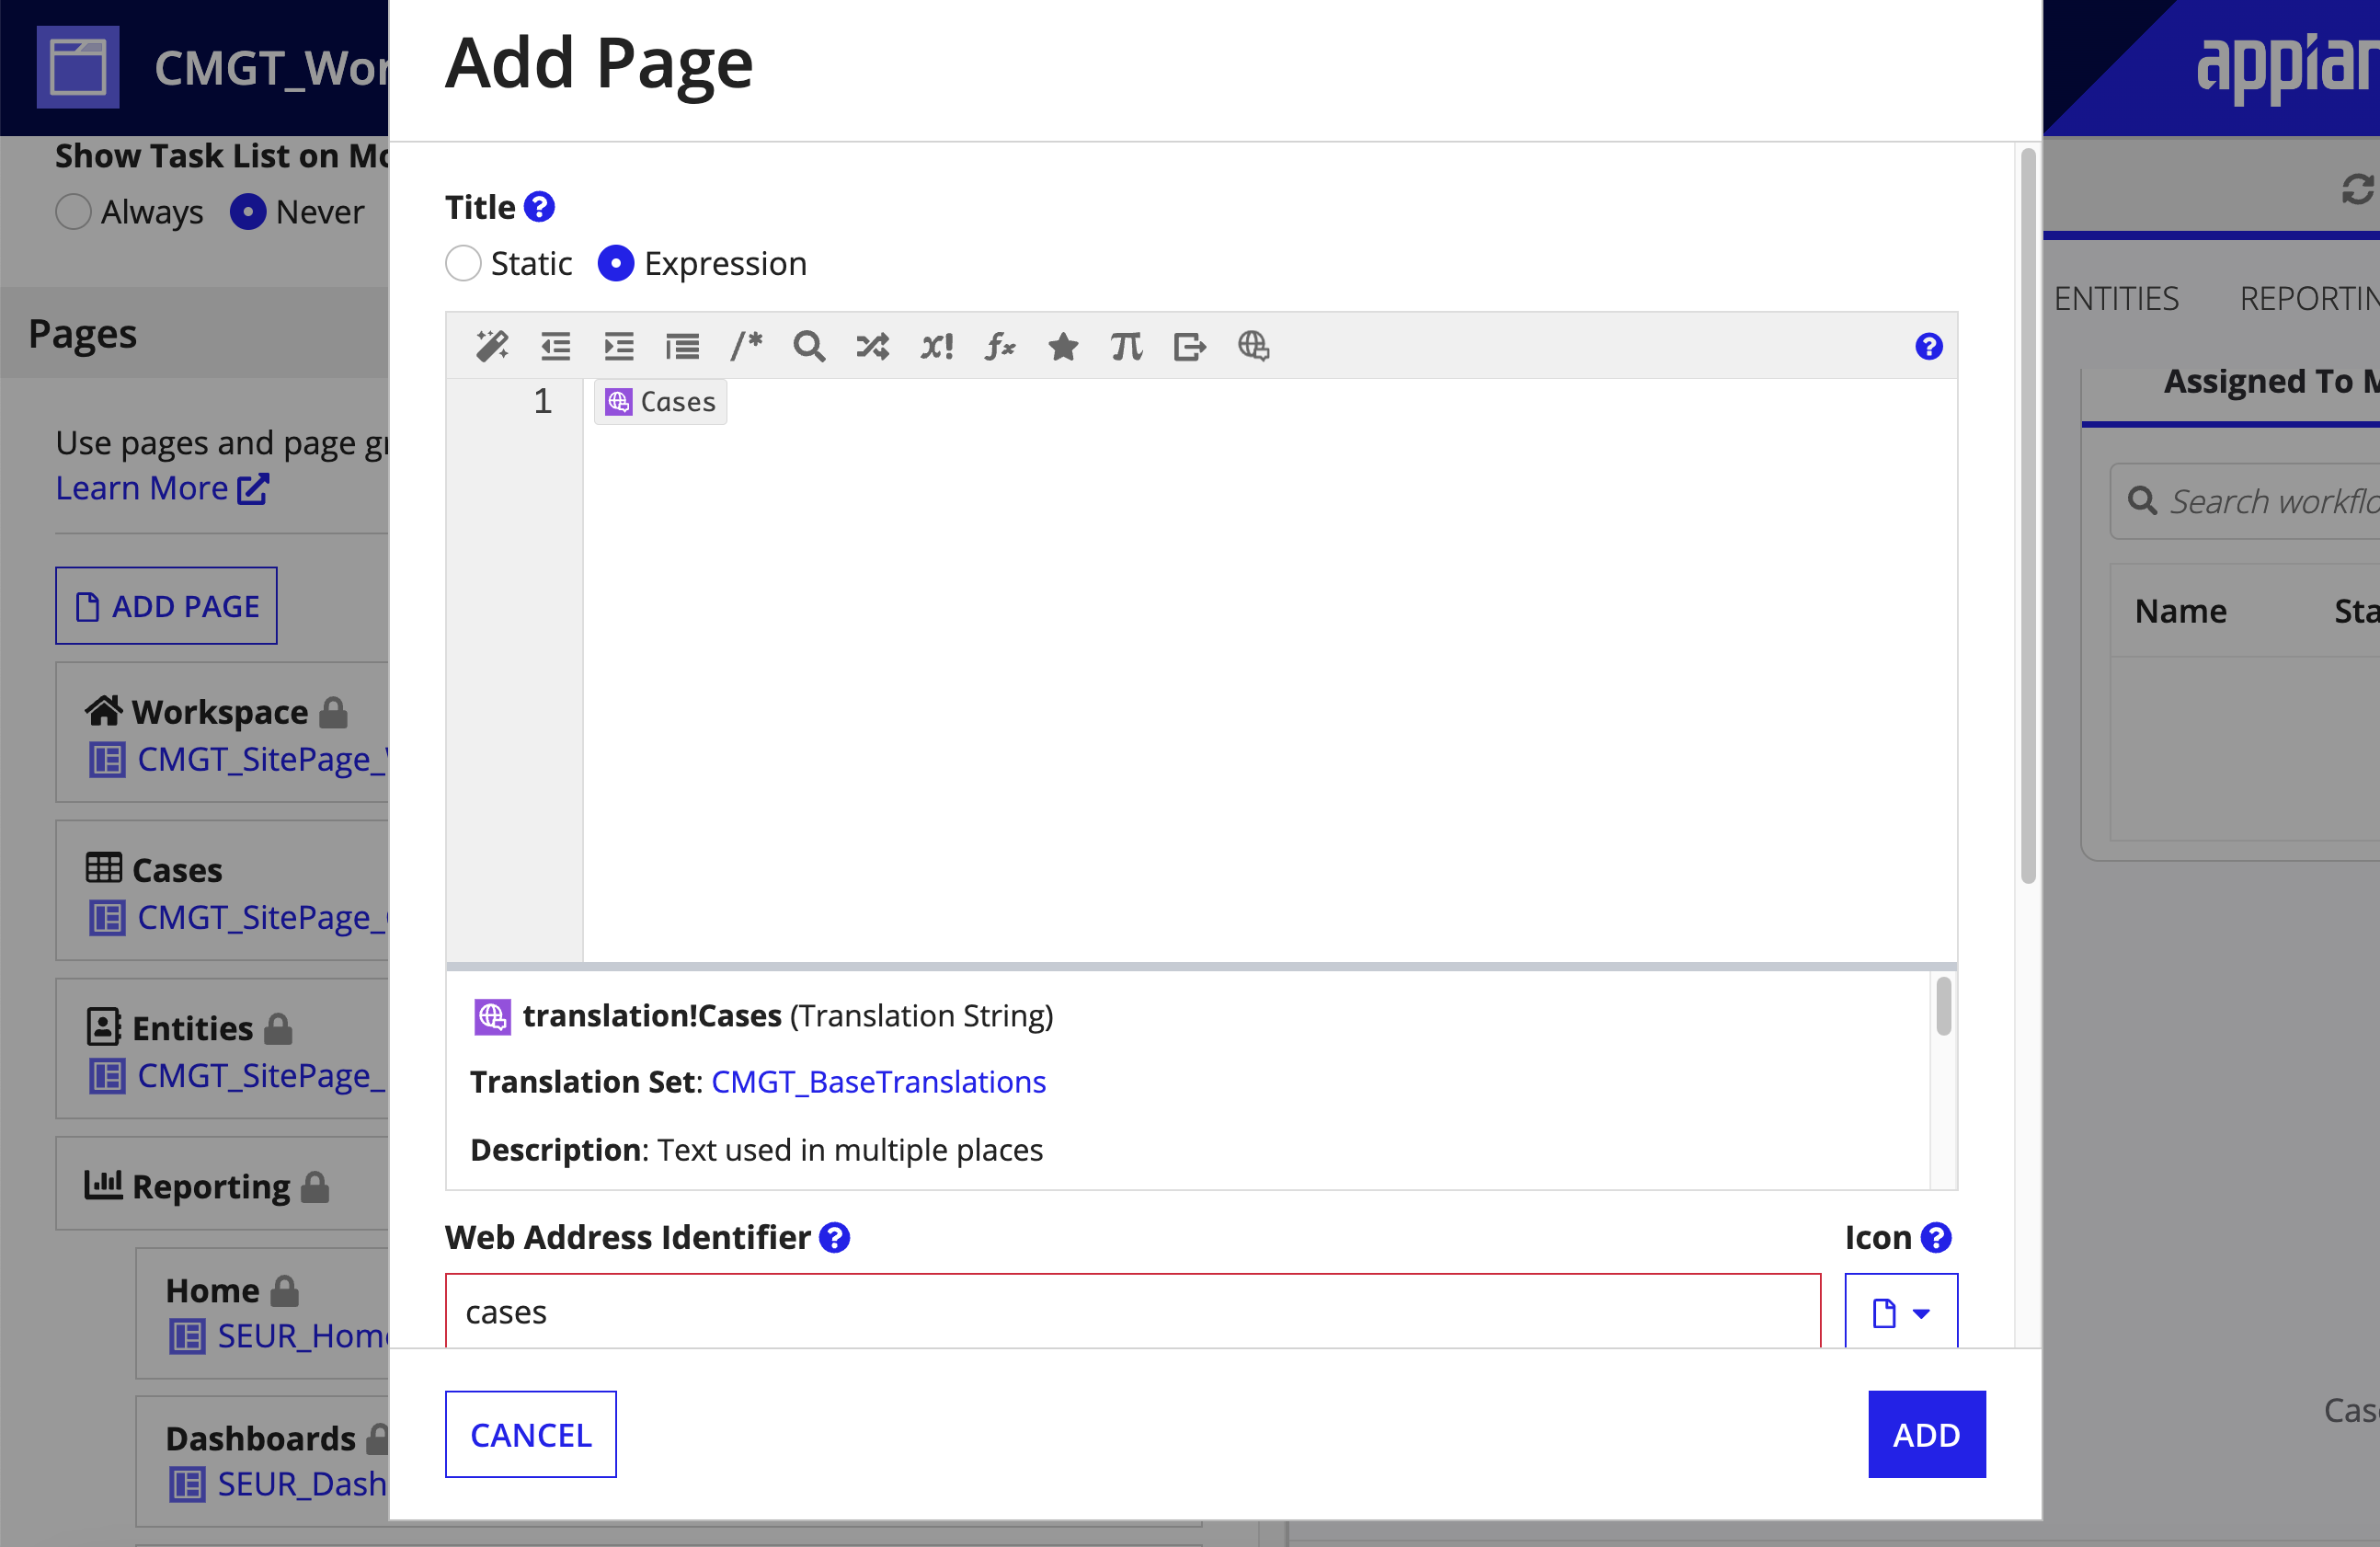
- In the Web Address Identifier field, enter
cases. - In the Interface Content field, call the
CMGT_SitePage_Casesinterface. - In the Width field, select Full.
- In the Visibility field, select Always show.
- Click ADD.
- In the newly created Cases page group, click the Add Page link and follow these steps to add the Triage Emails page:
- In the Title field, select Expression.
-
Copy and paste the following code snippet into the expression editor:
1
'translation!{9ccd1bc4-9914-437c-8daf-e4f4b64bf756}CMGT_EML_TRI_Translations.{913cbe12-d23c-4542-b556-f0a24df13ff0}Triage Emails'
Copy - In the Web Address Identifier field, enter
triage-emails. - In the Interface Content field, call the
CMGT_EML_TRI_SitePage_TriageEmailinterface. - In the Width field, select Full.
- In the Visibility field, select Only show when… and copy and paste the following code snippet into the expression editor.
1
2
3
4
5
6
  a!isUserMemberOfGroup(
    username: loggedInUser(),
    groups: {
      cons!CMGT_GRP_CASE_MANAGERS
    }
  )
Copy- Click ADD.
- In the Pages section, click Add Page Group.
-
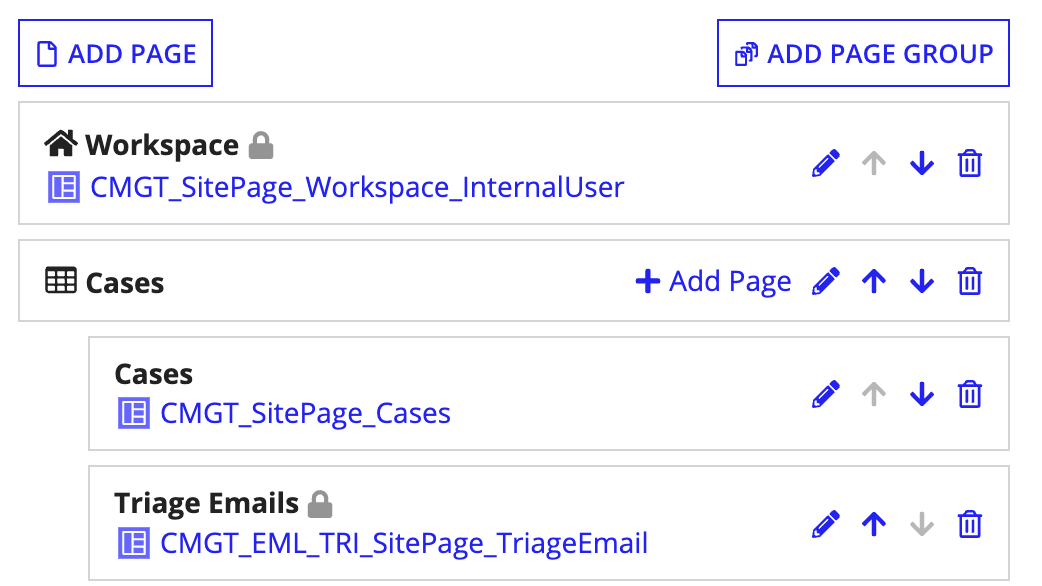
Lastly, click the up arrow on the newly created Cases page group until it is directly after the Workspace page.
- Click SAVE CHANGES.
- Search for and open the CMGT_SITE_PAGE_CASES expression rule.
- Replace the old Cases page reference with the new Cases page reference.
- Note: The page reference is different now that it was recreated as part of a site page group.
- Click SAVE CHANGES on the expression rule.
- Replace the old Cases page reference with the new Cases page reference.
Step 3: Add the Emails view on the case recordCopy link to clipboard
To display the email threads that are associated with a case in their own record view:
- Login to the target environment.
- Navigate to the Appian Designer.
- Navigate to CMGT Case Management Studio Base application.
- Search for and open the CMGT_Case record type.
- Select Views and click ADD VIEW MANUALLY.
-
For the View Name field, copy and paste the following code snippet into the expression editor:
1
'translation!{9ccd1bc4-9914-437c-8daf-e4f4b64bf756}CMGT_EML_TRI_Translations.{297cf25d-abb6-4d91-b9ed-ab0139f56398}Emails'
Copy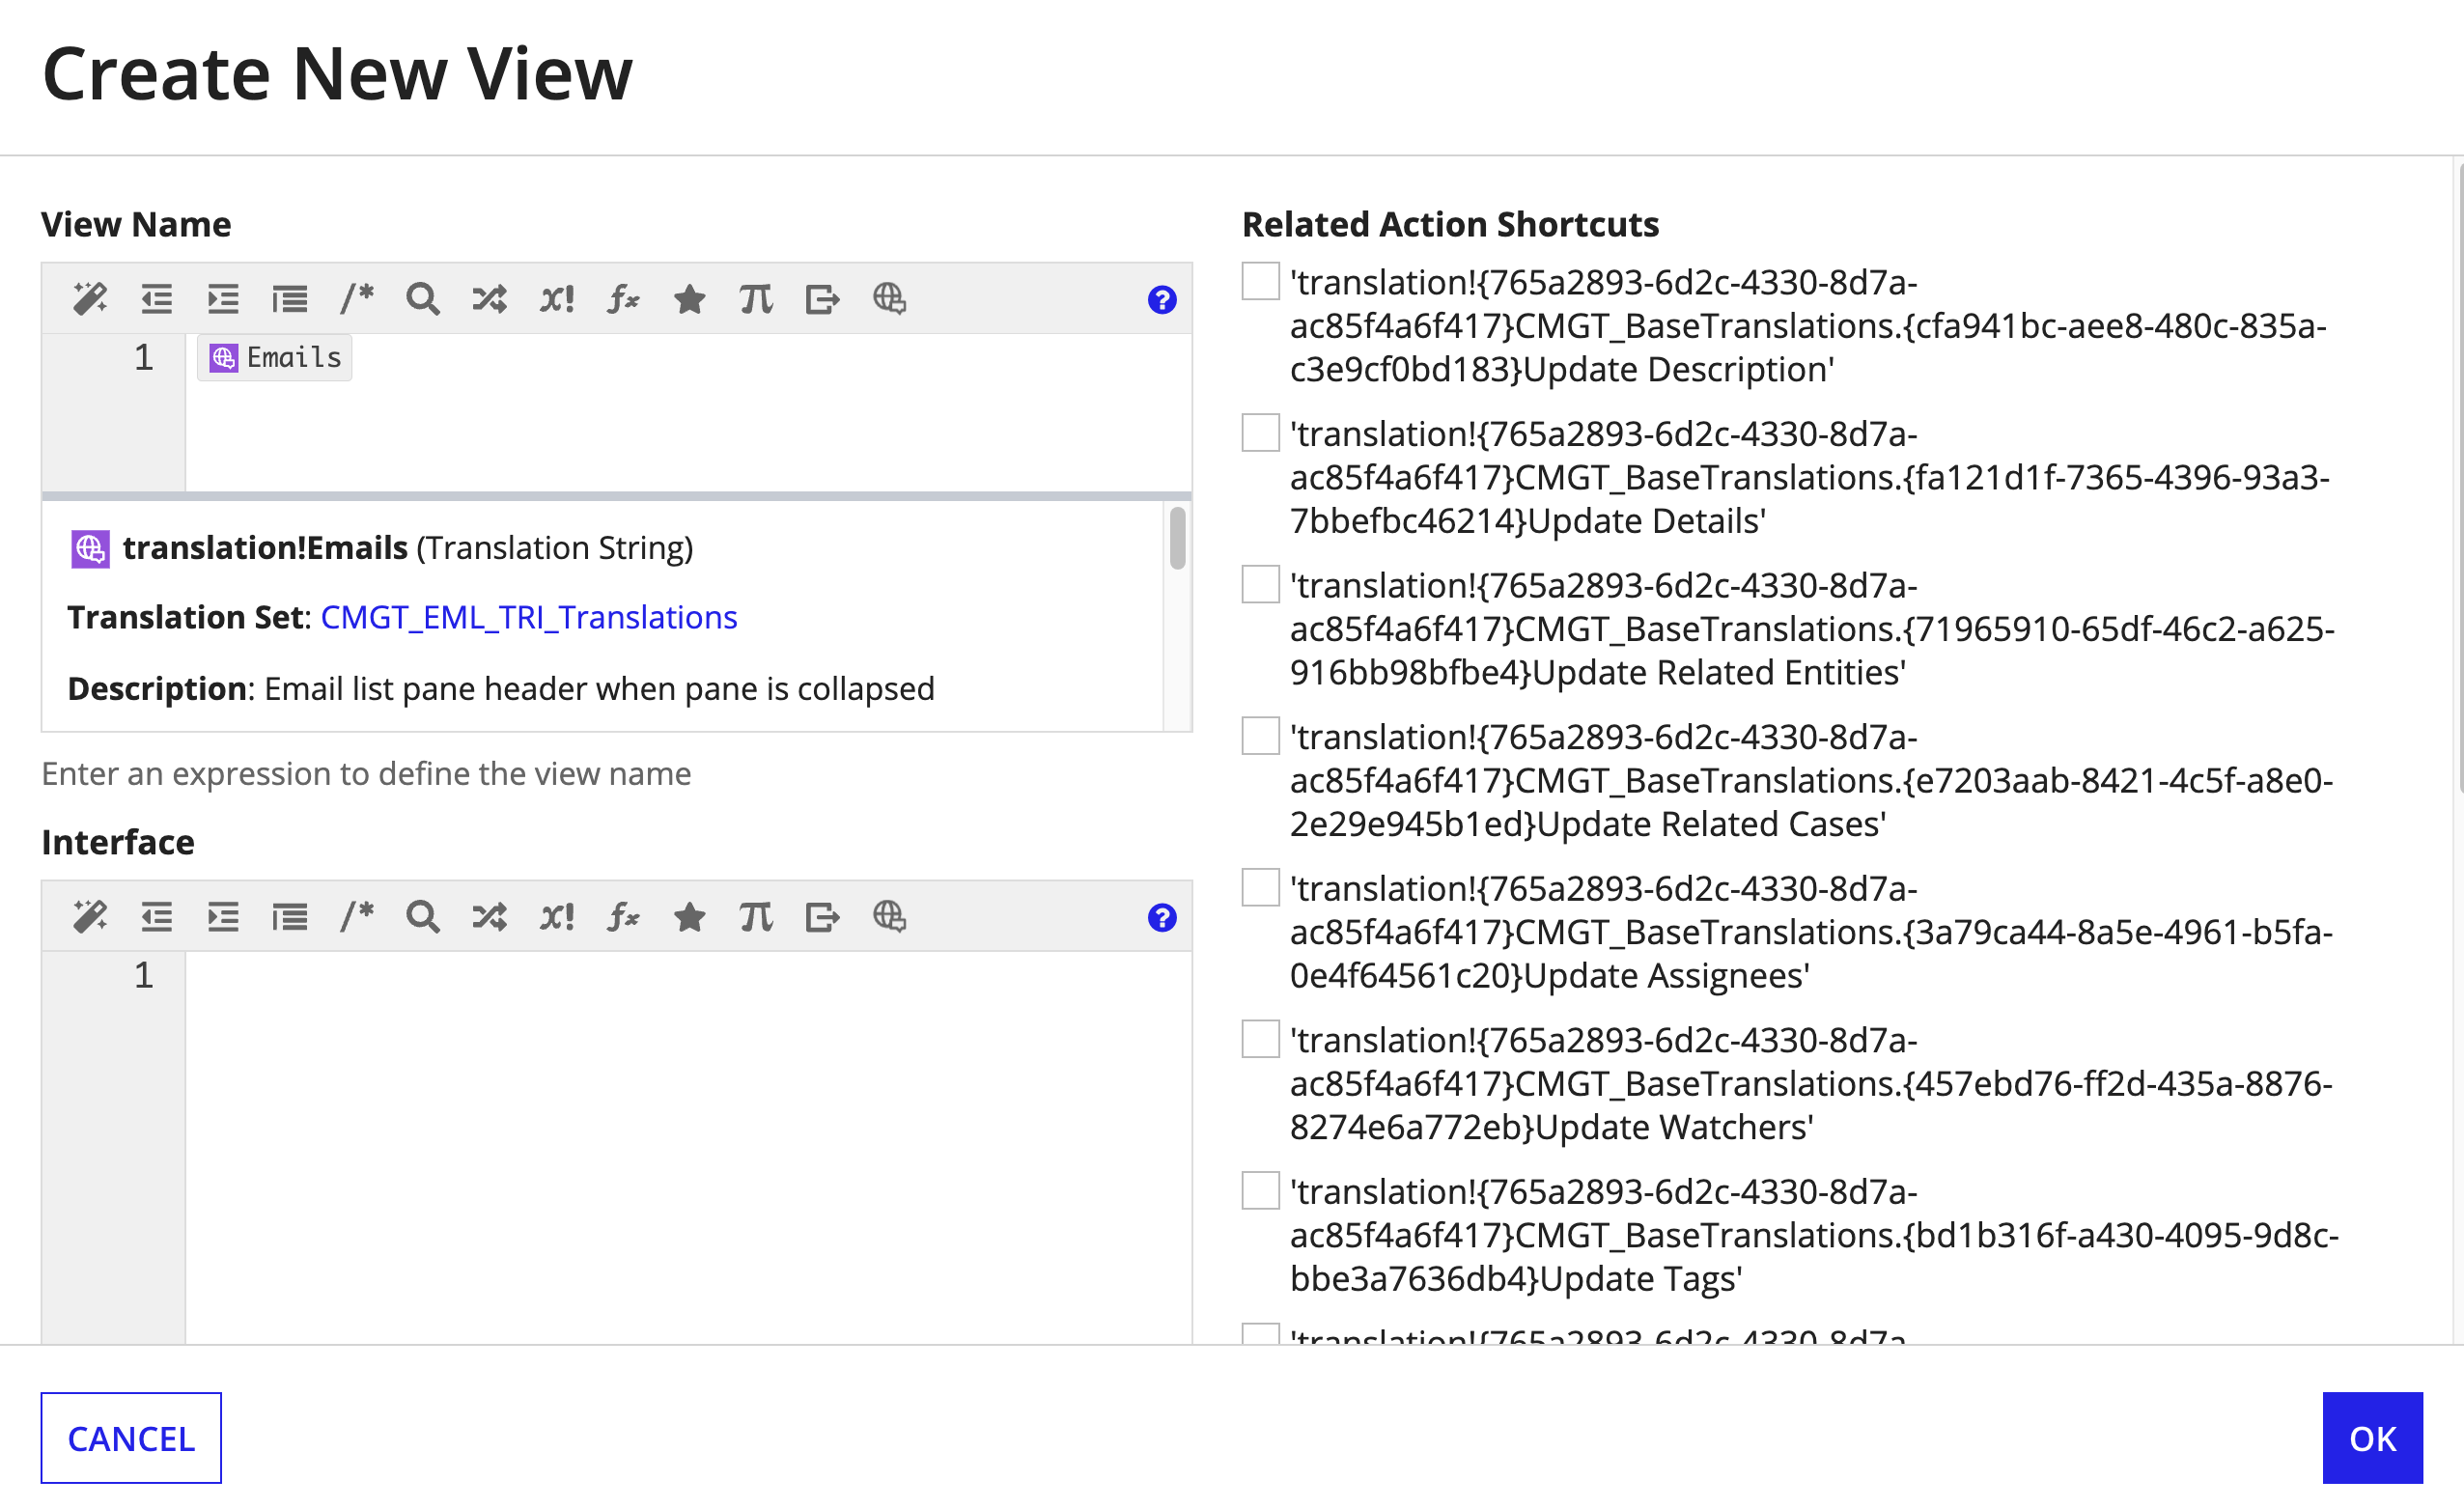
-
For the Interface field, copy and paste the following code snippet into the expression editor:
1
rule!CMGT_EML_TRI_Case_RecordView_Emails(caseId: rv!identifier)
Copy - Click OK.
- Copy the URL stub that was generated for the new view.
- Navigate to Views and Actions Security and select the
edit icon in the Emails section.
-
Configure the security so that only users in the CMGT Internal Users group can see the view, as shown.

- Click OK.
- Click SAVE CHANGES on the record type.
-
-
- Search for and open the
CMGT_EML_TRI_TXT_URL_STUB_CASE_RECORD_EMAILS_TABconstant.- Paste the value of the URL stub for the new view in the Value field.
- Click SAVE.
Step 4: Add the Emails section on the case summaryCopy link to clipboard
To display a preview of the email threads that are associated with a case on the case summary:
- Login to the target environment.
- Navigate to the Appian Designer.
- Navigate to CMGT Case Management Studio Base application.
- Search for and open the CMGT_Case_RecordView_Summary interface.
- In expression mode, find the section layout that contains
CMGT_Case_CaseDetailsSummary. -
Copy and paste the following code snippet in
CMGT_Case_CaseDetailsSummaryas shown.1 2 3 4 5
rule!CMGT_EML_TRI_CaseSummary_Emails( caseId: ri!case['recordType!{d81cdd0e-c54d-4b8e-beec-b7ae37fefe7f}CMGT_Case.fields.{f4bdff4d-4087-4519-bf34-34a1139e5c3d}caseId'], brandingMap: local!brandingMap, triggerRefresh: local!triggerRefresh ),
Copy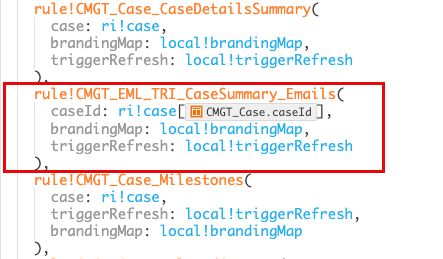
- Click SAVE CHANGES.
- In expression mode, find the section layout that contains
Step 5: Add the email triage actions to the case audit frameworkCopy link to clipboard
The action of associating an email to a case should be included in the case history. To include this new action in the case history:
- Login to the target environment.
- Navigate to the Appian Designer.
- Navigate to CMGT Case Management Studio Base application.
- Search for and open the CMGT_EventHistory_Case_FormatDetails expression rule.
-
Copy and paste the following code block above the default condition in the
match()statement, as shown.1 2 3 4 5 6 7 8 9 10 11 12
whenTrue: fv!value = cons!CMGT_EML_TRI_REFID_EVENT_TYPE_LINKED_THREAD, then: 'translation!{9ccd1bc4-9914-437c-8daf-e4f4b64bf756}CMGT_EML_TRI_Translations.{65c8bfe4-e5b7-48d1-b95f-7ff19b102d5c}Thread: {subjectName}'( 'translation!{9ccd1bc4-9914-437c-8daf-e4f4b64bf756}CMGT_EML_TRI_Translations.{65c8bfe4-e5b7-48d1-b95f-7ff19b102d5c}Thread: {subjectName}.translationvariables.{df0a14e0-2a2f-456a-a64b-d14a5258f50d}subjectName': index( rule!CMGT_EML_TRI_QR_GetThreads( threadIds: local!details.threadId, fields: 'recordType!{53d3f93d-ccb6-423d-9238-2edf8811d08f-cmgt_eml_tri}CMGT_EML_TRI_Thread.fields.{2a95571a-53a9-490b-9322-b32712e2fa2a-cmgt_eml_tri}subject', executeWhen: a!isNotNullOrEmpty(value: local!details.threadId) ), 'recordType!{53d3f93d-ccb6-423d-9238-2edf8811d08f-cmgt_eml_tri}CMGT_EML_TRI_Thread.fields.{2a95571a-53a9-490b-9322-b32712e2fa2a-cmgt_eml_tri}subject', null ) ),
Copy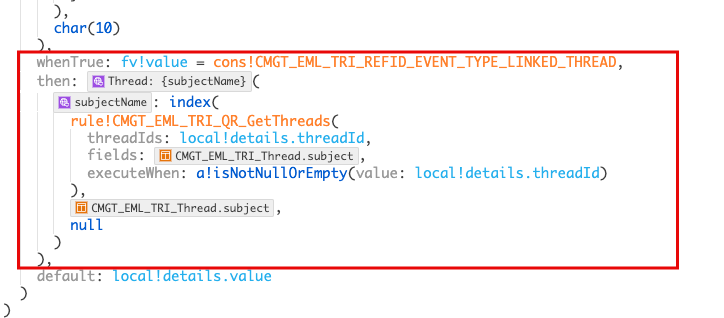
-
Click SAVE CHANGES.
-
Step 6: Customize the email sent upon triageCopy link to clipboard
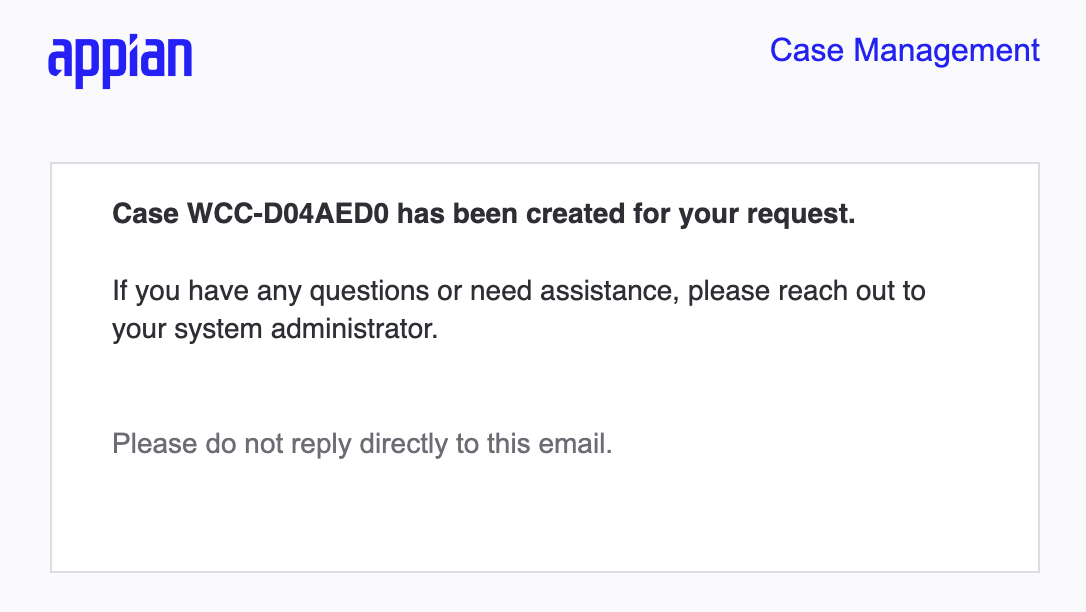
When an email is linked to an existing case or created as a new case, the original email sender will receive a notification that an action has been taken on their email. The notification will include the case identifier for reference. By default, the message on this email states “If you have any questions or need assistance, please reach out to your system administrator.” You can tailor this message to match the needs of your organization, team, or process.
To change this message:
- Login to the target environment.
- Navigate to the Appian Designer.
- Navigate to the CMGT Add-On - Case Creation via Email application.
- Search for and open the CMGT_EML_TRI_Translations translation set.
- Find the string with the English value
If you have any questions or need assistance, please reach out to your system administrator. -
Edit the value of the string to something that makes sense for your organization. See the image below for reference as to where this string appears.
- Click SAVE.
- Find the string with the English value
- Search for and open the CMGT_EML_TRI_Translations translation set.
Step 7: Update the time interval for polling emailsCopy link to clipboard
By default, the email poller checks the connected email inbox every ten minutes for new emails to retrieve. You can customize this process to run less frequently. This is an optional step.
We do not recommend that the process run more frequently, to avoid potential performance issues.
To decrease the frequency:
- Login to the target environment.
- Navigate to the Appian Designer.
- Navigate to CMGT Add-On - Case Creation via Email application.
- Search for and open the CMGT_EML_TRI_EMAIL_POLLER_TIME_INTERVAL_IN_MINUTES constant.
- Update the value to an integer for how often the email poller should run. Be sure the value is in minutes.
- Click SAVE.
- Search for and open the CMGT_EML_TRI_IngestMailViaPoller process model.
- From the File menu, click Save & Publish.
- Search for and open the CMGT_EML_TRI_EMAIL_POLLER_TIME_INTERVAL_IN_MINUTES constant.
Step 8: Add automation to pre-populate the case type of the emailCopy link to clipboard
When converting an email into a case, the case manager must enter the appropriate case type, then enter the rest of the required details before submitting the case. By default, the case type selection is manual. To add a customization that automatically sets the case type based on the email content, you can customize CMGT_EML_TRI_InitializeCaseDetails using your own custom AI Skills object or expression rule. This is an optional step.
For additional guidance, open the expression rule in the Appian Designer and read the in-line comments.
