
| This content applies solely to Connected Underwriting Life, which must be purchased separately from the Appian base platform. This content was written for Appian 24.3 and may not reflect the interfaces or functionality of other Appian versions. |
IntroductionCopy link to clipboard
Built on the Appian Low-Code platform, the Connected Underwriting (CU) Life Workbench is a pre-built, configurable application that enables insurers to speed up the underwriting process and enhance customer experience by decreasing quoting time and integrating various data sources to create a 360-view.
Installing the Connected Underwriting Life Workbench (CU Life Workbench) consists of four main steps:
- Download the software package.
- Deploy CU Life Workbench plug-ins to the Appian environment.
- Create the database objects in the business data source.
- Import the CU Life Workbench application into the Appian environment.
This guide provides how-to instructions for installing the CU Life Workbench. Before starting the installation process, review the System Requirements to ensure all minimum requirements are met and verify the Appian version and database type and the CU Life Workbench Base application version.
System requirementsCopy link to clipboard
- Appian version 24.3 or later for CU Life Workbench 1.2.0.
- Note: We recommend using Appian HIPAA Cloud to protect and safeguard any user health data.
- A supported version of a MariaDB database as a business data source.
- Note: Instructions below are tailored for MariaDB databases. The SQL scripts used in Step 3 will need to be modified for use with other databases.
- A supported web browser.
Verify the Appian version and database typeCopy link to clipboard
Follow the steps in this section to verify the Appian platform version and database, and the CU Life Workbench Base application version.
- From the navigation menu, click About Appian.
-
Under System Information, verify the Appian Version is 24.3.
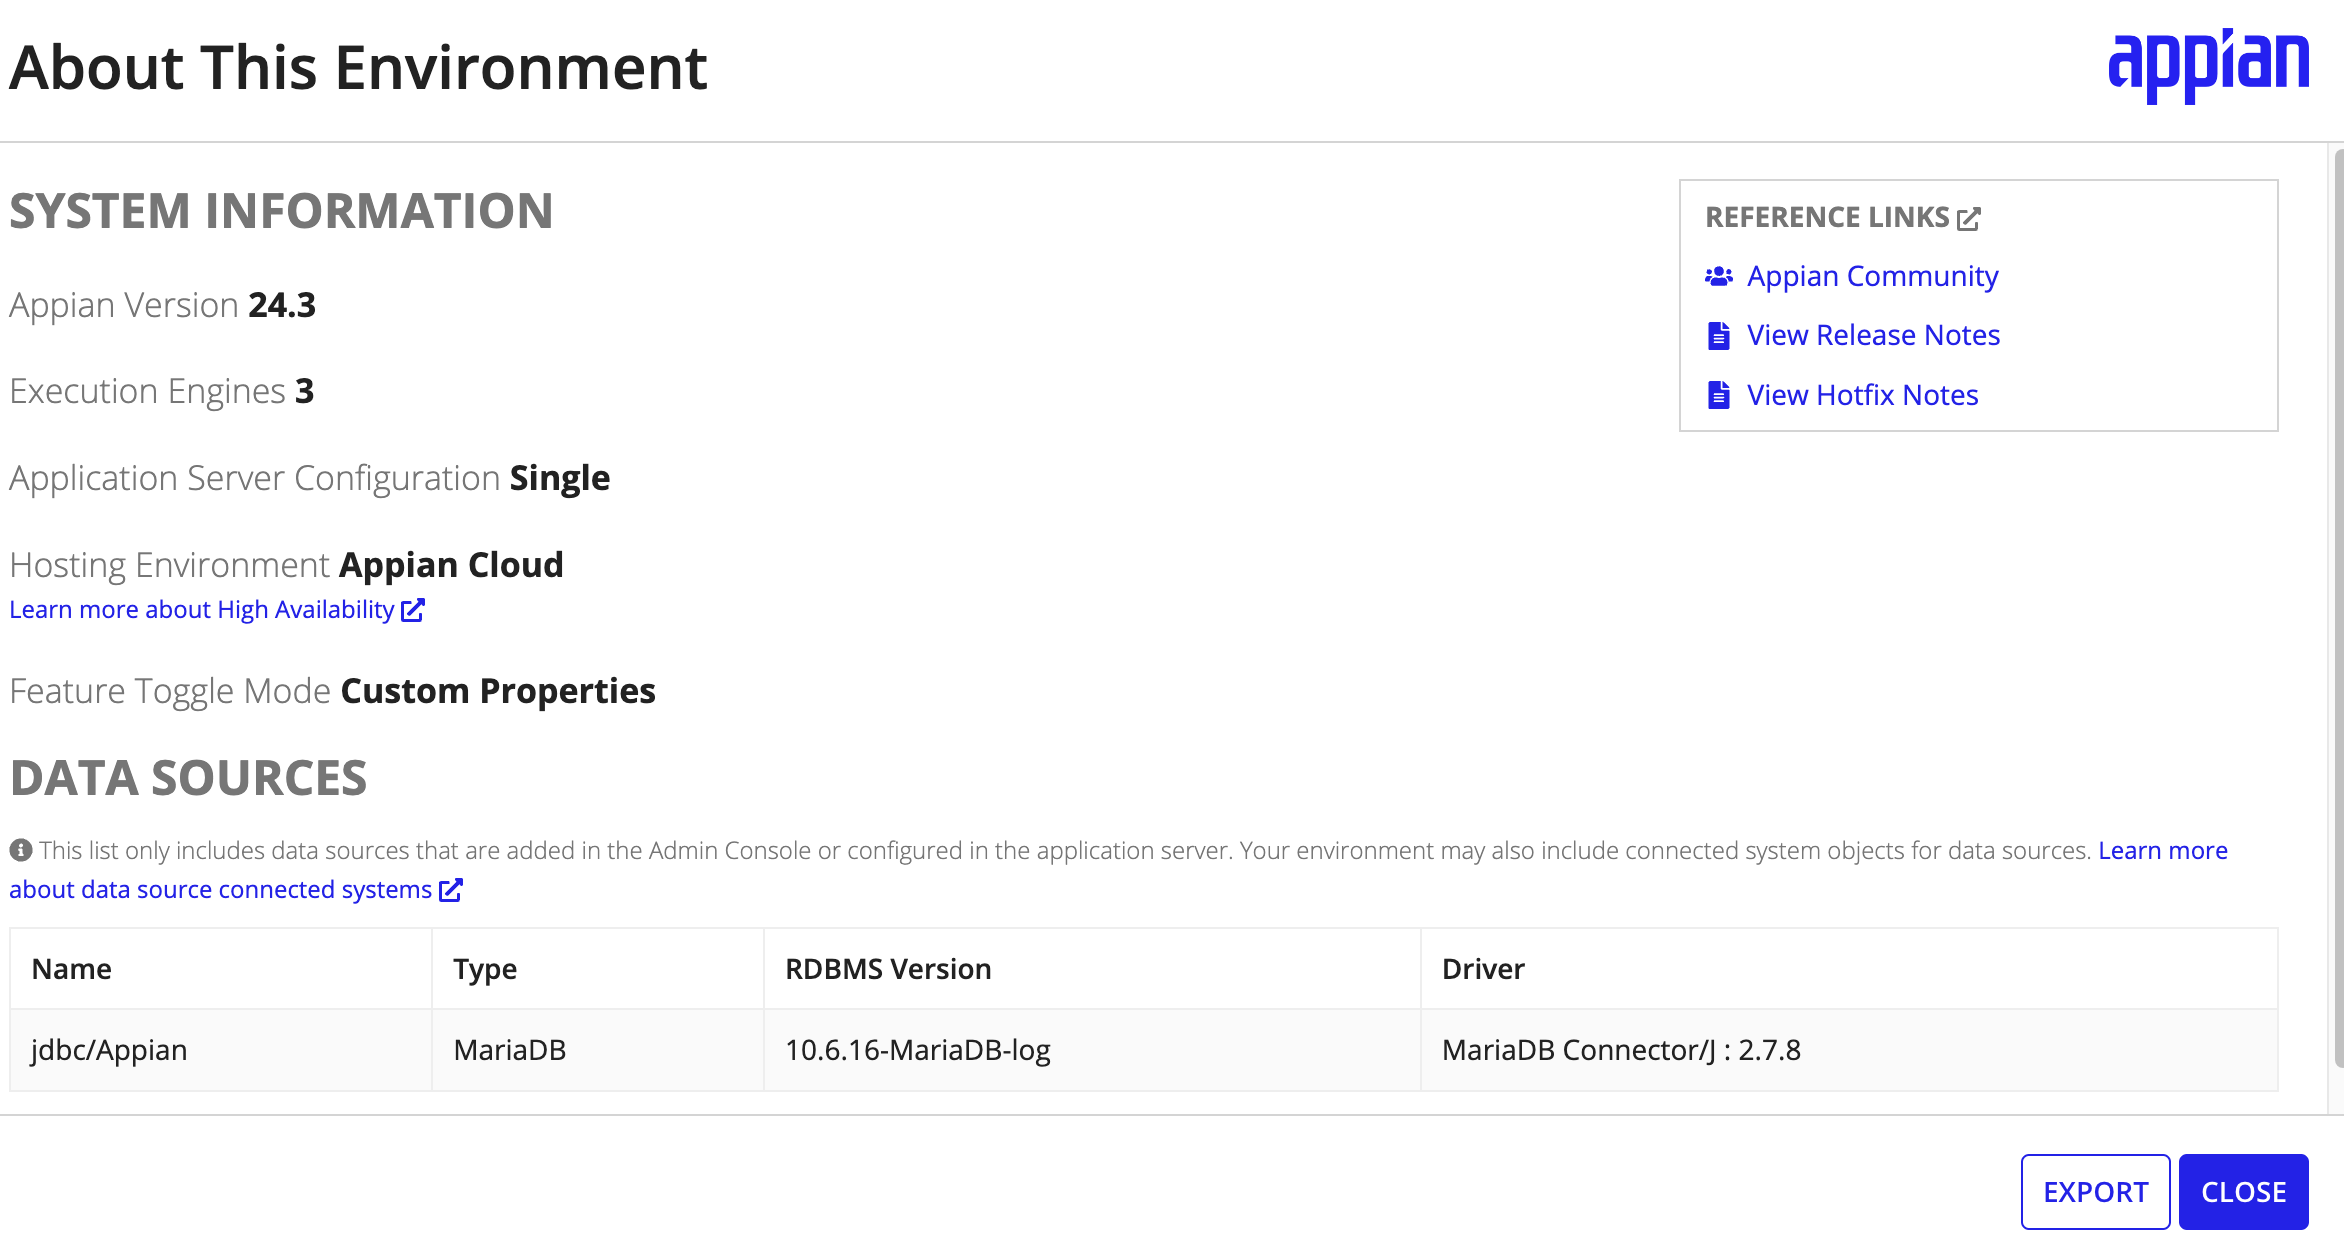
- Under DATA SOURCES, verify that a supported version of MariaDB is a business data source.
- From the navigation menu, go to Appian Designer.
-
Enter
ISL_VRS_INSURANCE_LIFE_UNDERWRITINGin the Search field and open the constant to verify the CU Life Workbench Base application version.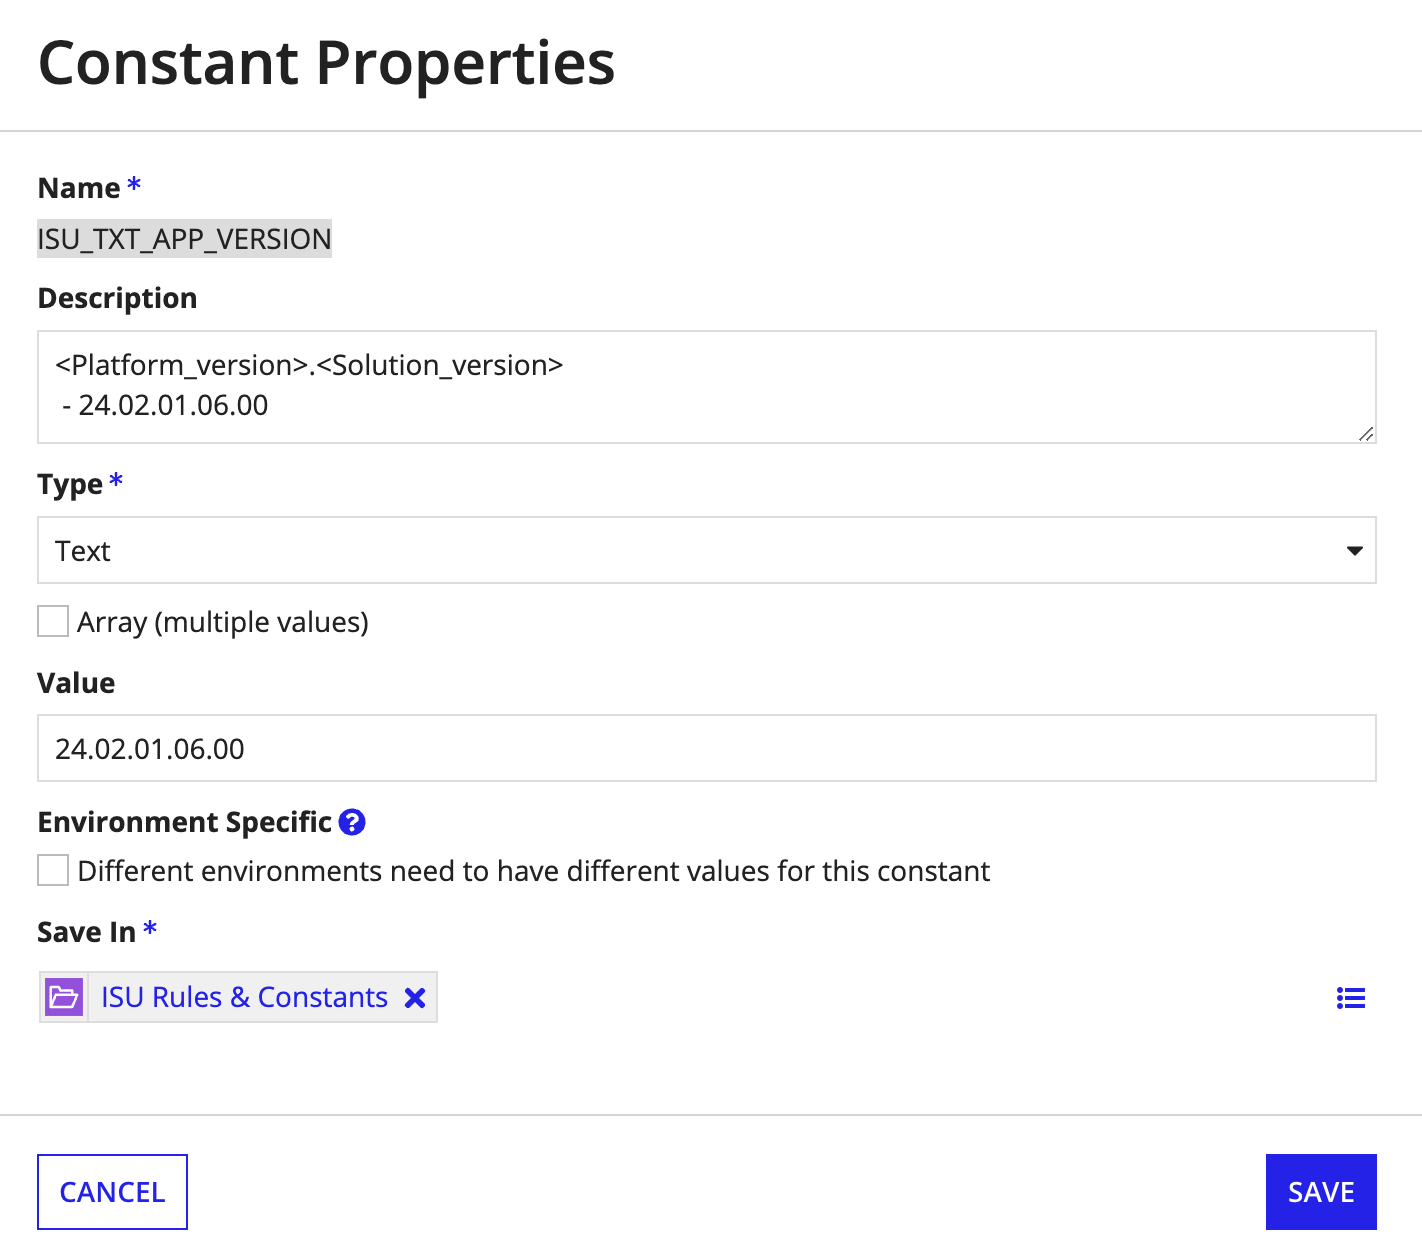
Technical supportCopy link to clipboard
During the installation, if you experience any technical difficulty, log into Appian Community and open a support case. All users of CU Life Workbench can also email Appian Support at support@appian.com.
Step 1: Download software packageCopy link to clipboard
To install CU Life Workbench, you will need to download the software package that contains the following files you'll use in the remaining setup steps.
- 01.ConnectedLifeUnderwritingv1.2.0.sql: SQL script for creating the database objects needed for the Connected Underwriting Life application.
- ConnectedLifeUnderwritingv1.2.0.zip: Application package to import into Appian.
- ConnectedLifeUnderwritingv1.2.0-AdminConsole.zip: Admin console package to import into Appian.
To download the software package:
- Go to the SUPPORT tab on My Appian.
- Click the DOWNLOADS tab.
- Click SOLUTIONS.
- Find and open Connected Underwriting Life Workbench v1.2.0.
- In Downloads, click the Connected Life Underwriting Installer link.
- Click PROCEED to agree to the License Agreement.
- Click Connected Life Underwriting Installer to download the ZIP file.
- Unzip
ConnectedLifeUnderwritingv1.2.0 - Forum.zipto access the software installation files.
Step 2: Deploy plug-insCopy link to clipboard
The CU Life Workbench relies on the following plug-ins to be deployed and configured in the target system before you can import the application files.
Appian SolutionsRich TextAppian Solutions Component Plugins
The steps for deploying plug-ins differ for an Appian Cloud or self-managed environment. Be sure to note which deployment steps you need for your environment.
Appian Cloud EnvironmentsCopy link to clipboard
To deploy the plug-ins for an Appian Cloud environment:
- In the target environment, log in as the deployment user.
- Navigate to the Admin Console.
- On the left side of the console, click Plug-ins.
- Click ADD PLUG-INS.
- Search for and click
Appian Solutions. - Click DEPLOY.
- Search for and click
Rich Text. - Click DEPLOY.
Self-Managed EnvironmentsCopy link to clipboard
To deploy the plug-ins for a self-managed environment:
- Download the following plug-ins from the Appian AppMarket:
- Follow the Deploying Plug-ins instructions to deploy the plug-ins listed above.
Step 3: Create database objectsCopy link to clipboard
You will need to run a DDL script in your database to create the structure for the database tables, views, and other objects that are a part of the CU Life Workbench.
To create the database objects:
-
In your database, run the
ConnectedLifeUnderwritingv1.2.0.sqlDDL file downloaded in Step 1. -
Note: This DDL file is optimized for MariaDB. If you use a different database type, the DDL file may need to be modified.
Step 4: Import the applicationCopy link to clipboard
The next step needed is installing the CU Life Workbench by importing the application files into the target environment.
To import the application:
- In the target environment, log in as the deployment user.
- Navigate to the Appian Designer.
- Click IMPORT.
- Click UPLOAD and choose the
ConnectedLifeUnderwritingv1.2.0.zipfile downloaded in Step 1. - Click INSPECT.
- Review the inspection results. If there are no issues, click IMPORT PACKAGE.
- NOTE: The import may time out due to file size, but the import will continue in the background.
Note: A warning will occur when importing the data stores if the business database is not called Appian. To fix this, after the import is complete, go into each record object and manually change the source table to the appropriate database schema.