OverviewCopy link to clipboard
This page describes what you can do in the Users view of Appian Designer.
To access this view, click Users in the navigation pane at the environment level.
PurposeCopy link to clipboard
The Users view allows you to manage users in the Appian environment. In this context, users are primarily developers building applications, but they can also act in other roles.
Learn more about user management.
ElementsCopy link to clipboard
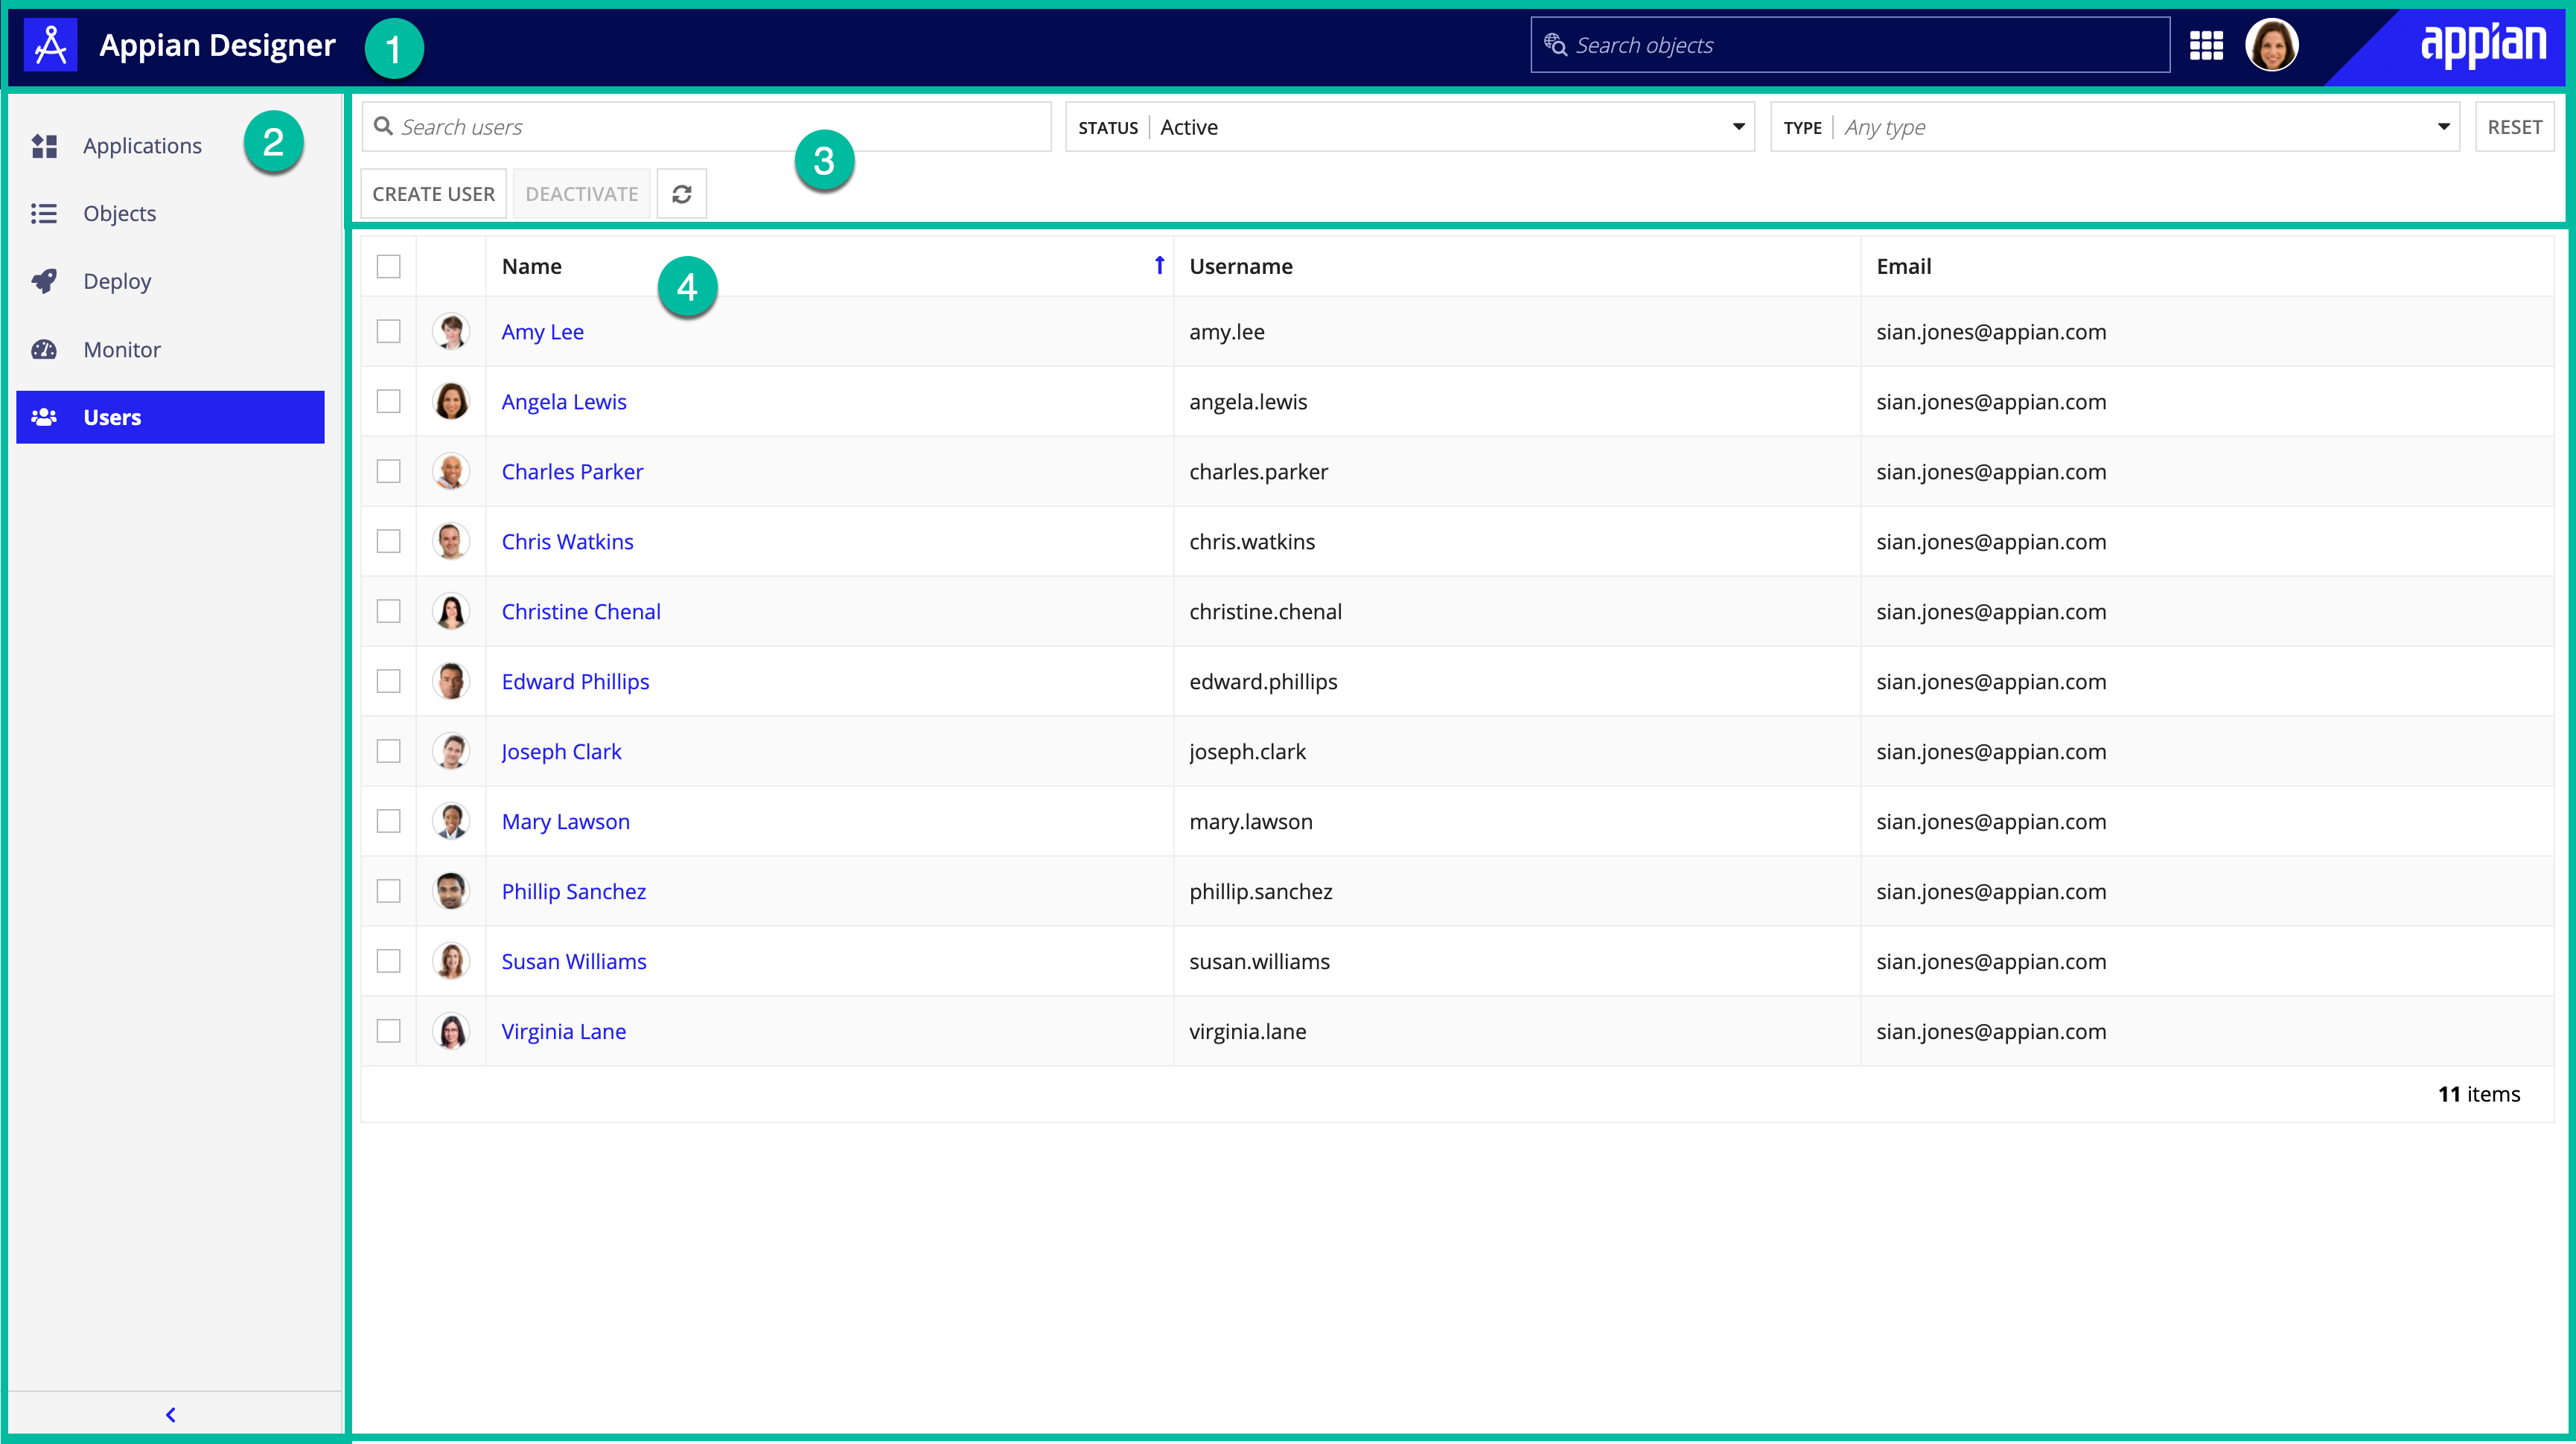
The following image highlights the elements that make up this view:
# |
Element |
Available Actions |
|---|---|---|
1 |
Header bar |
Learn more about the header bar. |
2 |
Navigation pane |
Learn more about the navigation pane. |
3 |
Toolbar |
|
4 |
Grid |
Search for a userCopy link to clipboard
In the filter pane, you can search by full name, username, and email.
Filter the users gridCopy link to clipboard
System administrators can filter the grid by the user's status and the user's type.
User status values include:
- Active: (Default) View active users.
- Inactive: View deactivated users only.
- All: View both active and deactivated users.
Create a userCopy link to clipboard
Required role: System administrator
To create a new user:
- In the toolbar, click CREATE USER. The Create User dialog displays.
-
In the Profile section, configure the following properties:
Property Description Username The username that uniquely identifies the user in the environment. For example: angela.lewis.First Name The first name of the user. Last Name The last name of the user. Nickname A nickname for the user. Email The email for the user. This email will be used for notifications and resetting the user's password. Supervisor Select an existing user. Title Select from existing titles, create a new title, or select none. -
In the Security section, configure the following properties:
Property Description User Type Select a user type. Temporary Password Enter a temporary password. The user will need this password to sign on to Appian, at which time the system will prompt them to reset the password. Confirm Password Re-enter the temporary password. - Continue as appropriate:
- Click CREATE to create this user only.
- Click CREATE & ADD ANOTHER to create this user and return to a blank Create User dialog.
View user detailsCopy link to clipboard
System administrators can view details for all users in the environment.
Developers can see other users' details in read-only form, and the User Type and Groups fields are hidden from their view.
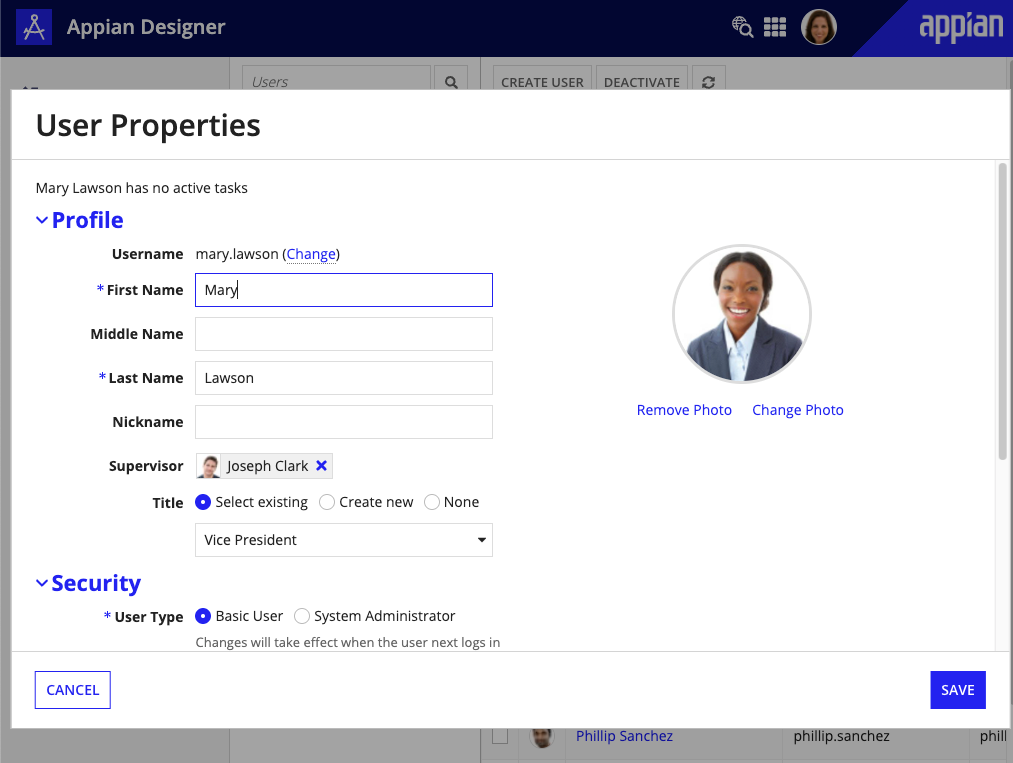
To view user details, click the username in the users grid. The User Properties dialog displays.
Edit a userCopy link to clipboard
System administrators can edit any user. Developers can edit their own user information only.
To edit a user:
-
In the users grid, click the name of a user. The User Properties dialog displays.
- Make your changes.
- Click SAVE.
System administrators can update any of the following fields:
- Profile
- First Name
- Middle Name
- Last Name
- Nickname
- Supervisor
- Title
- Profile Photo
- Security
- User Type
- Contact
- Office Phone
- Mobile Phone
- Home Phone
- Location
- Address 1
- Address 2
- Address 3
- City
- State
- Province
- ZIP Code
- Country
- Internationalization
- Locale
- Time Zone
- Custom Fields
- Custom Fields 1 - 10
- Groups
- This section displays the groups the user is a member of. You can add them to more groups in the Groups View.
Deactivate or reactivate a userCopy link to clipboard
Required role: System administrator
When you deactivate a user:
- The user will not able to sign in to Appian and will not be returned in user searches (for example, in a user picker).
- Processes will fail if the process is configured to run as the deactivated user.
To deactivate a user:
- In the users grid, select a user.
- In the toolbar, click DEACTIVATE. A confirmation dialog displays.
- Click DEACTIVATE to confirm. The system deactivates the user.
To view deactivated users, filter the users grid by the Inactive status.
To reactivate a user:
- In the filter pane, filter the grid by Inactive status.
- In the filtered grid, select a user.
- In the toolbar, click REACTIVATE. The system fully restores the user.


