| This content applies solely to Connected Claims, which must be purchased separately from the Appian base platform. This content was written for Appian 23.4 and may not reflect the interfaces or functionality of other Appian versions. |
Getting startedCopy link to clipboard
The Connected Claims Customer Service module allows you to view customer records, access claim details, and collect customer feedback through integrated communication channels. You can quickly view and take action on active customer service cases to ensure your customers are supported throughout their insurance activities, improving their overall customer experience.
This guide demonstrates the pages and views available within the Customer Service module. Note that your specific implementation of the Connected Claims application may have more or less functionality.
Use case: lending a helping handCopy link to clipboard
Rebecca is a customer service representative for a large insurance company, answering phone calls for various customer needs. Many calls Rebecca takes require her to be capable of the following actions:
- Updating customer information
- Taking detailed notes
- Looking up customer policies
- Reviewing cases and communications
Rebecca receives a call from Harry, who is calling to check on the status of a claim. To properly handle Harry's call, Rebecca must pull up the appropriate information and navigate the data in Harry's file. Note that while the policy is for Toni, Harry is the one contacting the insurance provider. In this instance, Toni is the Account Name, and Harry and Toni are both Customers on the account.
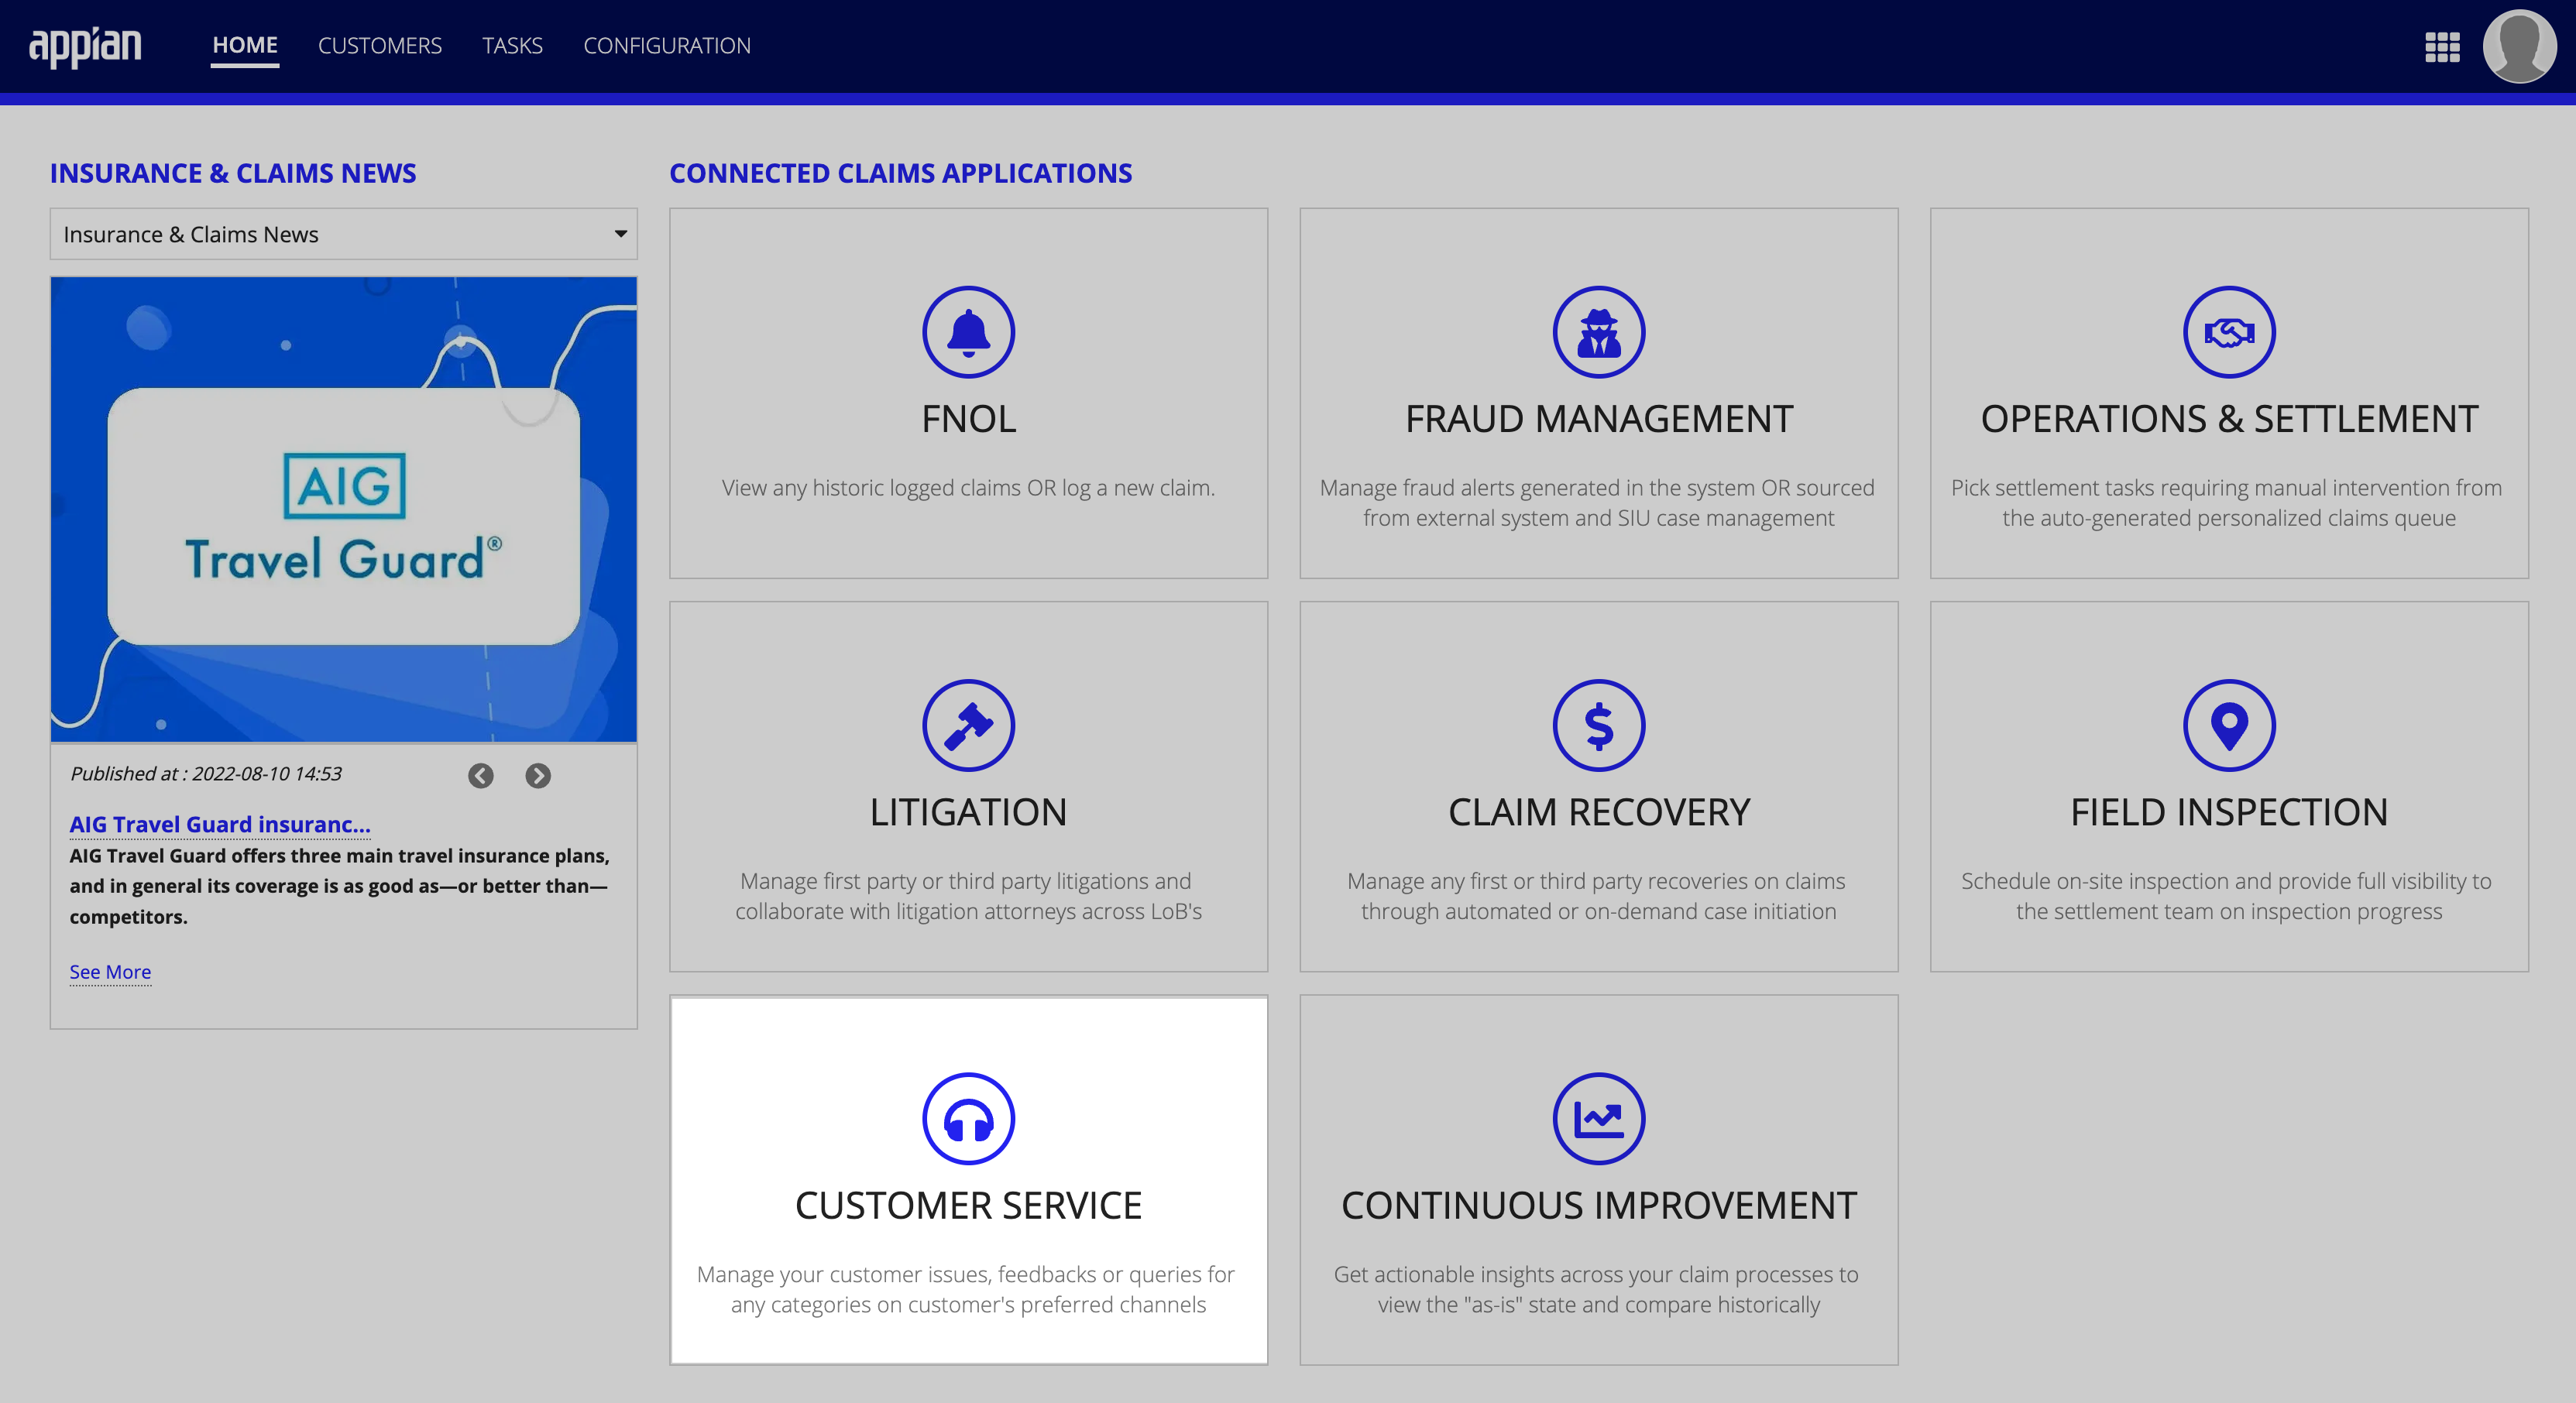
From the Connected Claims home page, Rebecca clicks the CUSTOMER SERVICE card. This module allows Rebecca the ability to pull up Harry's customer information and any associated items that may be attached to Harry's account.
Viewing customer informationCopy link to clipboard
Once within the Customer Service module, the CUSTOMERS dashboard displays by default. This screen provides Rebecca with a view of basic customer information like names, contact information, case information, and a customer rating.
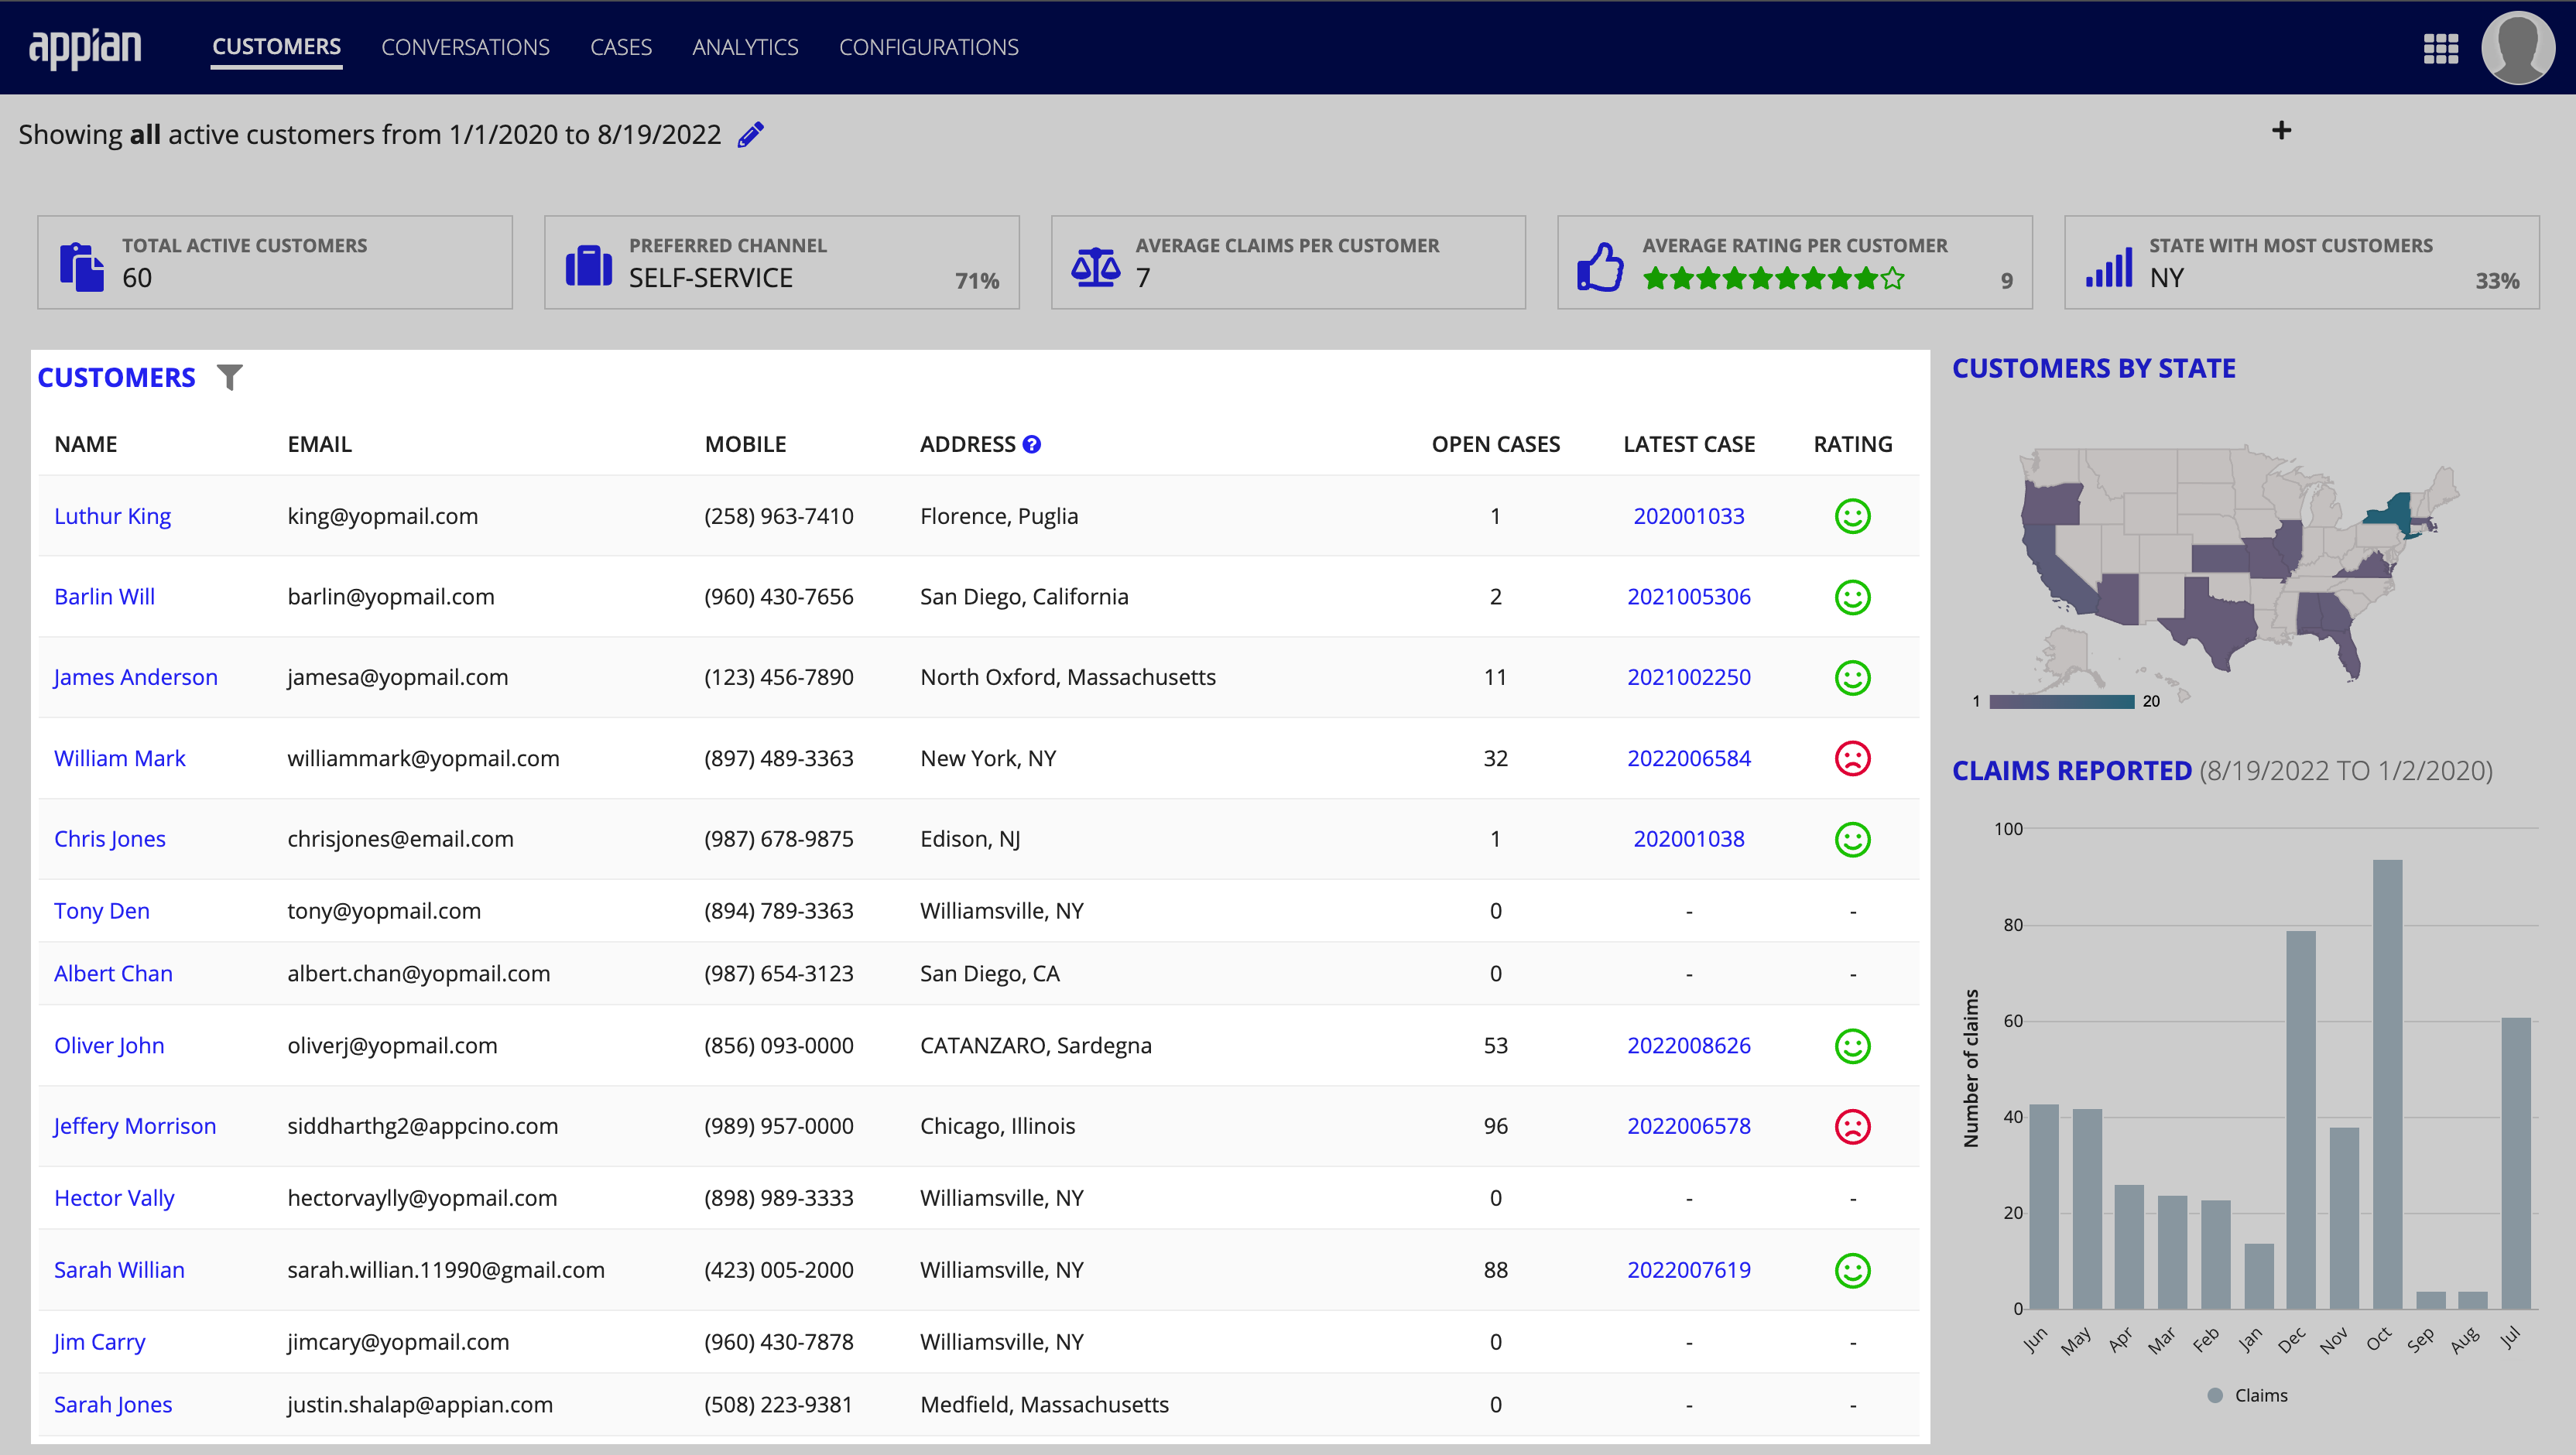
To filter the record table:
- From the CUSTOMERS dashboard, click the filter icon on the CUSTOMERS table header.
- Enter the values you want to filter the table by.
- Click Apply Filter.

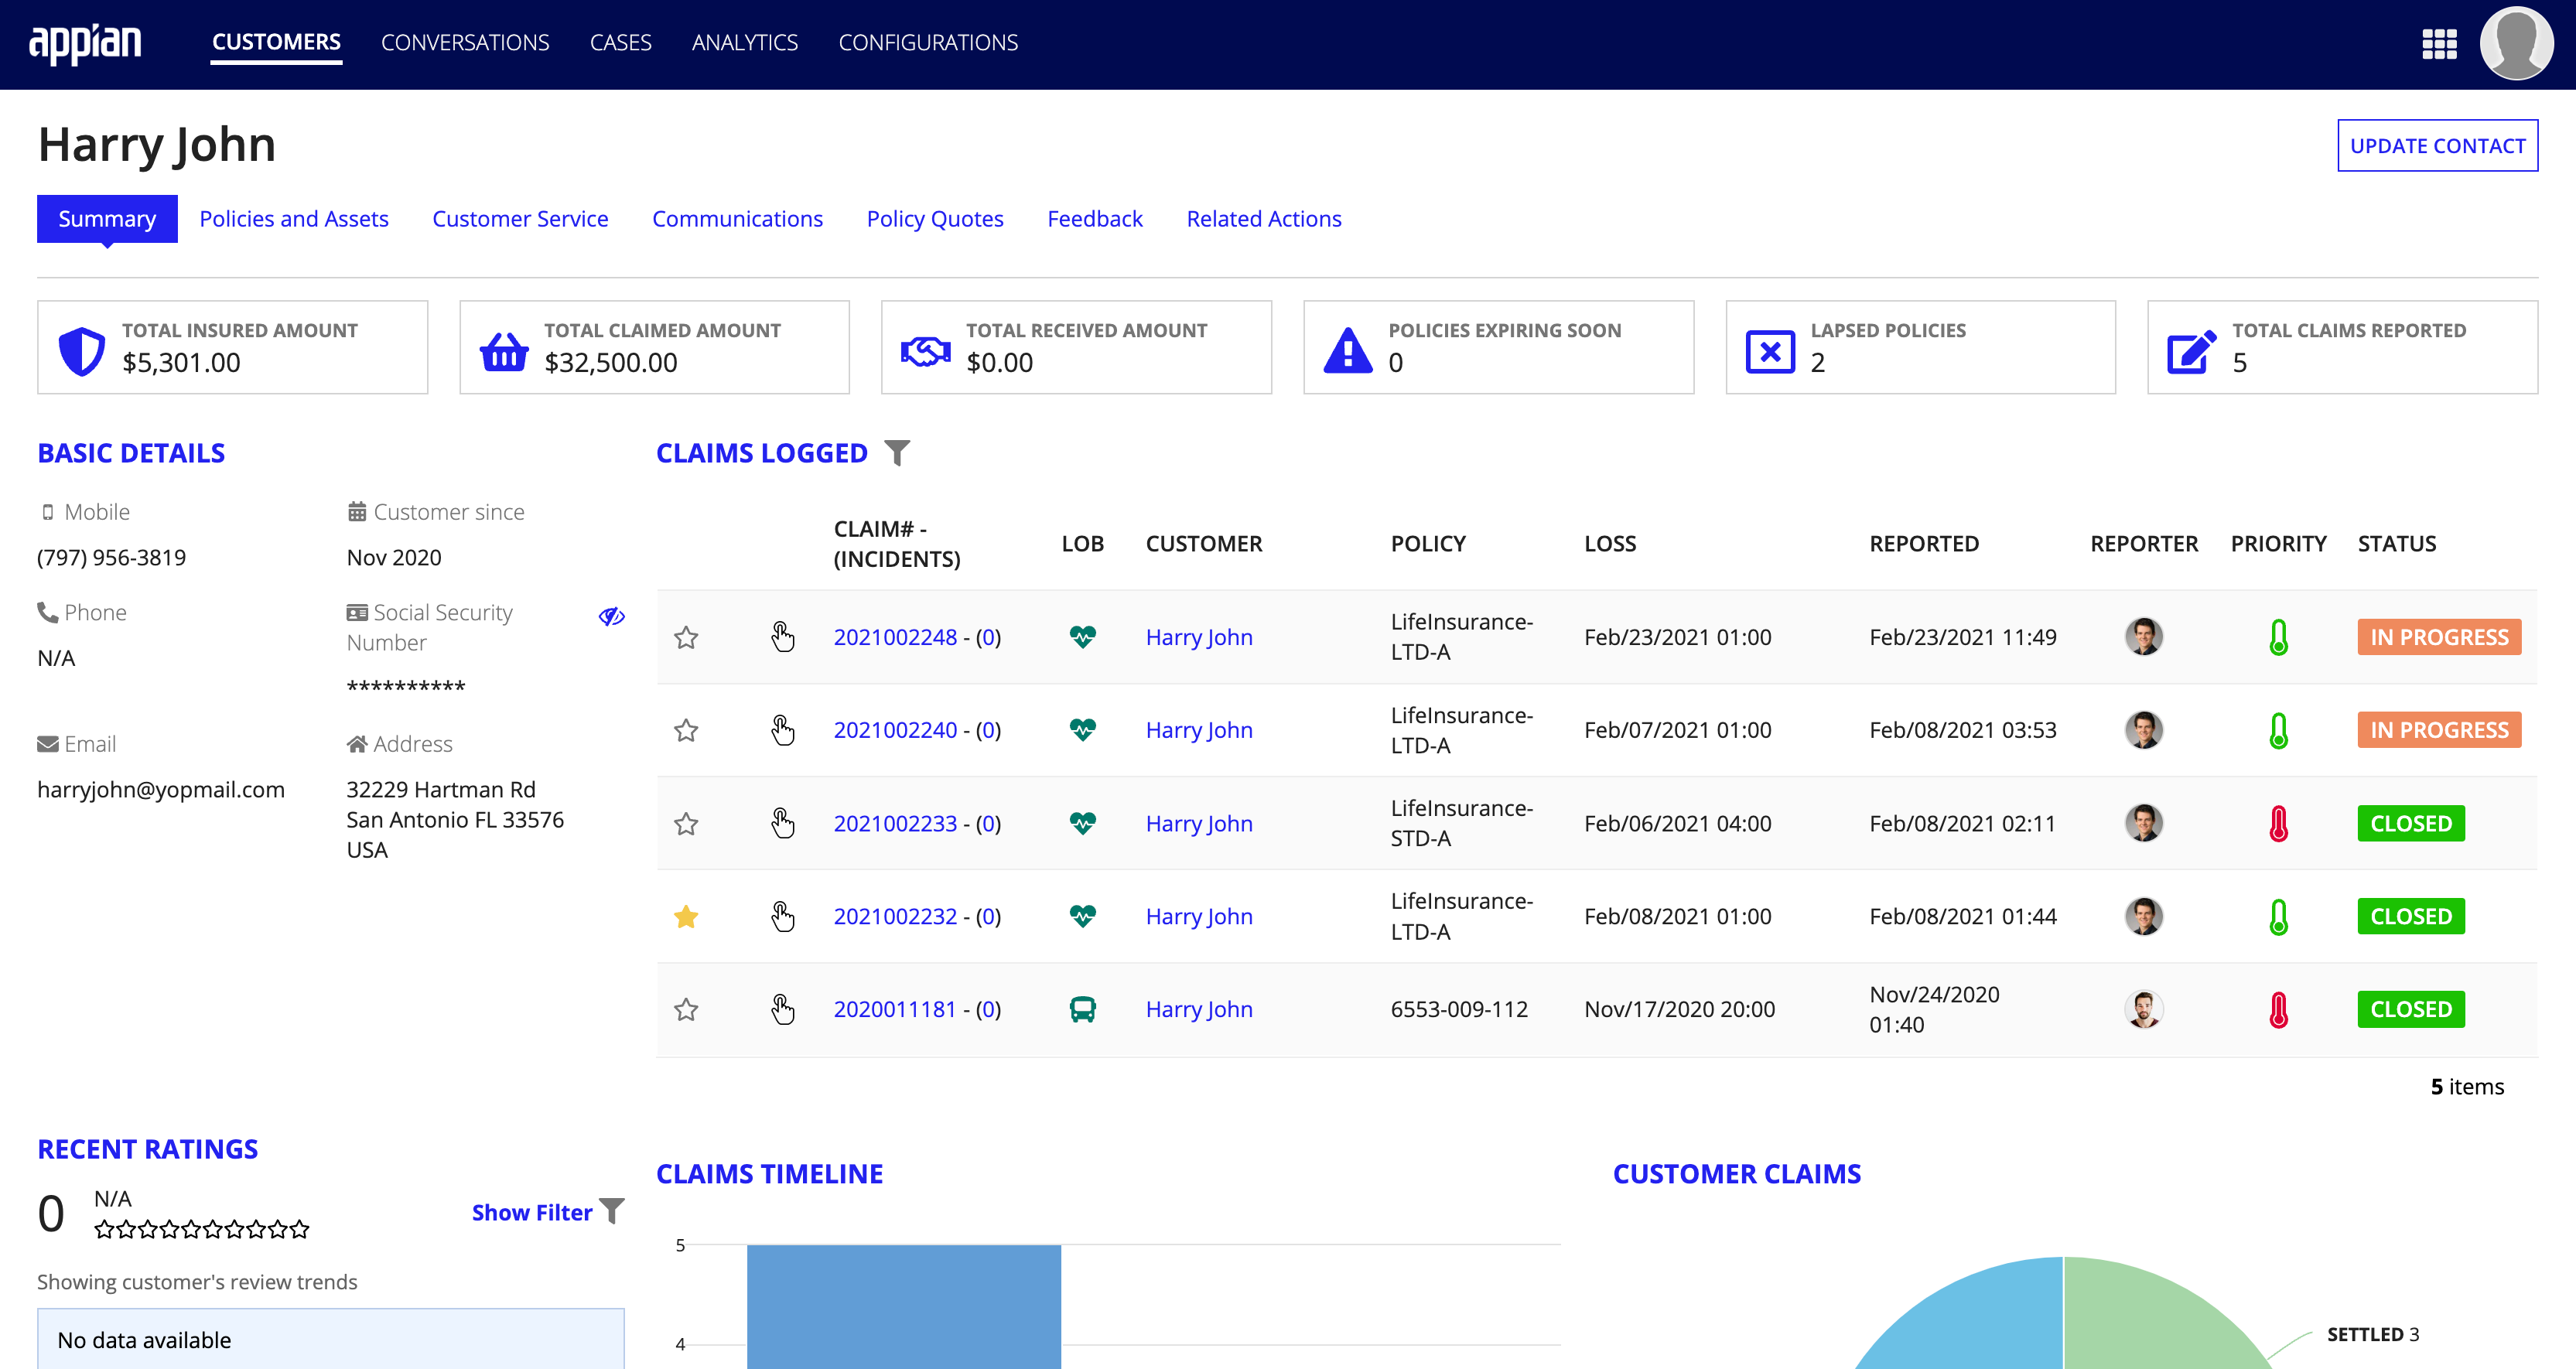
Clicking Harry's account from the NAME column brings Rebecca to the Customer Summary page, which provides helpful details, like contact information and a record table with claim history.
Updating customer contact informationCopy link to clipboard
Before assisting Harry with his inquiry, Rebecca must first verify Harry's identity against his customer record. Harry indicates that his address has recently changed and he wants to update it. After confirming his identity, Lisa proceeds with updating his contact information.

To update contact information:
- From the Customer Summary page, click UPDATE CONTACT.
- Enter the updated information within the appropriate fields.
- Click UPDATE.
Creating new customers or customer groupsCopy link to clipboard
In some instances, Rebecca may need to create new customers or customer groups. When performing this action, Rebecca must know the difference between a customer and a customer group. The differences are:
- Customer: The individual who a customer service representative would interact with to resolve a customer service case.
- Customer Group: A group that a customer may be added into. A customer group allows the user to enter customers who are not specific individuals. The Account Type options are:
- Public Company
- Private Company
- Individual
- Legal Company
- Internal Insurer
Note: If the customer is an Individual, the Customer Group and the Customer have the same information.
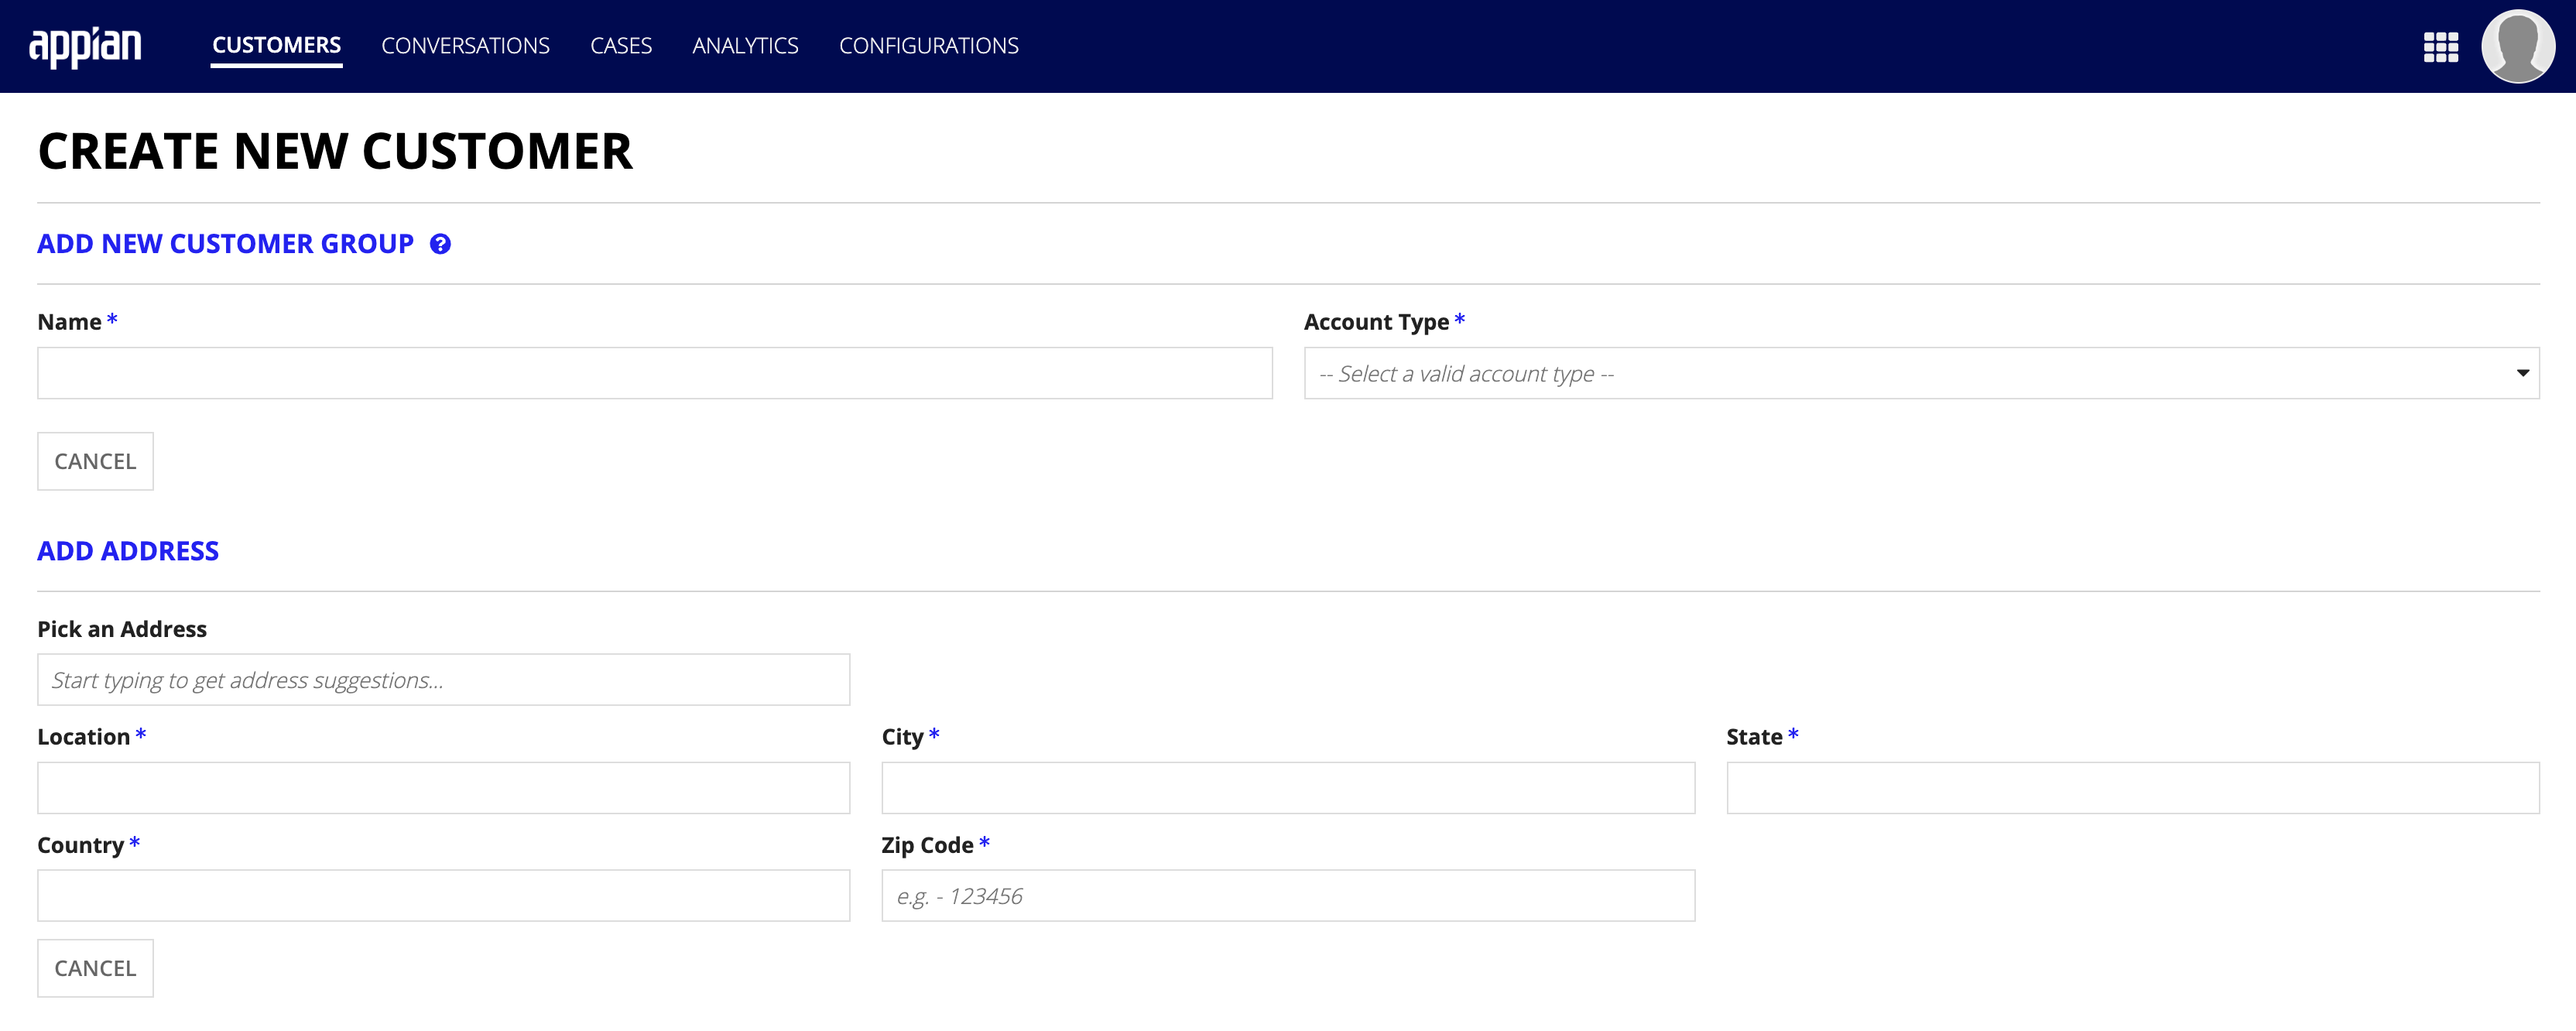
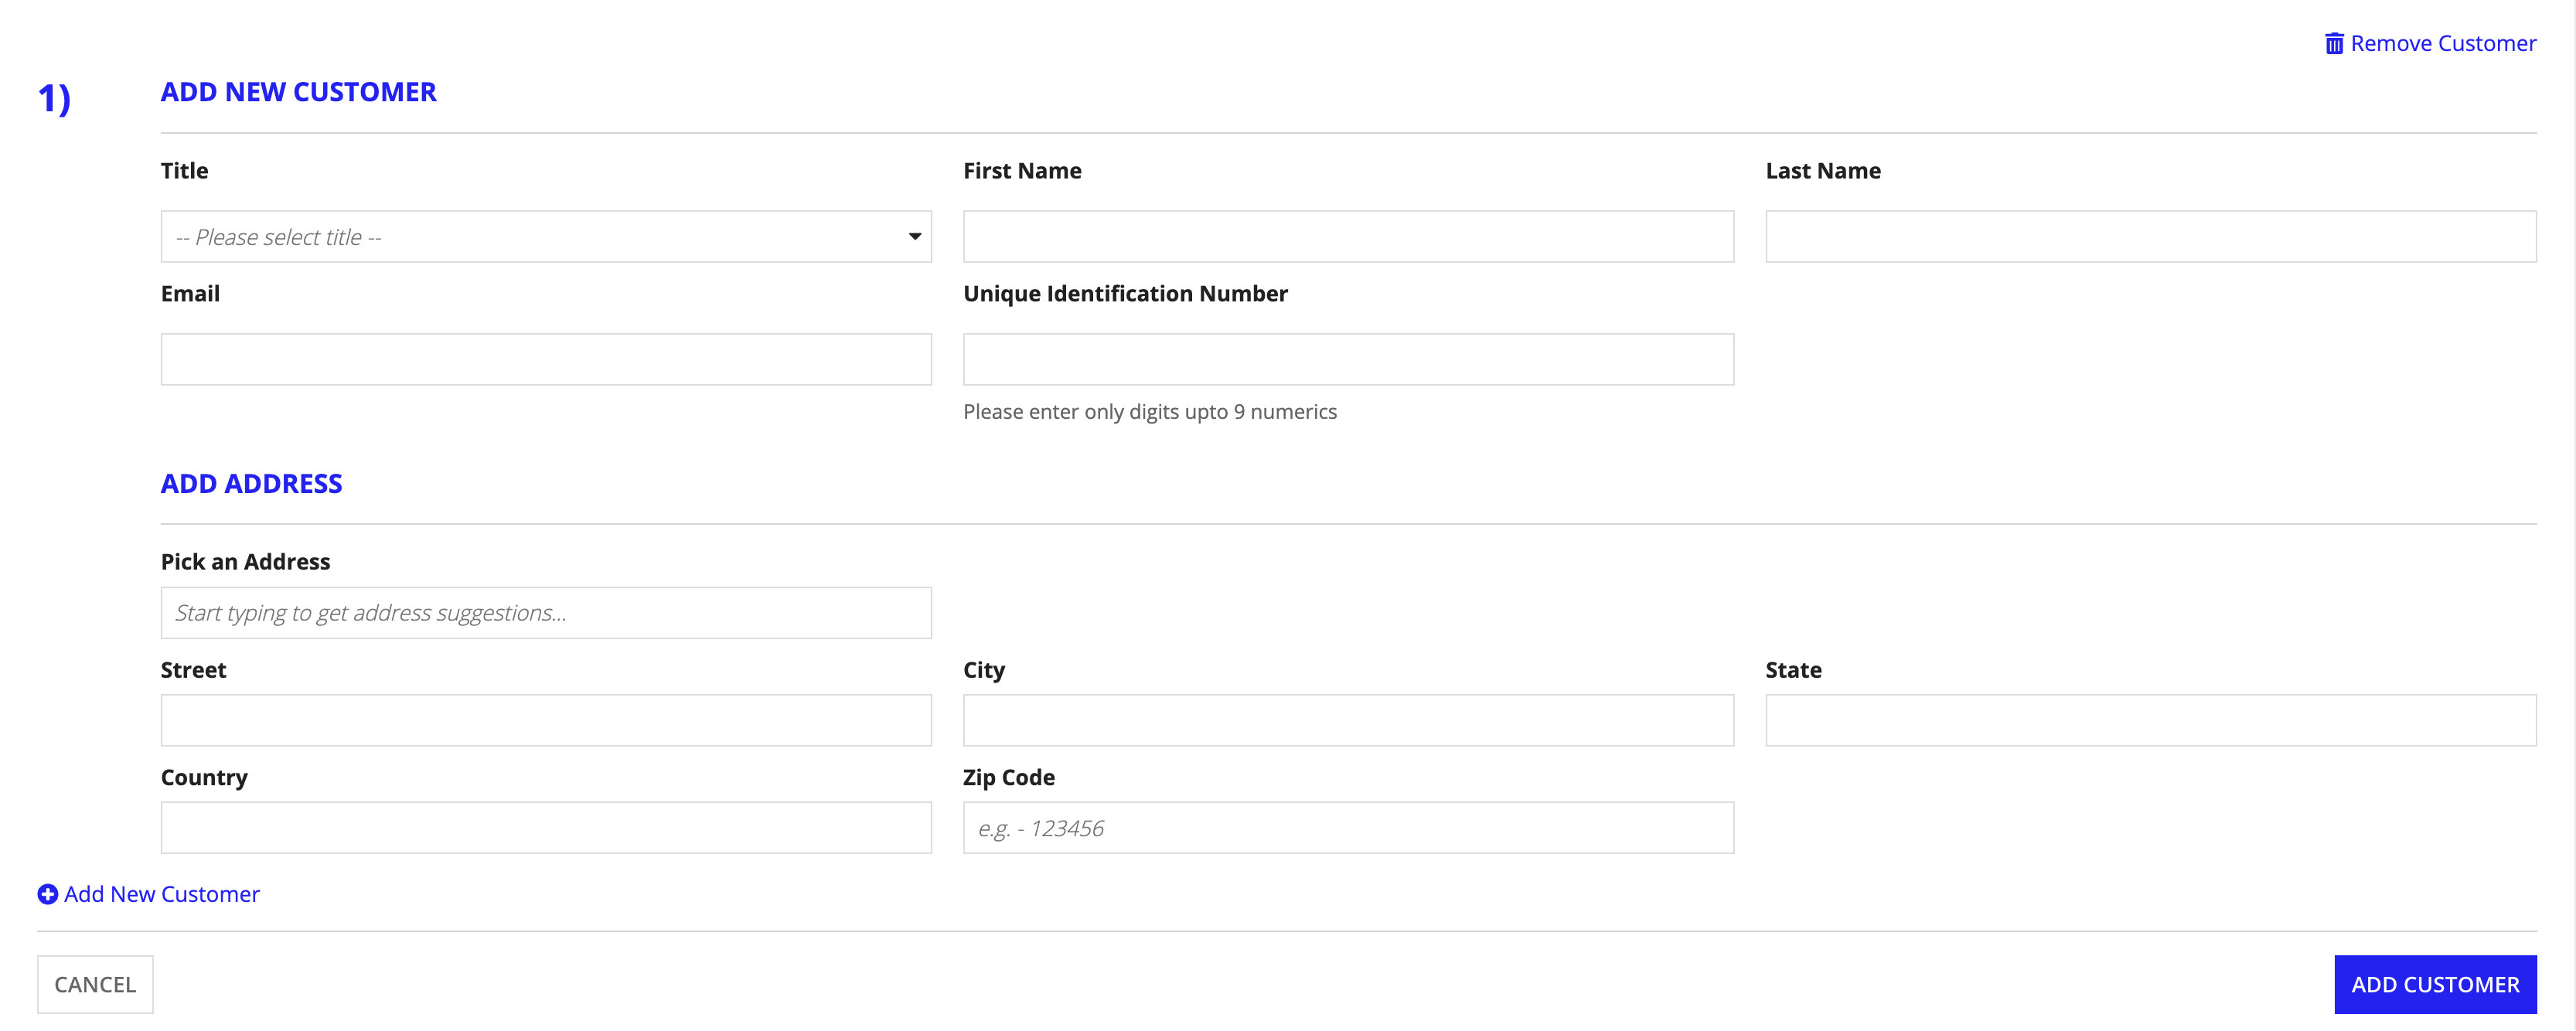
To create a new customer or customer group:
- From the Customer Summary page, click CREATE NEW CUSTOMER.
- In the Customer Group Name field, select the appropriate group.
- If the correct group is not available, click Add New Customer Group and fill in the correct customer name and account type.
- Click Add New Customer and fill in the customer information.
- To add multiple customers to a group at once, click Add New Customer for each customer being added.
- Click Add Customer to create the customer group and commit new customers to the organization.
Customer actionsCopy link to clipboard
The following actions are available through the tabs located along the top of a Customer Summary page:
- Viewing customer policies and assets
- Viewing customer service cases
- Managing communications
- Reviewing/soliciting customer feedback

Viewing customer policies and assetsCopy link to clipboard
As a large provider of insurance policies, Rebecca's company offers many options. To become familiar with a customer's policy and benefits, Rebecca clicks the Policies and Assets tab at the top of the Customer Summary page.
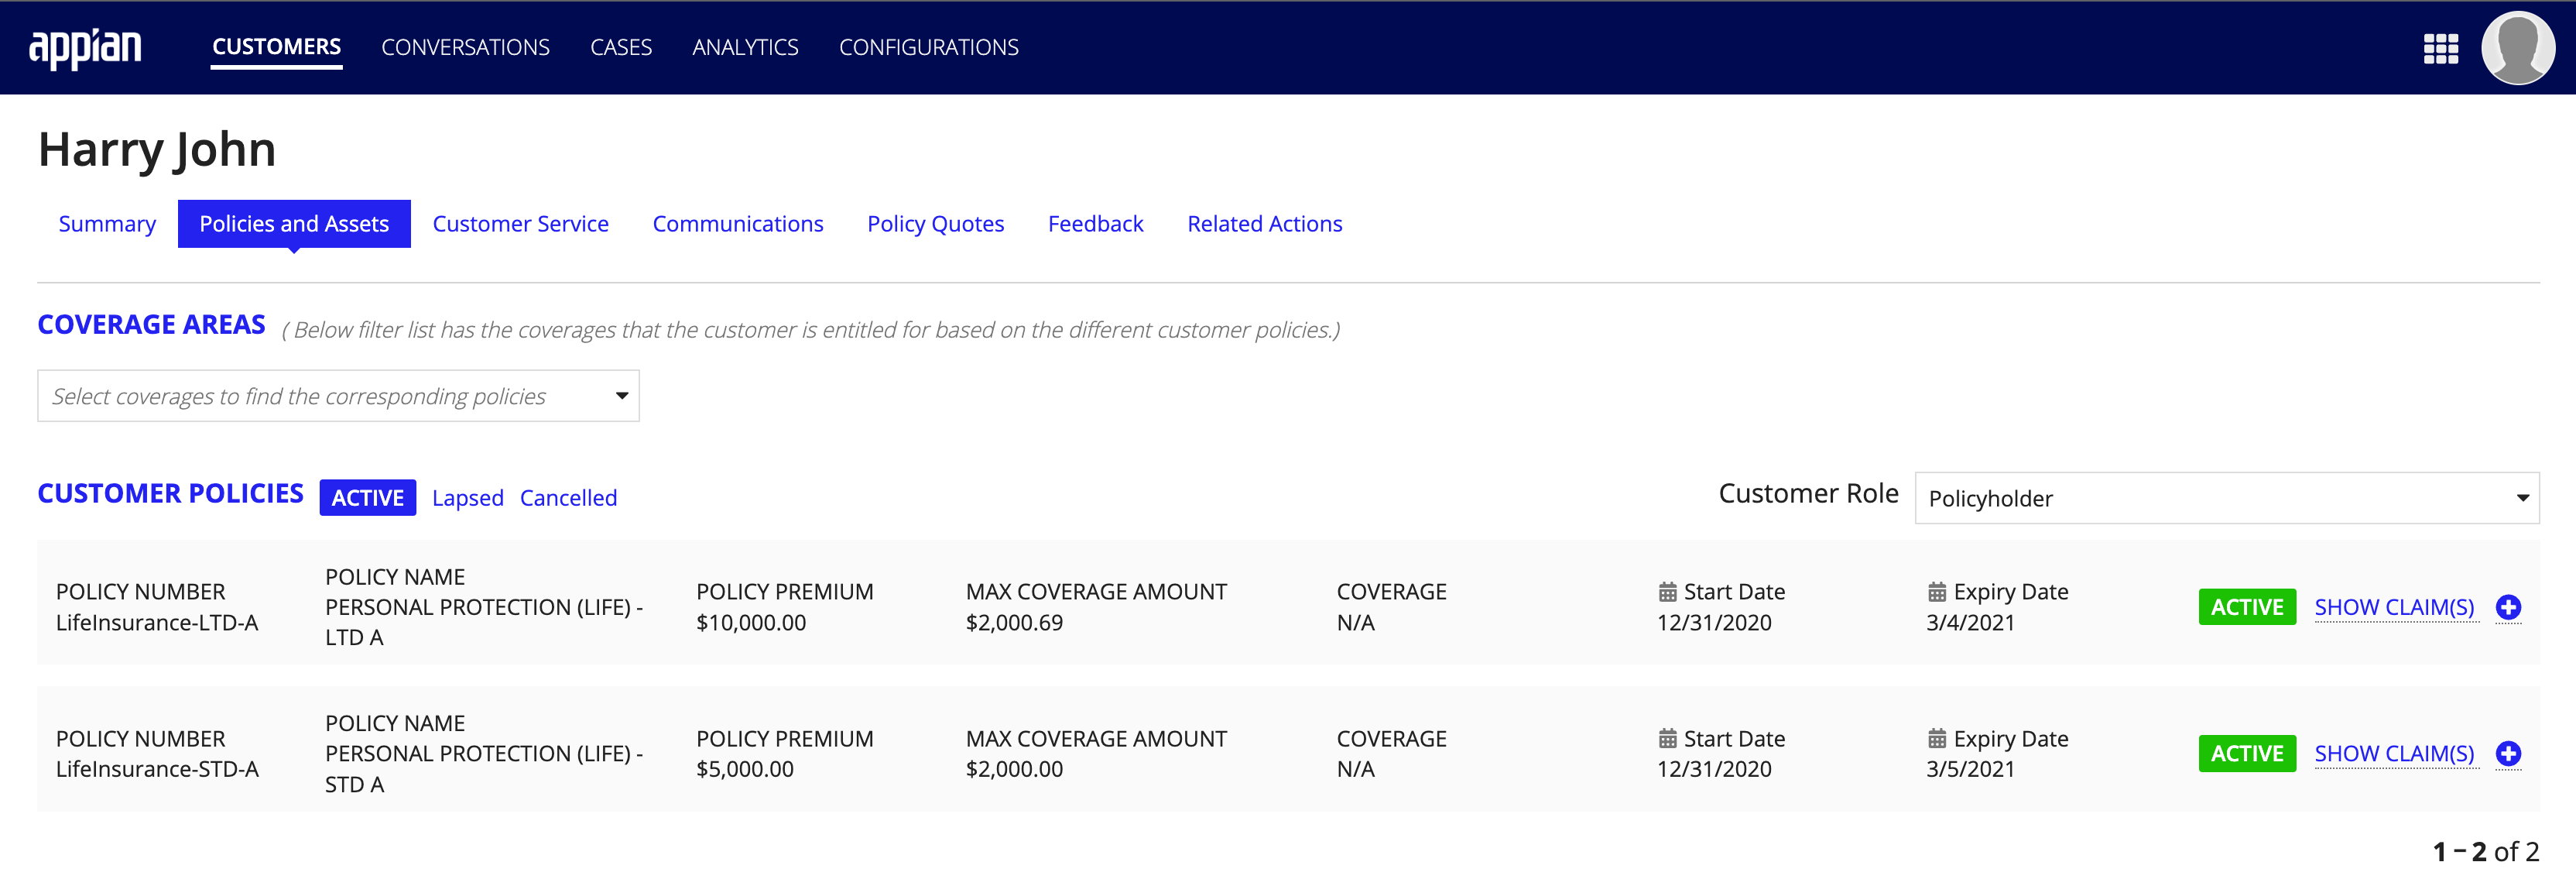
On the Policies and Assets page, Rebecca can view any policies active for Harry.
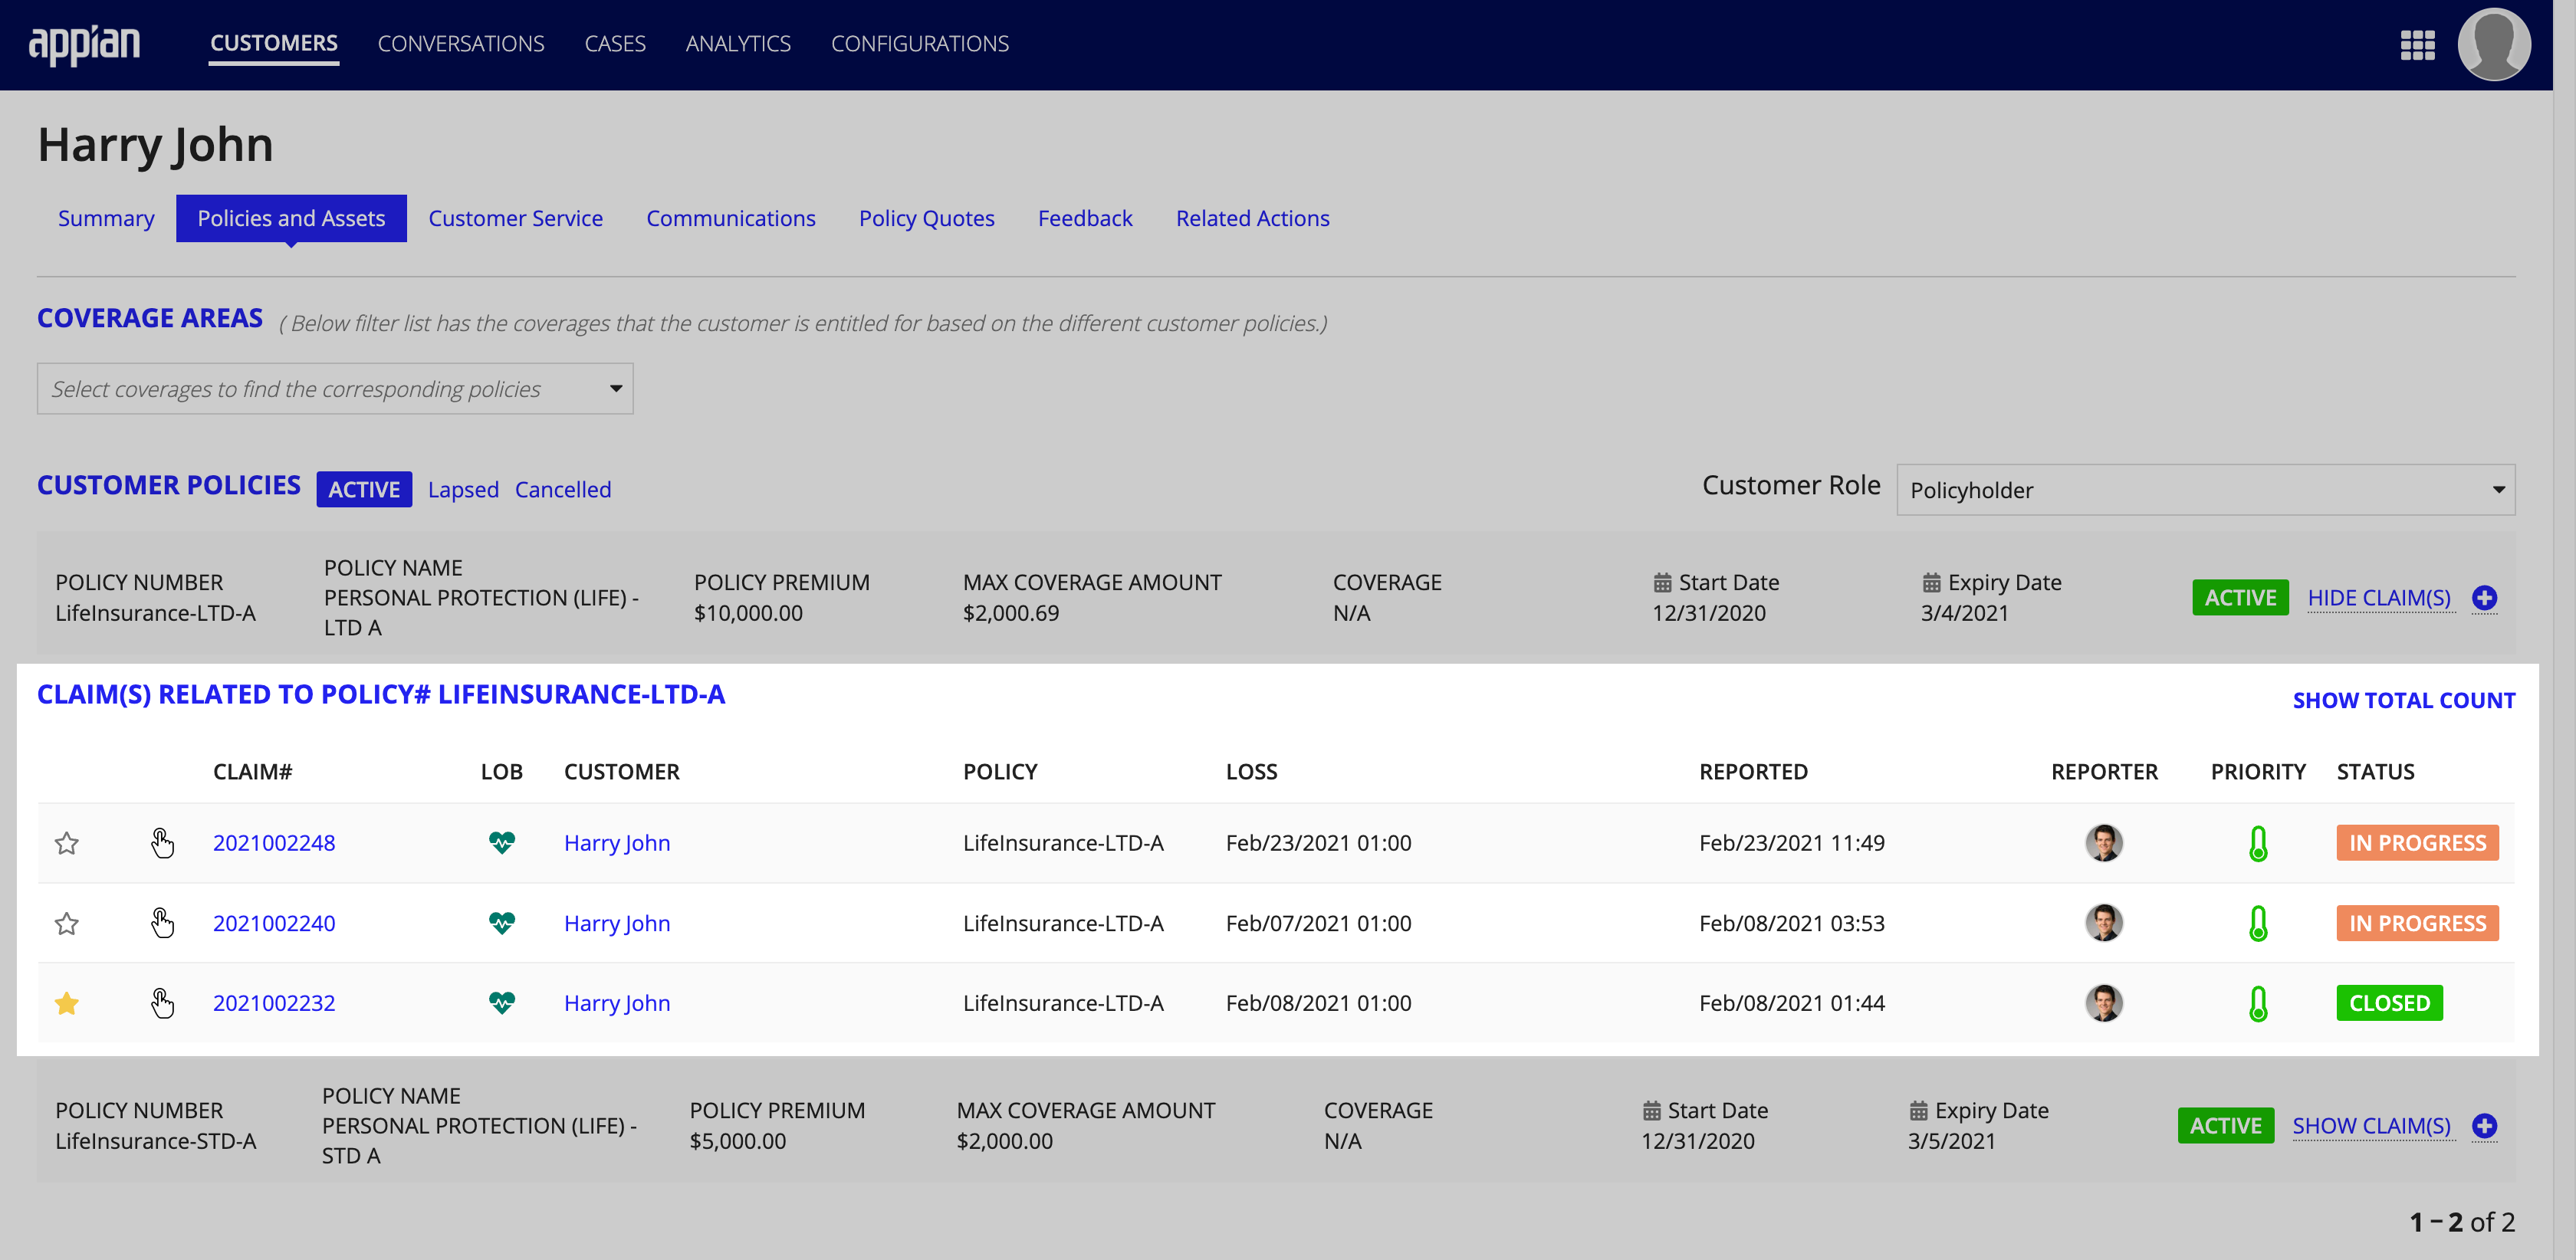
Clicking SHOW CLAIM(S) on a record displays all claims associated with that policy. Policies can also be filtered by their status: Active, Lapsed, or Cancelled.
Viewing customer service casesCopy link to clipboard
The Cases associated with an account are accessible by selecting the Customer Service tab. All Cases are added via the CASES page accessed through the navigation bar.

Viewing and taking action on customer service cases is covered in detail in a full [Viewing customer service cases] section later in this guide.
Managing communicationsCopy link to clipboard
Communications items include automated messages and exchanges between customers and customer service representatives.
Note: Self-service items are communications that are automatically generated and sent to the customer as a result of a customer-performed action.
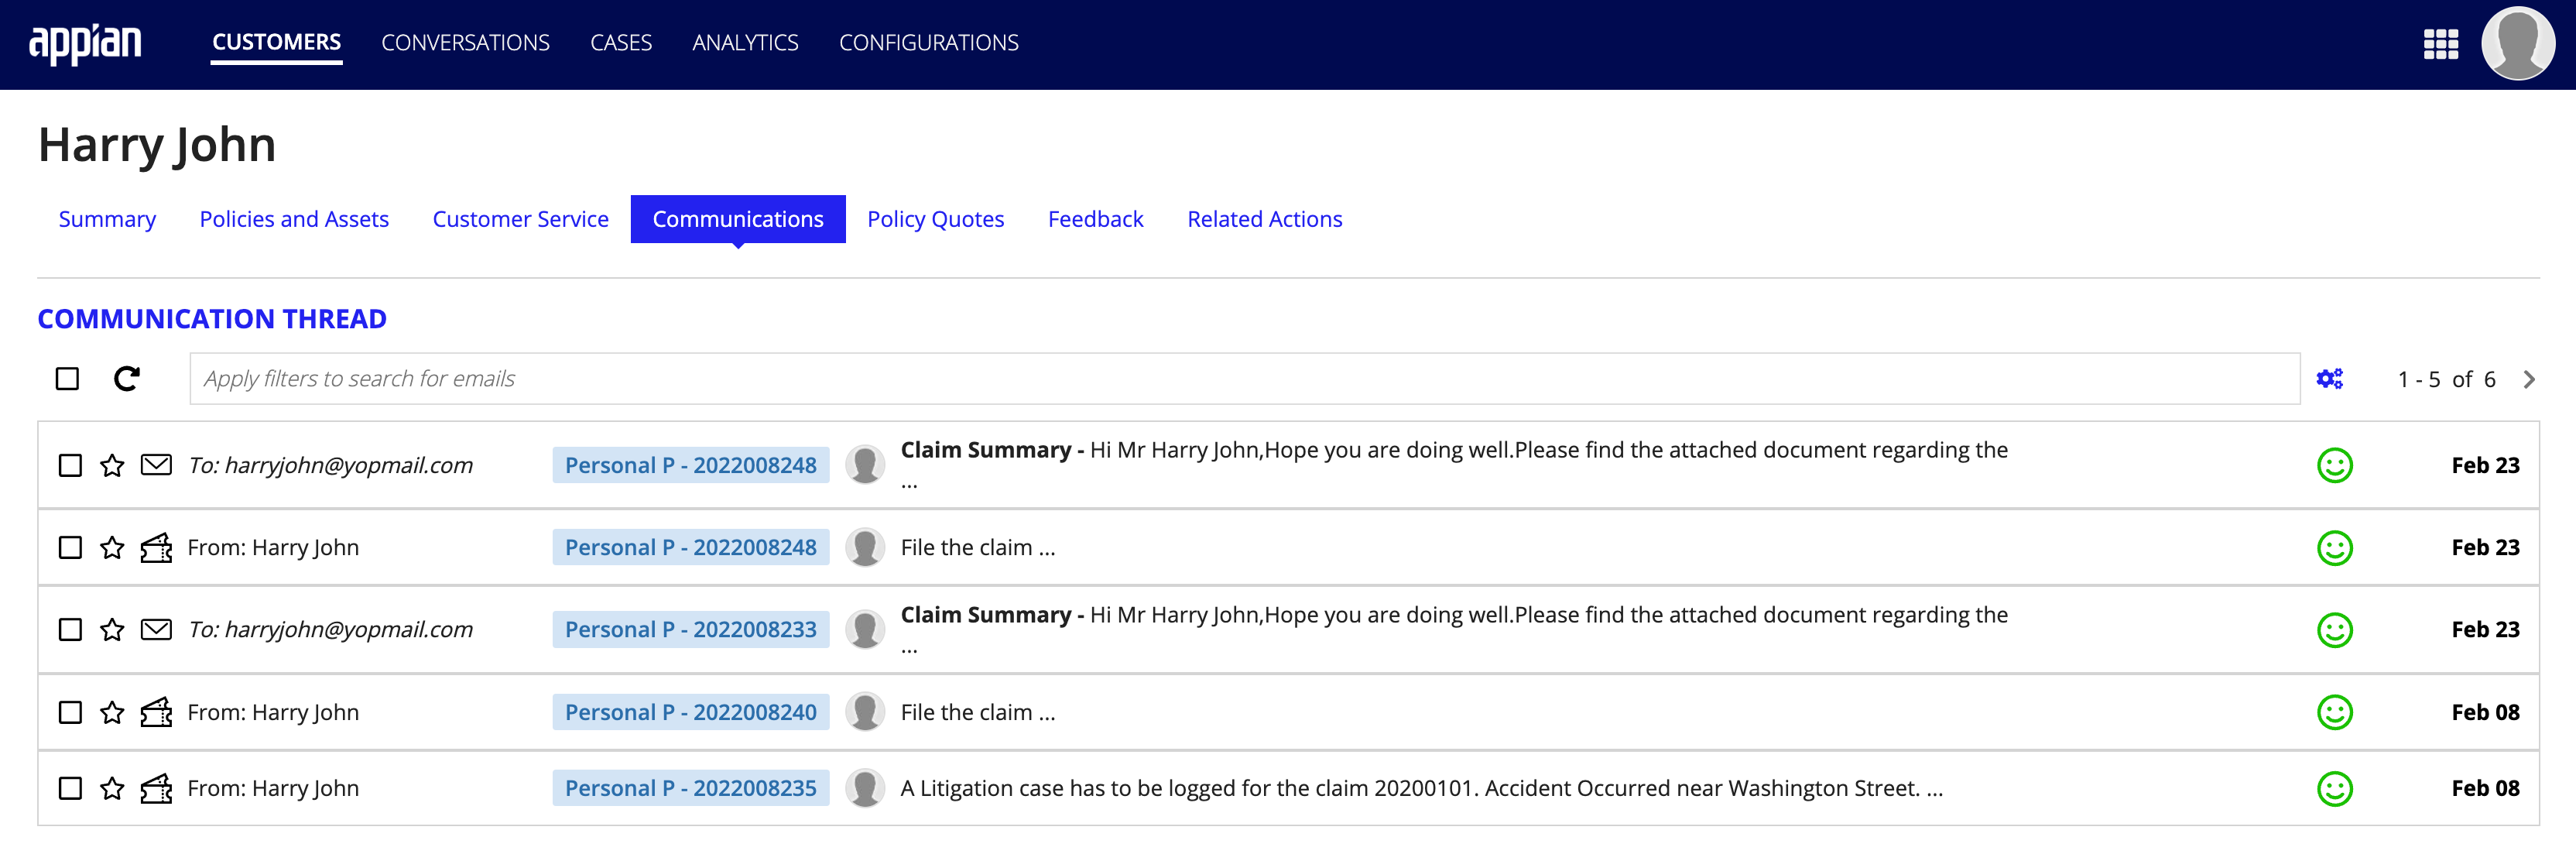
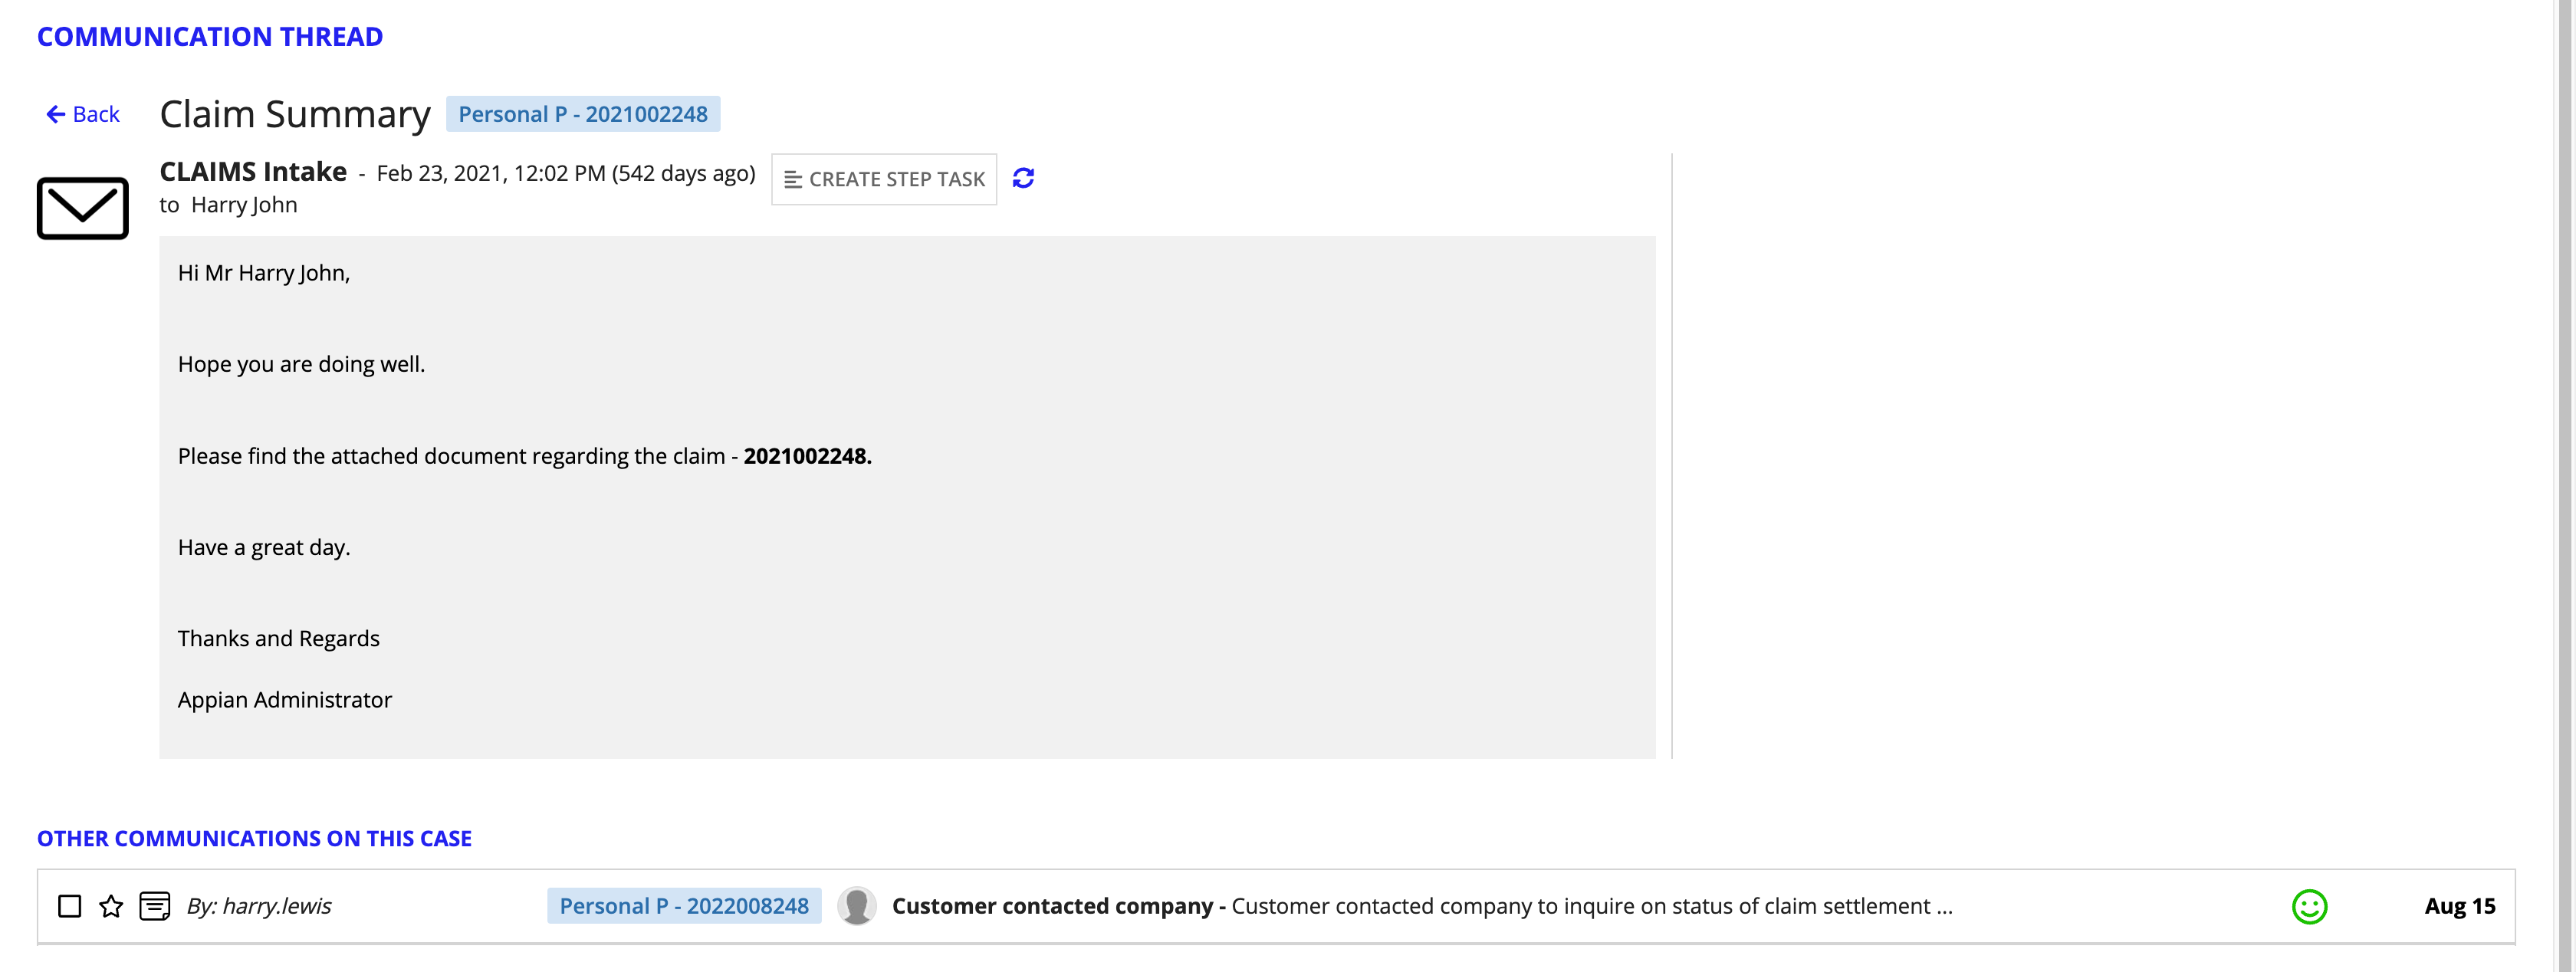
Selecting a communications item provides a detailed look at the message transmitted. The COMMUNICATION THREAD screen shows the message, method, and details.

To create a new communication message:
- From the Case Summary page or the Communications tab, click RESPOND TO CUSTOMER.
- Select a mode of communication from the options available alongside the message box.
- Email: The envelope icon will configure the message box for email delivery.
- WhatsApp: The WhatsApp icon will configure the message box for WhatsApp delivery.
- SMS: The speech bubble icon will configure the message box for SMS delivery.
- Select from the Keyword and Template fields to pre-populate information into the message box.
- Keyword: The options available in this field will populate different pieces of customer-specific claim information into the message box.
- Template: The options available in this field will populate the message box with pre-written template to draft the communication.
- Click SEND EMAIL/MESSAGE/SMS.
Tip: Email and WhatsApp messages support file attachments. SMS does not.
Accessing customer claimsCopy link to clipboard
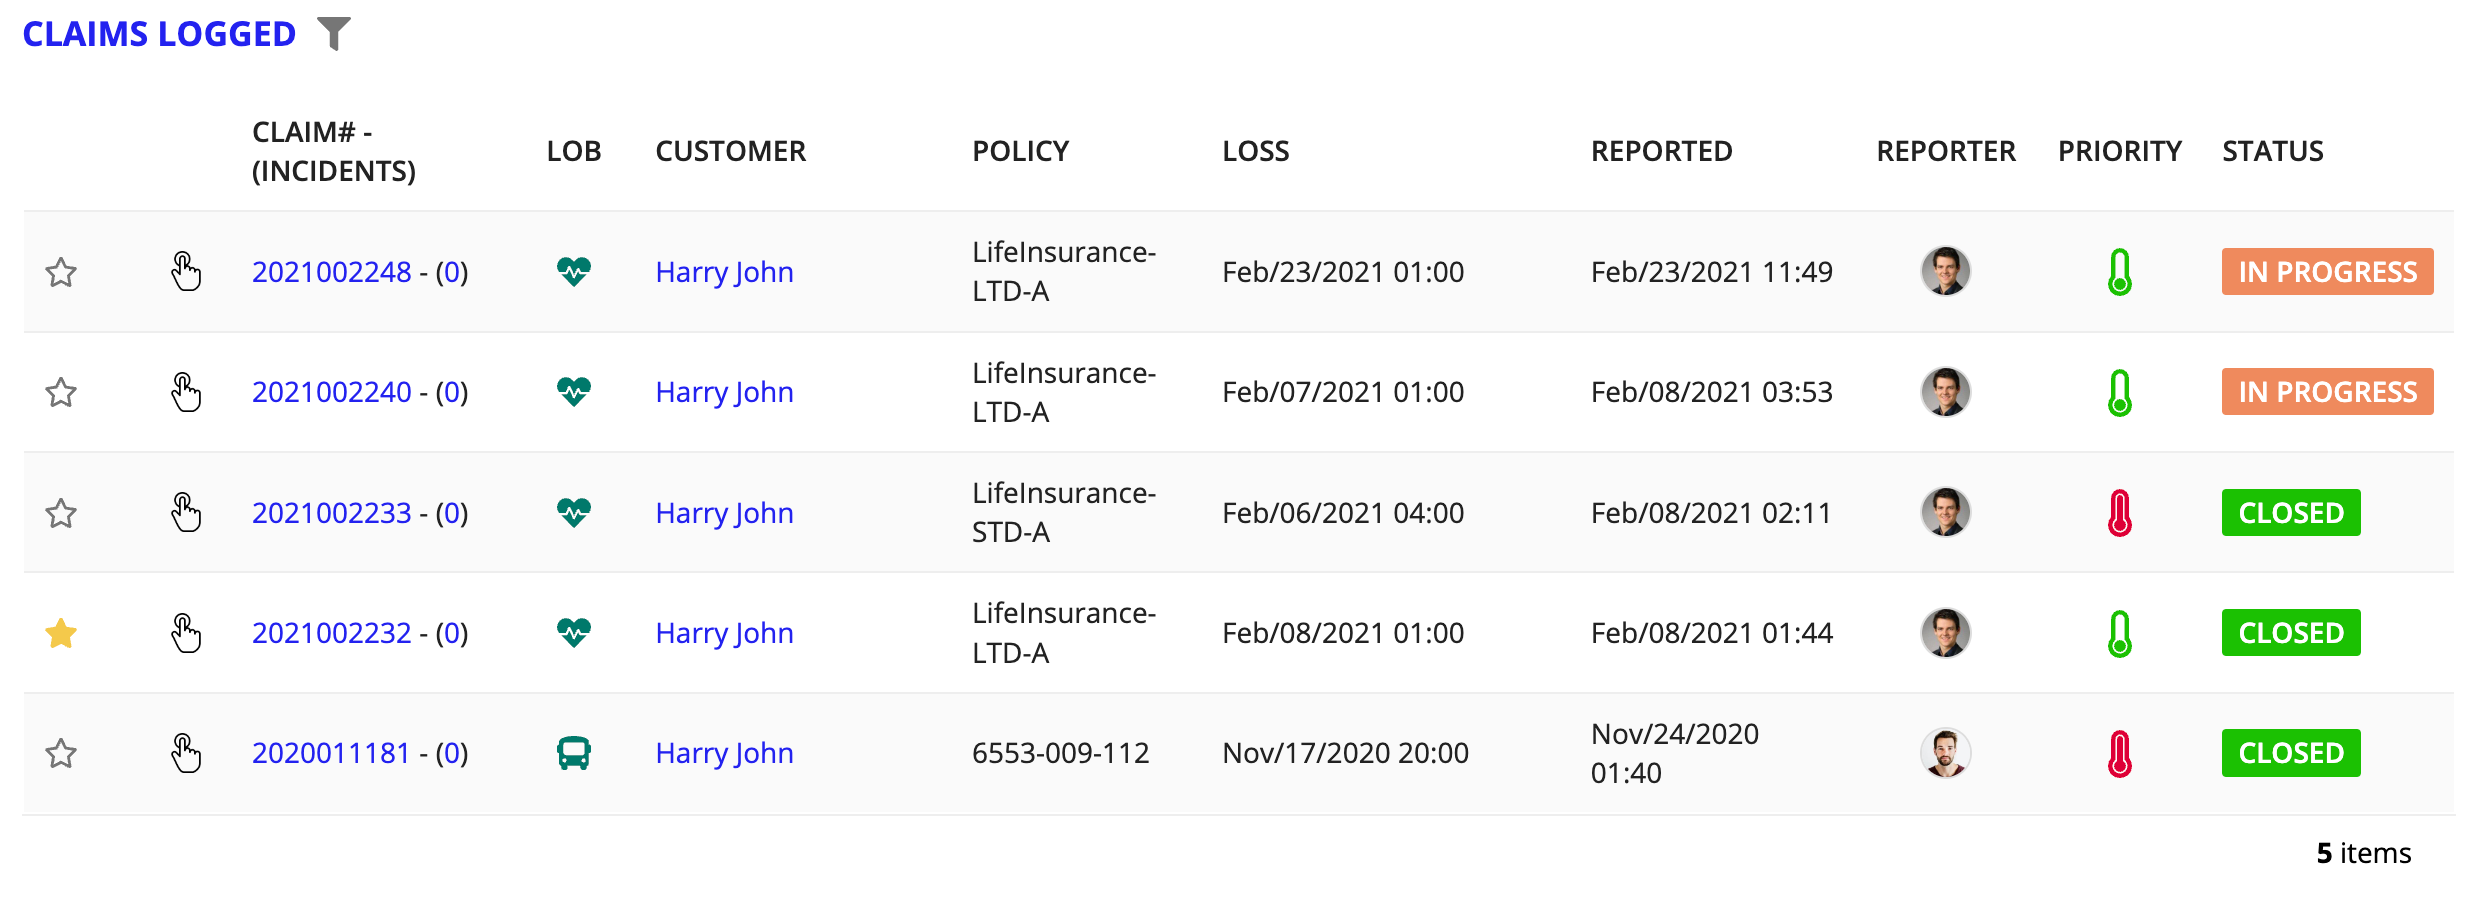
From Harry's Customer Summary page, Rebecca can see a list of claims associated with Harry's account shown in the CLAIMS LOGGED record table. Clicking the hyperlink in the CLAIM # column opens the Claim Summary page.
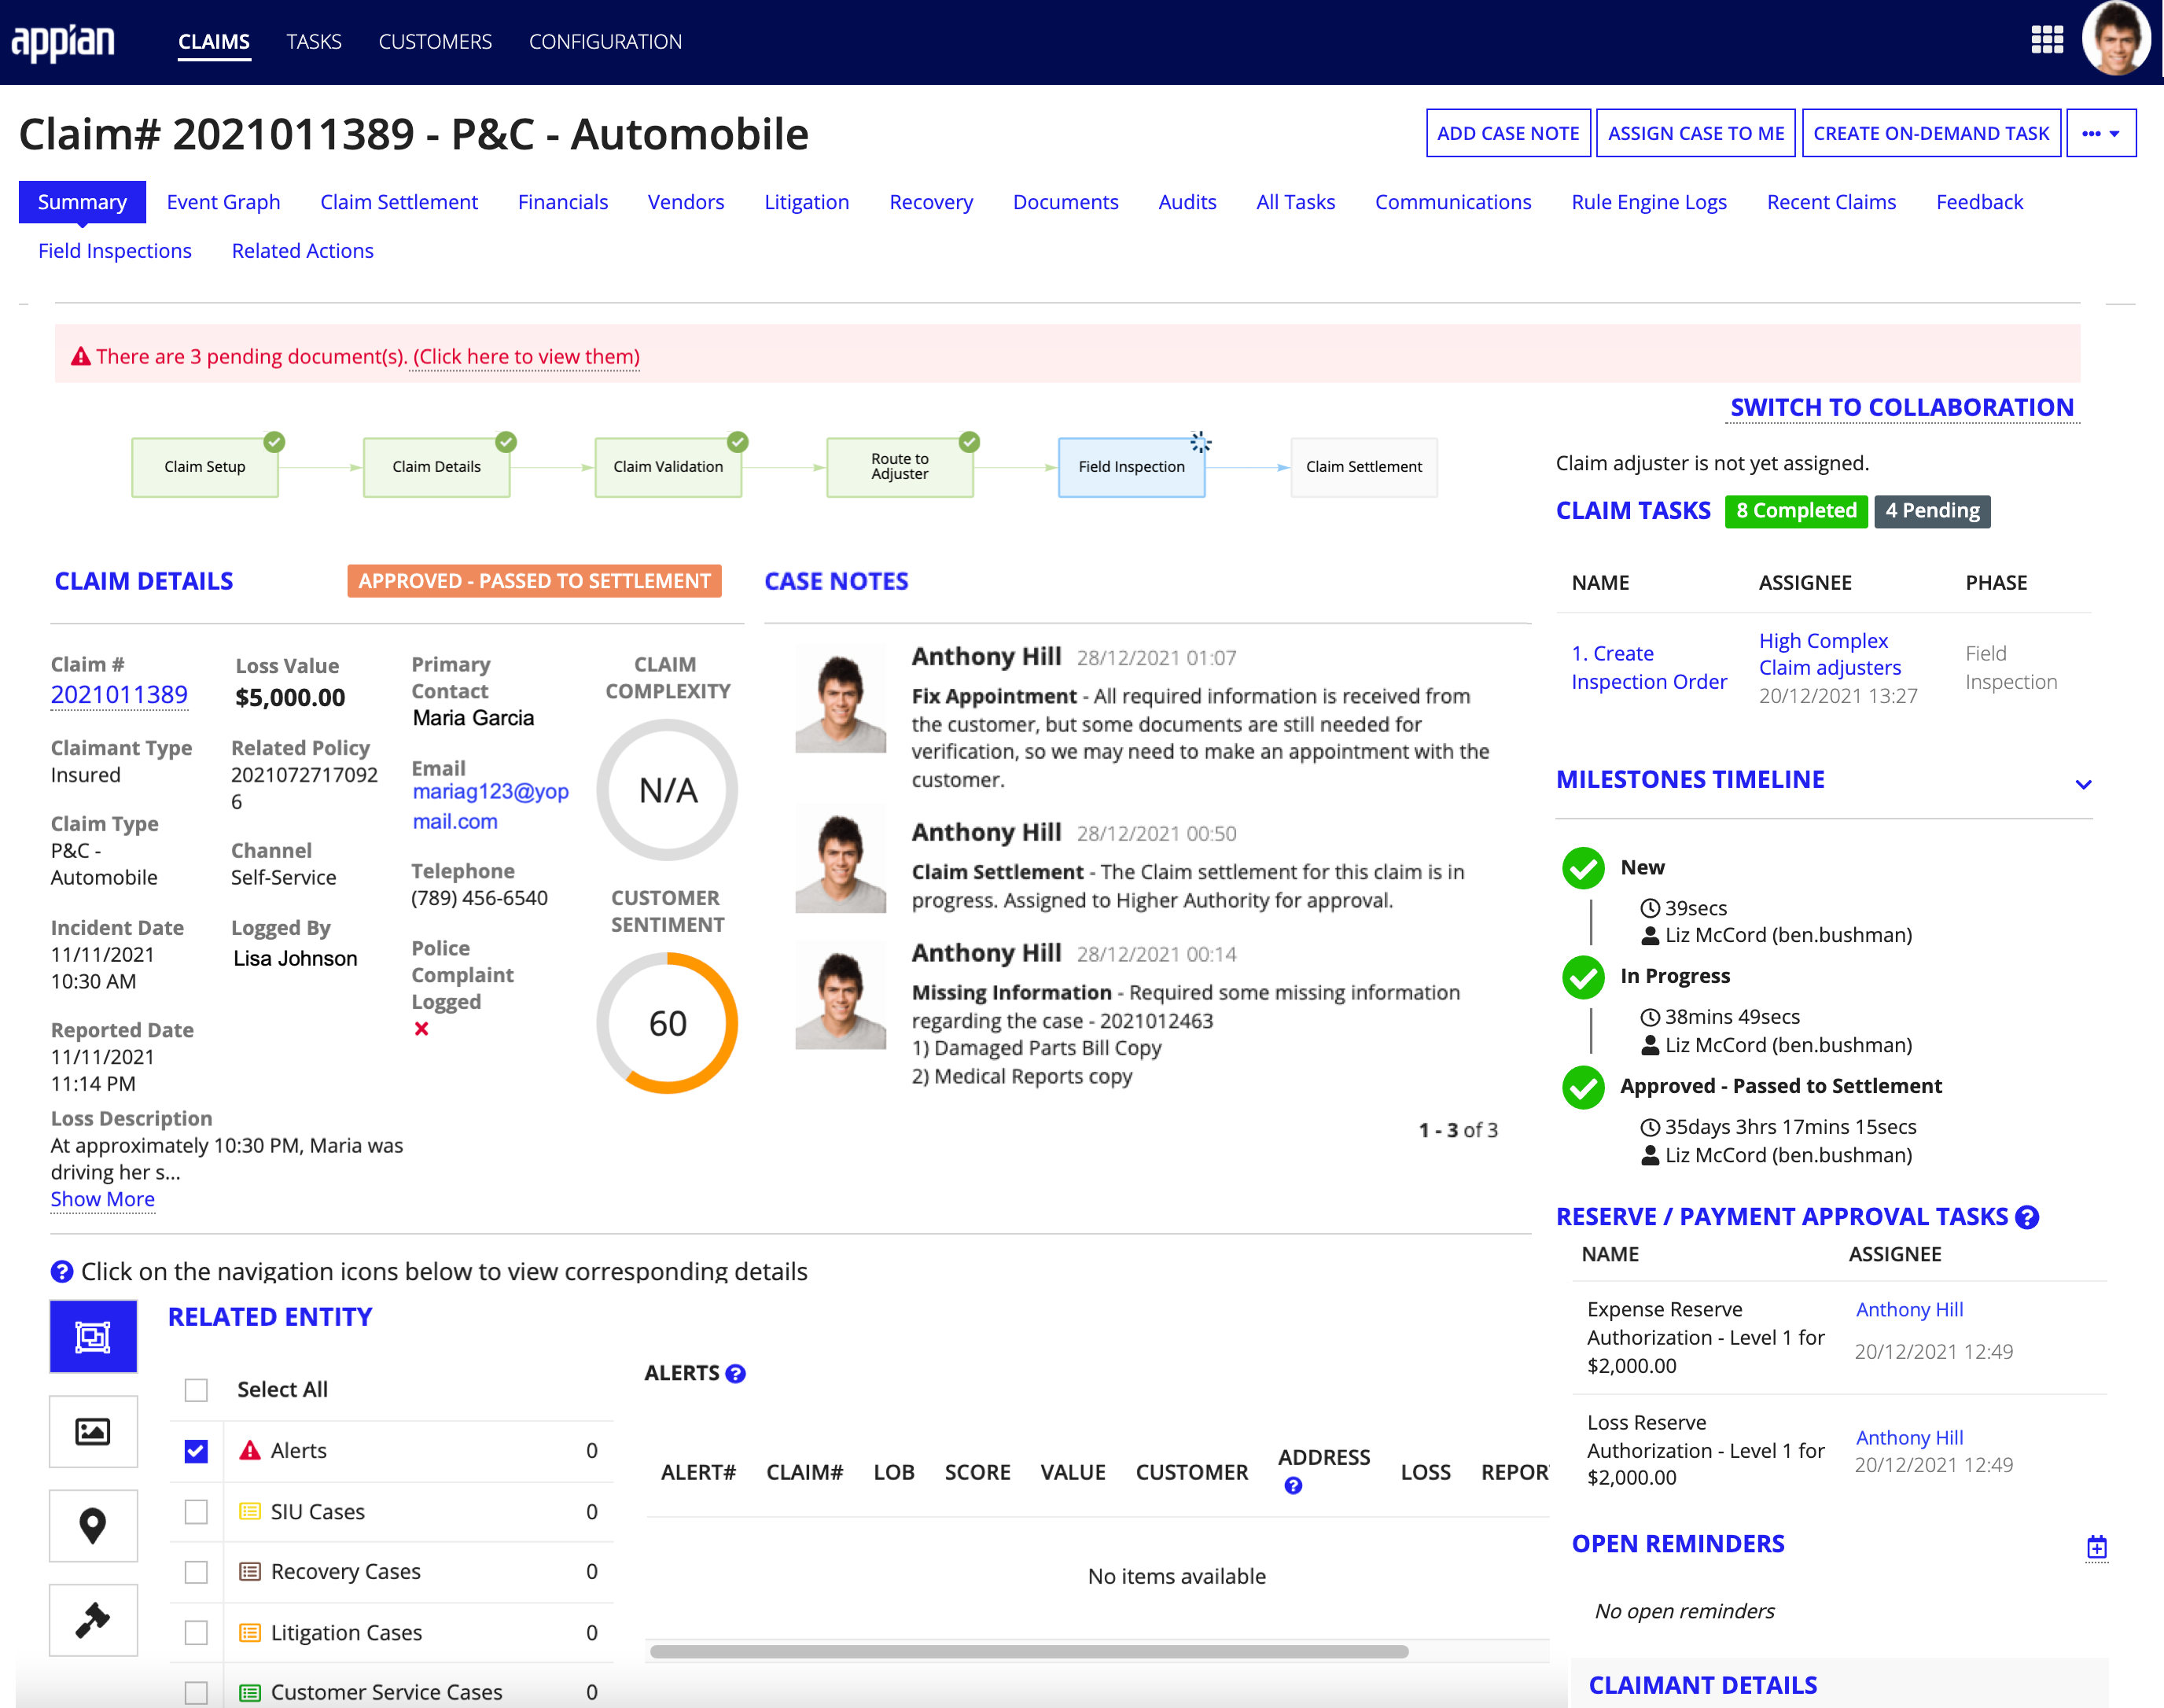
For information claim records, visit the How to Settle a Claim guide.
Viewing customer service feedbackCopy link to clipboard
Rebecca can view the feedback a customer has given for services they have received. Each feedback item provides insight into the customer's experience via claim-specific questionnaires.

Rebecca clicks the eye icon for the feedback item she wants to view. The lower portion of the Feedback screen displays the results collected from the selected questionnaire.

Creating new customer service feedback casesCopy link to clipboard
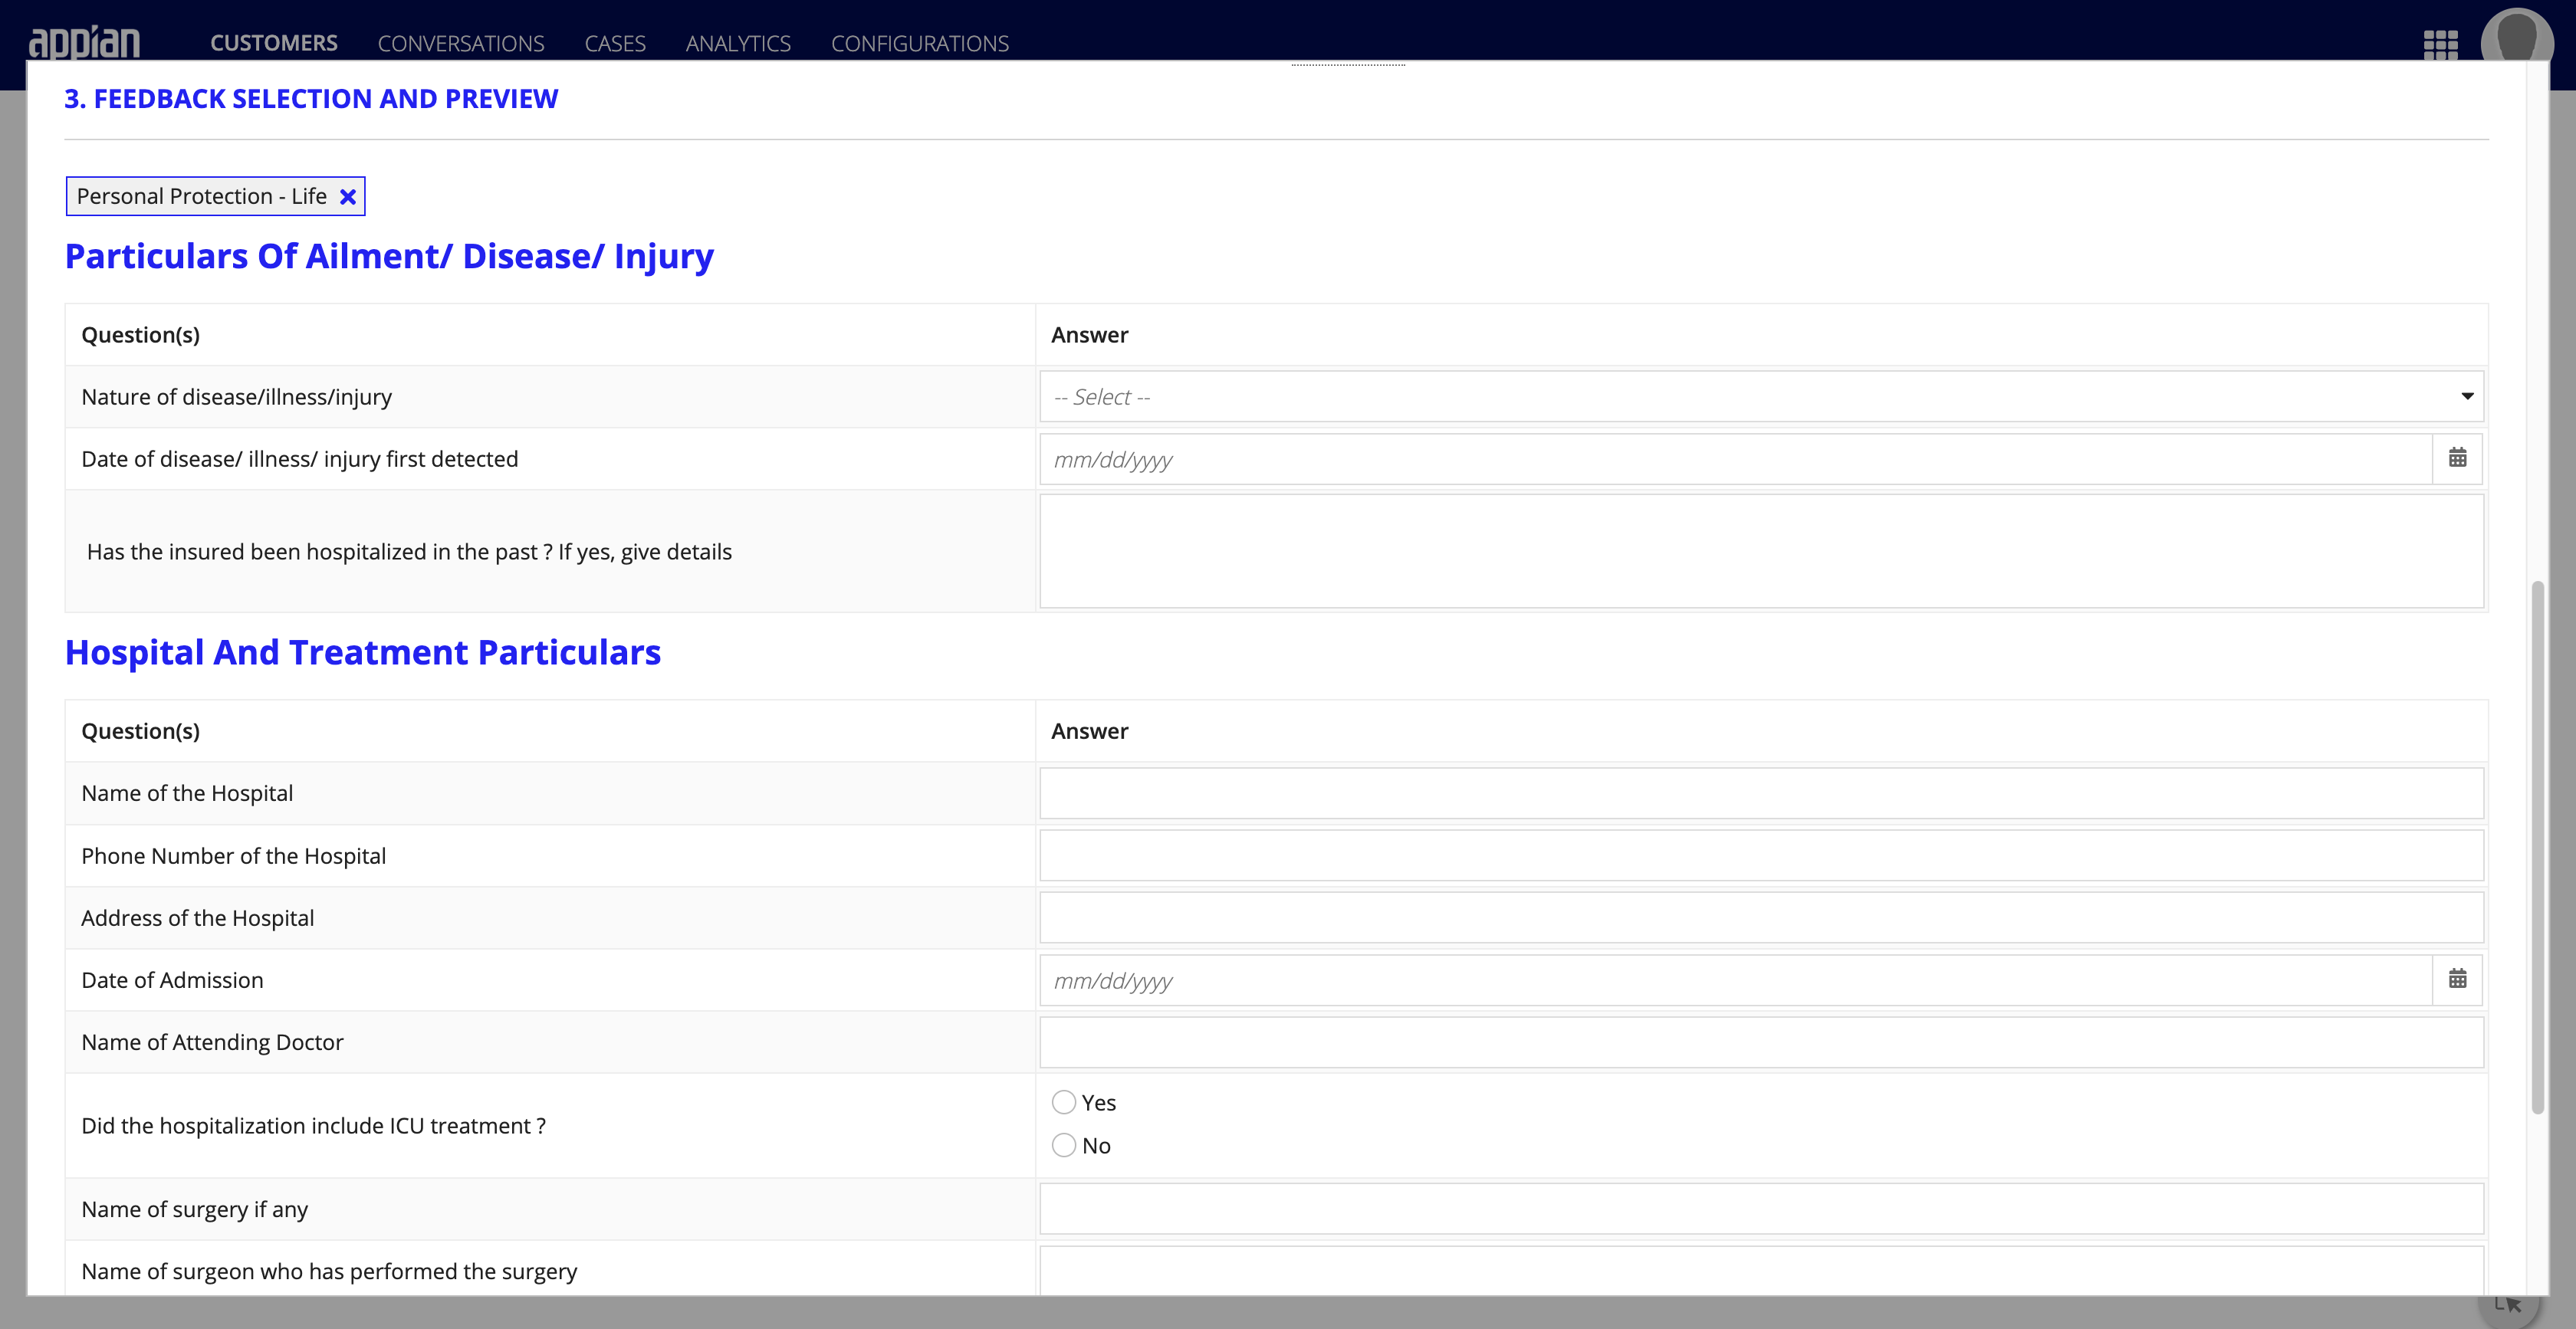
Rebecca wants to send Harry a customer feedback questionnaire once they have resolved any outstanding questions. Rebecca must configure the questionnaire to reflect the correct claim type, ensuring the form provided to Harry is relevant.
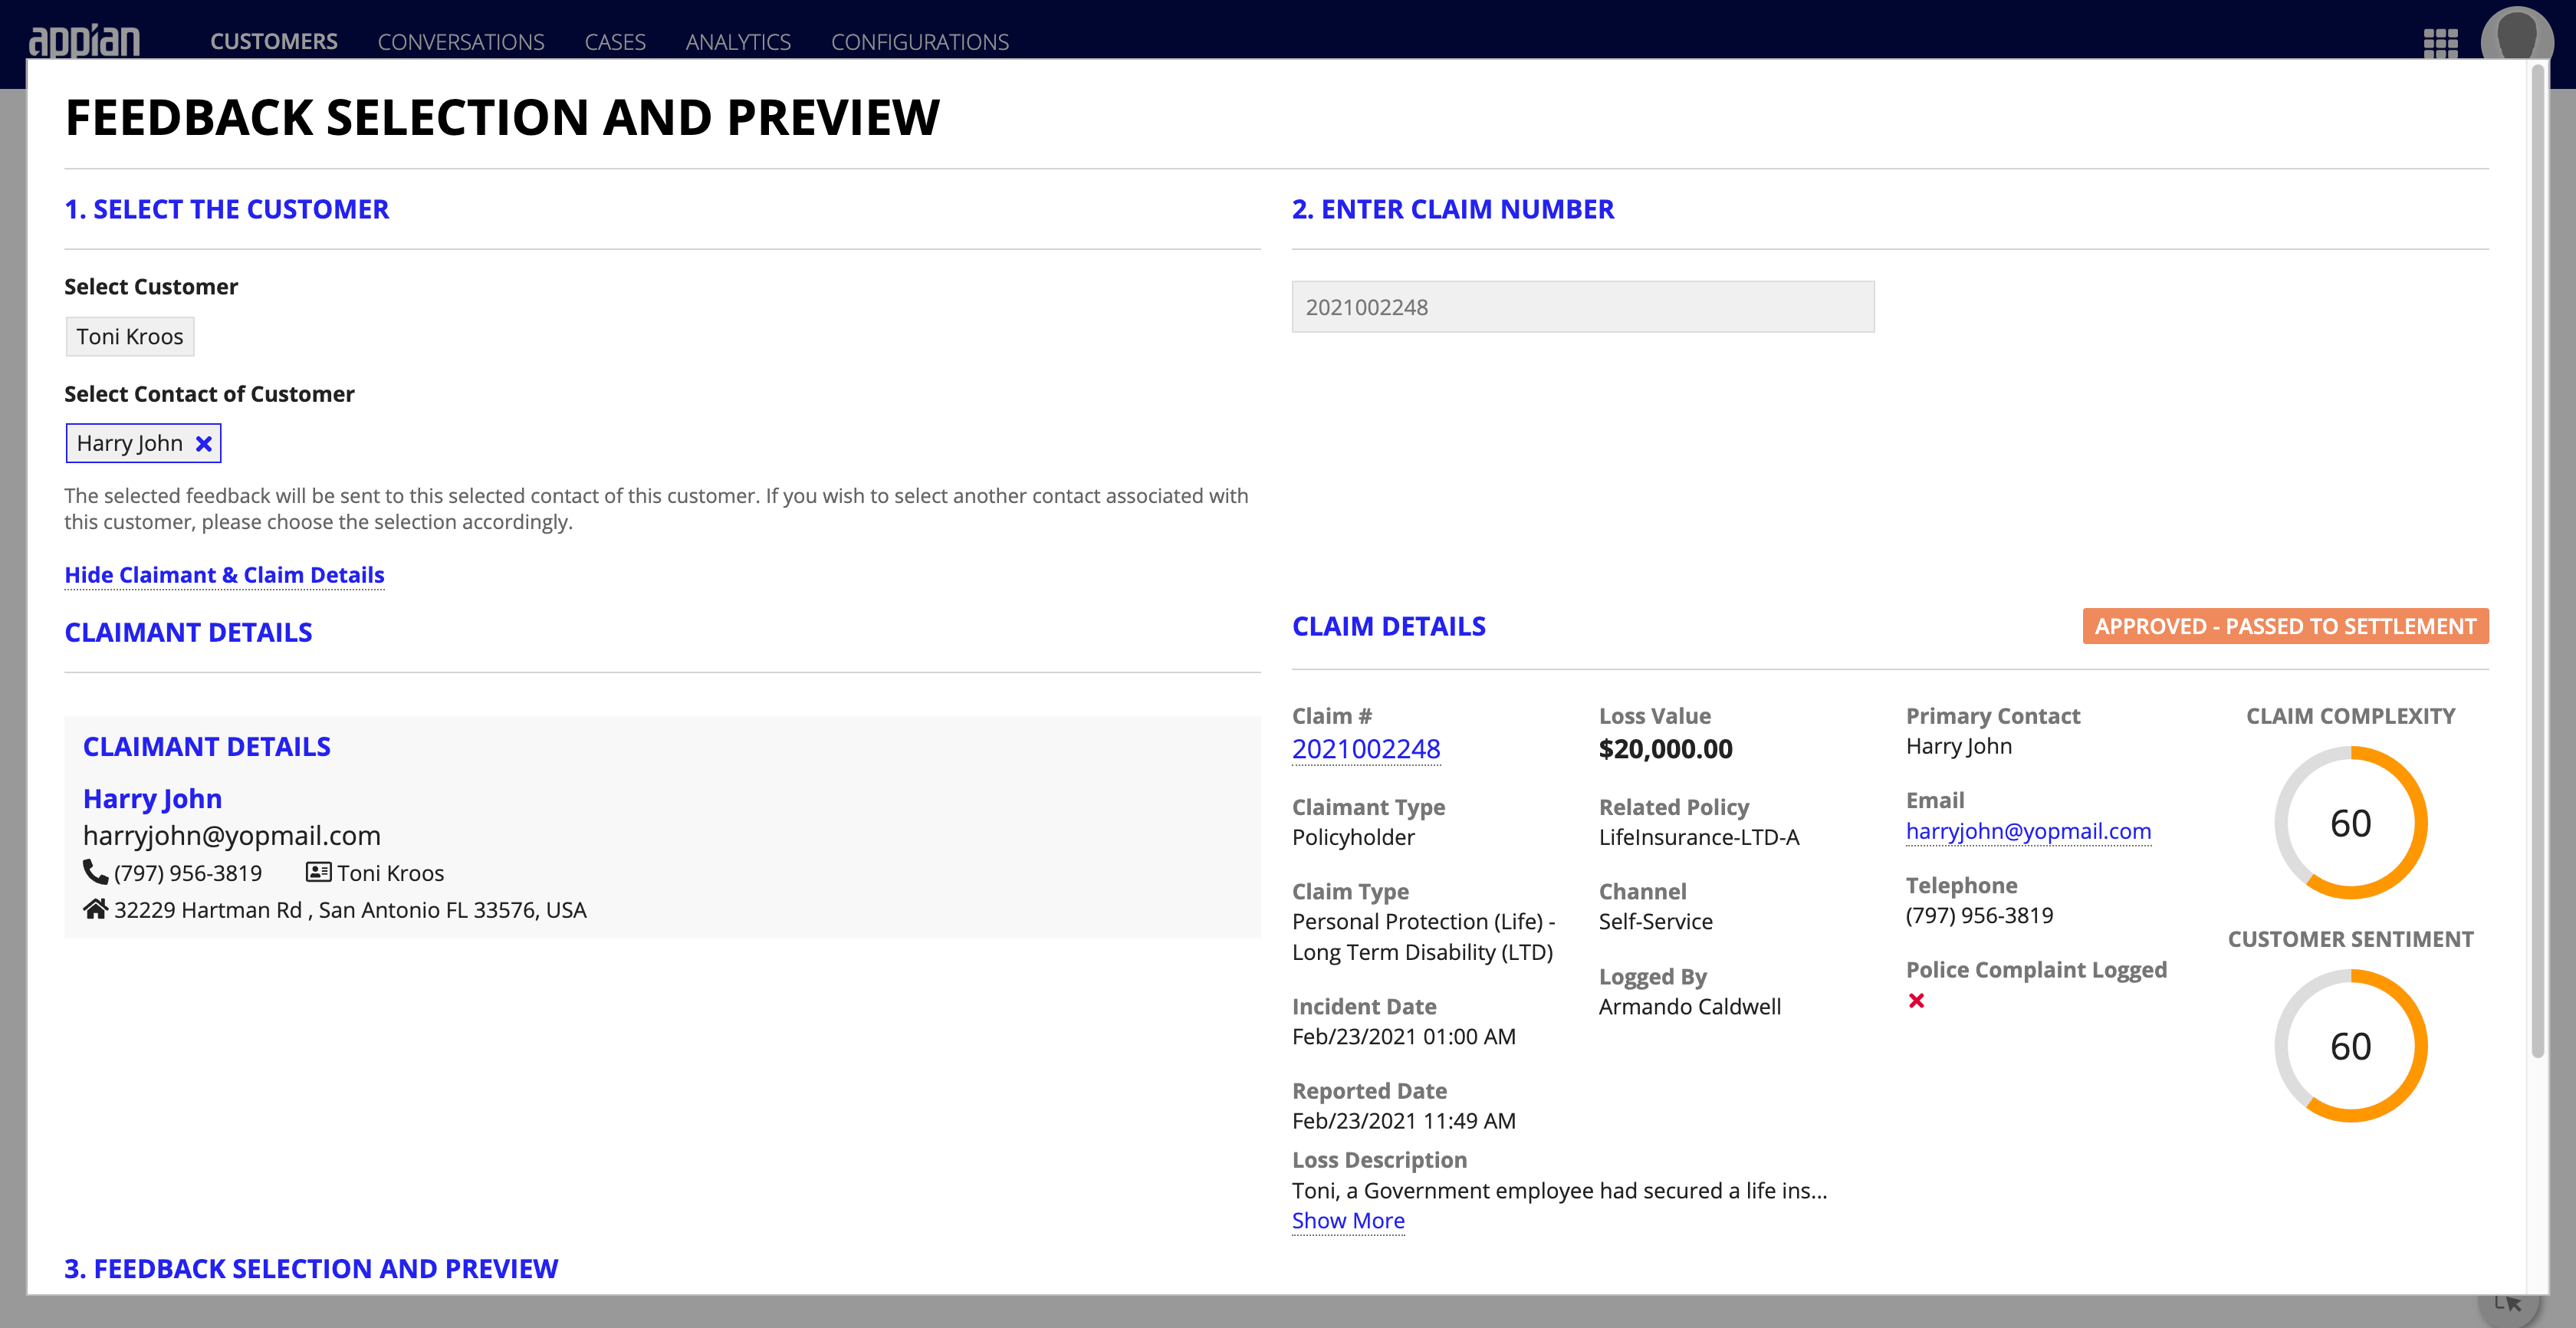
To add a customer feedback case:
- From the Feedback page, click INITIATE CUSTOMER FEEDBACK.
- Enter the following information in the form:
- Select Customer: This will auto-populate based on the customer.
- Select Contact of Customer: The options in this field are based on the different contacts associated with the customer above.
- Enter Claim Number: You may search for the claim number using the Search button.
- Feedback Selection and Preview: A dropdown menu providing a variety of different claim type options, driving the questions populating the feedback form.
- Click SEND FEEDBACK.
Viewing conversationsCopy link to clipboard
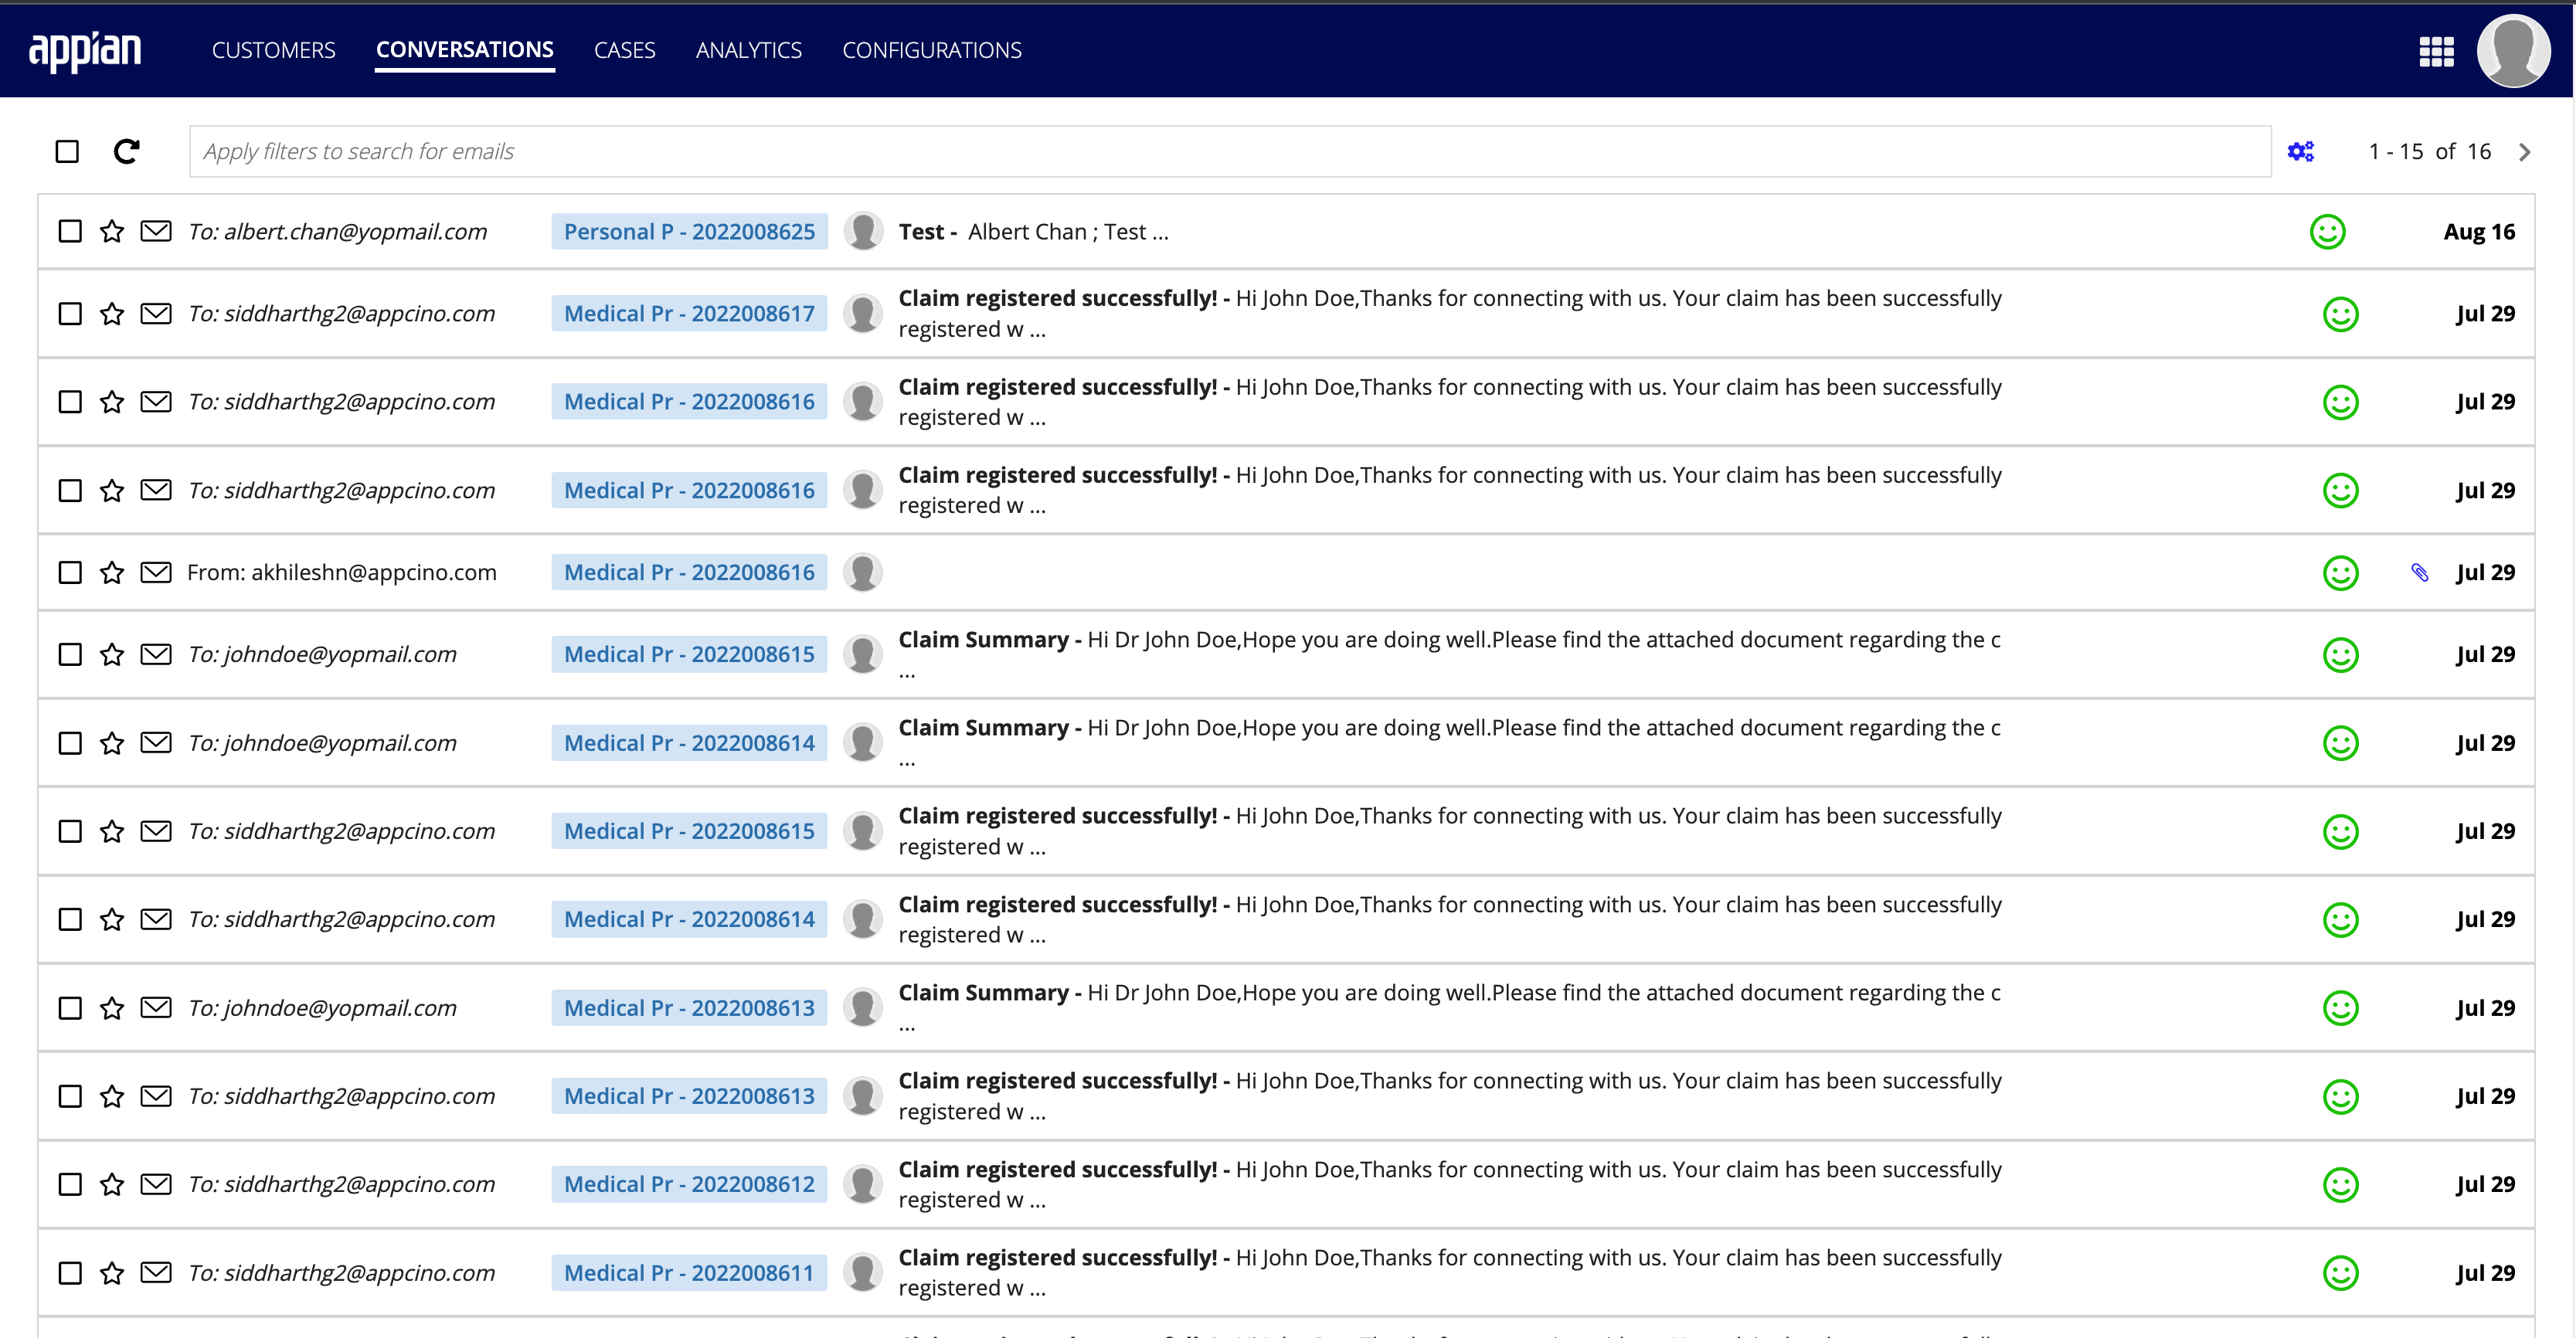
Rebecca has the ability to access all the conversations by selecting Conversations on the navigation bar.
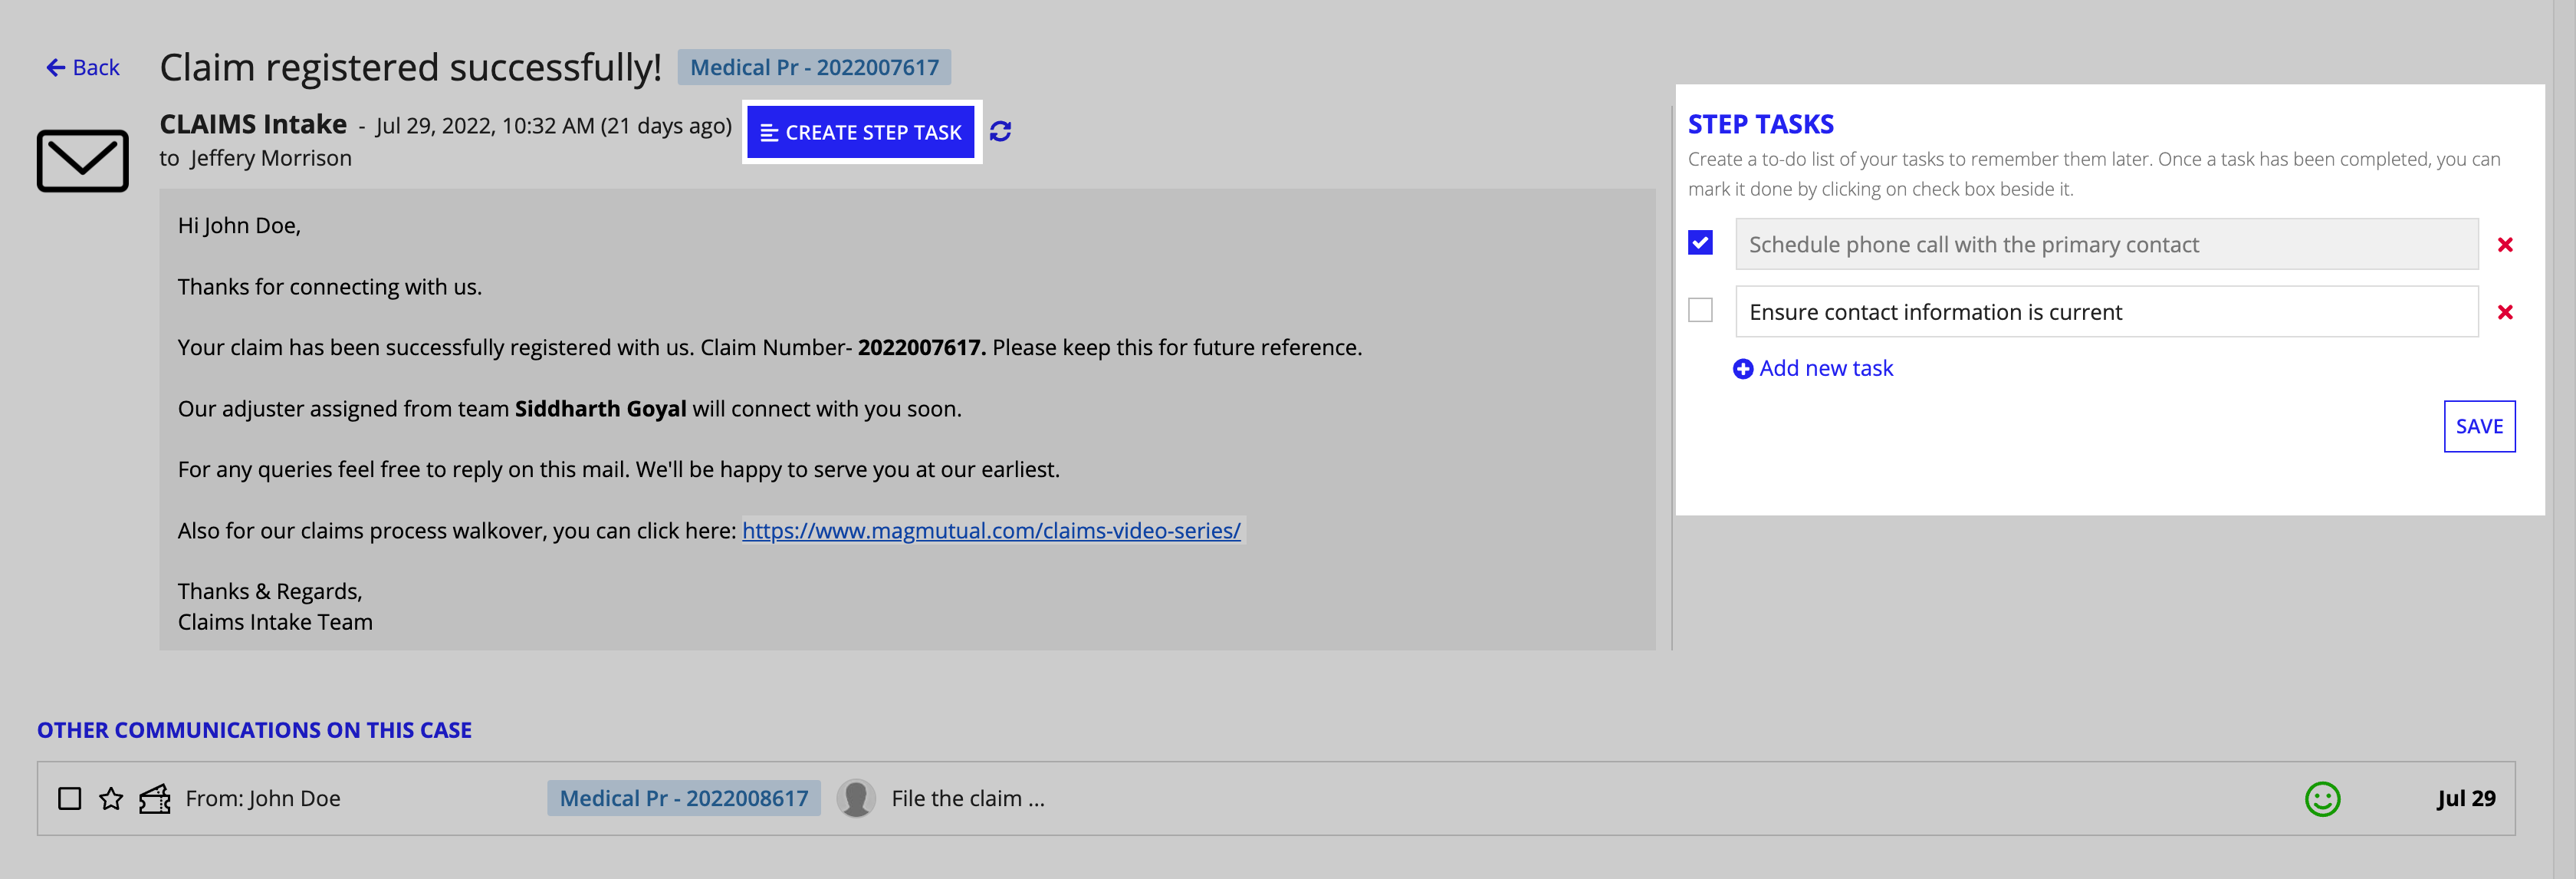
The Conversations page works in the same way as the Communications tab, in that an item provides a detailed look at the message transmitted. The Conversation item screen shows the message, method, and details. Rebecca can select other communications items associated with a case from the OTHER COMMUNICATIONS ON THIS CASE window at the bottom of the screen.
Conversation items cannot be created directly from the Conversations screen. Items can only be added by creating Communications Items from a Customer, Claim, or Case.
Creating step tasksCopy link to clipboard
A set of step tasks allows you to create a checklist of actionable items to complete.
To create a list of step tasks:
- From the Conversation item, click CREATE STEP TASK. This opens a Step Tasks side window.
- Clicking Add new task creates a new line to enter a task item. The check box marks the task as completed, while the X deletes the task.
- Click SAVE.
Viewing customer service casesCopy link to clipboard
Accessed by the CASES button located in the navigation bar, the CASES dashboard provides a detailed view of Case items registered in the system, including the mode in which a Case was filed, the owner of the Case, the type of Case, and the status of the Case.
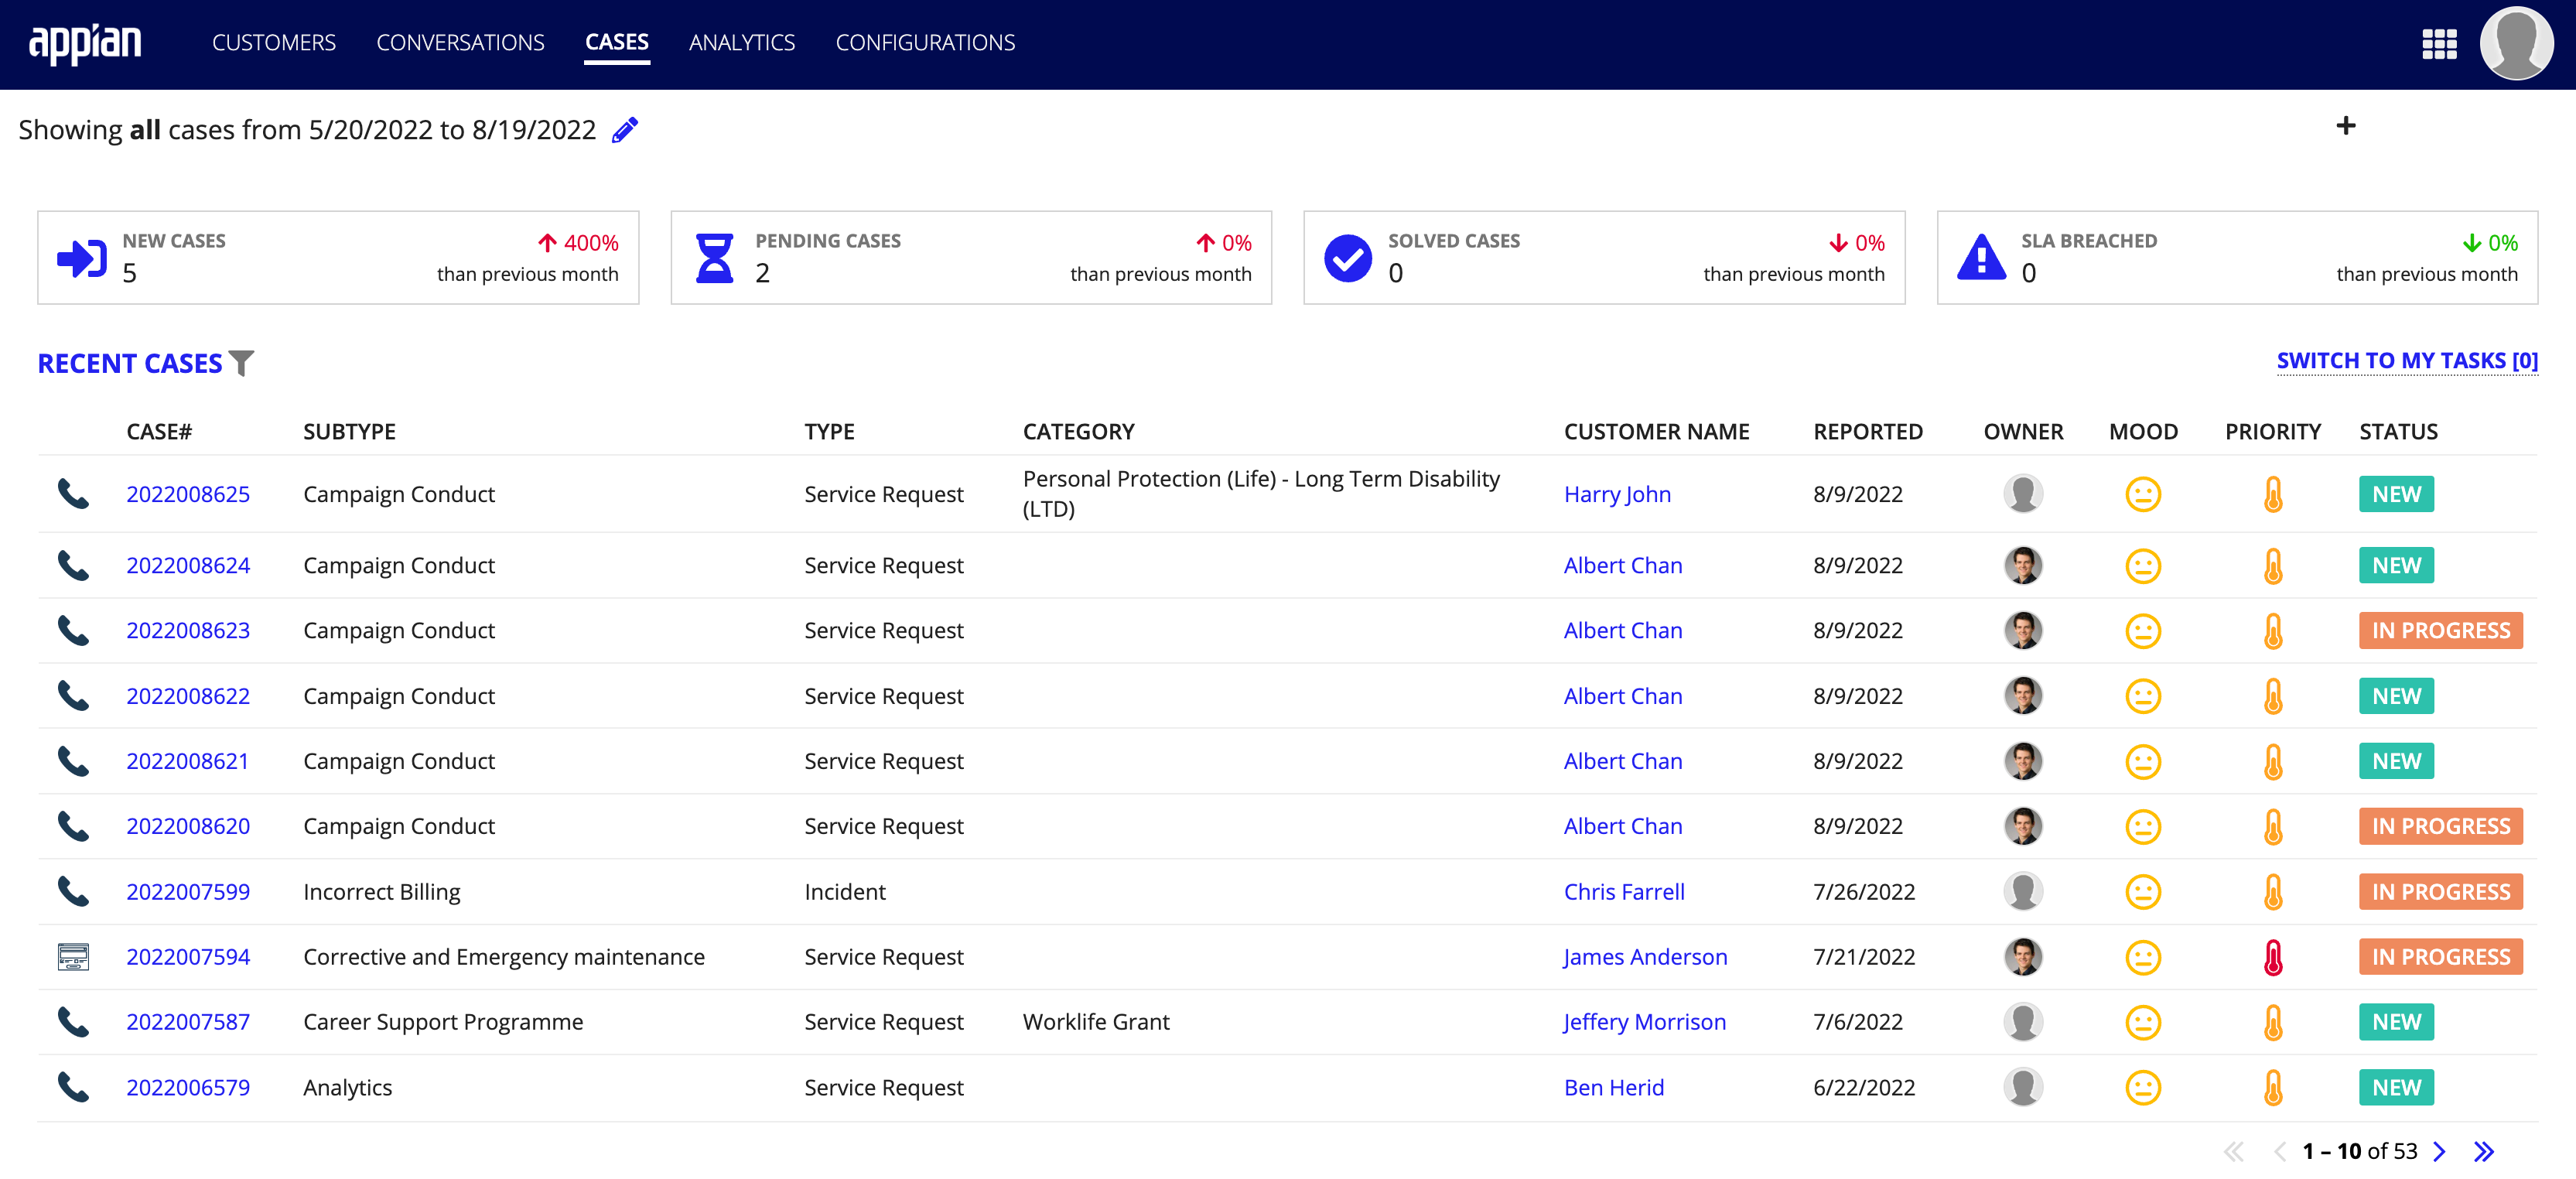
At the bottom of the CASES dashboard is a breakdown of CASE STATISTICS, showing a graph of the different methods customers have used to file their customer service cases, as well as case handler information.

Creating new customer service casesCopy link to clipboard
When a Rebecca receives a call from a policyholder, she has to create a new customer service case to record the interaction.

To create a new customer service case:
- From the Case Summary page, click CREATE NEW CASE.
- Enter the following information in the form:
- Account Name: Select the account name from the field provided; this will populate in the box to the right.
- Primary Contact: Select the primary contact from the field provided; this will populate in the box to the right.
- Origin: This is the channel in which the customer contacted the business, prompting the Case.
- Type: The type of Case is the nature for which the case was created.
- Priority: Determines the importance placed upon the completion of the Case.
- Sub Type: The secondary type for logging the Case in the system.
- Case Category: The category within the subtype that the Case is logged as.
- Problem Statement: The free-form text box for entering details about the Case.
- Upload Attachments: A document or image file that you want to attach as evidence on the new Case.
- Click CREATE CASE.
It is important that Rebecca fills out the Problem Statement free-form box and attaches any supporting documents - this will be helpful in the instance someone else needs to work the case.
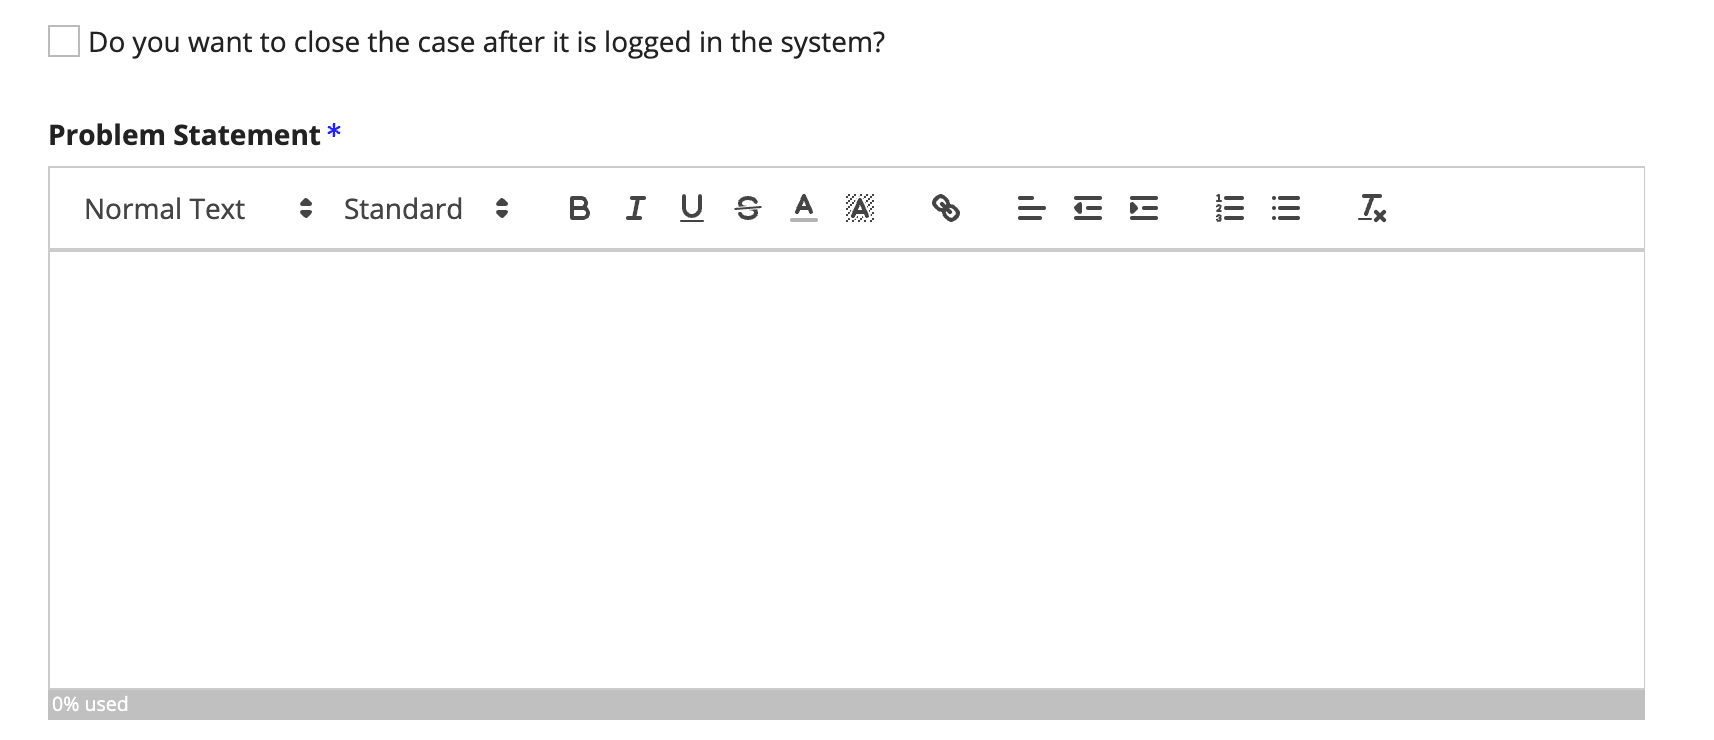
Tip: This form offers the ability to close a case upon generation by selecting a check box located above the Problem Statement.
Updating a customer service caseCopy link to clipboard


To update a customer service case:
- From the Case Summary page, click UPDATE CASE.
- Click the appropriate field to edit.
- Click UPDATE CASE.
Adding notes to a customer service caseCopy link to clipboard
Rebecca adds notes to cases to record relevant information that may become available later.


To add notes to a customer service case:
- From the Case Summary page, click UPDATE CASE.
- Set the visibility to either public or private:
- Public: Case notes are visible to everyone.
- Private: Case notes are visible to only users with permission to view them.
- In the Title and Description boxes, enter the applicable information.
- Click SAVE NOTE.
Responding to customer casesCopy link to clipboard
See the [Managing communications] section.
Viewing audits on a customer service caseCopy link to clipboard
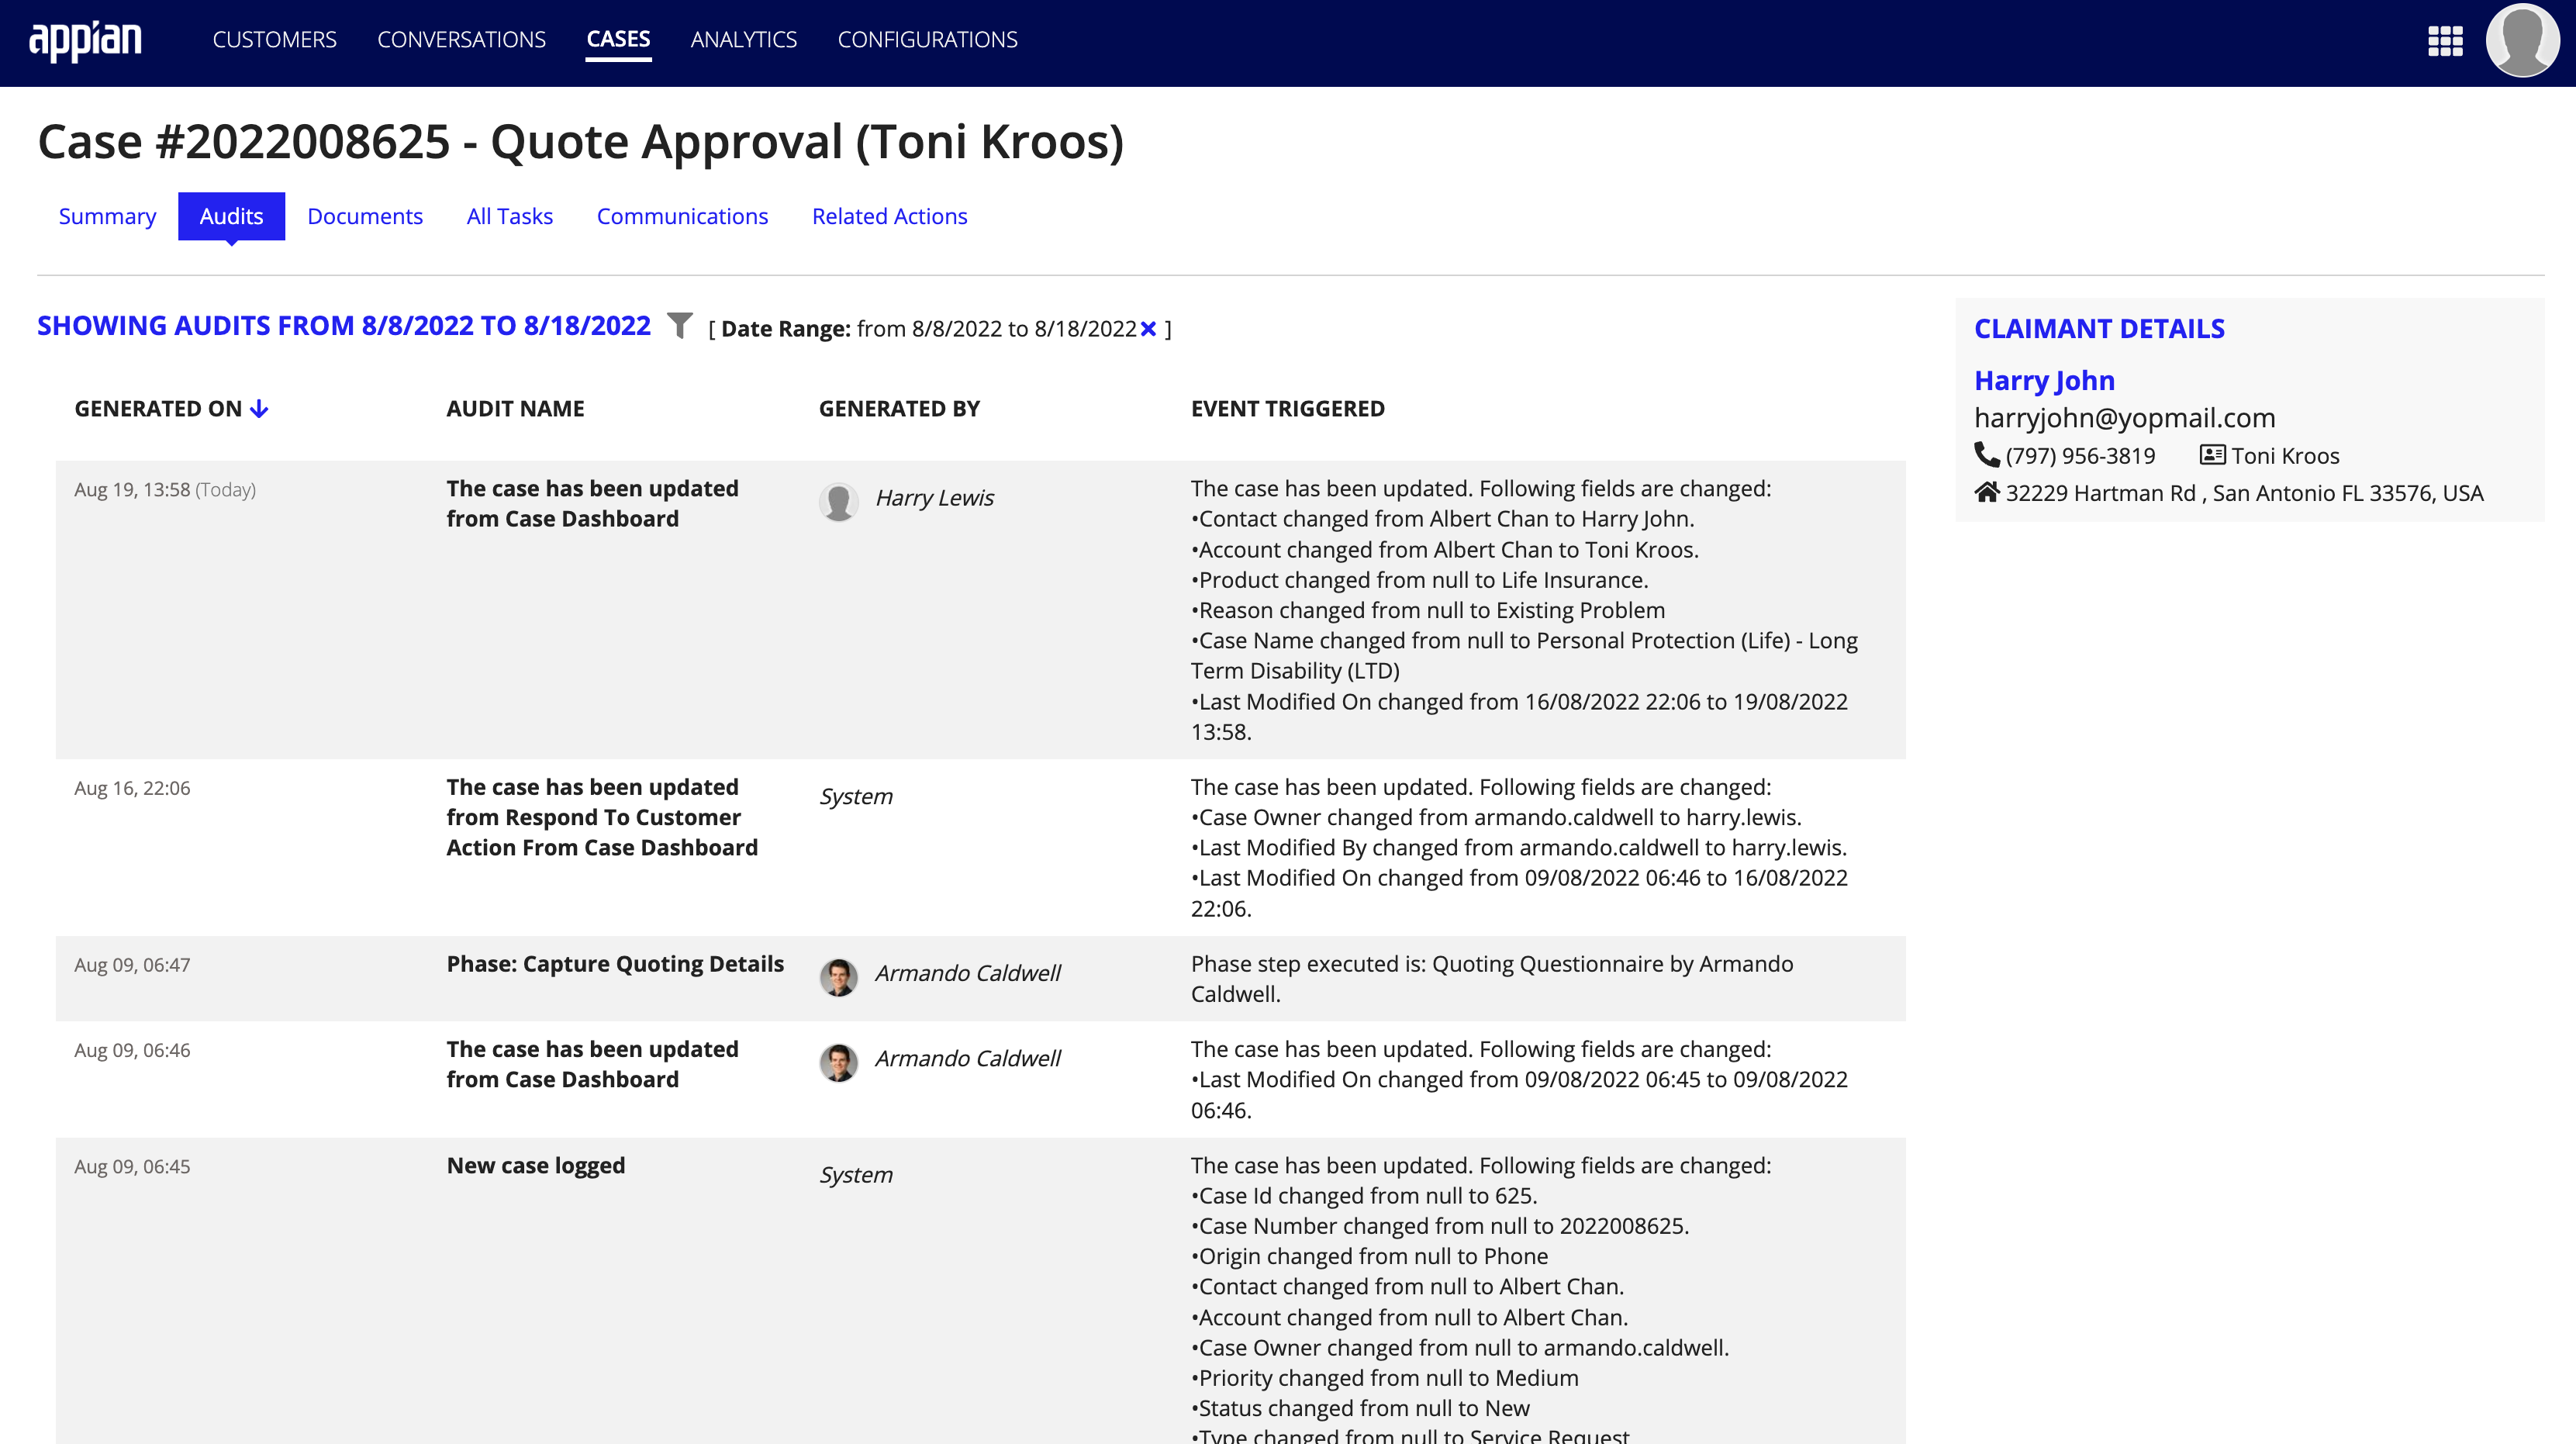
Clicking on the Audits tab from the Case Summary page opens the Audits page, showing all the actions performed on a case.
Viewing customer service analyticsCopy link to clipboard
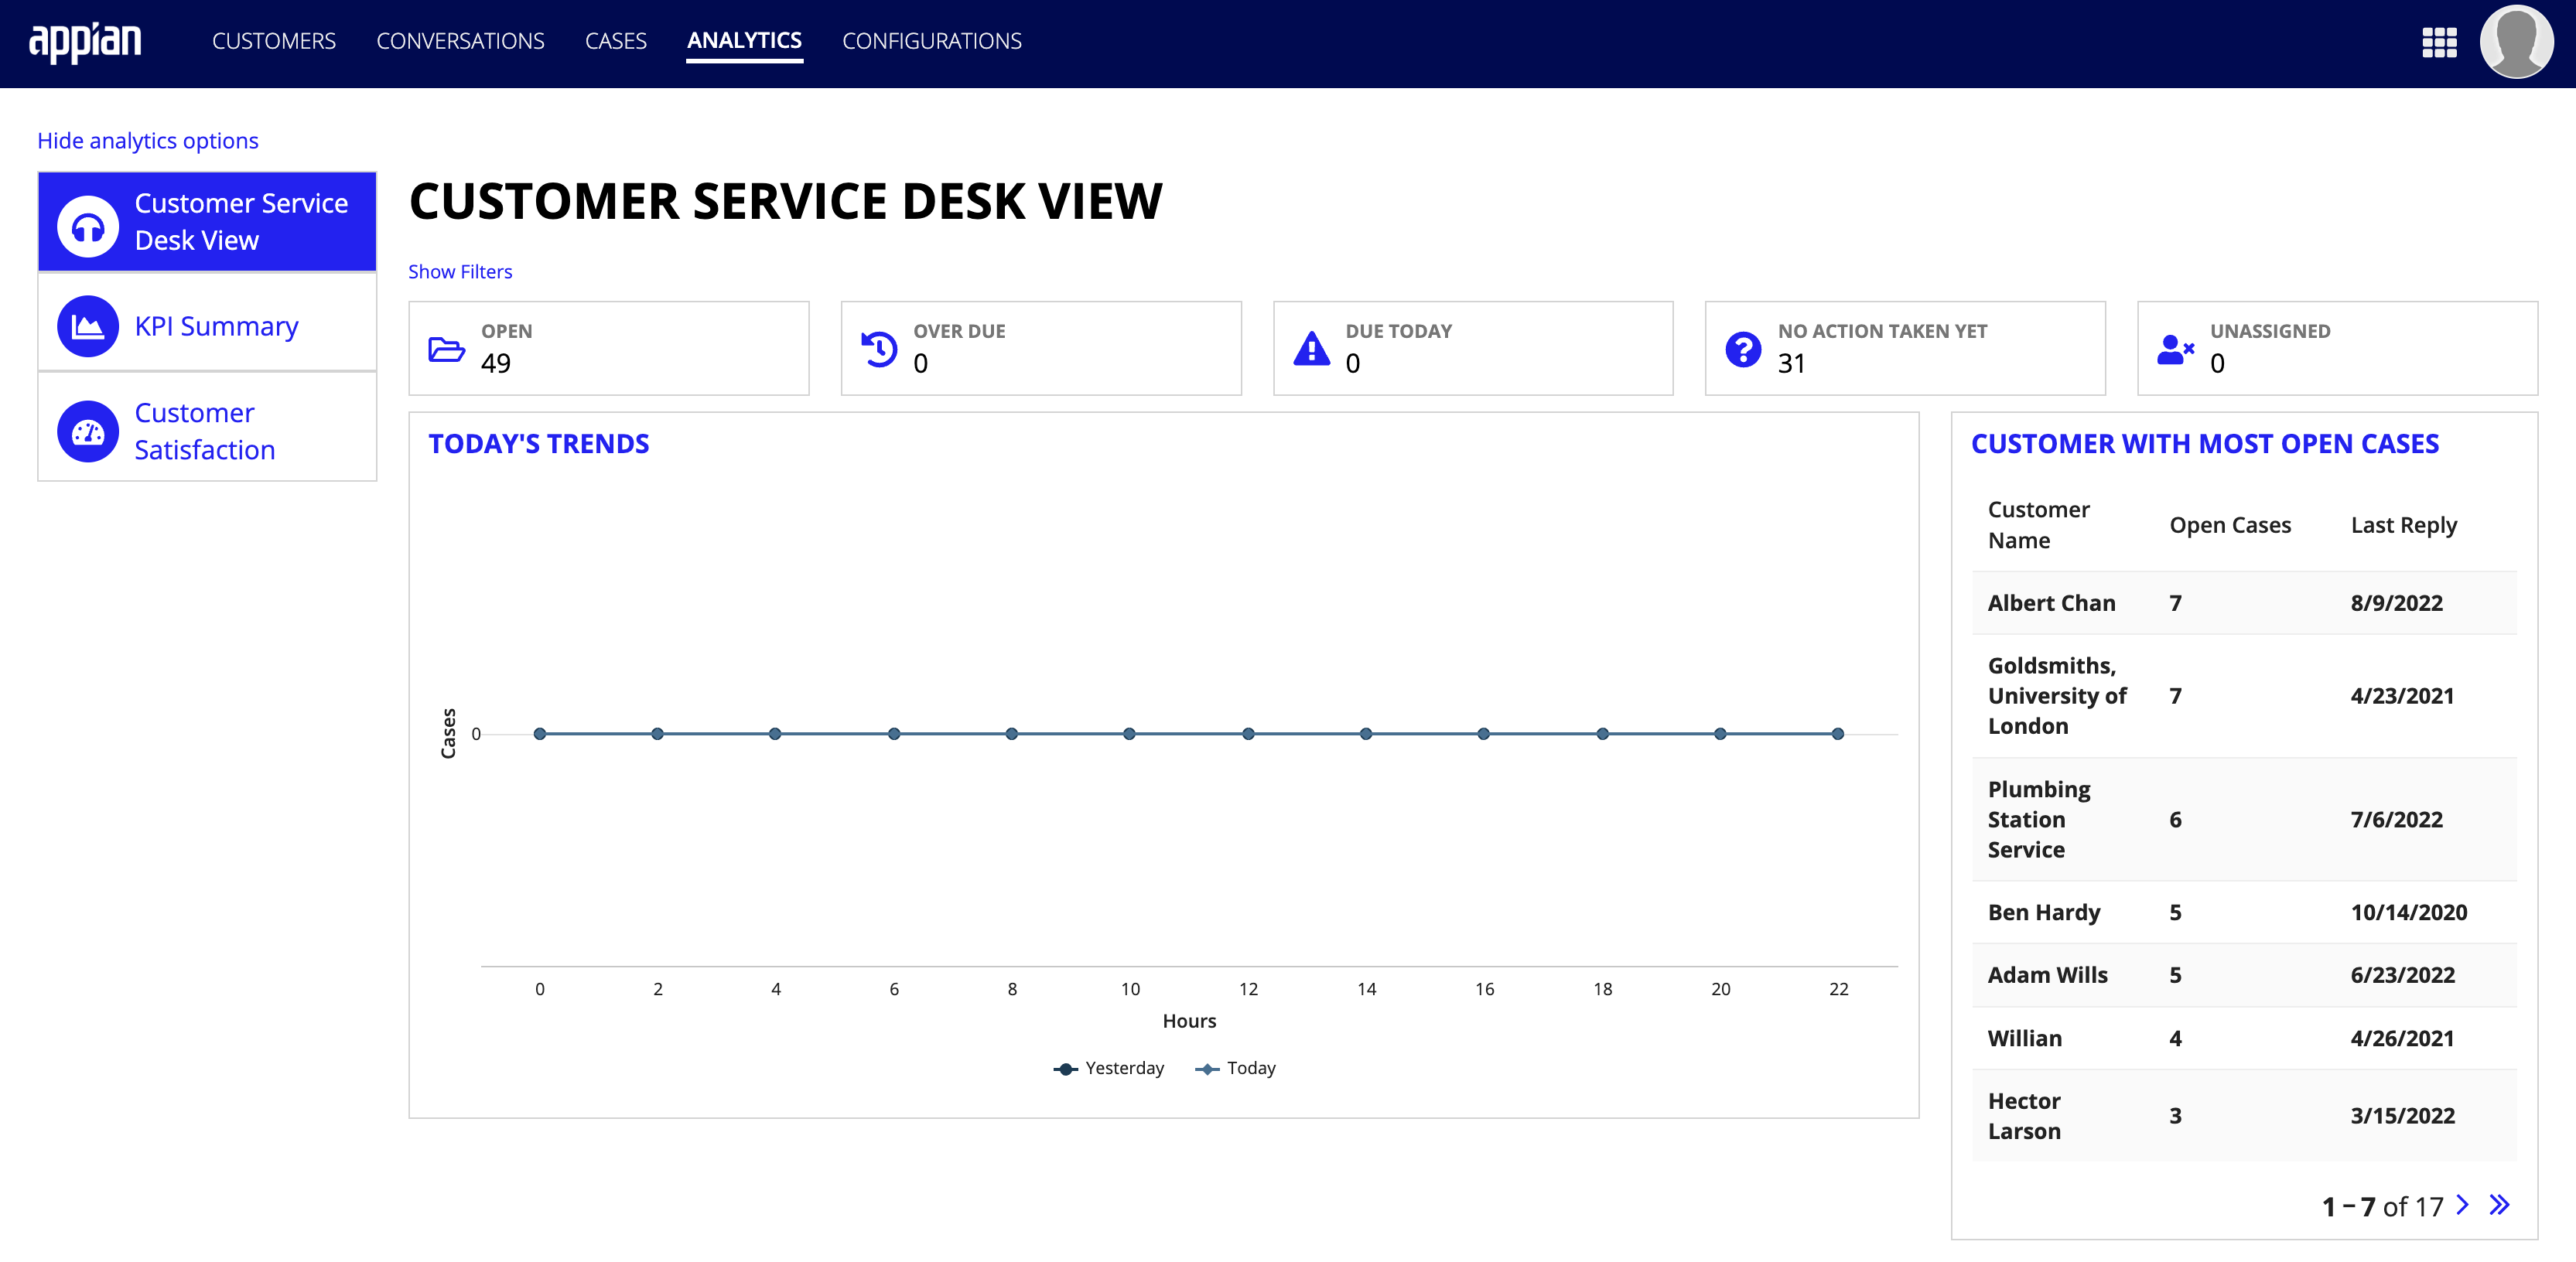
The Customer Service module offers the ability to view customer service metrics through a convenient built-in reporting tool. Click the ANALYTICS tab on the navigation bar to open the Customer Service Desk View, which shows a variety of metrics, including trends, open cases, and global distribution of cases.
Switching analytics viewsCopy link to clipboard
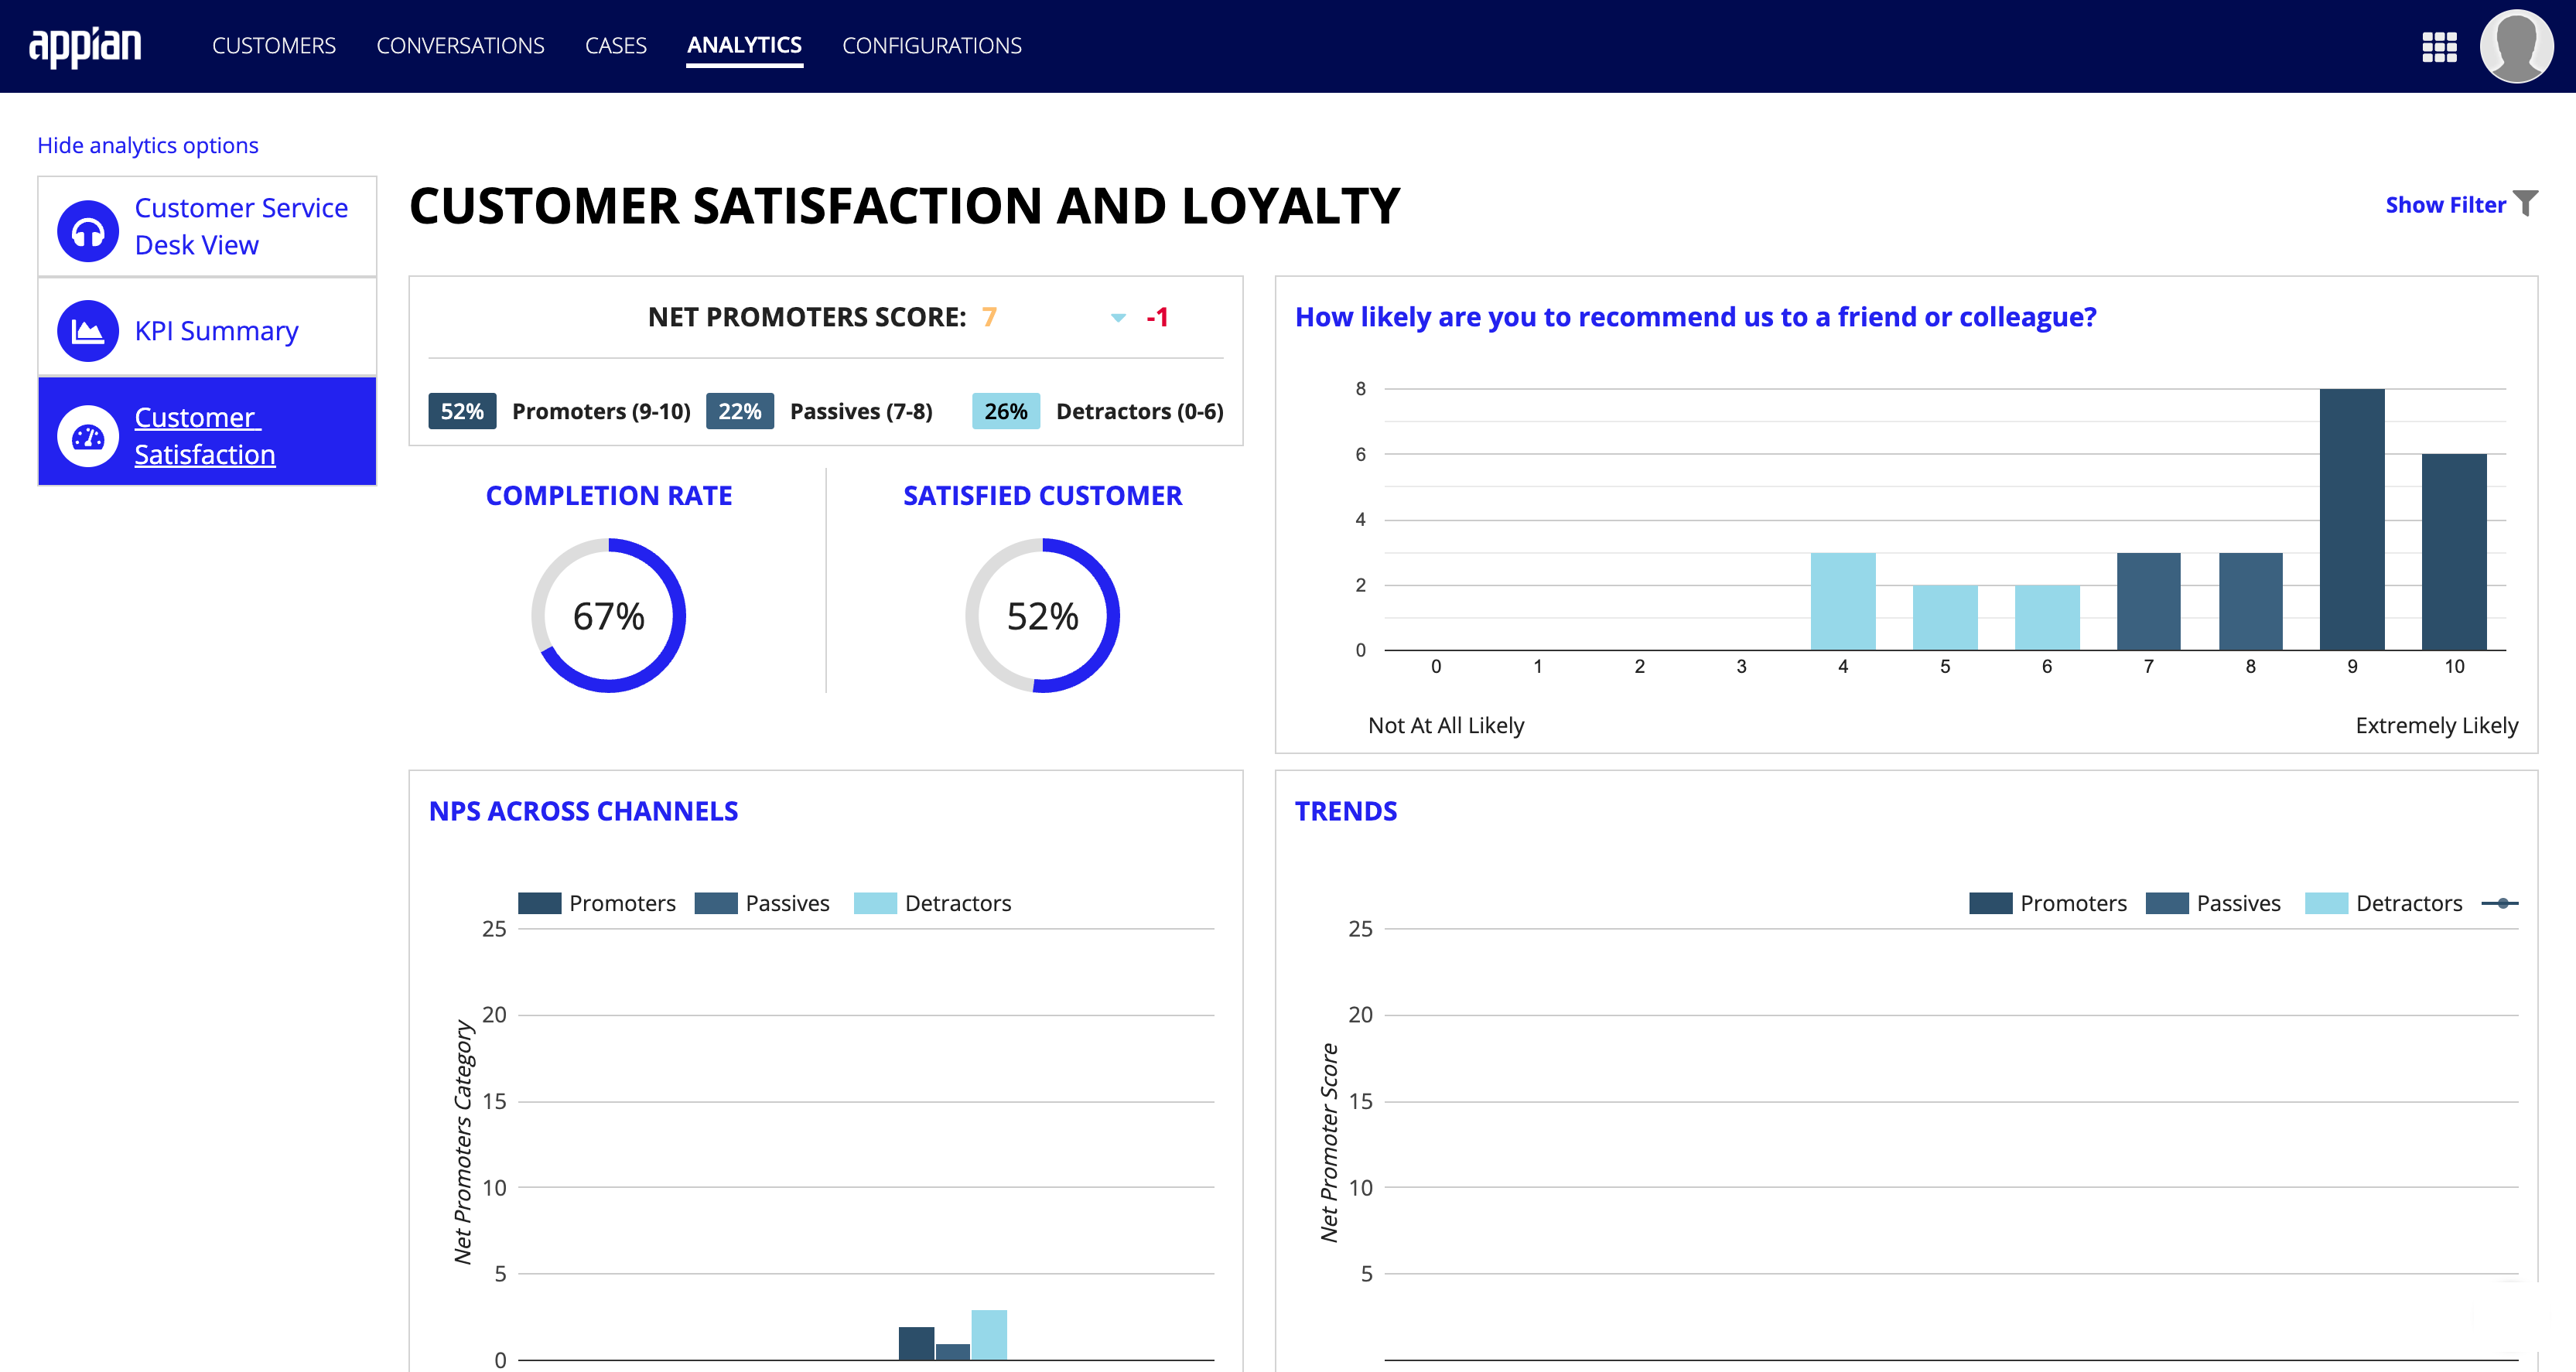
Located on the ANALYTICS dashboard are two links allowing users to toggle between view options: KPI Summary and Customer Satisfaction.
- KPI Summary: The KPI view offers a customizable breakdown of different metrics important to maintaining and tracking customer satisfaction.

- Customer Satisfaction: The customer satisfaction view offers a filterable summary of customer satisfaction traits and trends.
Ready to startCopy link to clipboard
Now that you have walked through the various steps demonstrating the ways in which you can manage customer information, you can start using the Customer Service module to support your customer base.
