OverviewCopy link to clipboard
This tutorial will teach you how to build an interface in Appian, working in both design mode and expression mode. Completing this tutorial will enable you to move on to the Process Model Tutorial.
The interface we're creating in this tutorial will be a form that lets users add new employee information to the system. We'll create this form in the Appian Tutorial application and use the Employee record type from the Database-Backed Record Type Tutorial to build out the form.
Tip: If your record type has data sync enabled, you can generate record views and process forms so your interfaces are configured for you.
Create the Appian Tutorial applicationCopy link to clipboard
Tip: The Appian Tutorial application is used throughout Appian tutorials. Skip the steps in this section if you've already created this application in another tutorial.
To begin with, we need to create an application to contain our design objects.
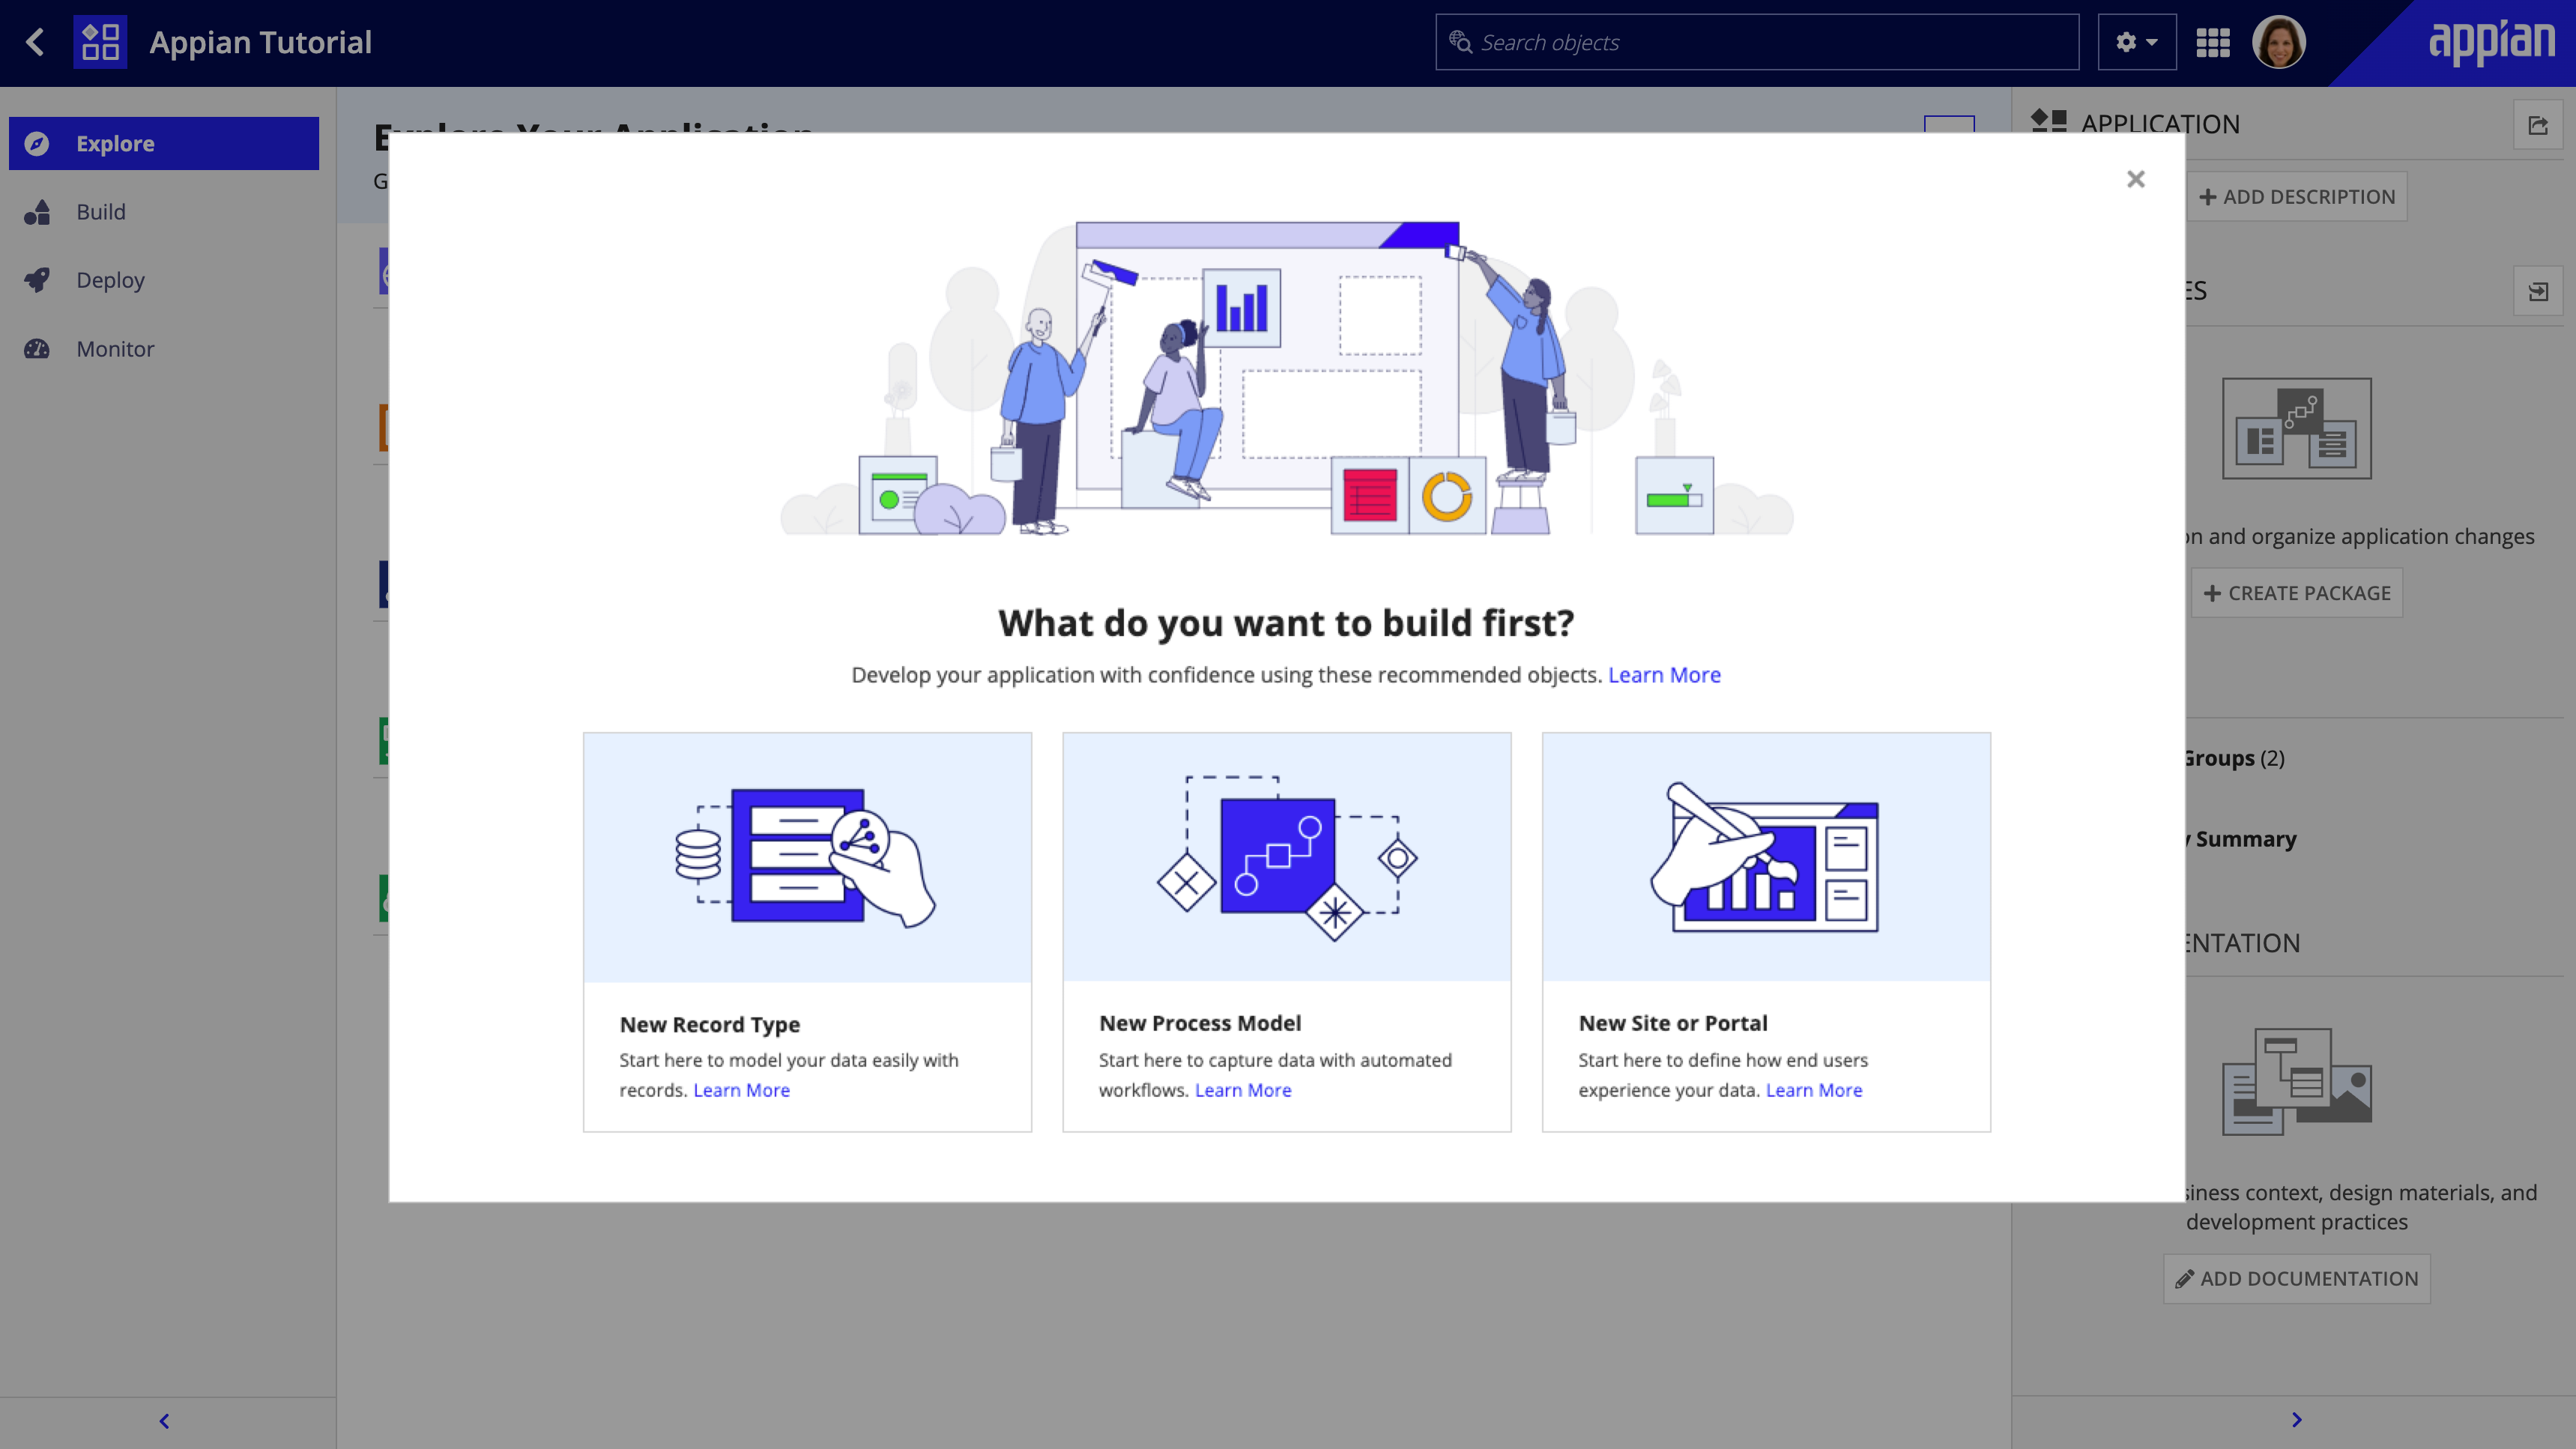
We will be creating the Appian Tutorial application for this tutorial. All of Appian's tutorials use the Appian Tutorial application as the reference application. After completing this tutorial, you can reuse this application as you work through other Appian tutorials.
To create the Appian Tutorial application:
- Log in to Appian Designer (for example, myappiansite.com/suite/design).
- In the Applications view, click +New Application.
-
In the Create New Application dialog, configure the following properties:
Property Description Name Enter Appian Tutorial.Prefix Keep the default prefix, AT, which Appian constructs using the initial characters of each word you entered in the Name parameter. We'll be following the recommended naming standard, and using this short, unique prefix whenever we name an object in this application.Description Leave blank. It's normally a best practice to add descriptions to all design objects. However, to save a little time during this tutorial, we'll skip adding descriptions unless the description displays to the end user. Generate groups and folders to secure and organize objects Keep this checkbox selected, so that Appian will automatically generate standard groups and folders and assign default security groups for this application. - Click CREATE.
-
In the Review Application Security dialog, keep the default security settings. Because we selected the Generate groups and folders option in the previous step, Appian automatically uses the AT Users and AT Administrator groups it generated to set our application security appropriately.
Tip: The security of the application object is unrelated to the security of each of the objects contained within the application. This means that you will need to set security permissions for every object in an application in addition to the application object itself. For more information about security permissions for the application object, see Application Security.
-
Click SAVE.
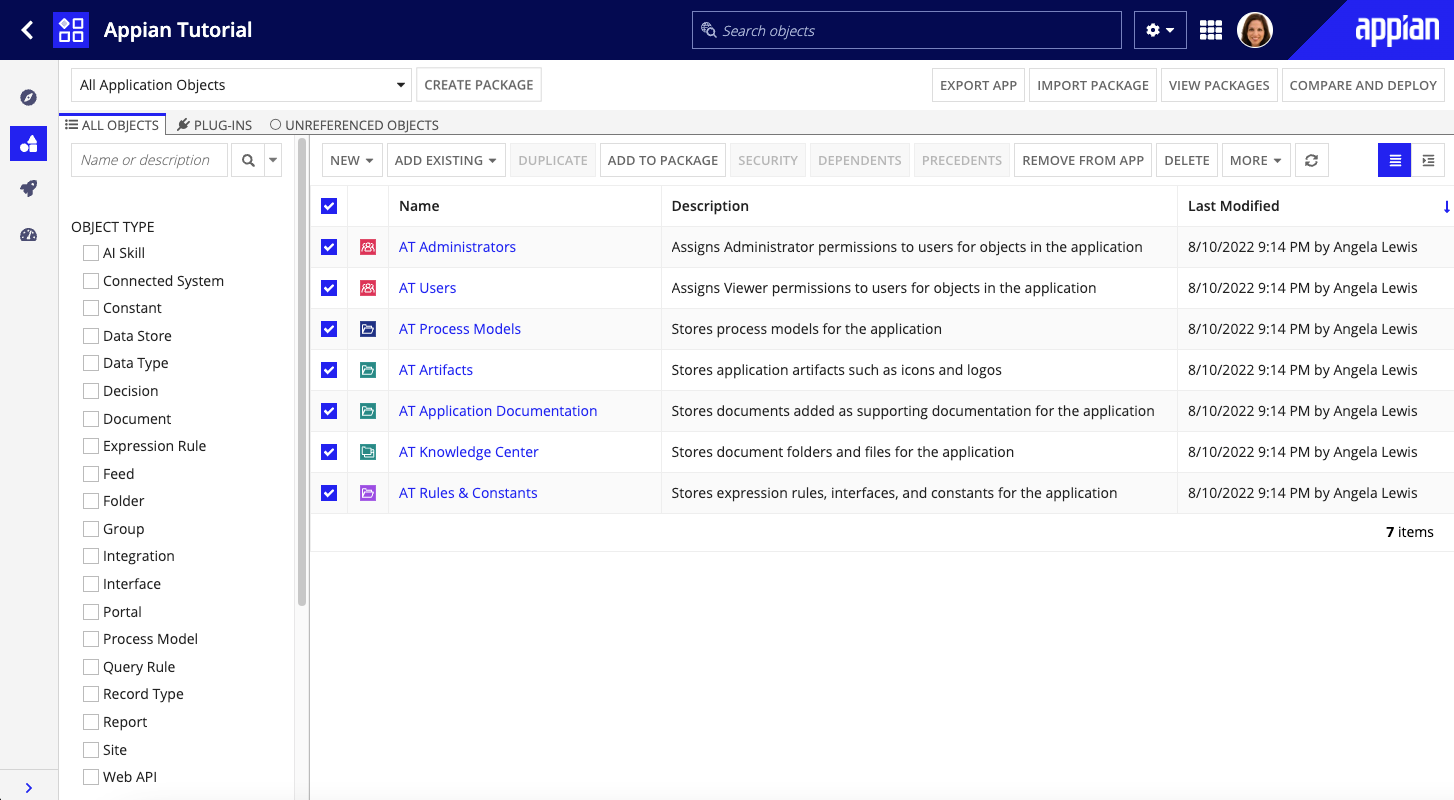
Right now, the application contains the folders and groups Appian generated automatically. To see these, click Build in the navigation pane. Each design object that you create during the course of this tutorial will appear in this list in the Build view and be associated with the tutorial application.
Create the Employee record typeCopy link to clipboard
To build the interface, you need to create an Employee record type as described in the Database-Backed Record Type Tutorial.
Complete the following sections of that tutorial before continuing:
Create an interfaceCopy link to clipboard
Now that we've created your application and record type, let's get started on the interface.
We're going to create an interface named AT_employeeForm. This interface will show a form for users to input values about new employees.
Create an interface objectCopy link to clipboard
To create an interface object:
- In the Build view, click NEW > Interface.
- In the Create Interface dialog, configure the following properties:
- Leave Create from Scratch selected.
- For Name, enter
AT_employeeForm. - For Save In, select the AT Rules & Constants folder that Appian generated.
- Leave Include in the design library unselected.
- Click CREATE.
The newly created interface will open in a new tab by default. If you don't see a new tab, make sure you have pop-ups enabled for your browser.
By default, the new interface is in DESIGN mode. That's where we want to be for now.
Select a templateCopy link to clipboard
Next, let's select an interface template, so we can take advantage of functionality already configured in the template.
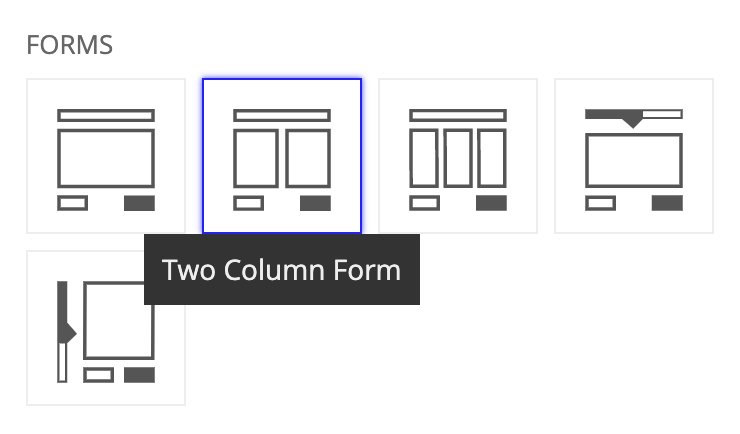
In the Select a Template panel, under FORMS, click Two Column Form.
The template you selected opens in the EDIT view.
Change the form titleCopy link to clipboard
Now, let's change the form title, so that users viewing the published interface know they're in the right place to create new employees in the system.
To change the form title:
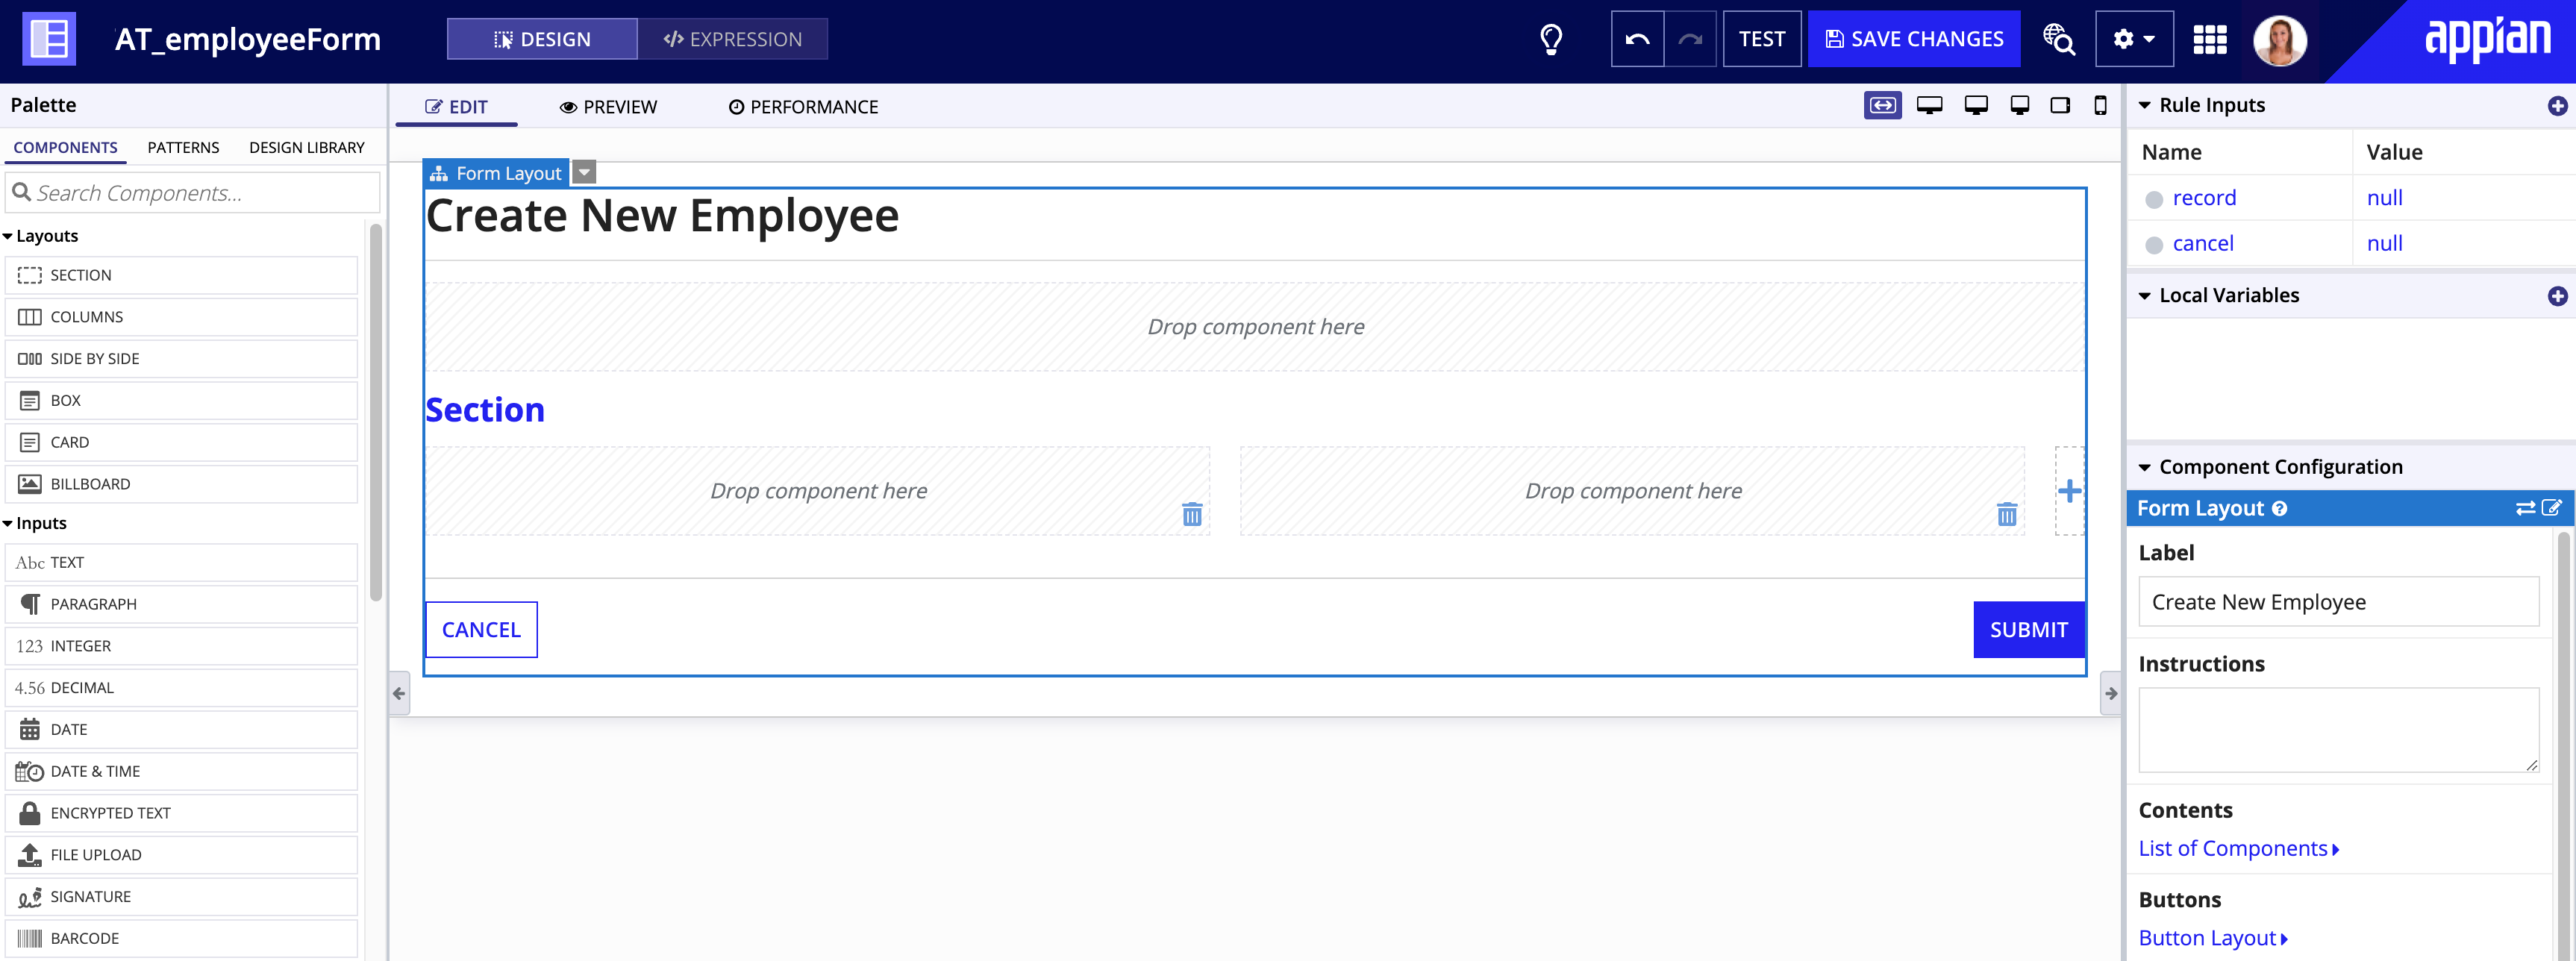
- Click on the title Form to select the Form Layout component. This action opens the component properties for editing in the COMPONENT CONFIGURATION pane on the right.
-
In the COMPONENT CONFIGURATION pane, replace the default Label value with
Create New Employee.
Rearrange the sectionsCopy link to clipboard
The template we selected contains two sections, but we only need the section with two columns. We'll also add some more columns to lay out the other components of the form.
To reorder the section components:
- Click the first Section Layout to select it.
-
From the context menu next to Section Layout, click Delete.
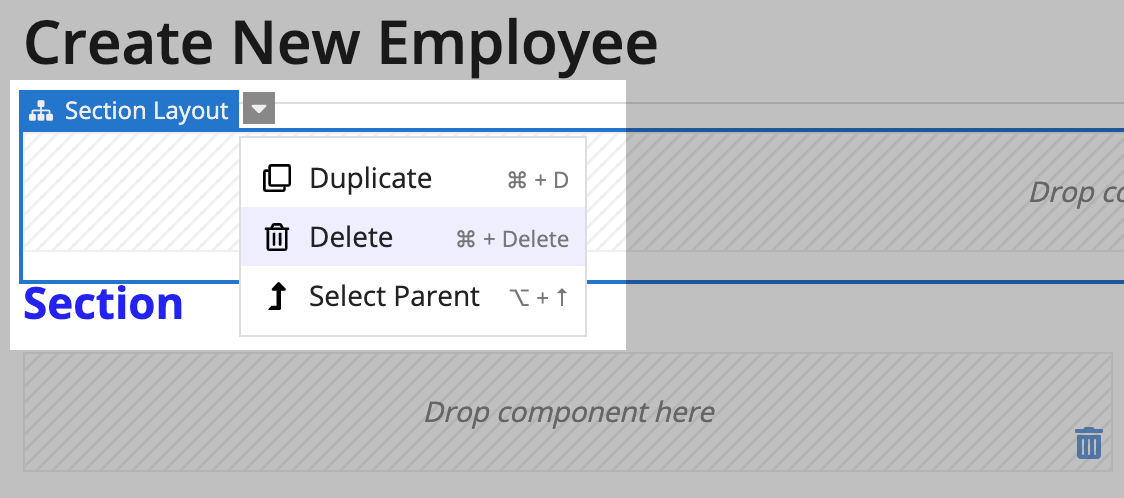
- Click the remaining Section Layout to select it.
- In the COMPONENT CONFIGURATION pane, delete the default section Label value of
Section.
You should be left with nothing but the form layout and the cancel and submit buttons.

Create the record rule inputCopy link to clipboard
Before we add new interface components, let's add the rule input needed to store user-entered data for those components. A rule input is a variable that stores inputs from the interface, so those inputs can be successfully passed to a process model.
- In the RULE INPUTS pane on the right, click New Rule Input.
- For Name, enter
record. - For Description, keep the blank default.
Adding supplemental information in this field can be useful to guide future development, but for the purposes of this tutorial, we'll keep it blank.
- For Type, select the AT Employee record type.
- Leave the Array checkbox unselected. The form only allows users to submit a single employee, so there is no need for the rule input to accept multiple records.
- Click CREATE.
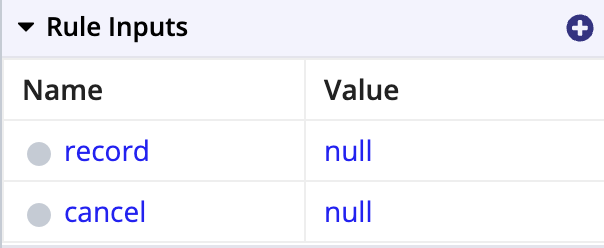
Your finished rule inputs should look like this:
Add componentsCopy link to clipboard
Now, we'll add components to the interface that let users add employee data. These components are available in the PALETTE panel.
To add components to the interface:
- Drag the following components into the left column, in the following order:
- TEXT component
- DROPDOWN component
- TEXT component
- Drag the following components into the right column, in the following order:
- TEXT component
- TEXT component
- TEXT component
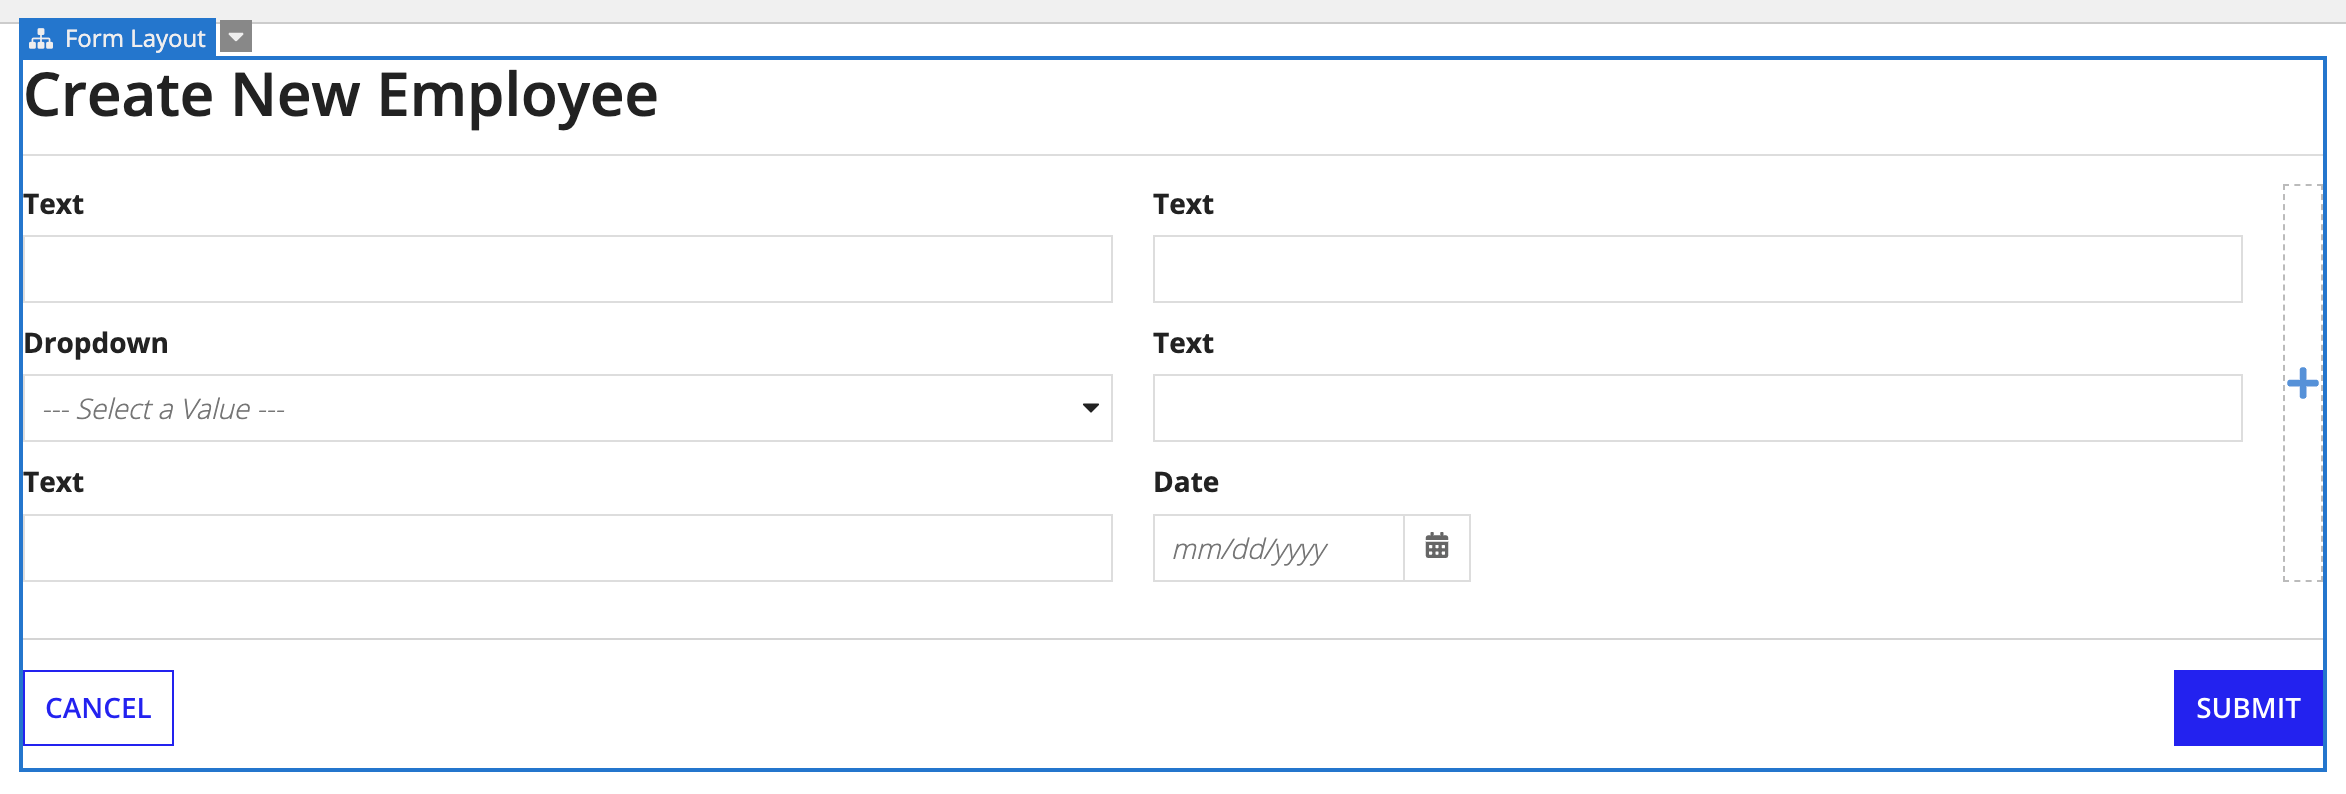
Your interface should look like this:
Configure the new componentsCopy link to clipboard
Next, we'll configure the components so that the form inputs connect to the rule input. We'll also specify whether a specific form input is required to submit the form.
For each of the components, perform the following steps:
- Click a component to select it.
-
For the components in the left column, configure the following properties in the COMPONENT CONFIGURATION pane:
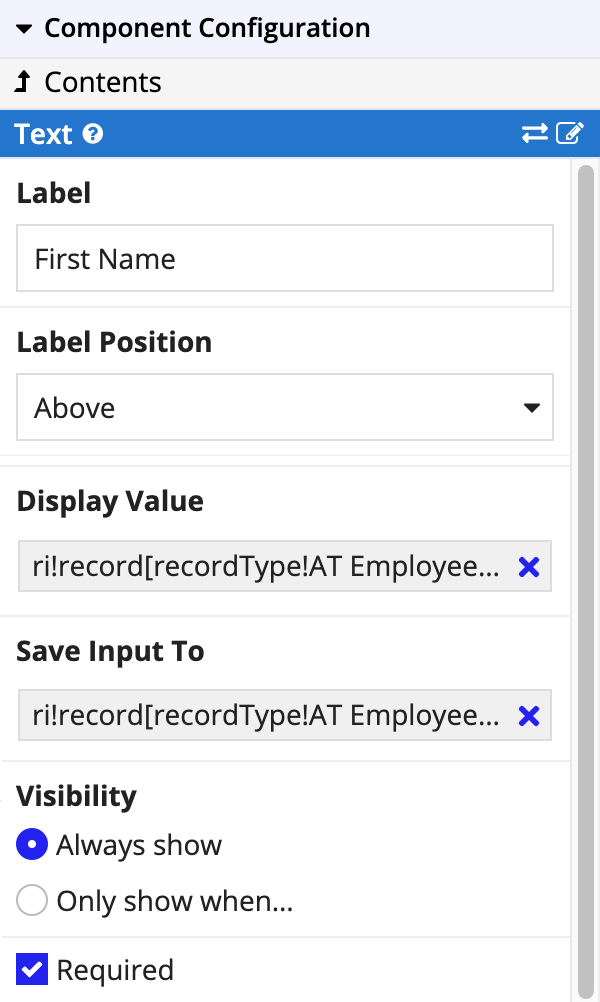
Component Label Display Value / Selected Value Save Input To / Save Selection To Required Text First Nameri!record[AT Employee.firstName]ri!record[AT Employee.firstName]selected Dropdown Departmentri!record[AT Employee.department]ri!record[AT Employee.department]not selected Text Phone Numberri!record[AT Employee.phoneNumber]ri!record[AT Employee.phoneNumber]not selected -
For the components in the right column, configure the following properties in the COMPONENT CONFIGURATION pane:
Component Label Display Value Save Input To Required Text Last Nameri!record[AT Employee.lastName]ri!record[AT Employee.lastName]selected Text Titleri!record[AT Employee.title]ri!record[AT Employee.title]not selected Date Start Dateri!record[AT Employee.startDate]ri!record[AT Employee.startDate]selected For example, the first field should have the following properties configured:
- Click SAVE CHANGES.
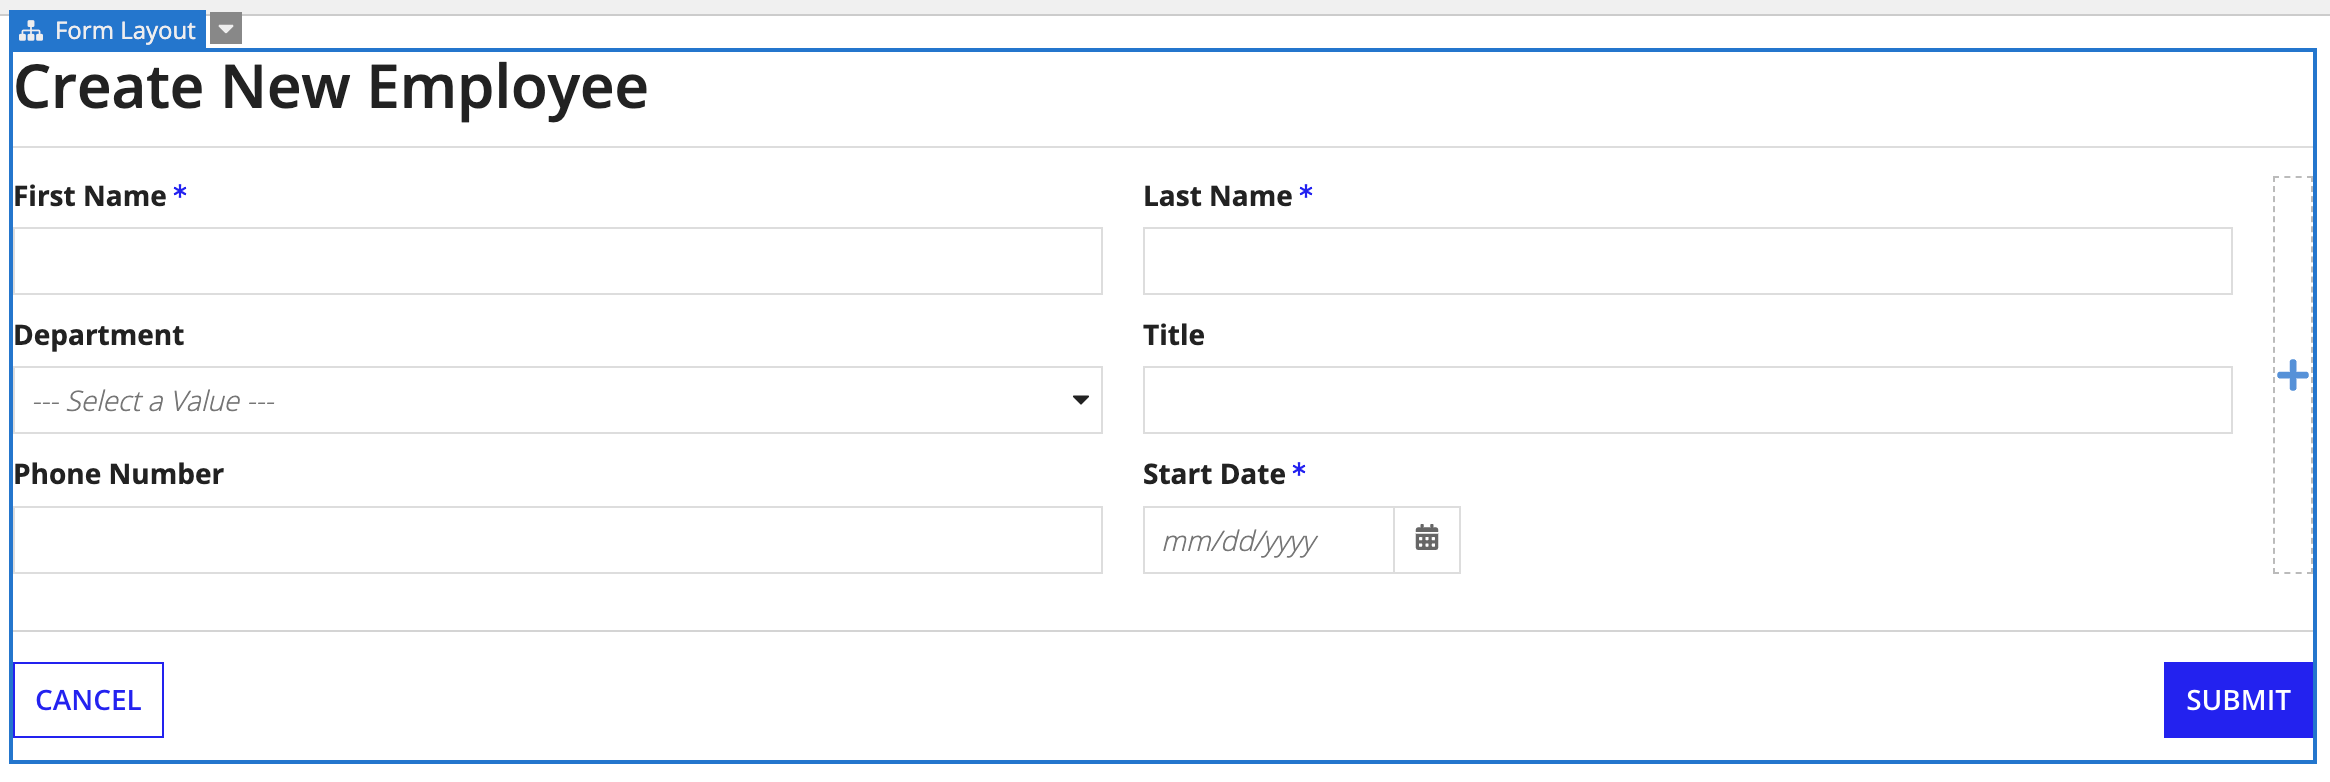
Your interface should now look like this:
Configure choices using a constantCopy link to clipboard
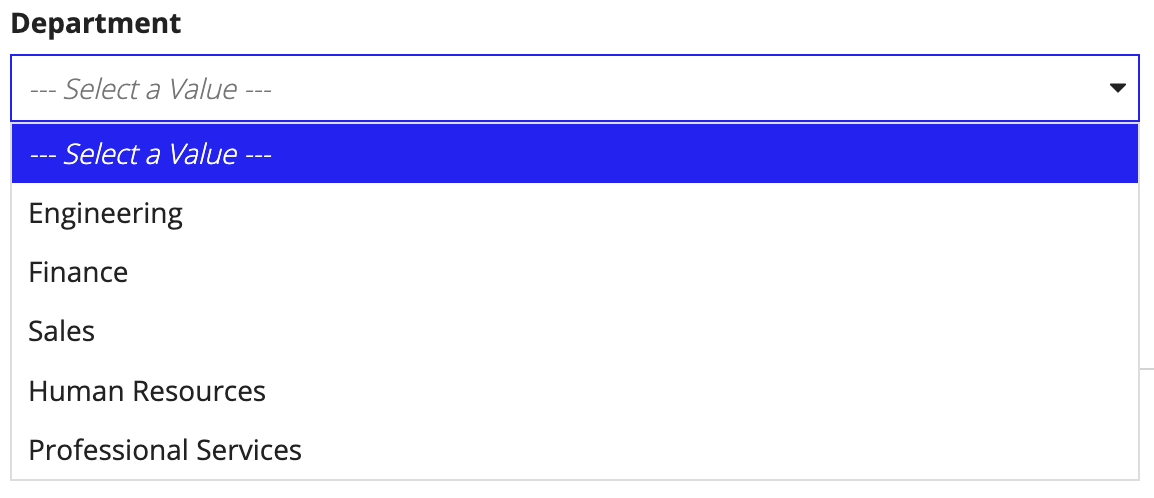
To ensure users only select an existing department from the dropdown list, we'll create a constant to define the field's options.
To set up the Department field's choices:
- Click the Department dropdown component.
- In the COMPONENT CONFIGURATION pane, locate the Choice Labels and click Edit as Expression.
- Delete the default options in the expression editor.
- Click Create Constant
 .
. - In the Create Constant dialog, for Name, enter
AT_DEPARTMENT_LIST. - For Type, select Text.
- Select the Array checkbox.
-
For Value, enter the department options. Separate each department by a line break, but do not include spaces, commas, or quotations:
1
2
3
4
5
Engineering
Finance
Sales
Human Resources
Professional Services
Copy - Click CREATE.
- Click OK. An error appears, but this is expected because there are currently five Choice Labels and twelve Choice Values. We'll correct this in the next steps.
- In the COMPONENT CONFIGURATION pane, locate the Choice Values and click Edit as Expression.
- Replace the default expression with
cons!AT_DEPARTMENT_LIST. - Click OK.
- Click SAVE CHANGES.
The dropdown now shows the five departments employees can be assigned to:
Add a validationCopy link to clipboard
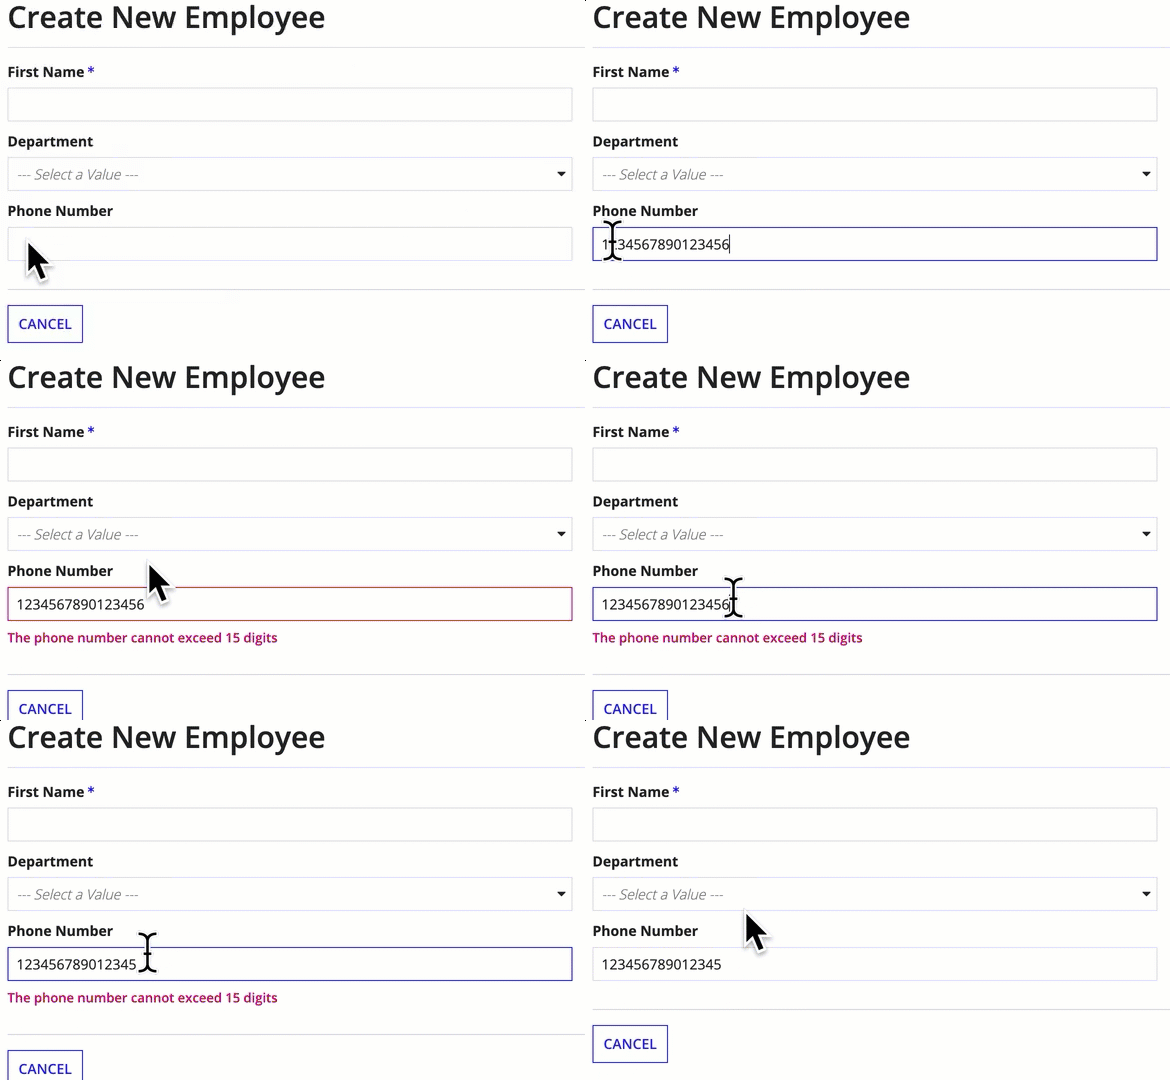
You can configure validations on the form's components to ensure the data users enter doesn't contain preventable mistakes. For example, let's add a custom validation to our form so users are limited to a maximum of 15 characters in the Phone Number field.
To add a custom validation:
- Select the Phone Number text component.
- In the COMPONENT CONFIGURATION pane, hover over the Validations property, then click Edit as Expression.
-
Enter the following expression in the Validations (List of Text String) expression box:
1
2
3
4
5
if(
 len(tostring(ri!record[recordType!AT Employee.phoneNumber]))<=15,
 null,
 "The phone number cannot exceed 15 digits"
 )
Copy - In the expression, change the record type reference to use the record type reference in your environment.
- Click OK to close the expression box.
- To test the validation:
- For Phone Number, enter
1234567890123456. - Click outside the text field. You should see the validation message.
- For Phone Number, delete the
6at the end of the string. The validation message should no longer appear.
- For Phone Number, enter
- Click SAVE CHANGES.
Congratulations!Copy link to clipboard
You did it! You created a records-powered interface to meet a business use case. You're ready to move on to other tutorials.
- To connect your interface to a process model that saves new employee data, check out the Process Modeling Tutorial.
See Also: Interface Recipes to create different interfaces with specific layouts and dynamic behavior.

