This tutorial will help you create a process model that end users can start as an application action.
The process model we're creating in this tutorial is for a simple expense management application. We'll create an action so that users can submit their own expense reports. The form for the expense report will contain a few inputs that are saved into process variables so we can use them later.
Then, we'll add a process flow that lets the user cancel their request. For the last step of setting up your process model, we'll add an approval step for a user to approve the expense report submitted.
Complete the Interface Tutorial first, so that you have both the Appian Tutorial application and the AT_expenseReportForm interface needed to complete this tutorial.
Make sure you're a member of the Process Model Creators system group. Contact your system administrator if you are unsure if you belong to this system group.
Let's start by using the AT_expenseReportForm interface to create an application action.
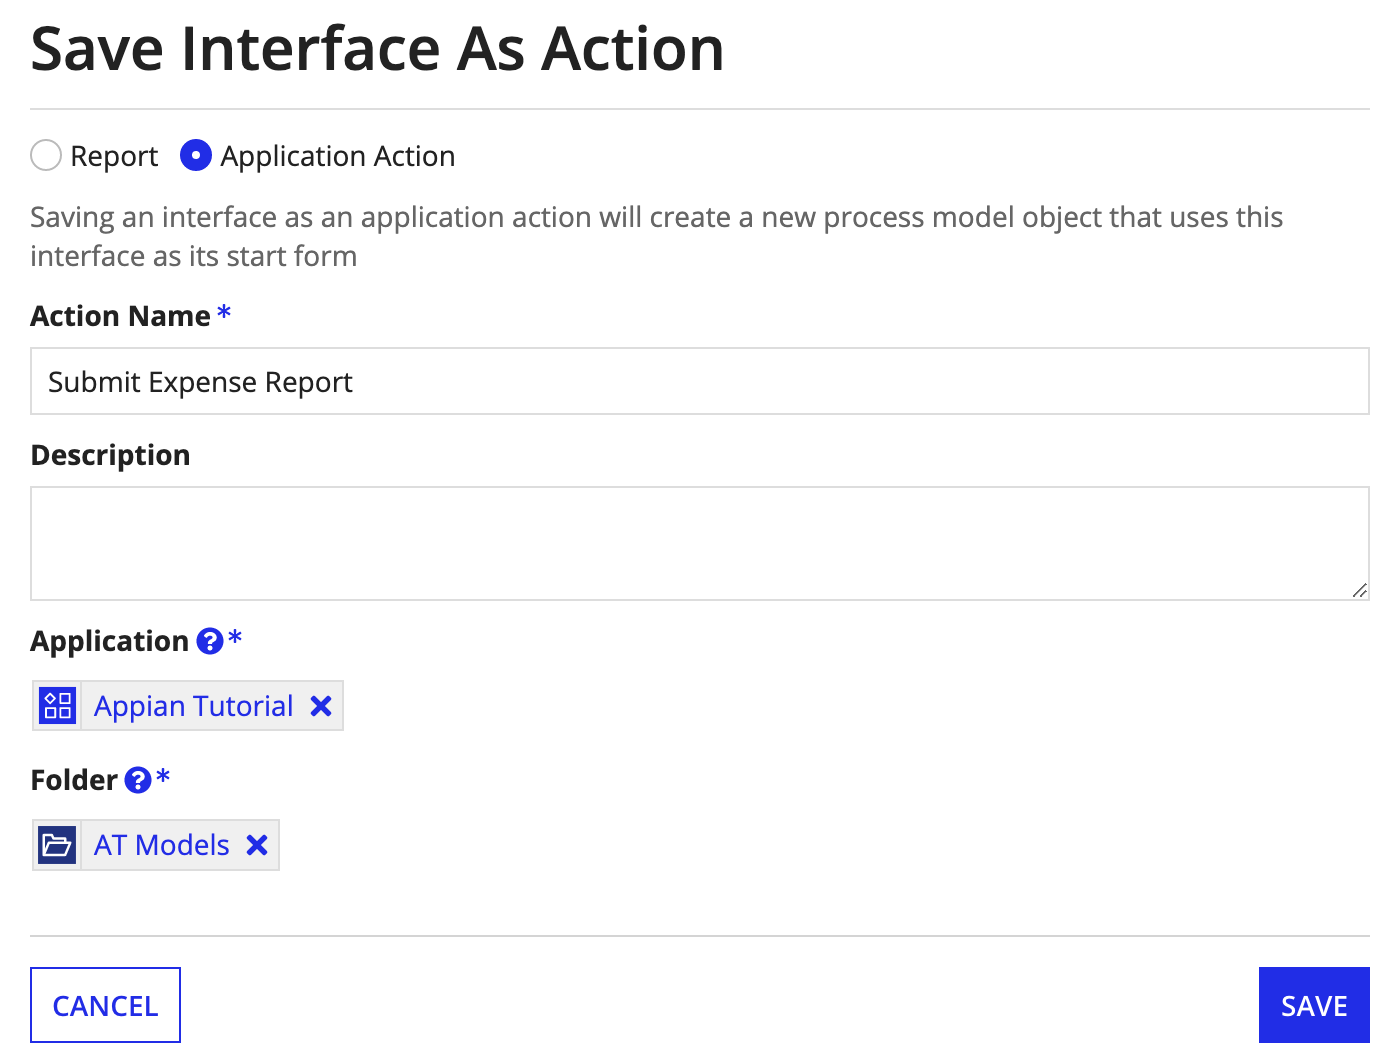
To create the application action:
Configure or verify the following properties:
| Property | Description |
|---|---|
| Action Name | Enter: Submit Expense Report |
| Application | Leave the default value unchanged. By default, the current application is selected. |
| Folder | Select AT Models. If that folder doesn't exist yet, create it:
|
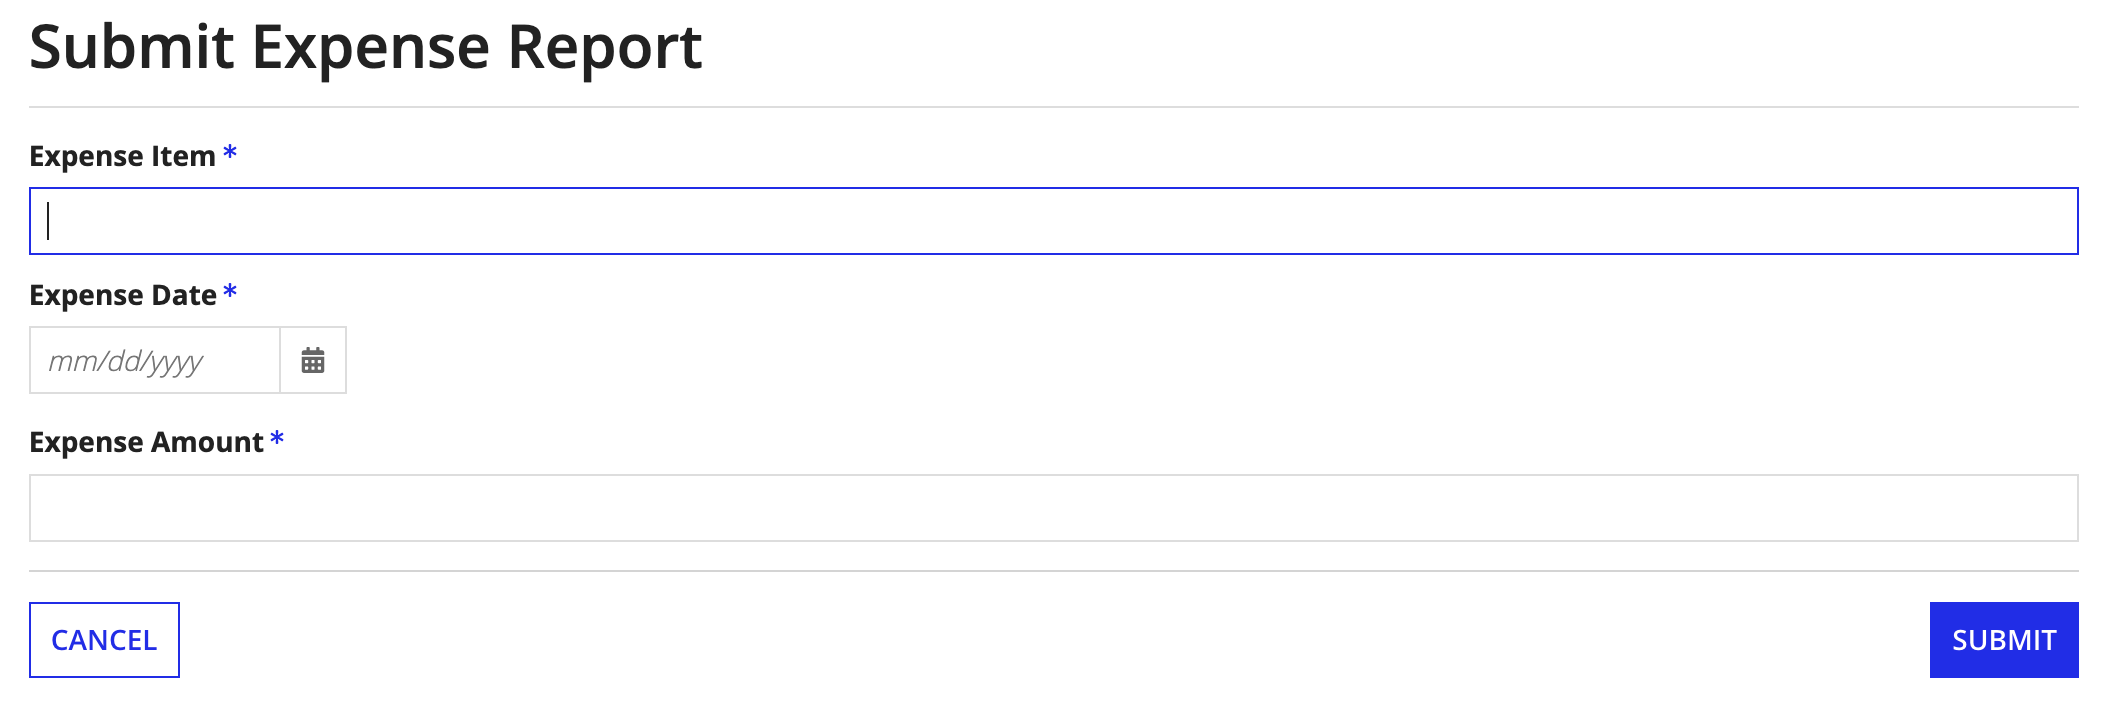
For example:
You have just created a process model for submitting expense reports and made it available in Tempo as an action. This step essentially does the following:
To test out the application action:
Click your process instance. The monitoring view of the process instance displays in the Appian Process Modeler. The flow that your process instance followed is highlighted in blue.
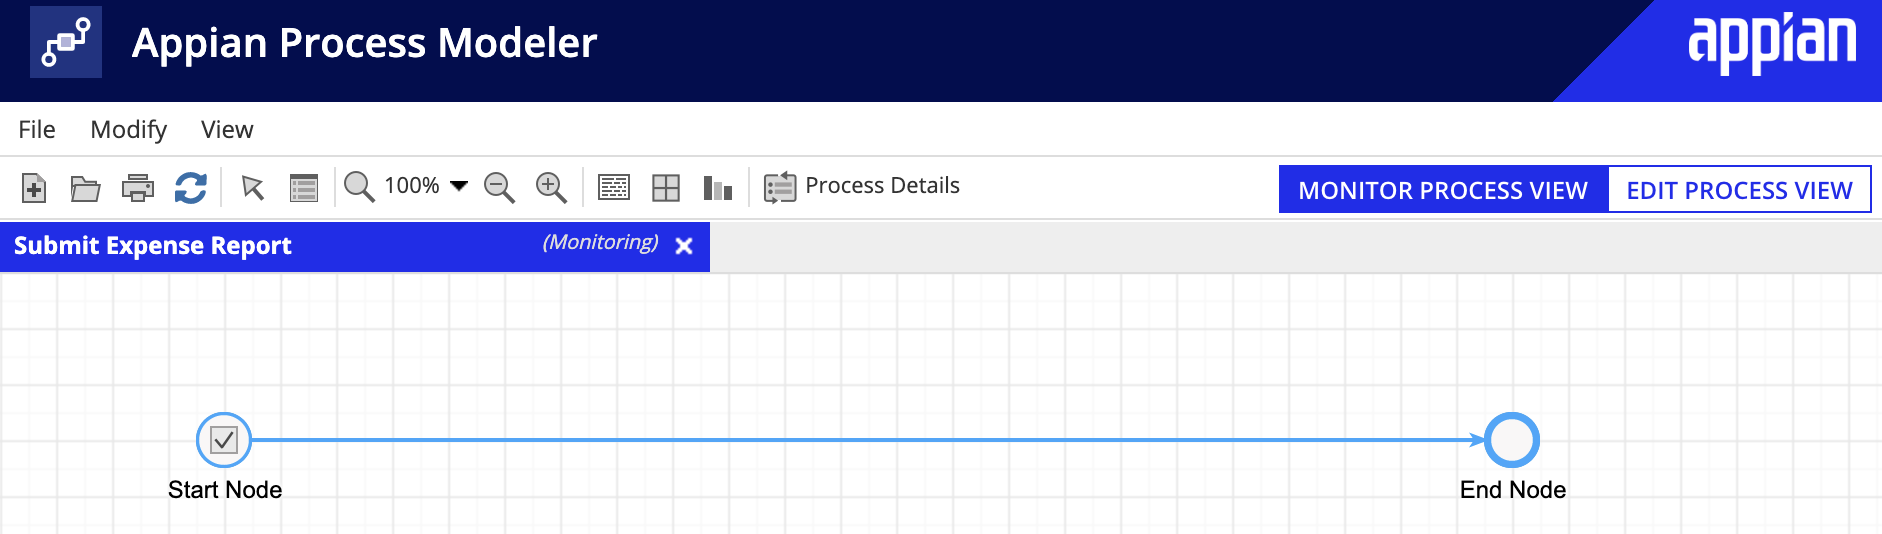
In this case, the flow was straightforward: it started at the Start Node and successfully continued to the End Node.
In the toolbar, click Process Details. By default, the Process History tab is active.
For example:
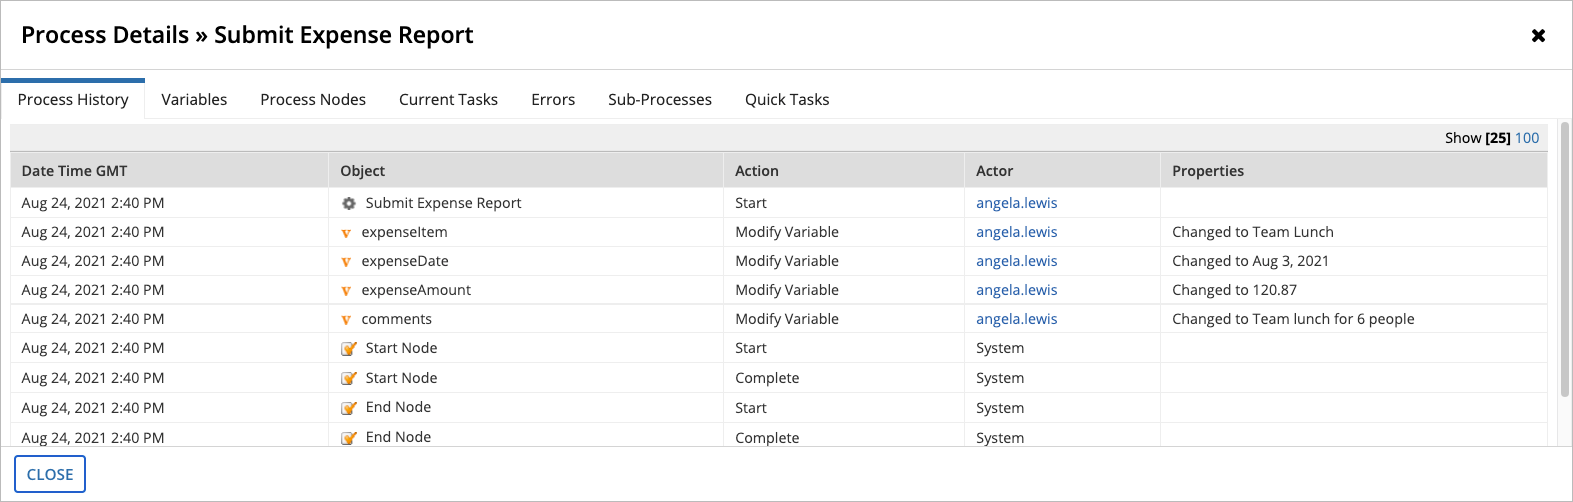

In this example, you can see each event Appian logged as you started the application action, completed the input fields, and submitted the form.
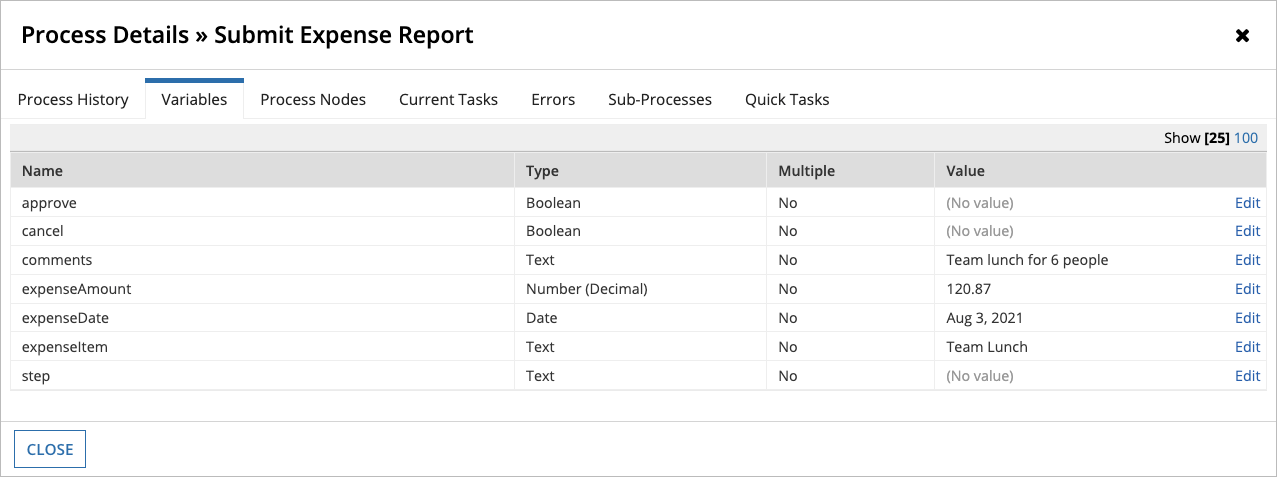
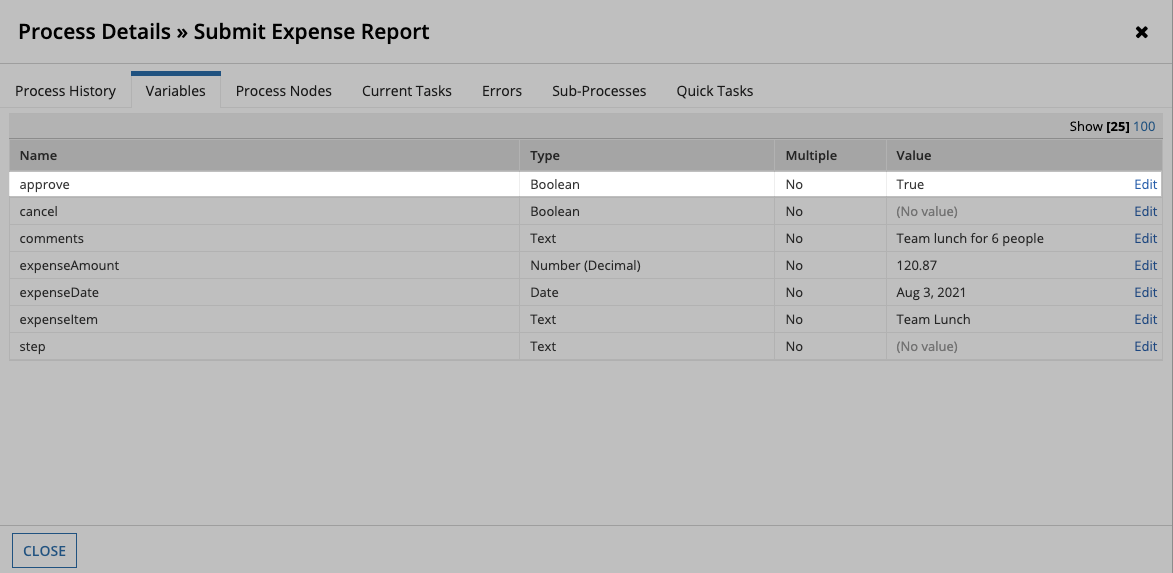
Go to the Variables tab. If your process instance was successful, this tab displays the values that Appian populated to the process variables based on your field inputs.
For example:
In the PROCESS ACTIVITY list, you might have noticed that the process name is simply Submit Expense Report. As more expense reports are submitted and other applications are introduced into this environment, it will become difficult to distinguish processes from each other if the process instance names are generic.
So, let's update the name to include information that's specific to each process instance.
To make the process instance names dynamic:
="Expenses Submitted: " & pv!expenseItem. This expression adds expense item information to the display name of every process instance.Test the application action again. This time, in the Monitor view, notice that the process name includes the value from the Expense Item field of the input form:

We've enabled our users to submit a report, but we still need to handle the case when the user starts to fill out the form, then wants to cancel the action.
We'll do that by adding a cancel flow to the process.
The process variables we'll need were automatically set up when we created the application action from the AT_expenseReportForm interface. We just need to add a gateway to redirect the process flow if the user clicks CANCEL.
To add a decision node:
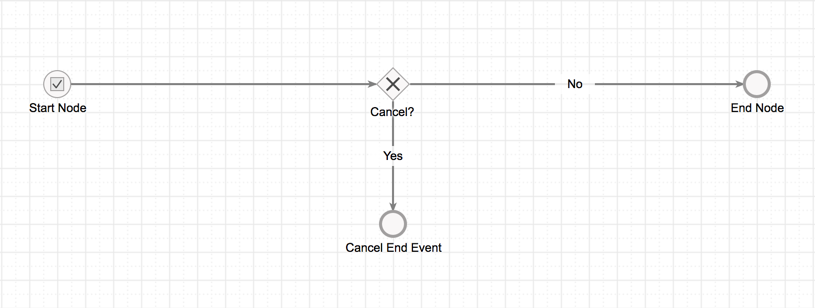
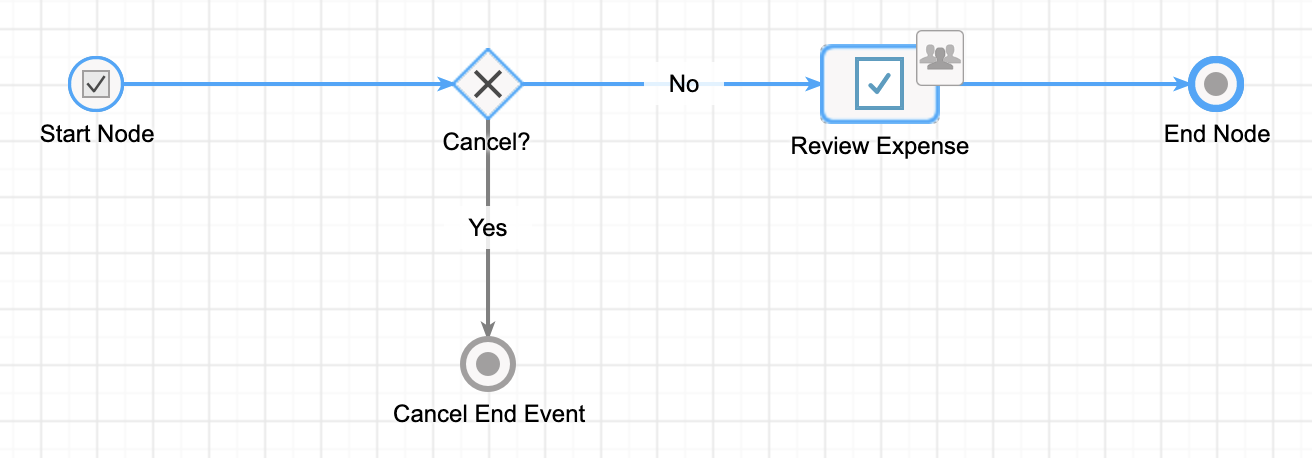
Cancel?.Cancel? gateway. A red dot appears indicating that these two nodes will be connected.Cancel End Event.Double-click the flow connector between the Cancel node and the Cancel End Event node, and set the Label property to Yes.
The process model should look like this:
Now let's configure the logic within the Cancel? gateway:
pv!cancel.
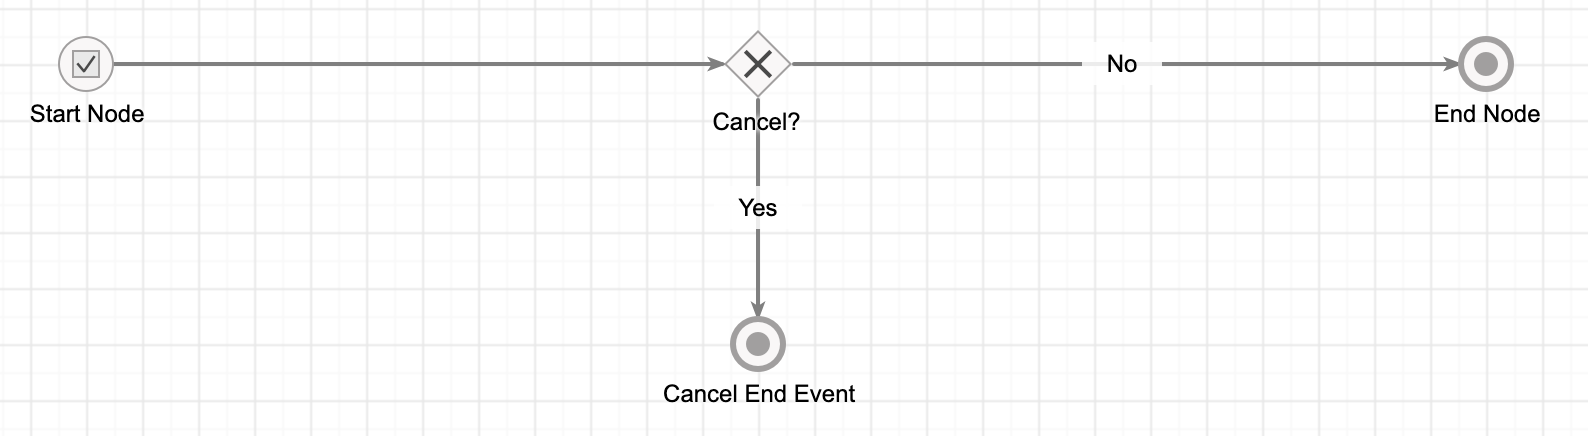
It's best practice to formally terminate a process when it reaches an end event, so we'll want to configure both the End Node and the Cancel End Event to terminate the process on completion of the node action.
In the process model, do the following for each of these nodes:
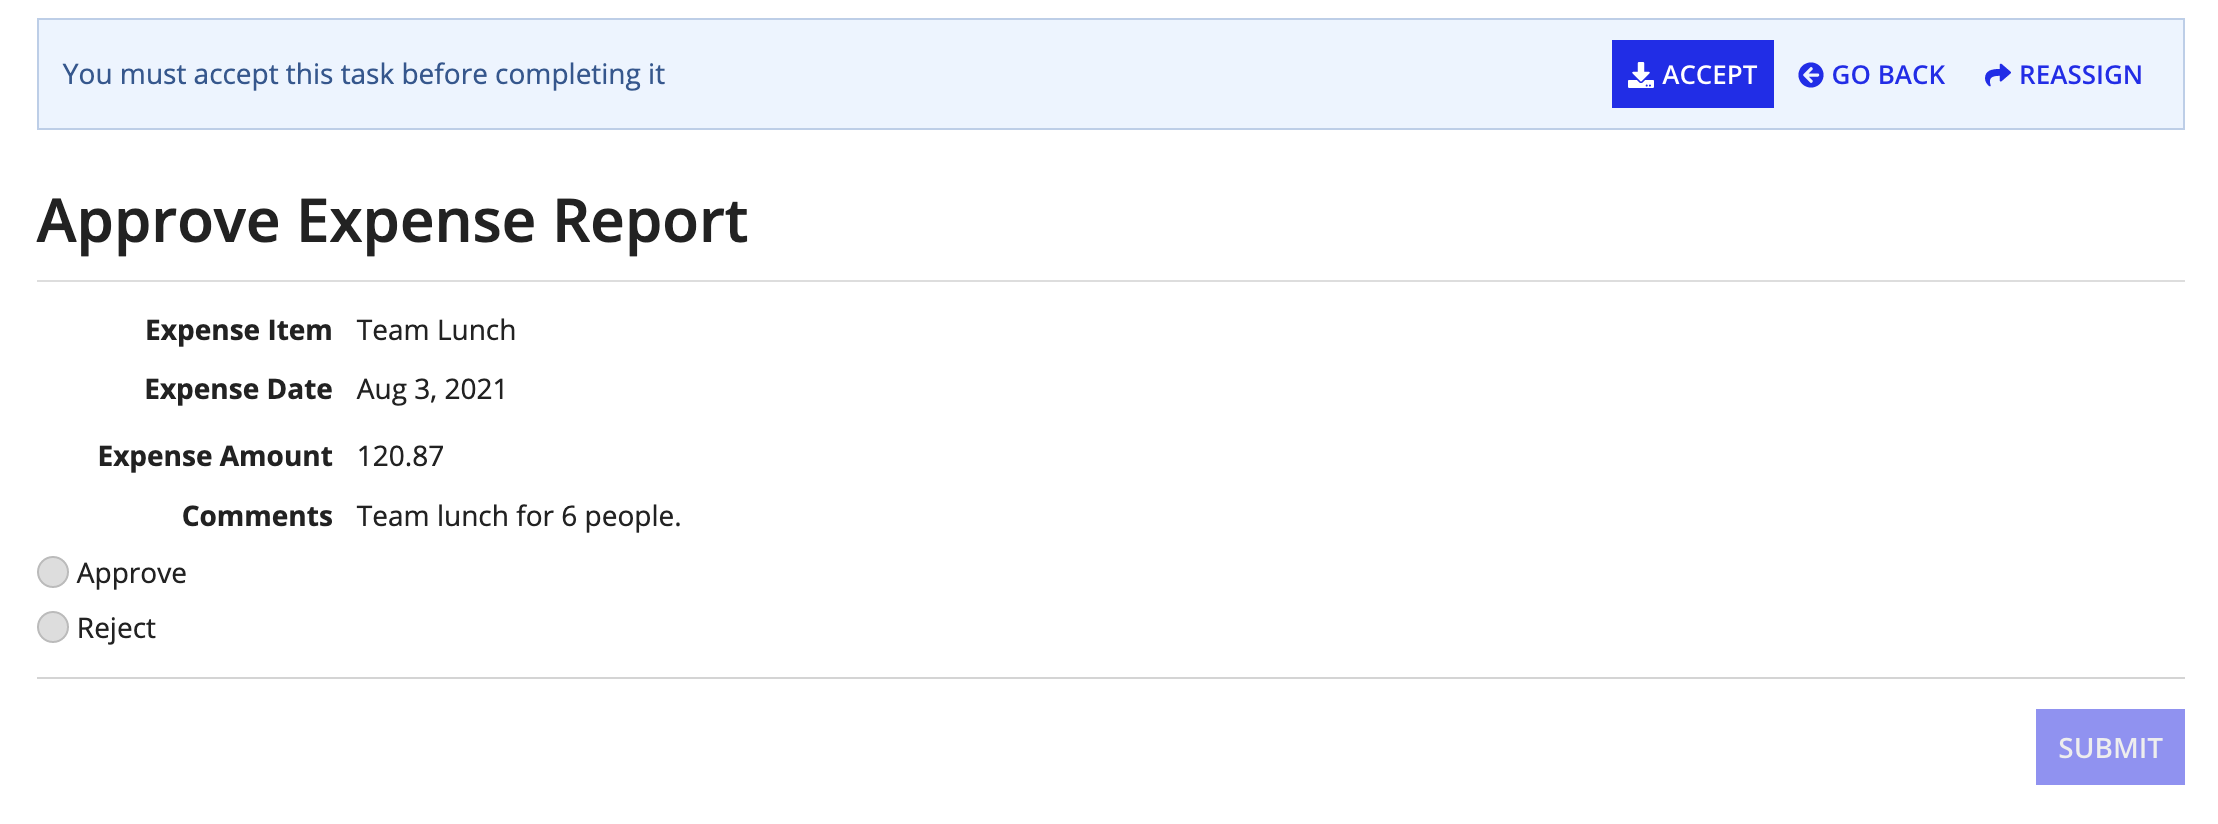
In the Interface Tutorial, we first configured the interface to allow an employee to submit an expense report, then configured it to allow a manager to approve or reject the expense report as well. Based on the value of a rule input, that interface displays each form field as read-only and adds Approved and Rejected radio buttons.
Now, let's add an approval step to the process model and assign it to the process initiator's manager.
We've configured the process so that anyone in the AT Users group can submit an expense request. Now, we need an AT Managers group that includes managers who can review and approve those requests.
To add a managers group:
Configure the following properties:
| Property | Description |
|---|---|
| Name | Enter: AT Managers |
| Parent Group | Select AT Users. |
| Group Members | Select your user account. In a real environment, employees probably wouldn't be in a managers group, but for this tutorial we need you to be able to act as a manager to test the process. |
Now, it's time to update the process model, so that, when an employee submits an expense request, Appian assigns the task to the AT Managers group.
To add the approval task to our process model:
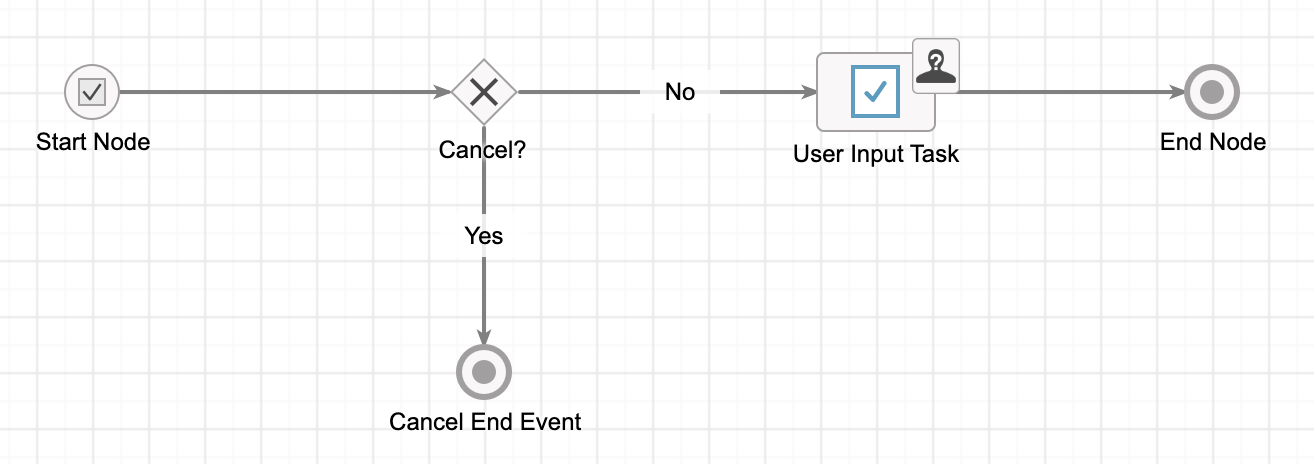
Drag a User Input Task node from the palette to the existing connector with the No label. This step connects the nodes as shown below. The logic in the Cancel? node is automatically updated so that the User Input Task node is selected for the second go to results.
Review Expense.In the Expression Editor dialog, enter the following expression:
="Approve Expenses for " & user(pp!initiator,"firstName") & " " & user(pp!initiator,"lastName")
This change gives every expense approval task a display name that includes data about the task, in this case the first and last name of the person who submitted the expense report.
When asked if you want to Create Process Parameters to match your interface's inputs, click YES. This adds the rule inputs from our interface into the process model.
For example:
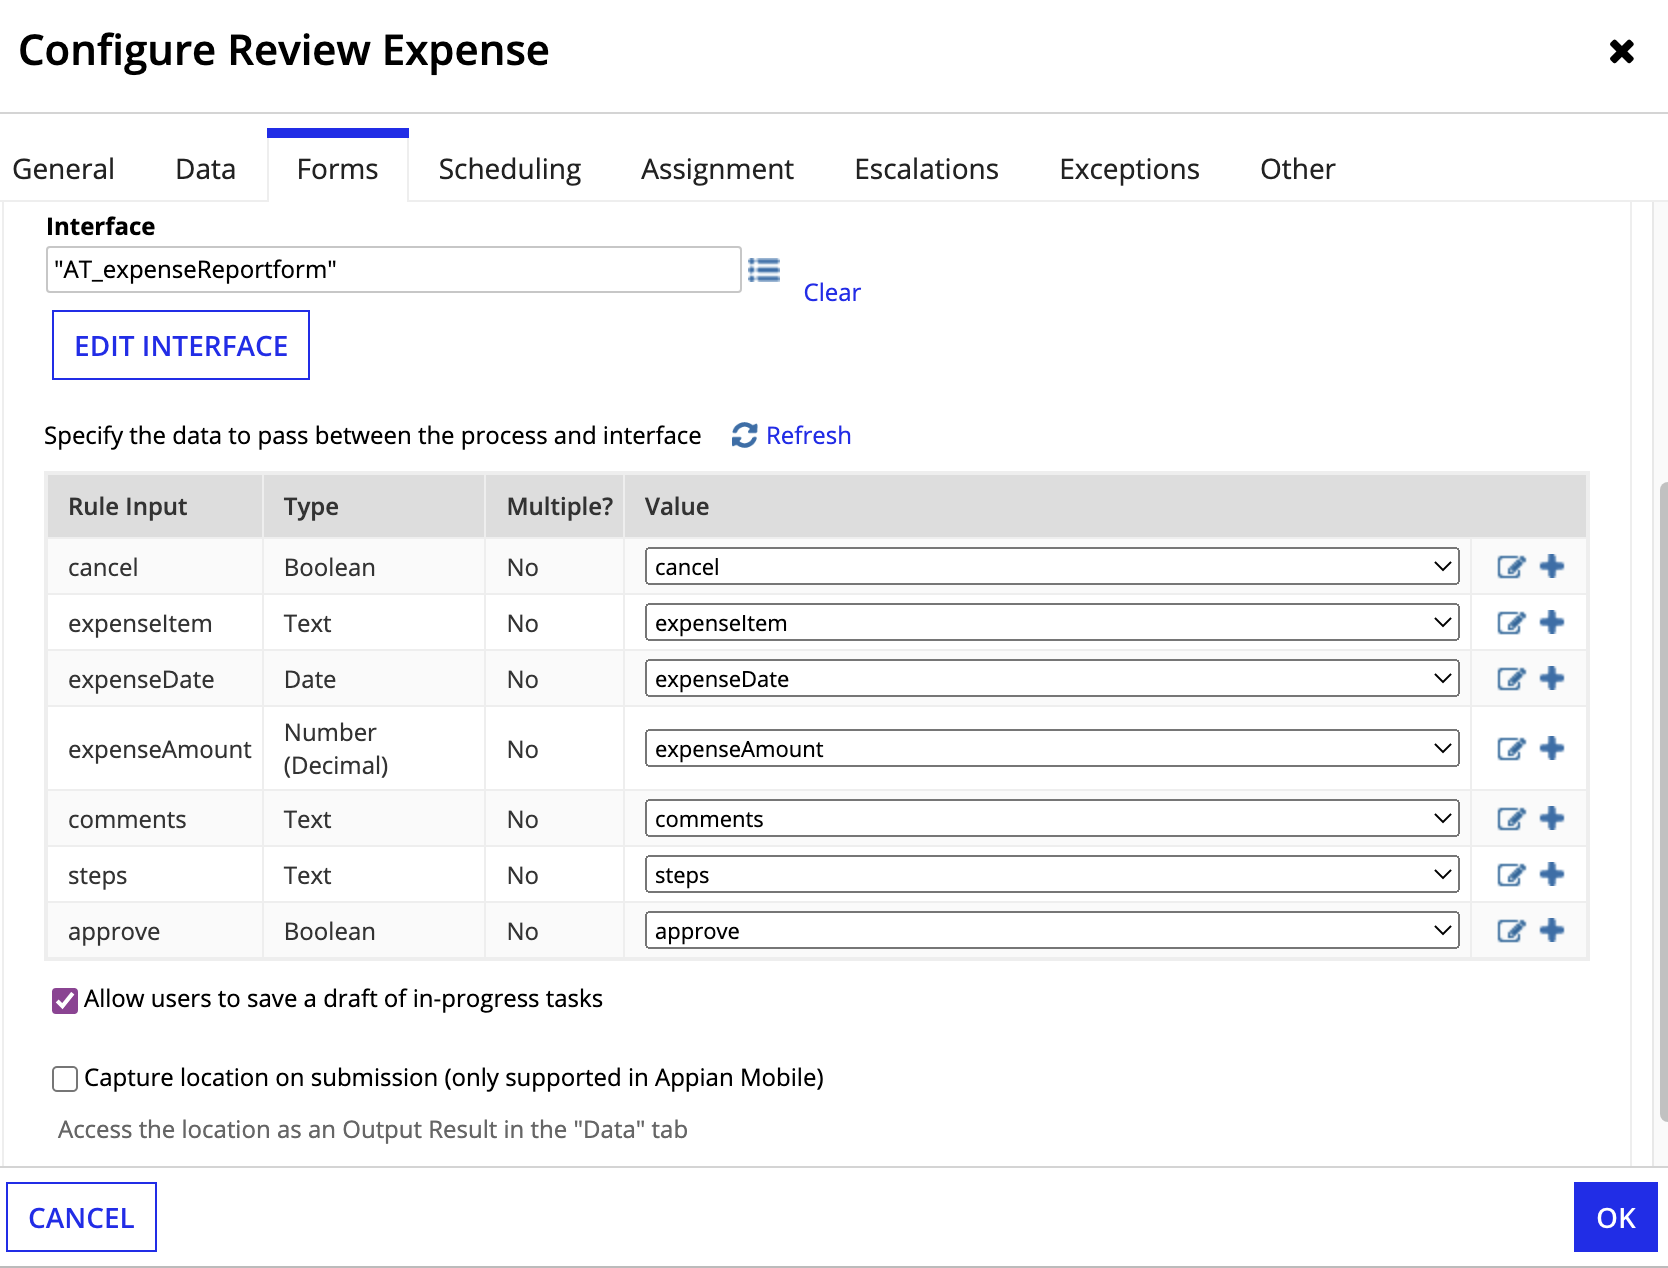
For the following inputs, click the input, then configure the specified field property:
| Input | Description |
|---|---|
| expenseItem | For Value, enter: pv!expenseItem |
| expenseDate | For Value, enter: pv!expenseDate |
| expenseAmount | For Value, enter: pv!expenseAmount |
| comments | For Value, enter: pv!comments |
| step | For Value, enter: REVIEW |
| approve | For Save into, select approve. |
On the Assignments tab, for Assign to the following, begin typing AT Managers and then select it from the auto-complete list displayed.
Note: We're selecting this group for testing purposes. Later, when you're ready to build your own process model, you can configure this input using the supervisor() function instead.
Our process model now contains two steps: one to enter the expenses information as an action, and one to approve the expenses. Now it's time to test both steps.
To test the full workflow:

Go to the Variables tab. The approve variable should be set to either True or False depending on whether you selected Approve or Reject in the review form.
For example:
Your process model now collects data from an employee, alerts the employee's manager that the data is ready for review, and saves the outcome of the manager's review to a process variable.
All of the data each user enters is available for viewing and reporting by accessing the process variables you configured. Learn more about writing data from the process variables to a data source.
