| This content applies solely to Connected Underwriting, which must be purchased separately from the Appian base platform. This content was written for Appian 23.4 and may not reflect the interfaces or functionality of other Appian versions. |
Quick and comprehensive access to customer, broker, and broker office information is a key feature of Connected Underwriting. The PARTIES dashboard contains all of this information, allowing users to confidently find the correct party they need to manage.
Note: For the purpose of this document, Customer, Broker, and Broker Office records are collectively referred to as “Party” or “Parties.”
Party records are divided into three categories:
This page describes the instructions for creating new Parties within Connected Underwriting and managing existing records.
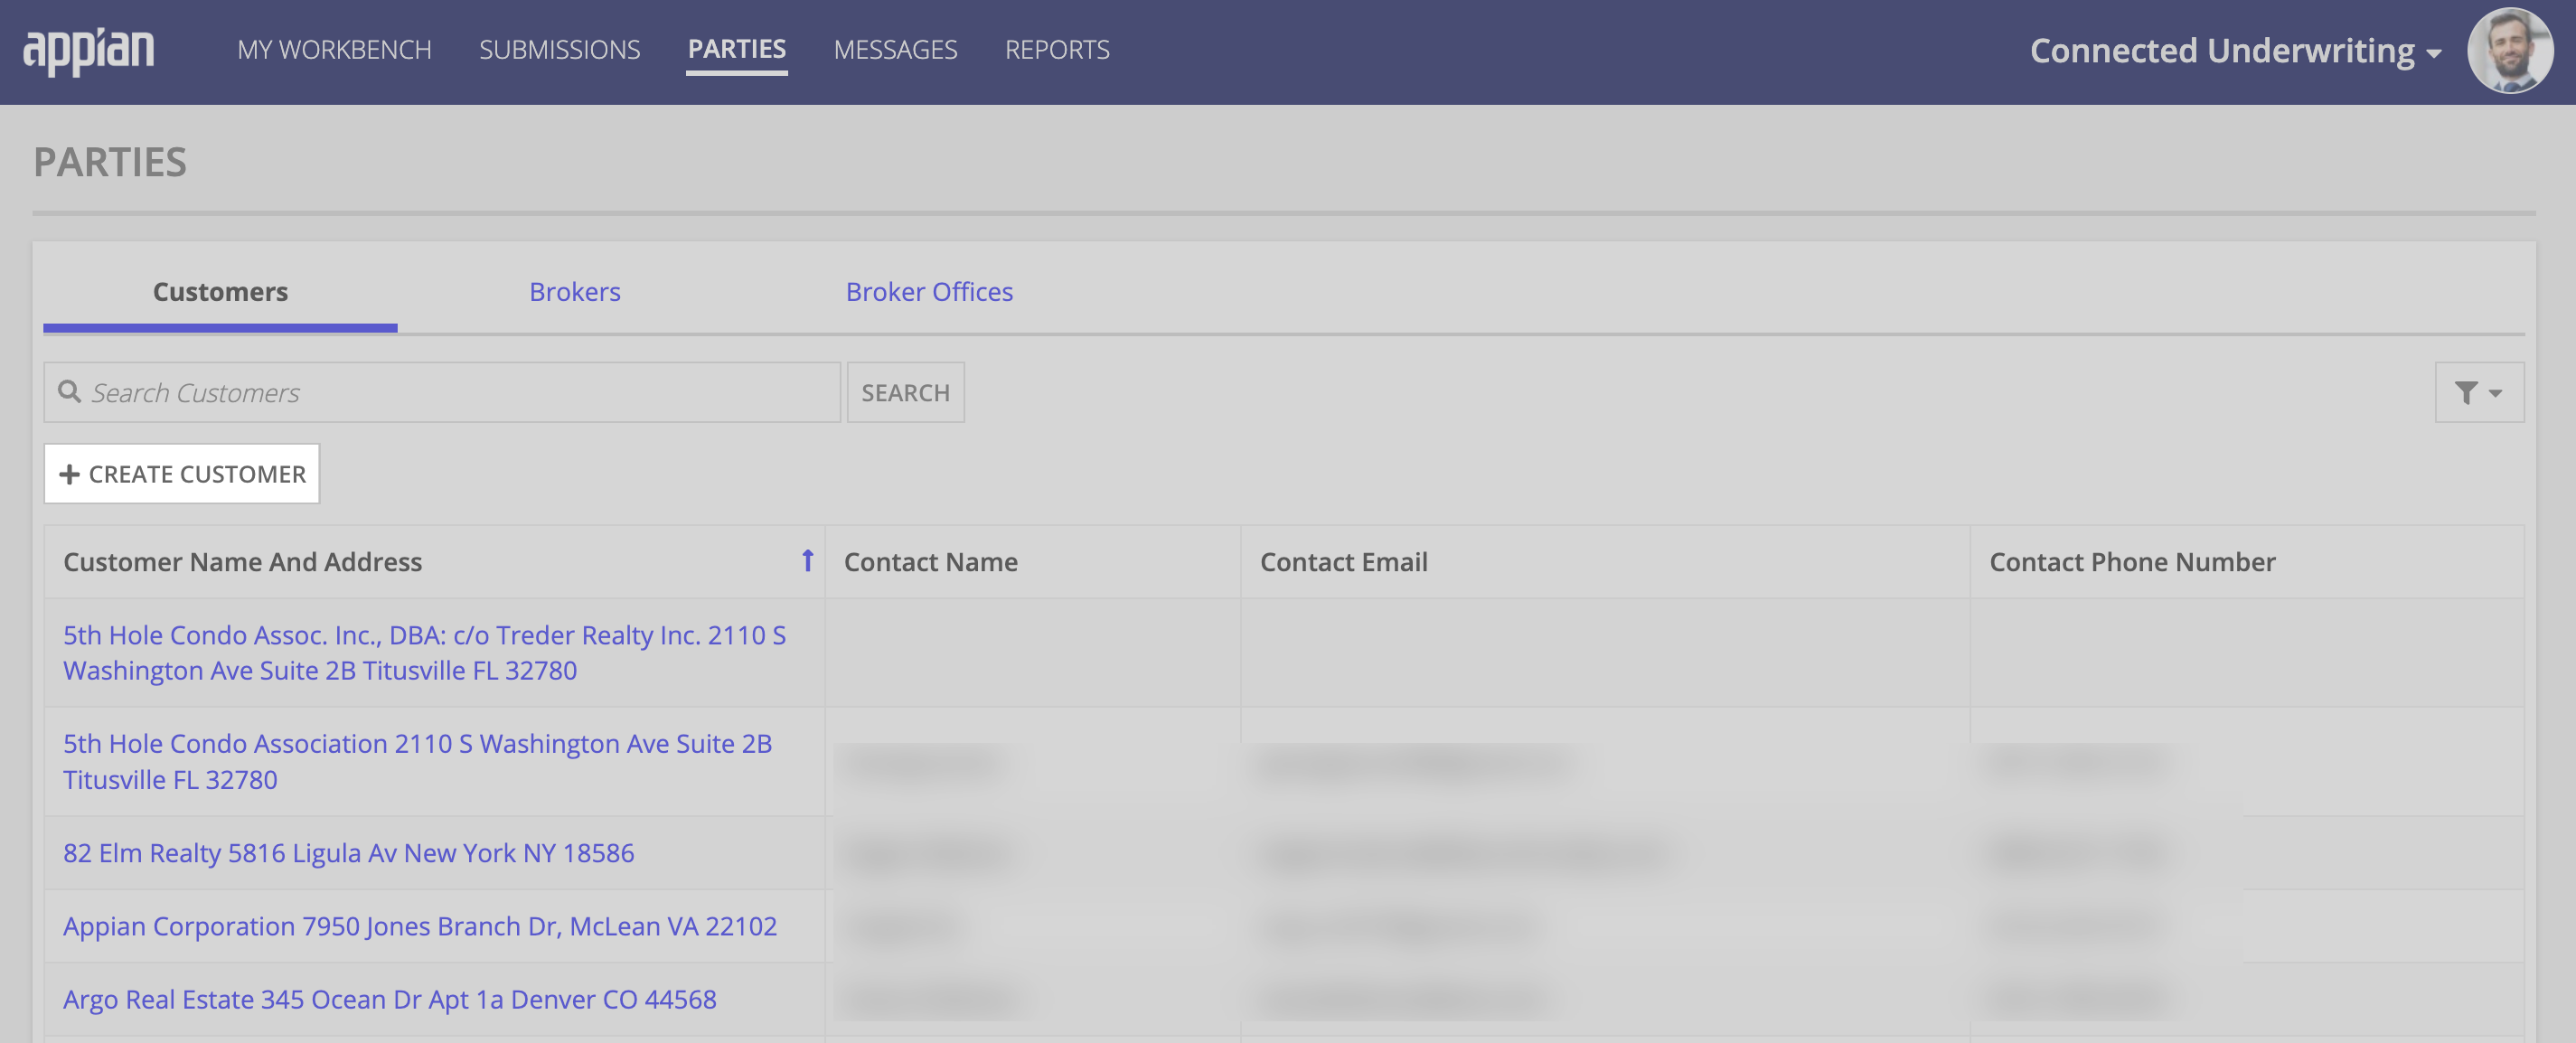
Party records can be accessed by clicking PARTIES on the navigation bar. This presents the PARTIES dashboard, featuring the PARTIES table.
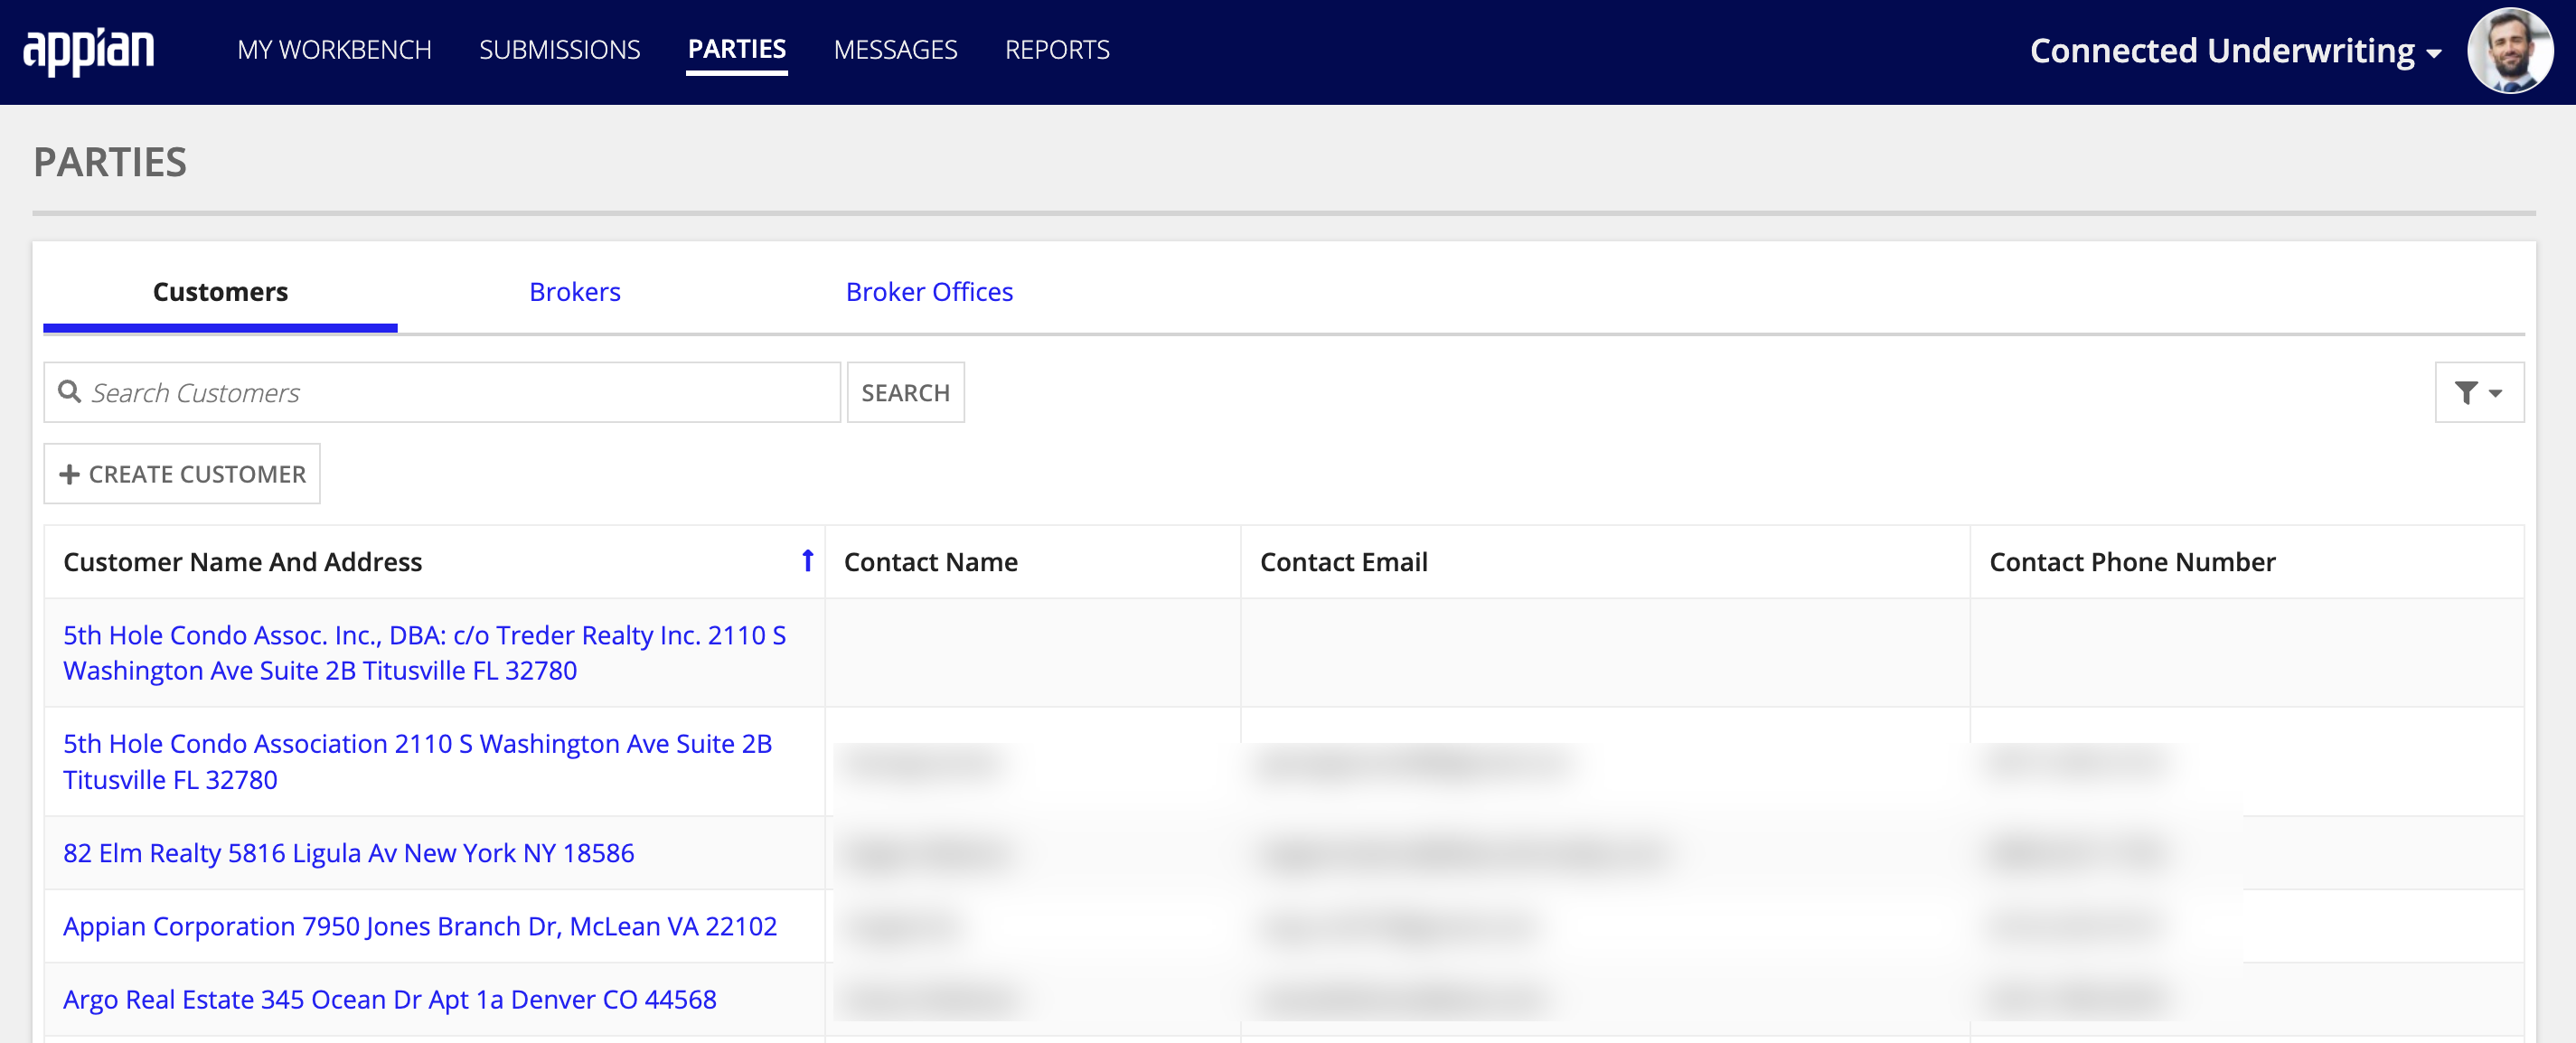
The PARTIES table features the ability to quickly switch between Customers, Brokers, and Broker Offices using the buttons located across the top row of the table. The table can also be searched by using the Search Customers field and clicking SEARCH.
Clicking a Party’s name or address displays the item for that Party. The Party item provides quick access to Customer Details, Contact Information, and Submission information.
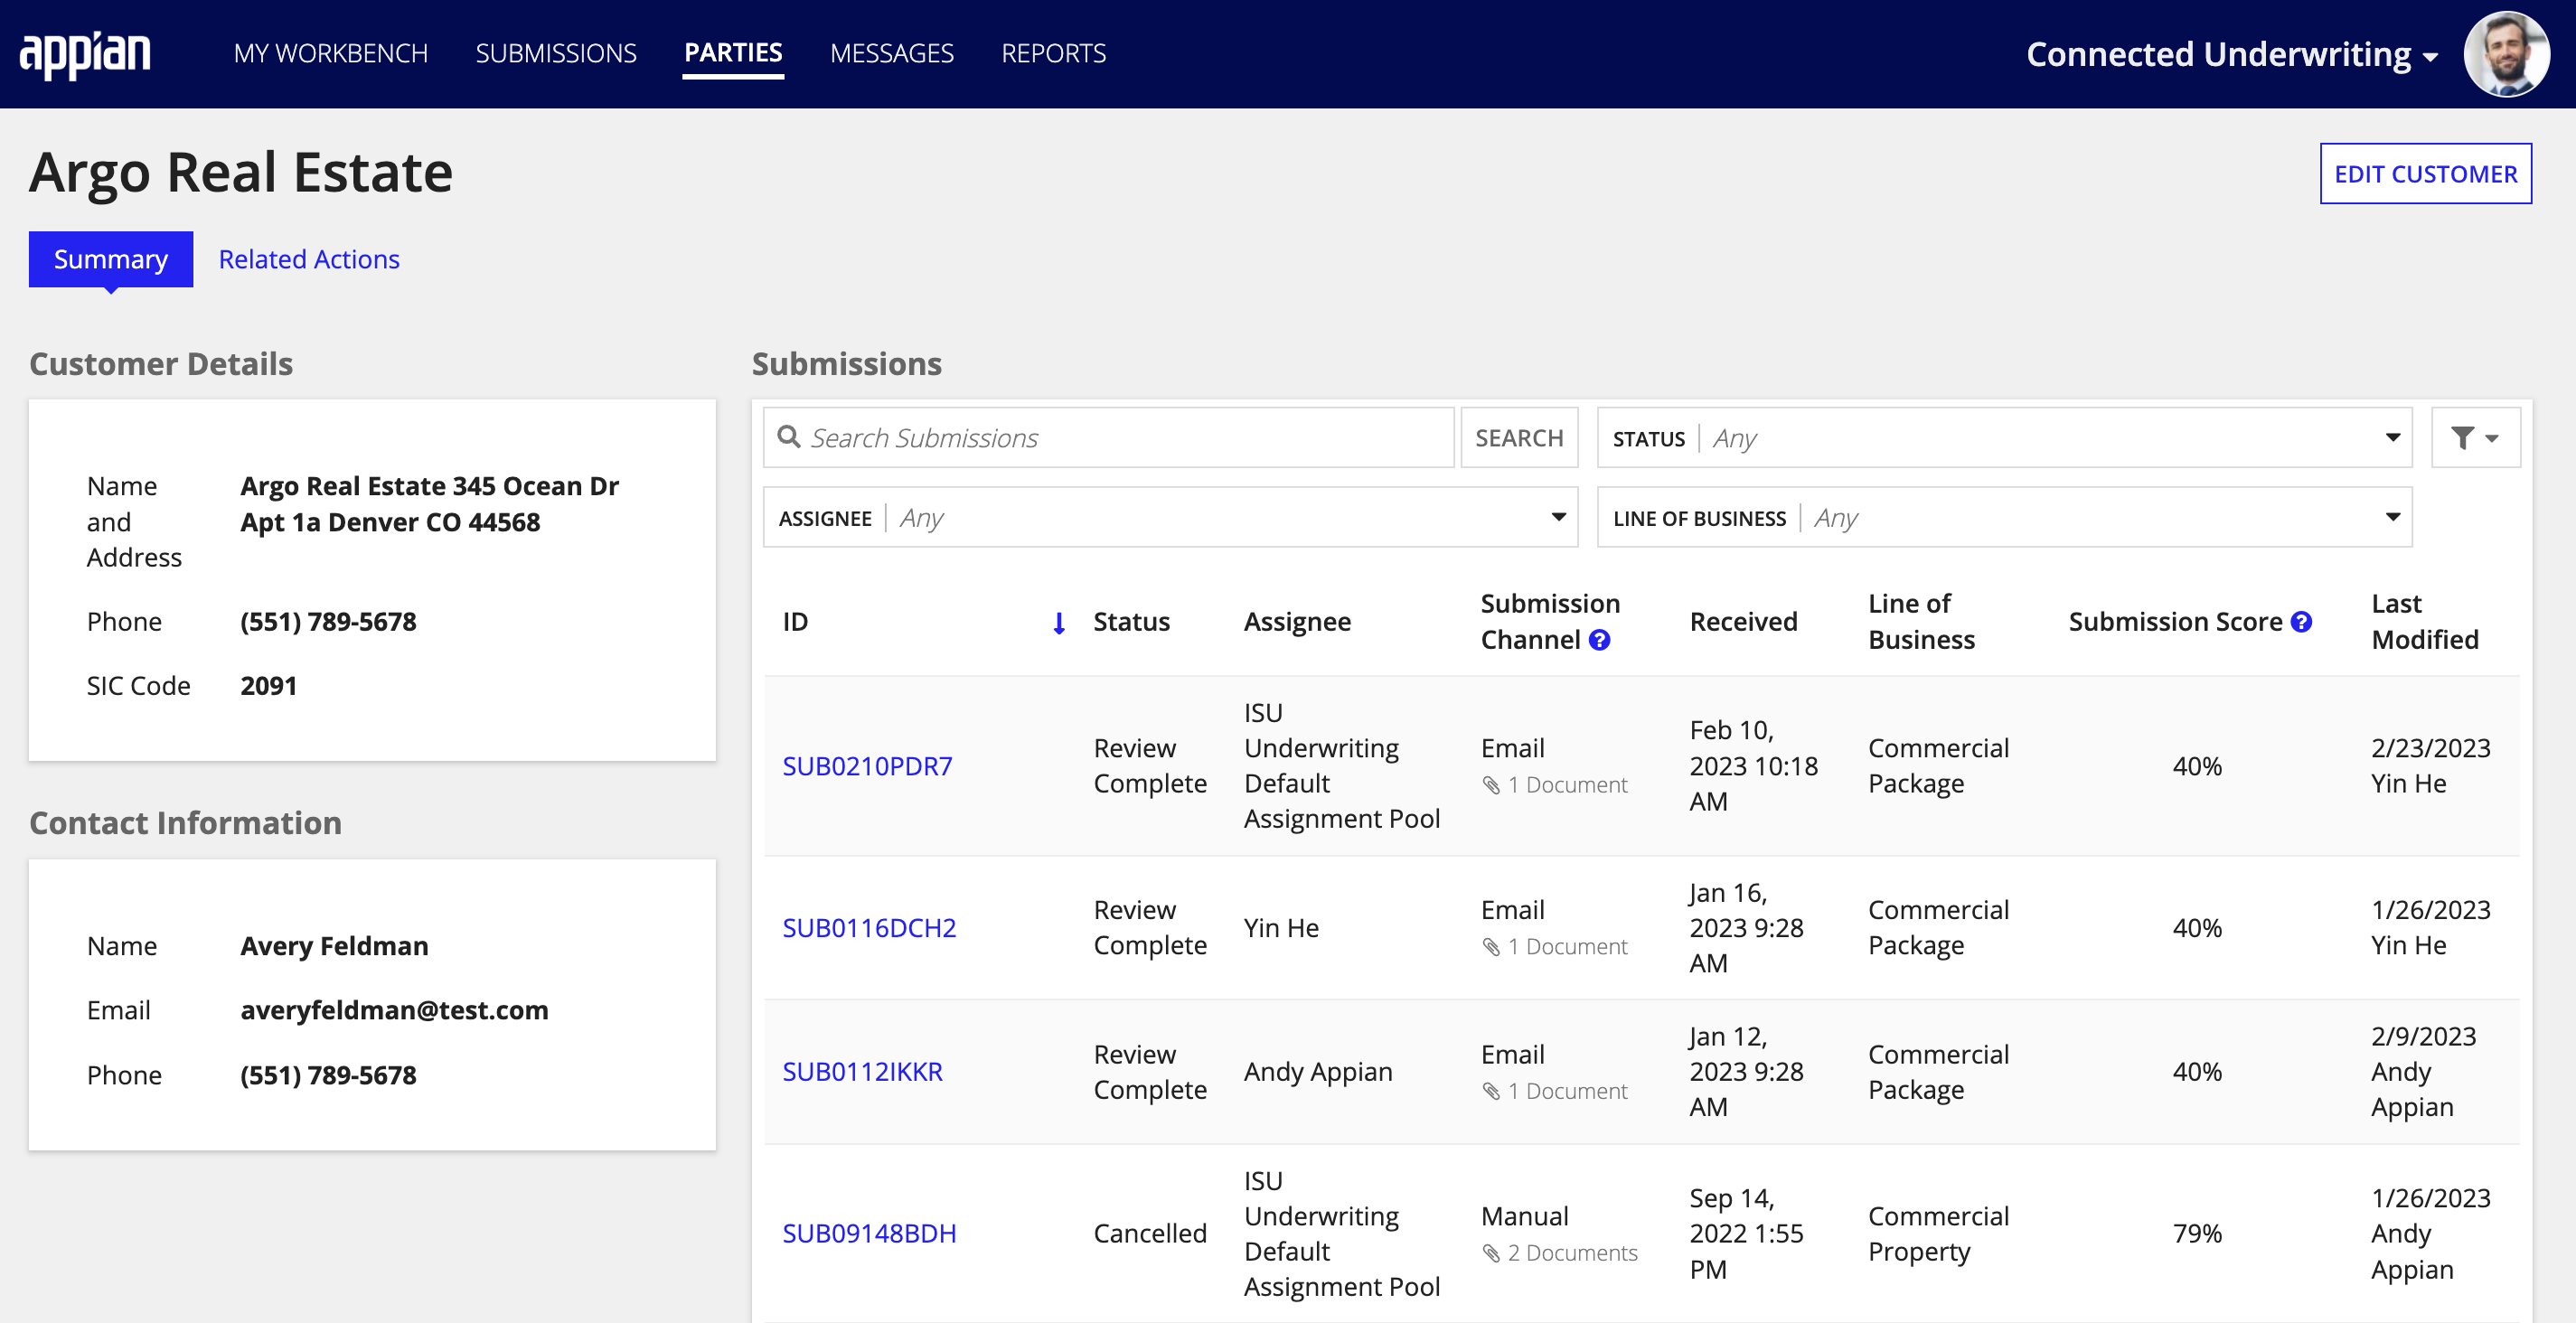
For more information on Submissions, view the Managing Submissions page.
There may be instances where details of a Party need to be updated - for example, a customer's address changing. Party Details and Contact Information are both easily updated from the Party item.
To edit Party information:
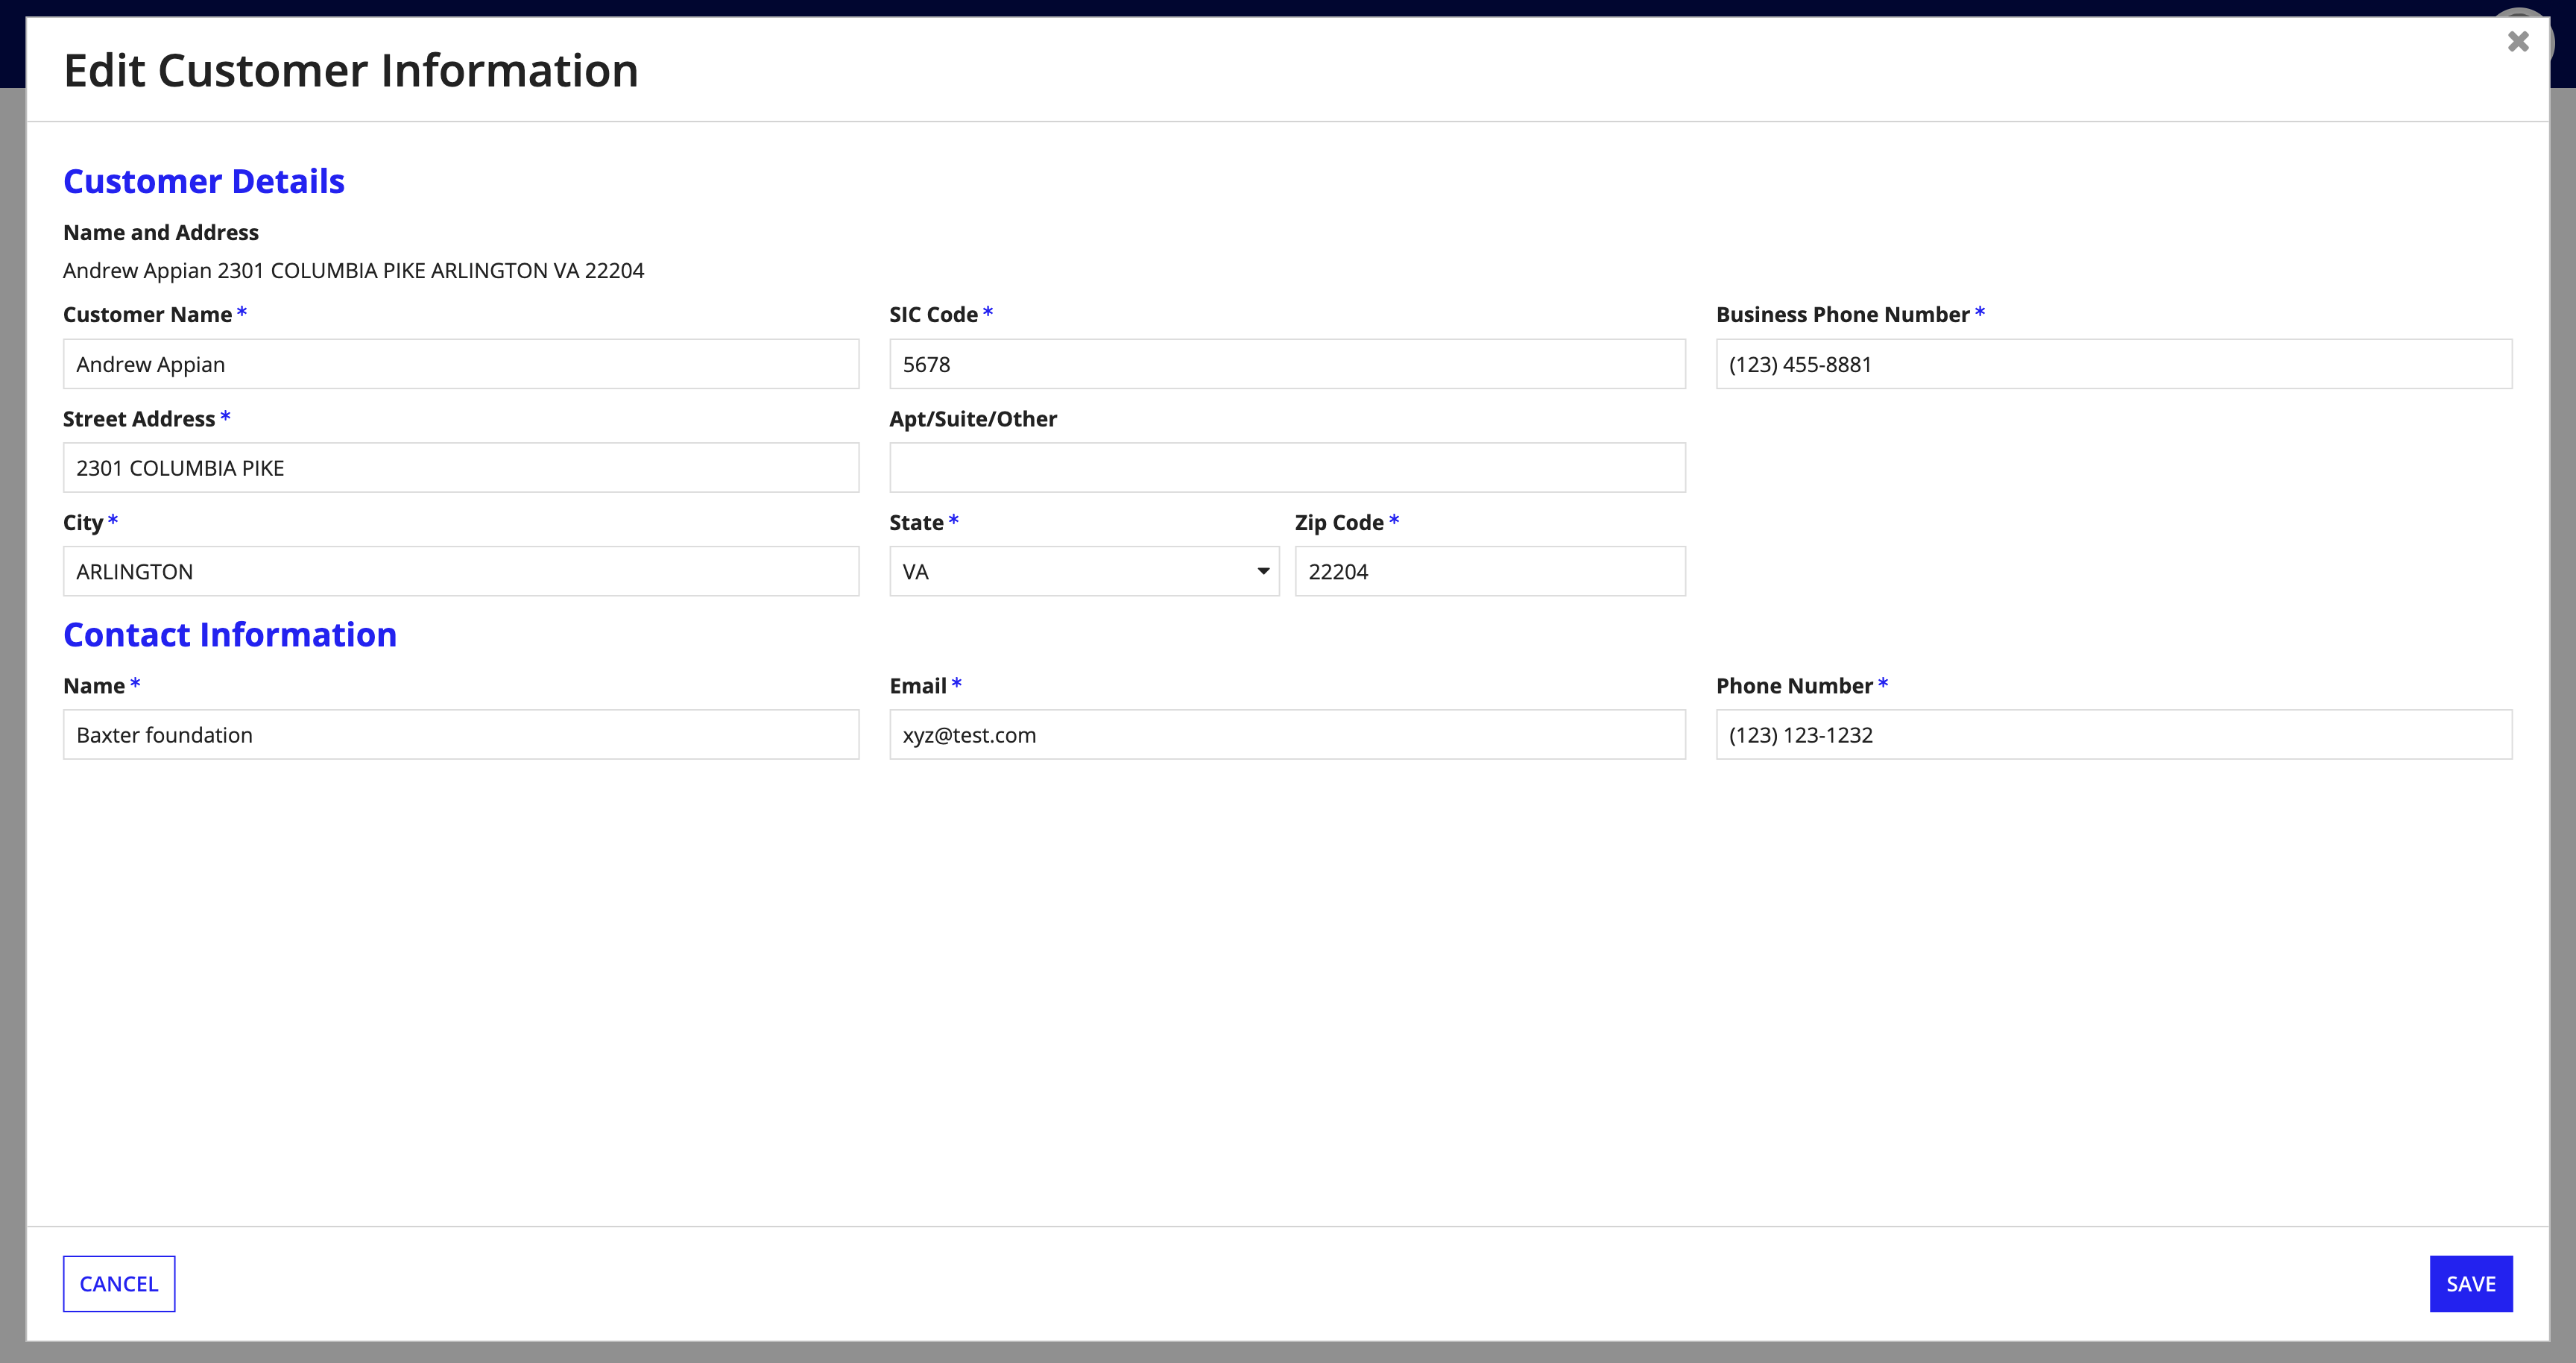
Verify that your changes are reflected in the Party Details and Contact Information panels on the Party item.
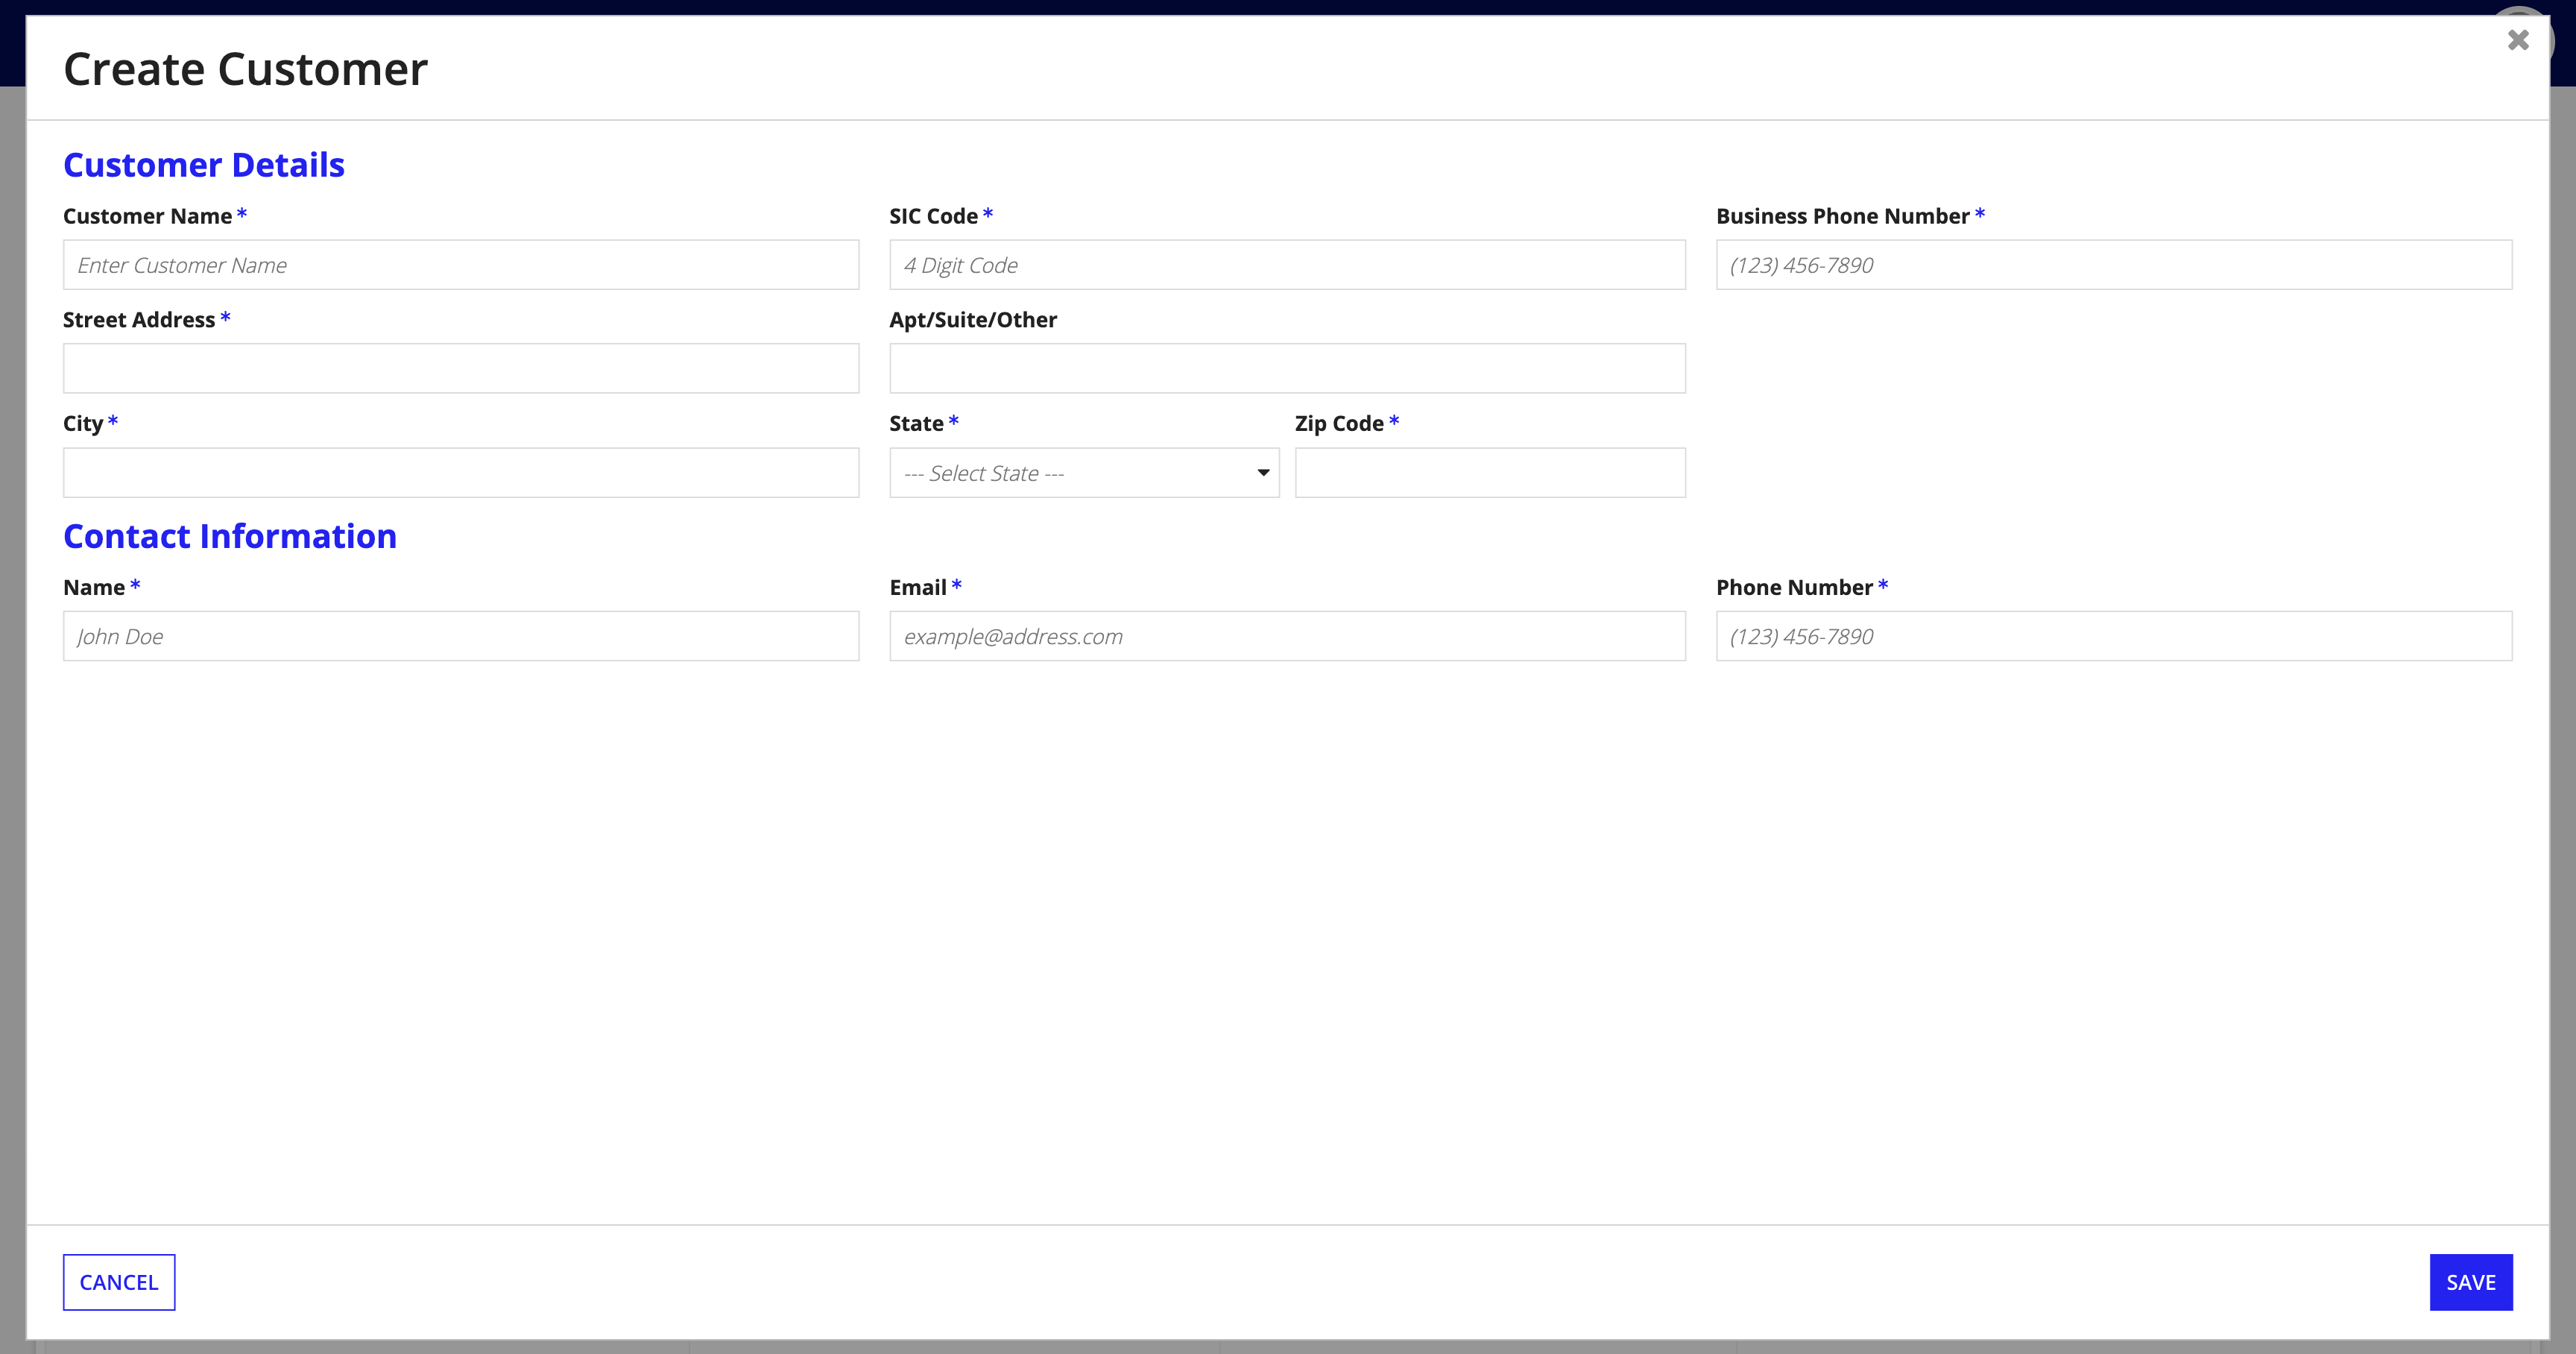
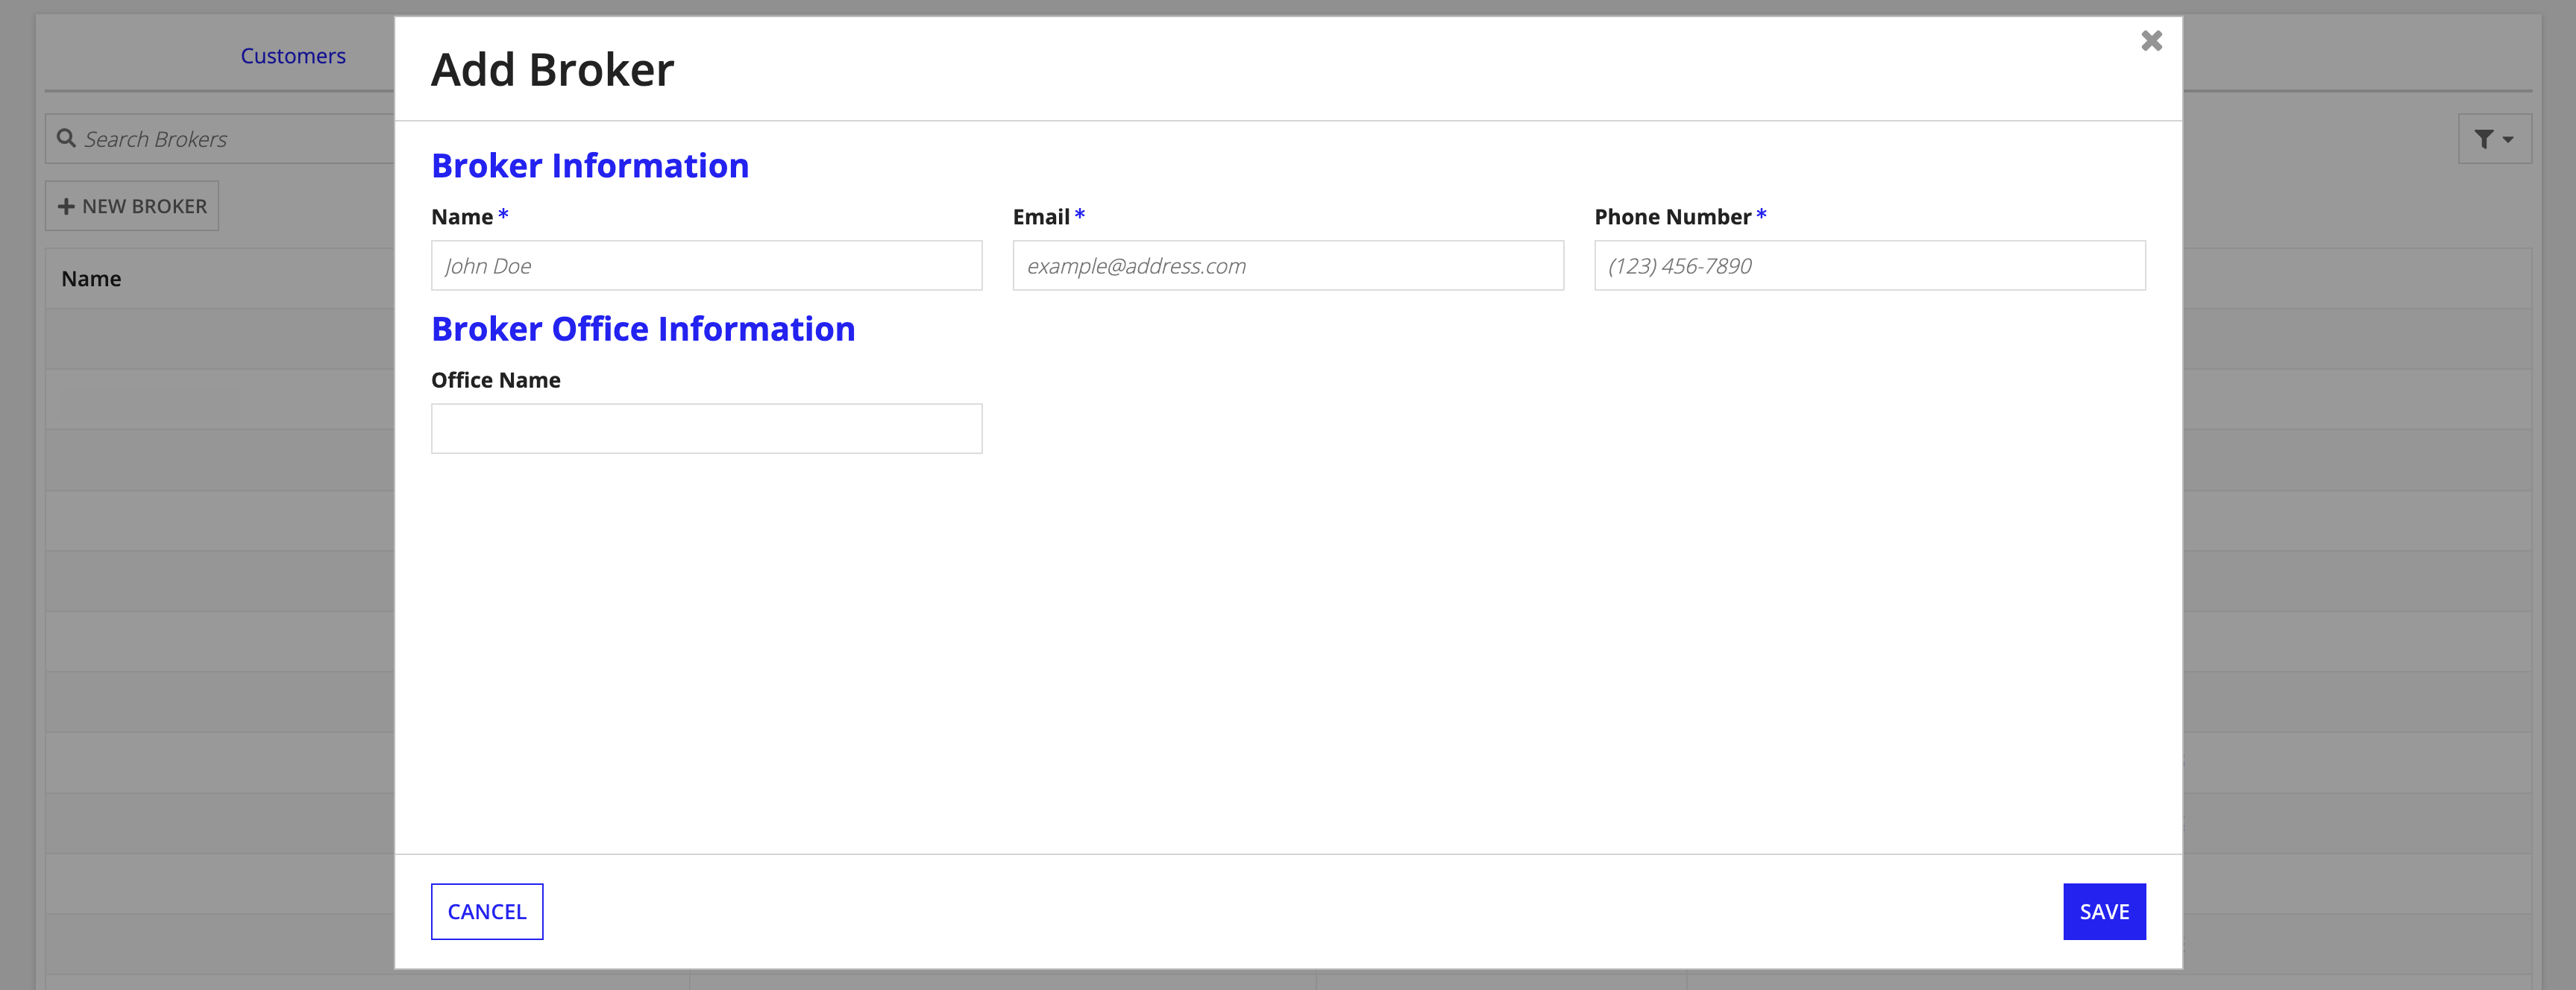
There are two ways in which you can create new Customer, Broker, and Broker Office records:
The primary way to create a new Party item is from the PARTIES dashboard.
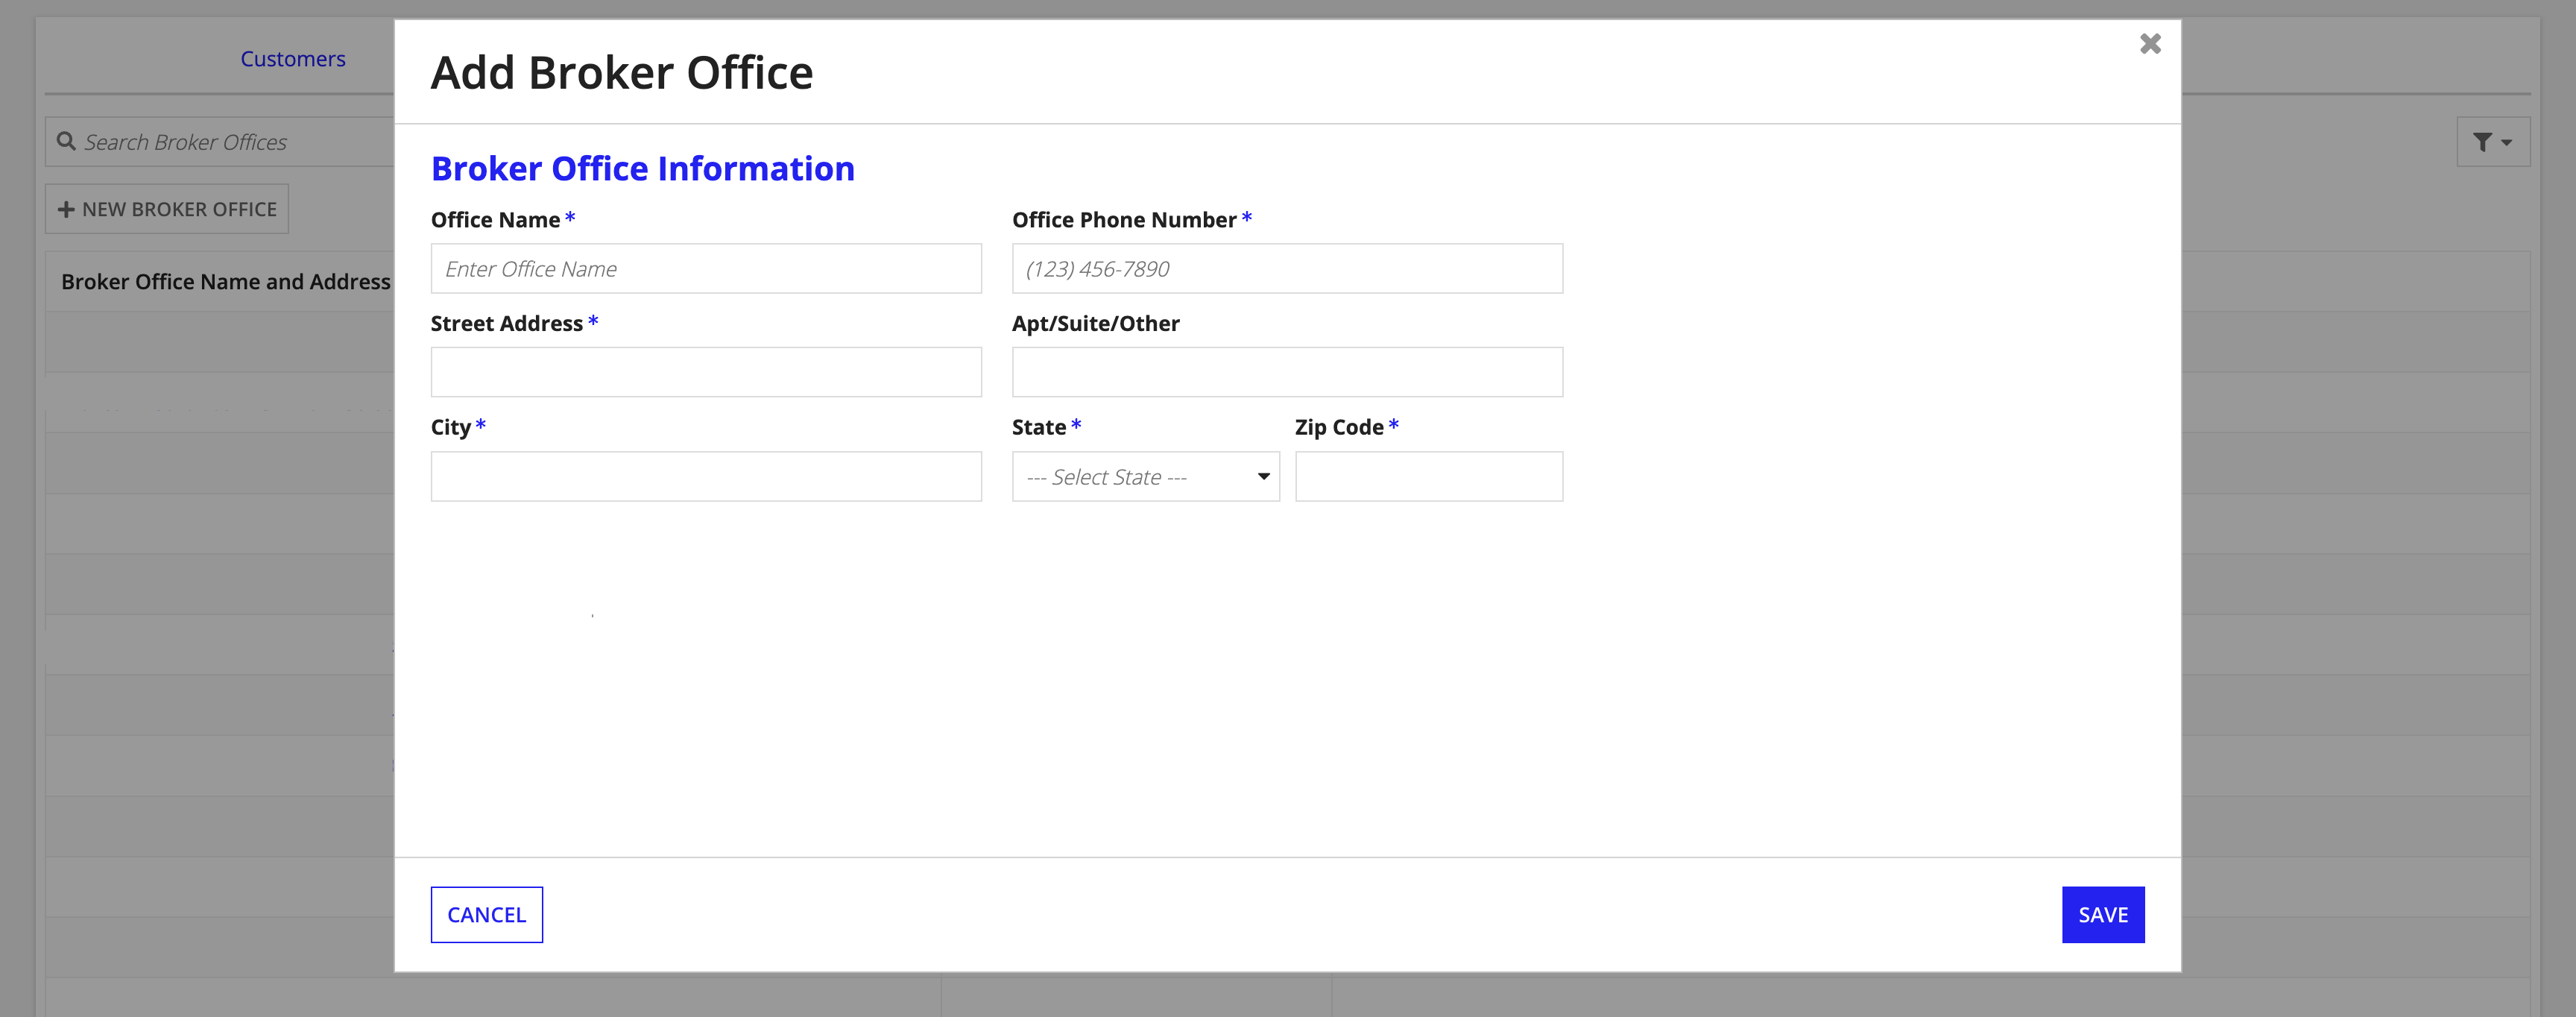
Parties can be created when creating a new Submission by indicating a Customer, Broker, or Broker Office as being “New,” and providing the appropriate Party information.
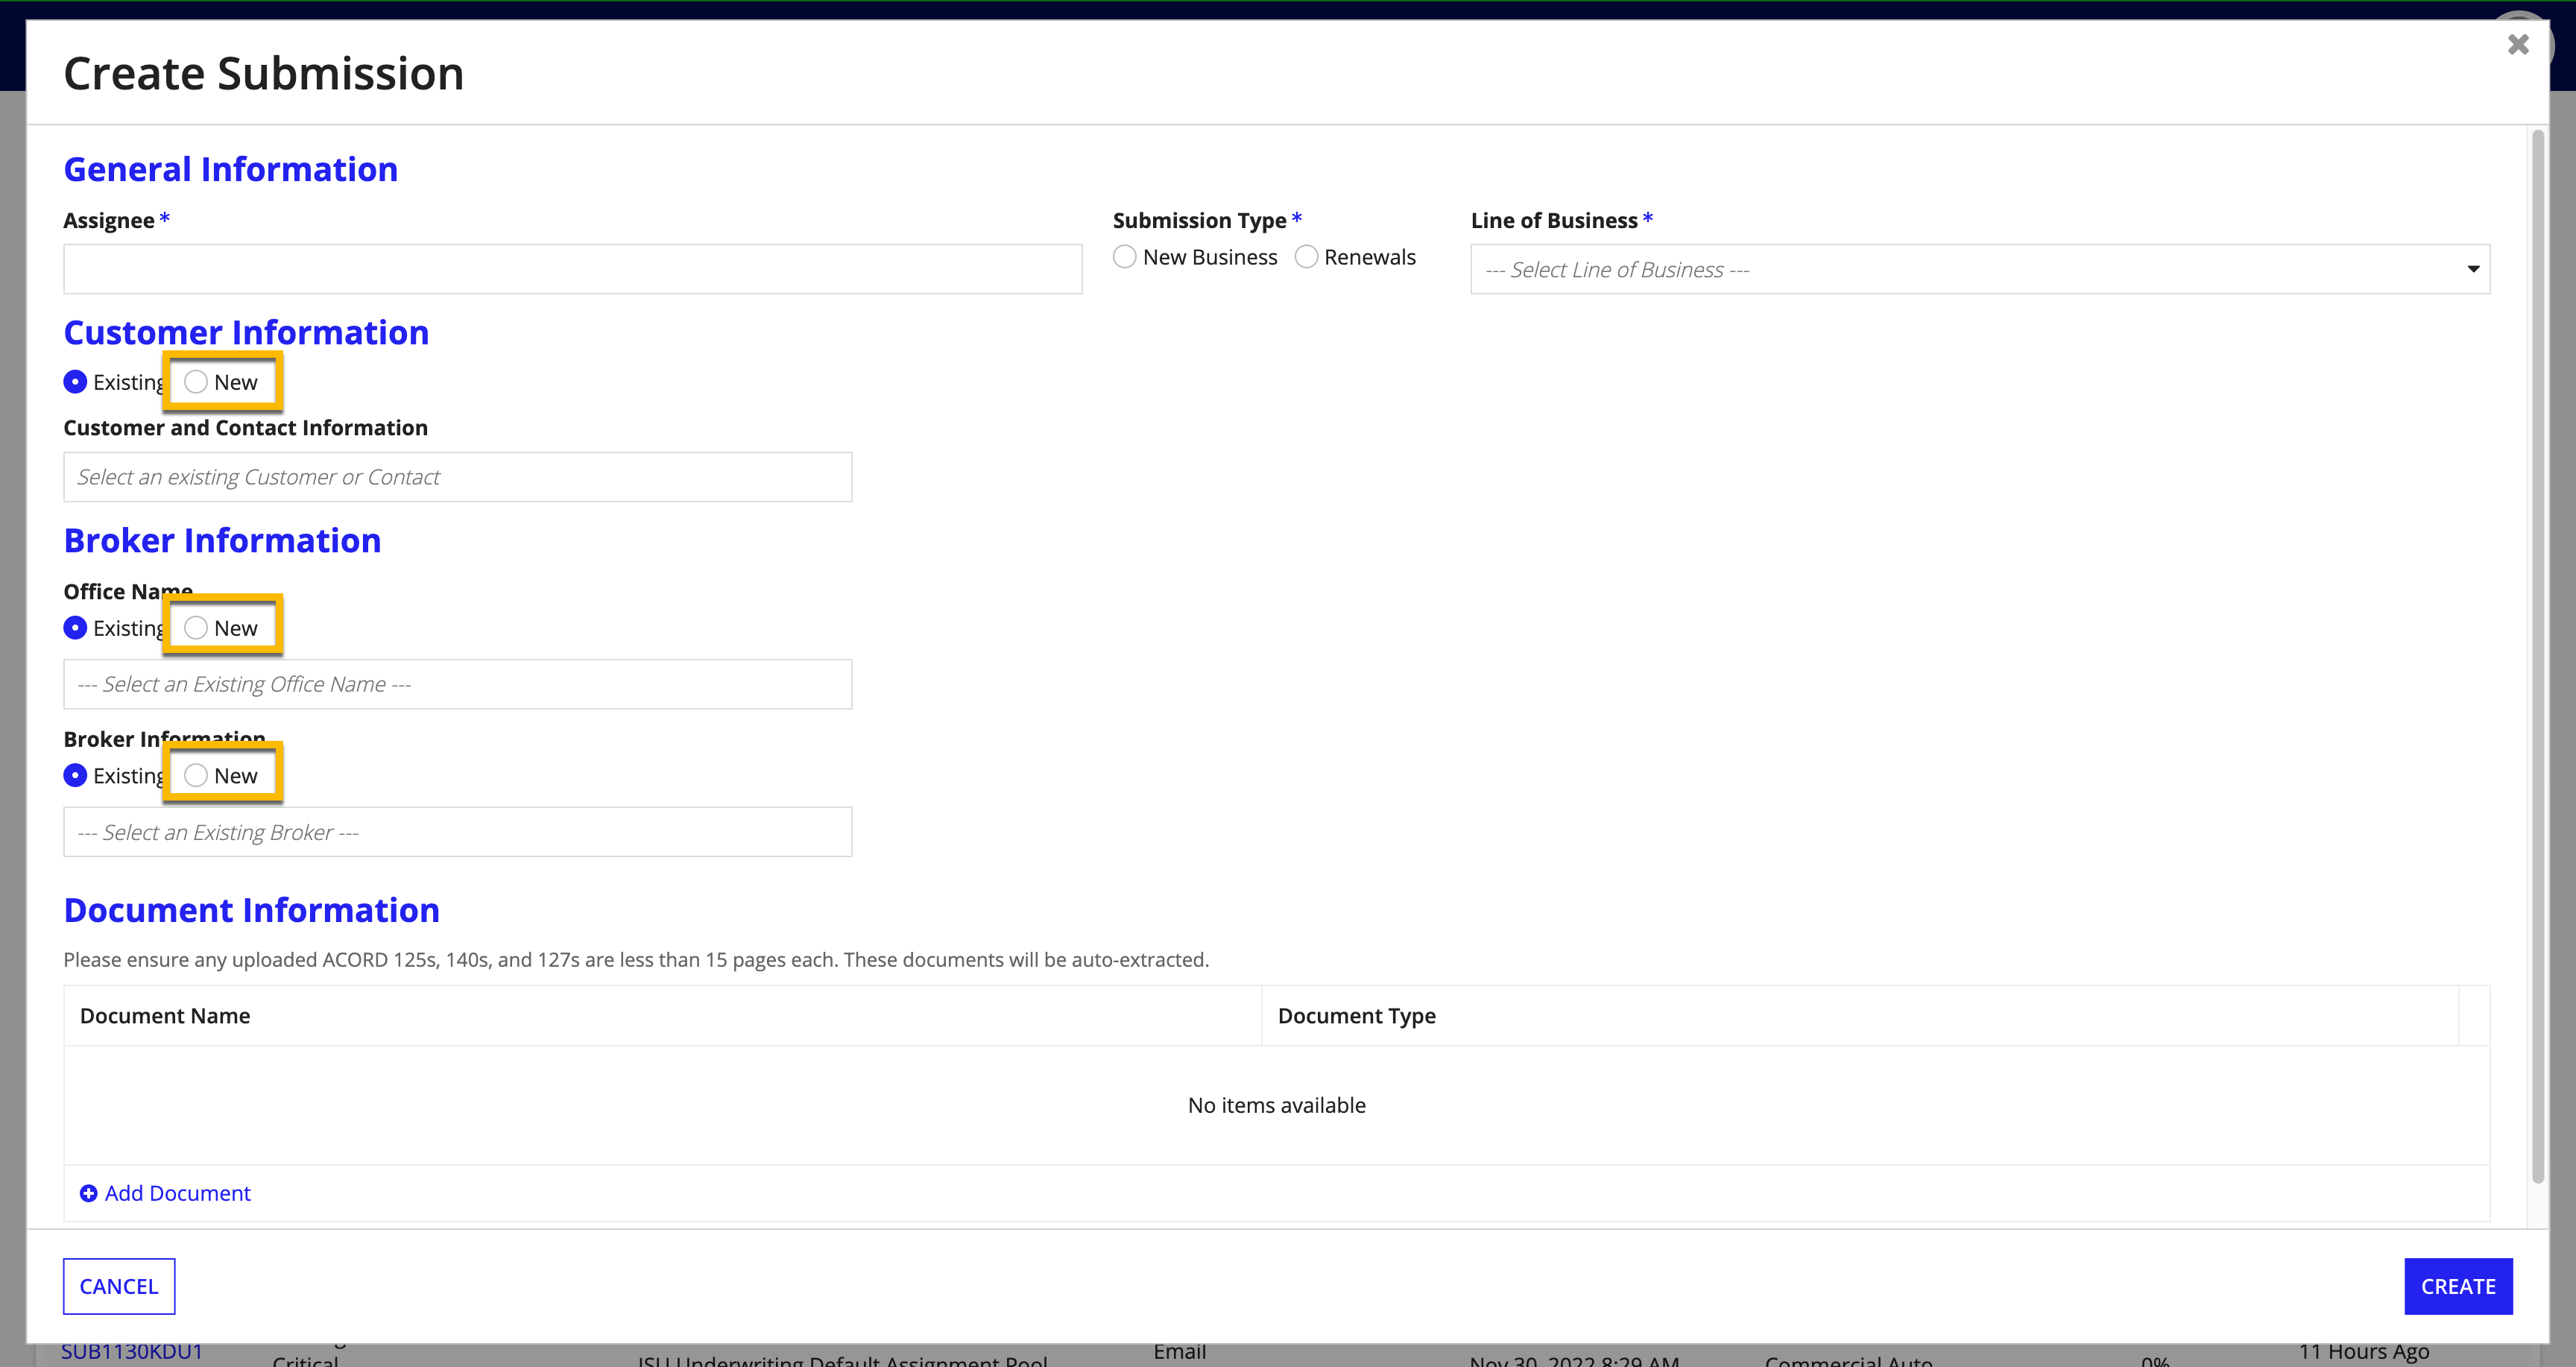
For more information on creating a new Submission, see Creating a New Submission.
Managing Parties
