
This page describes how to define a record view and style your record header.
OverviewCopy link to clipboard
After configuring the record list to allow users to interact with a set of records, you'll want to create a way for them to drill and act upon each record.
In Appian, each row of your source data will be displayed as a record. But a record is more than just a row of data–it's a combination of record views and related actions. This allows you to extend your data and consider what will users want to see and do from the context of each record.
Specifically, you can build your records around three questions:
- Who will view the record?
- What information will they want to see when they view the record?
- What will users want to do from the context of the record?
Your record views allow you to address the first two questions: who will view the records, and what do they need to see? Let's break it down with an example.
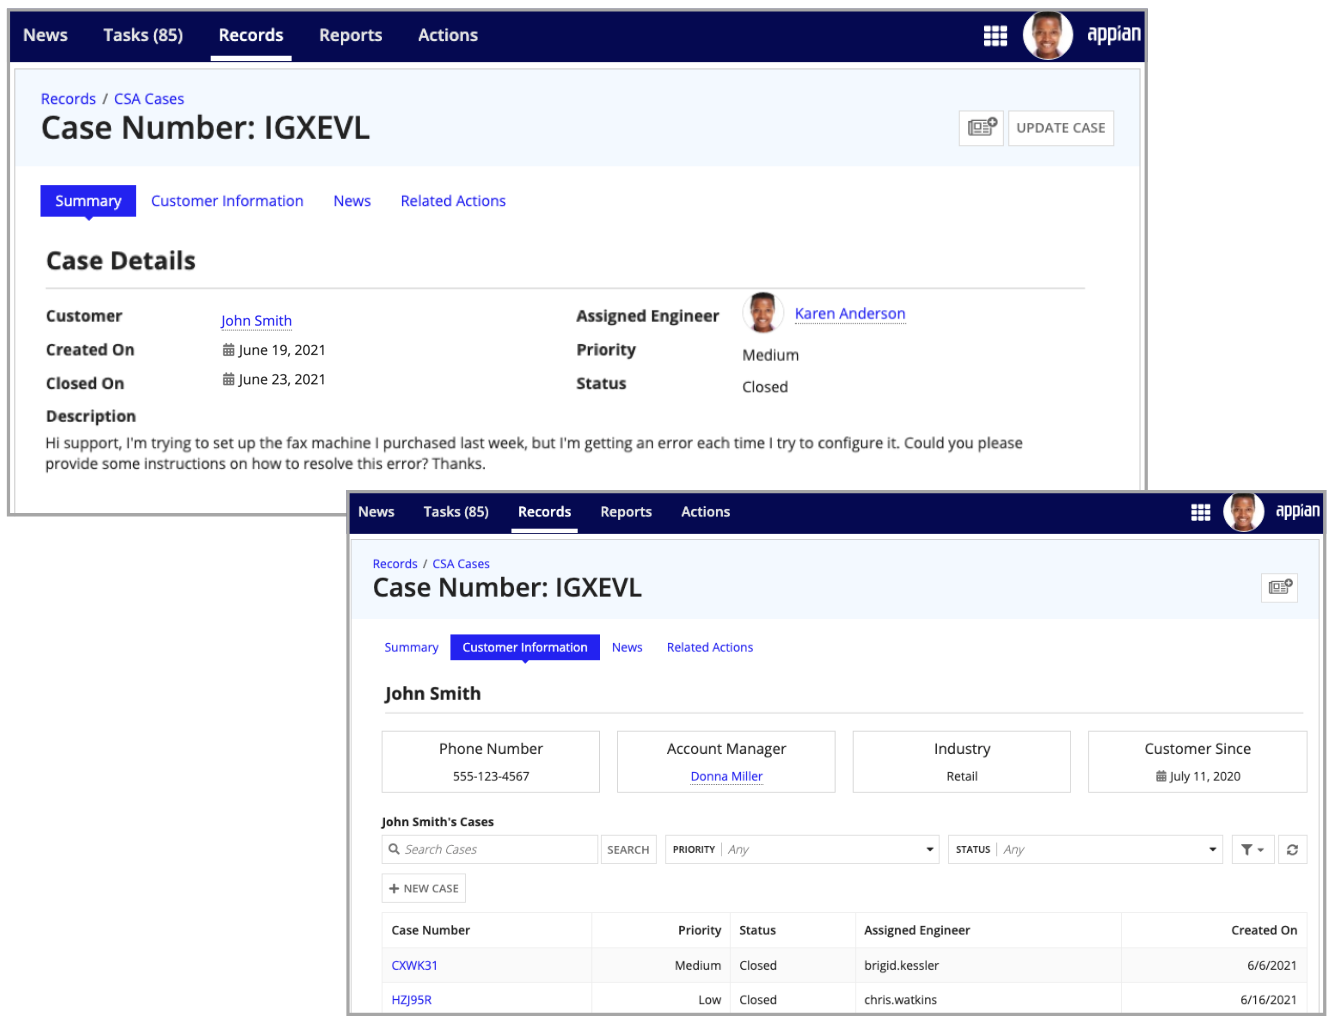
In a Support Case record type, you may have support engineers and case managers who need to view and monitor submitted cases. For each case, support engineers need to know who submitted it, when it was submitted, and what are the details about the issue. Case managers, on the other hand, want to know more about the customer who submitted each ticket.
To allow support engineers and case managers to find the information they need about each case, you can create different record views. Record views are design elements that you can use to tailor record data to a user's interests and needs. You can have multiple record views to create a more comprehensive view of your data that benefits many users.

Once you define your record views, learn how to create related actions so users can take action from the context of a record.
Tip: If you are working with an existing record type created in 20.2 or earlier, update the record type to use new record type object components, features, and functions.
Record viewsCopy link to clipboard
A record view is defined in the record type object and is composed of an interface that displays information from a single record to end users. You can have multiple record views to surface different insights about each record depending on a user's interests and needs. Learn more about creating an interface for a record view and passing the record data.
Although each record in the record type will contain the same record views, the layout and data that display for each record is determined by the expressions used to define the views.
By default, each record type will have at least three views:
- Summary view
- News view
- Related Actions view
The Summary view is displayed by default as the first view on a record. You can configure the Summary view and up to 20 additional record views on your record type.
The News and Related Actions views are configured out-of-the-box in the record type to display any news related to a record and any related actions associated with the record type. These two views are pre-configured to save development time, so they cannot be modified. However, you can choose to hide the default views if you wish.
Configure the Summary viewCopy link to clipboard
By default, each record has a Summary view. This view is always visible to users who can see the record and can be viewed by clicking on a record in the record list or in a records-powered grid.
Generate the Summary ViewCopy link to clipboard
If your record type has data sync enabled, Appian can generate your interface and configure the Summary view for you.
To generate a Summary view:
- In your record type, go to Views.
- Click GENERATE RECORD VIEW.
- Select the record types for the records you want to include. By default, your base record type is selected. If you've defined record type relationships, you can also select related record types to include related records in the view.
- Click NEXT.
-
Review the suggested values for the following properties, and change as needed:
Property Description View Name A name for the view. This name is displayed as the name of a view on the record. For the Summary view, this defaults to "Summary", but can be edited. Application The application where you want Appian to search for existing objects or create new objects to support this action. If the record type is associated with a single application, this property is read-only. If the record type is associated with more than one application in your Appian environment, the value defaults to the current application, but you can select a different application from the dropdown list. If the record type isn't associated with any application, select an application from the dropdown list. - Click NEXT.
-
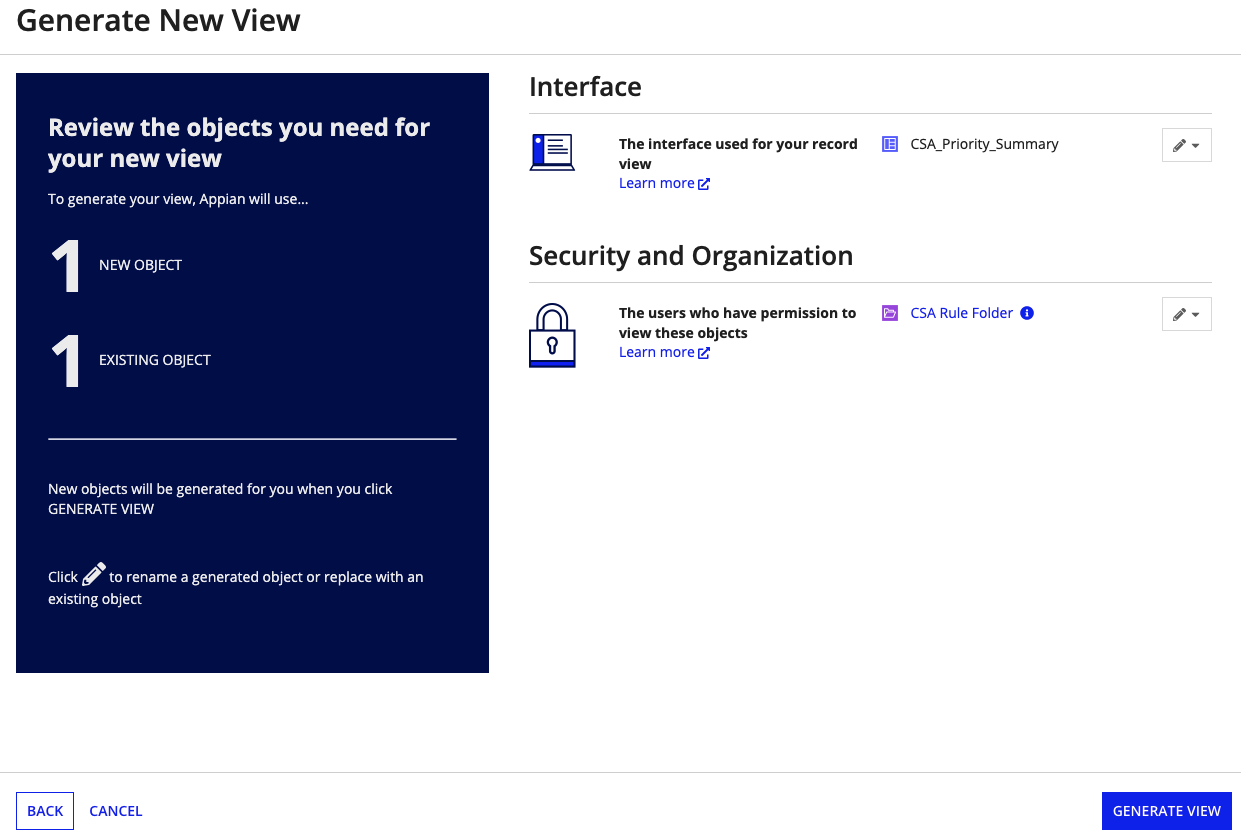
Review the objects that Appian will use for your new view, and make any necessary changes:
Object
Can
Rename
?Can
Replace
?Interface
Interface
Yes
No
Security and Organization
Group (application administrators)
Yes
Yes
Group (application users)
Yes
Yes
Rules and Constants Folder
Yes
Yes
Note: Existing objects are marked with the
 icon.
icon.If you use a new folder to store the new interface, groups will also be present in the list of objects. These groups will be used to configure security for the generated folder.
To change an object:
- Click
 next to the object.
 -
Continue as appropriate:
Change Action Rename a generated object.
- Click Rename from the dropdown menu. The object name becomes an editable text box.
- Enter a new name in the text box.
Replace a generated object with an existing object.
- Click Replace with existing object. The object name becomes a dropdown list.
- In the object dropdown list, select an existing object.
Replace an existing object with a generated object.
- Click Replace with generated object. The object name becomes an editable text box.
- Enter a name for the generated object.
- Click
- Click GENERATE VIEW. Appian generates the view, creating and/or configuring the objects you reviewed. For details about the generated interface, see Generated interfaces.
- Click CLOSE. Your new Summary view displays in the Record Views table.
The generated interface object will populate the Interface property of the view, and will pass in the rv!record variable to display your record data.

For more information on rv!, see Reference record values in the record type. You may open the interface object to reorganize or edit it.
Generated interfacesCopy link to clipboard
The generated interface will include a Section layout for each record type you selected in the Data Included in Your Record View step.
The content of each section will depend on the type of relationship between the base record type and the related record type:
| Relationship with the base record type | Display format |
|---|---|
| Self | All record fields organized in columns. If you configured record events, the record's events are displayed in an event history list component. |
| One-to-many relationship | All related record fields displayed in a read-only grid. |
| Many-to-one relationship | All related record fields organized in columns. |
| One-to-one relationship | All related record fields organized in columns. |
The generated interface inherits security from the folder where it's stored. If your interface is stored in a folder Appian generated for you, the inherited security is as follows:
| Group | Permission Level |
|---|---|
| Application administrators group you selected | Administrator |
| Application users group you selected | Viewer |
Manually define the Summary viewCopy link to clipboard
To manually define the Summary view:
- In your record type, go to Views.
- Click CONFIGURE VIEW MANUALLY.
-
For View Name, keep the Default ("Summary") or select Expression to enter an alternate name you want the user to see.
Note: If you change the name of the view, it will still be called "summary" in the view's URL.
- For Interface, enter an expression that calls your Summary view. For example, the expression
rule!AT_EmployeeSummary(record: rv!record)is used to call the interface and pass in the record. - (Optional) Configure related action shortcuts for the view:
- Under Related Action Shortcuts, select the related actions you want to display as buttons for this view. This section is blank if you haven't added any related actions to the record type yet.
- Under Open Actions In, select whether the related actions for this view open in a dialog, a new tab, or the same tab.
Tip: You can bulk update this setting for all views. Learn how to bulk update launch styles for related actions.
- Click OK.
- Click SAVE CHANGES.
Add a record viewCopy link to clipboard
In addition to the Summary view, you can add up to 20 record views. You can create additional views using the GENERATE RECORD VIEW button, or by adding the views manually:
To manually add another view:
- In your record type, go to Views.
-
In the Views section, click ADD VIEW MANUALLY.
Note: This button will only appear after you configure a Summary view.
- For View Name, enter the name you want the user to see. This is an expression field, so encase text values in quotes.
- For Interface, enter your interface expression or an expression rule that calls your interface. For example:
rule!AT_Employee_departmentView(record: rv!record). - (Optional) Configure related action shortcuts for the view:
- Under Related Action Shortcuts, select the related actions you want to display as buttons for this view. This section is blank if you haven't added any to the record type yet.
- Under Open Actions In, select whether the related actions for this view open in a dialog, a new tab, or the same tab.
Tip: You can bulk update this setting for all views. Learn how to bulk update launch styles for related actions.
- By default, the Security is set so that all users who can see the record can see the view. To modify the security, go to Views and Actions Security.
- Click OK.
- Click SAVE CHANGES.
Bulk update launch styles for related actionsCopy link to clipboard
The Open Actions In property for each view controls whether the related action shortcuts for that view open in a dialog, a new tab, or the same tab.
You can configure this property one view at a time. You can also bulk update this property for all actions in all views at the same time.
To bulk update the Open Actions In property for all your views:
- In your record type, go to Views.
- In the Views section, click UPDATE LAUNCH STYLES.
-
Under Open All Actions In, select whether the view opens in a dialog, a new tab, or the same tab.
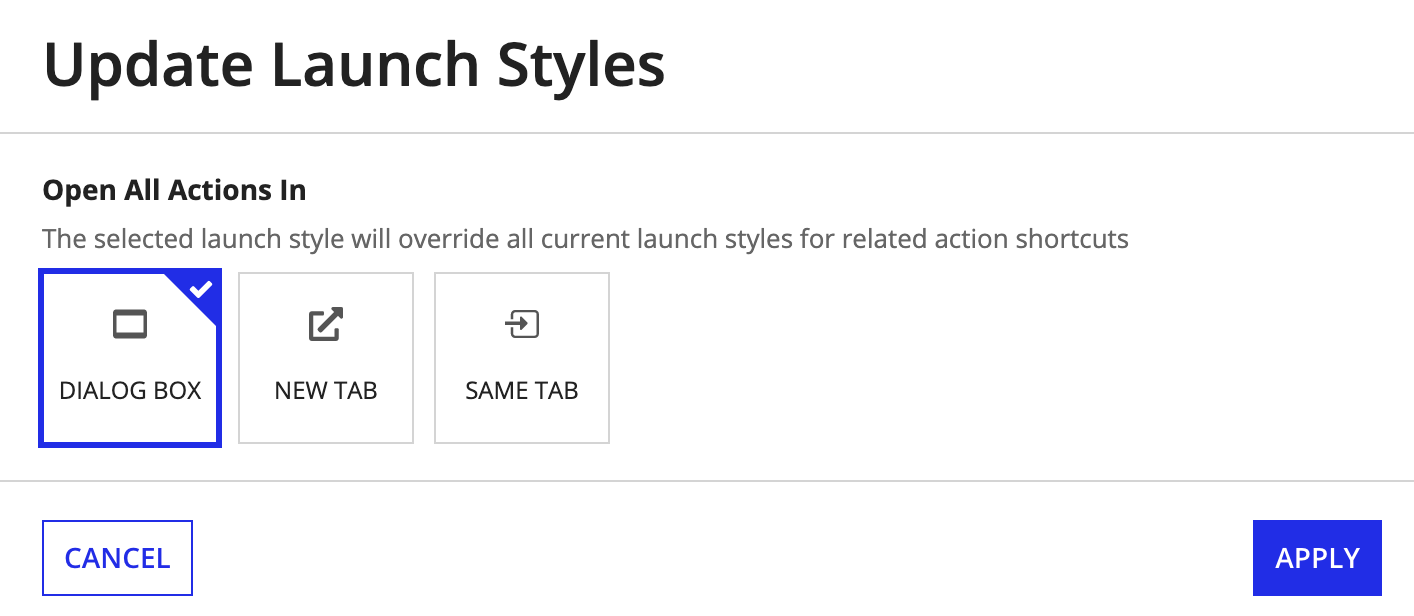
- Click APPLY. Appian sets the Open Actions In value for all related action shortcuts in all views to the option you selected.
-
Click SAVE CHANGES.
Tip: After bulk updating, you can change the Open Actions In property in individual views or again in bulk as needed.
Configure the display of default record viewsCopy link to clipboard
A record type has two record views that are configured out-of-the-box and displayed by default on each record:
- News view: This view shows the 20 most recent news events related to that record. Users can view and add comments to these news entries.
- Related Actions view: This view displays all related actions configured in the record type. Users can initiate related actions from this view.
Since these record views are auto-populated with related news events and related actions, they cannot be modified.
There may be cases when you don't want to display the News view or the Related Actions view on your records. For example, you may want to hide these views if your application doesn't utilize the News feed, or you've used the record action component to display related actions on your interfaces.
When you don't want to display the News or Related Actions views, you can hide them to prevent users from navigating or seeing these views on the records.
To control whether or not Appian displays the News or Related Actions view for the record type:
- In your record type, go to Views.
- Under Default Views, select or clear the Show News view and Show Related Actions view checkboxes.
When you choose to hide either of these views, users will not be able to see or interact with the view anywhere in the application.
For example, if you configure a site to display the News view, but you've hidden the view in the record type, the News view will not display on the site.
Hiding the Related Actions view does not determine the security of the related actions. Users can still perform related actions from related action shortcuts, the record action component, or by navigating to the URL for that related action if they have the proper security permissions to do so.
To restrict permissions on related actions, configure a security expression on the record action or modify the security on the underlying process model.
Style the record headerCopy link to clipboard
Once you've created your record views, the last step is to configure the record header.
The record header appears at the top of each record view and contains the record's title, breadcrumbs, and related actions. You can also style your record header by configuring a header background.
Record titleCopy link to clipboard
The record title appears at the top of each record view, in record tags, and in the hover card for that record.
The way you define the record title will vary depending on whether you plan to display your list of records as a grid-style or feed-style list.
For grid-style record lists:
- Go to the Views page of the record type.
- In the Header section, select one of the following options:
- Guided Configuration: Select a field from your record to use as the title. By default, the selected field is the first non-primary Text field from your record type.
Note: This option is only available for record types with data sync enabled.
- Expression: In the Record Title field, use the Expression Editor to define an expression for the title. For example, the expression
rv!record[recordType!CSA Customer.fields.firstName] & " " & rv!record[recordType!CSA Customer.fields.lastName]will display the first name and last name of the customer record.
- Guided Configuration: Select a field from your record to use as the title. By default, the selected field is the first non-primary Text field from your record type.
- Click SAVE CHANGES.
For feed-style record lists, the record title comes from the title parameter in a!listViewItem when you define the record list. Learn more about the a!listViewItem() function
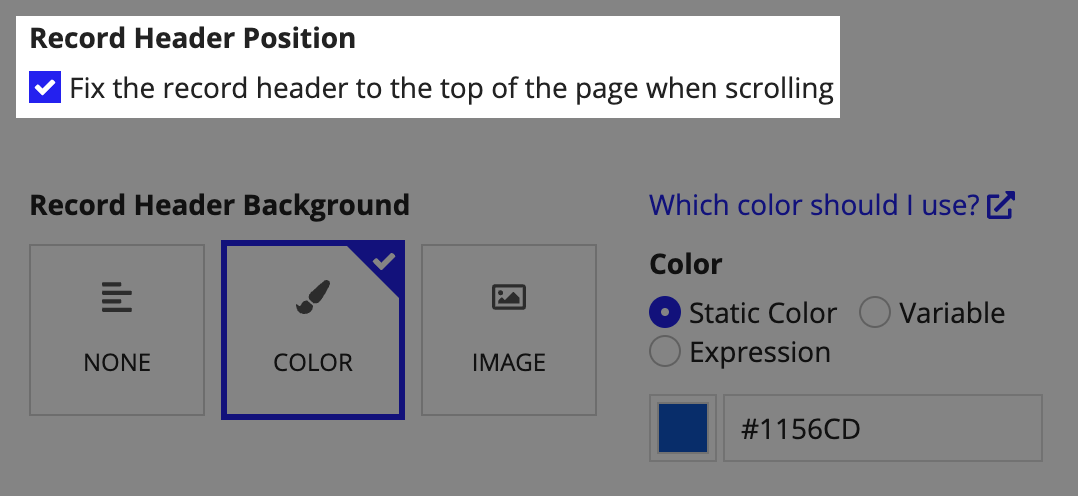
Record header positionCopy link to clipboard
By default, the record header will move with the rest of the page contents when a user scrolls up and down the page.
You can choose to fix the header to the top of the page to allow users to easily see the record title, views, and actions, no matter where they are on the page.
To fix the record header:
- In your record type, go to Views.
-
Under Record Header Position, select Fix the record header to the top of the page when scrolling.
- Click SAVE CHANGES.
Using fixed record header with header content layoutCopy link to clipboard
If you want to use a fixed header in a record type, there are two options:
-
Fix the record header only.
-
Fix the record header and the header content layout header.
If you fix the header content layout header, but don't fix the record header, neither header will be fixed.
Fixed record header in mobileCopy link to clipboard
In the mobile application, the record views are already fixed to the top of the page. Fixing the record header will also fix the record title to the top of screen.
| Fixed Record Header | Unfixed Record Header |
|---|---|
|

|
Record header backgroundCopy link to clipboard
The record header isn't styled by default, but you can configure it with a billboard image or color. Check out your record header configurations in the preview under the Header section.
Note that if you've changed the name of the Summary view or hidden the News and Related Actions tabs, these changes won't appear in the header preview.
Color backgroundsCopy link to clipboard
Headers can display one background color for all records in a record type, or different colors based on an expression or variables within the record.
The record header will display the selected color style with the record title, breadcrumbs, and related action buttons in the card.
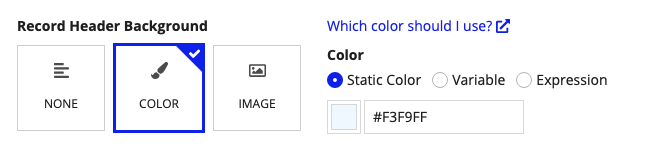
You can use one of the following options to set the background color:
- Static: Use the color picker to select the appropriate color or enter a hex code.
- Variable: Use the Color dropdown to select the record variable of your color. This picker returns the record variables of type
TEXT. - Expression: Enter an expression that evaluates to a valid hex color code.
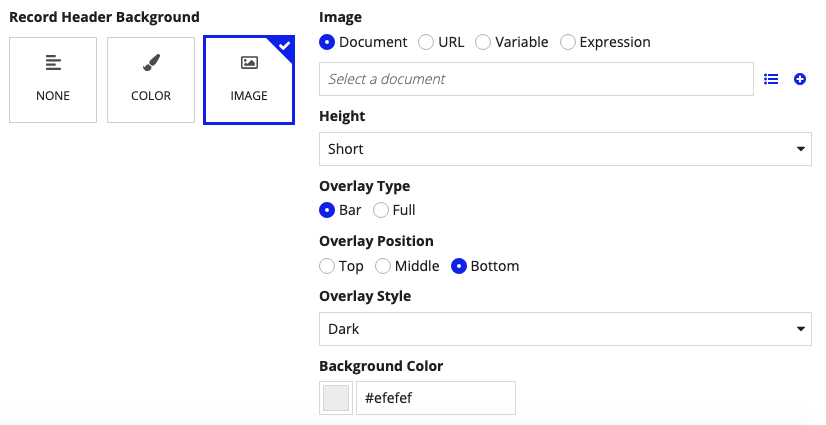
Image backgroundsCopy link to clipboard
You can configure headers to display one image or multiple images. One image from a document or a URL can be used for all records in a record type. Similar to color backgrounds, you can also configure image backgrounds to display different images based on variables within the record or using an expression.
The record header will display the billboard image of your choice, where you can style the overlay, height, and background color. The overlay will contain the record title, breadcrumbs, and related action buttons.
To configure the style of an image background:
- Go to the Views page of the record type.
-
In the Headers section, under Record Header Background, click IMAGE.
-
Select one of the following sources for the image:
Image Source Description Document Select an image using the document picker. URL Enter a secure URL of a static image you want as your billboard image. Variable From the dropdown, select the record field where you've stored a color value. This picker returns record fields of type TEXT,INTEGER, andDOCUMENT.Expression In the Expression Editor, input an expression that evaluates to a valid document or image URL. Note: If you use Variable or Expression to configure the image background, the live preview will not display the selected image.
-
Configure the following additional properties:
Property Description Image Height Select Short, Medium, Tall, or Auto. Overlay Type Select Bar or Full. Overlay Position Select Top, Middle, or Bottom. Overlay Style Select Dark, Semi-Dark, None, Semi-Light, or Light. Background Color Specify any valid hex code. This color appears if your image is null, is an invalid value, or the user does not have permission to see the image. - Click SAVE CHANGES.
Record view securityCopy link to clipboard
Whether or not a user can see a record view is dependent on the record type security, record-level security, and the security rule or security expression configured on the view itself.
To view a record view, users must have at least Viewer permissions for the record type and, if you've applied record-level security, users must also be included in a security rule or a security expression. If a user does not have access to a record because of any of these configurations, the user cannot access the record views, even if given a direct URL.
Anyone with access to the record can see the Summary view by default. For each additional record view, you can configure record view security to show or hide the view from certain users based on the conditions you specify. Users may access additional record views by navigating in Tempo or by using a record link that is configured to go to a certain view. Record links respect record view security.
Learn how to configure record view security.