| The capabilities described on this page are included in Appian's standard capability tier. Usage limits may apply. |
IntroductionCopy link to clipboard
In this page, you will learn how to create and configure an HTTP integration, as well as how to use the integration designer to test and troubleshoot problems.
- To learn about integration objects and their configuration options, see Integration Object.
- To learn about connected system objects and their configuration options, see Connected System Object.
- To learn how to call an integration from other places in your application, see Call an Integration.
- For a real-world example of how to build and use integrations, see the Integration Tutorial.
- To learn how to use different types of connected systems to connect to different systems, see Connected Systems.
Note: Below are details of an HTTP integration. The following screens will change depending on the selected connected system.
Create the HTTP integration objectCopy link to clipboard
To create an integration in Appian:
-
Open the destination application for the new integration.
- In the Build view, click New > Integration.
-
Select a creation method:
- Use a connected system.
- Create from scratch (HTTP only).
- Duplicate existing integration.
-
Configure the following properties:
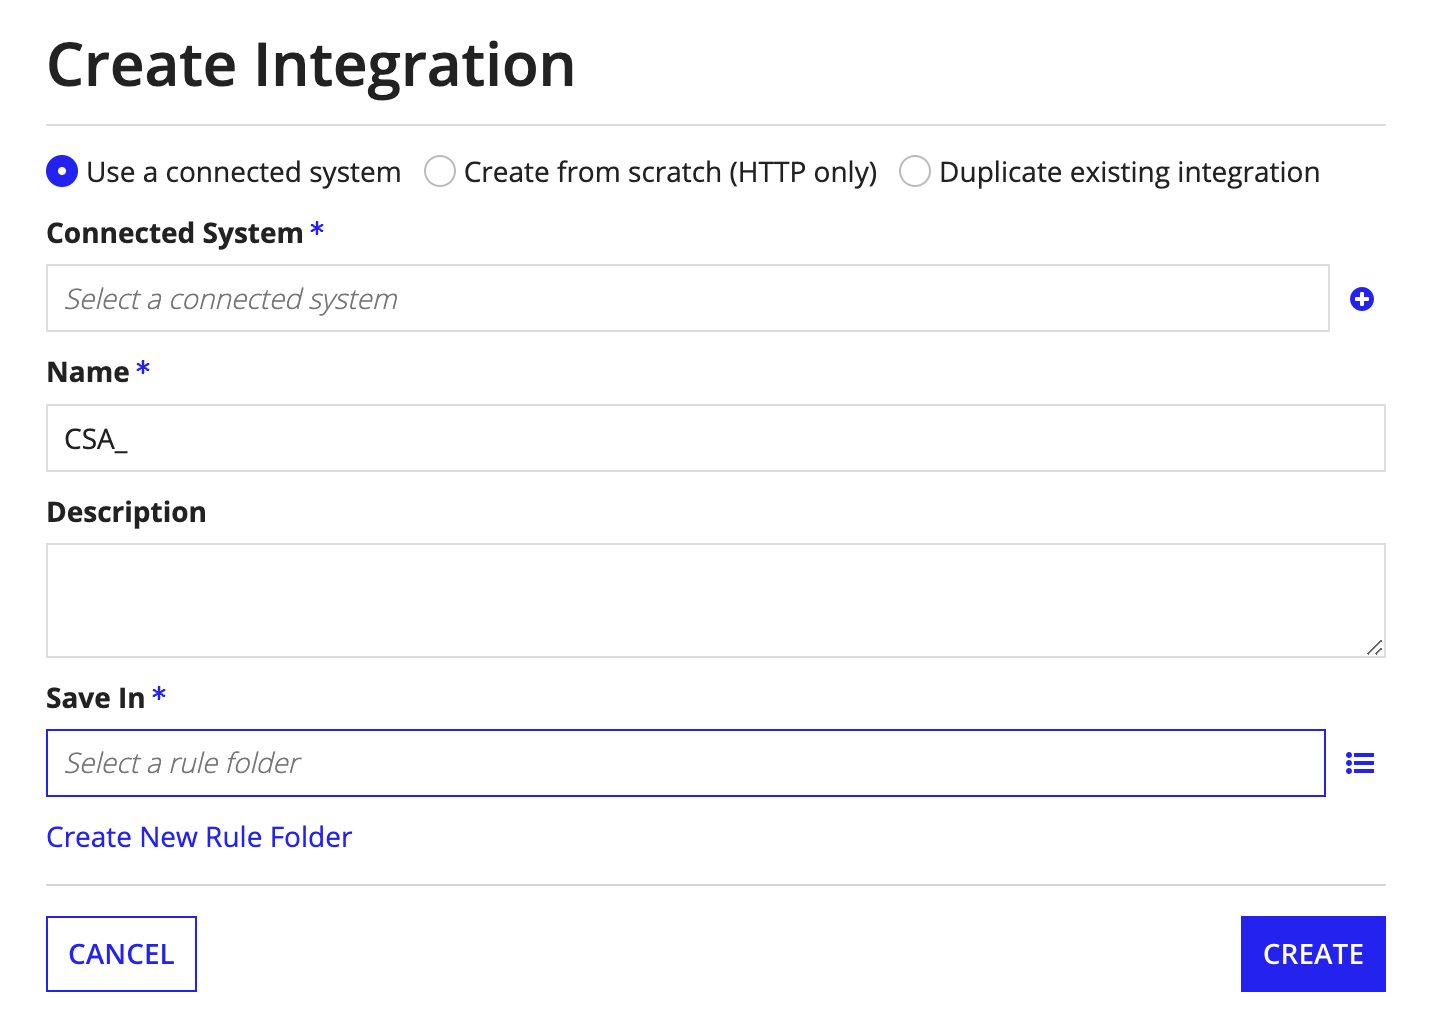
Property Description Connected System Browse to and select a connected system. This property is only present if you selected Use a connected system. Integration to Duplicate Browse to and select the existing integration you want to copy. This property is only present if you selected Duplicate existing integration. Name Enter a name that follows the recommended naming standard. Description (Optional) Enter a brief description of the integration. Save In Browse to and select an existing folder to store the integration object, or click Create New Rule Folder to create and select a new folder for the object. - Click Create. Appian displays the new integration for editing.
Tip: If you want to change the description or folder later, open the integration object, then select Properties in the gear menu.
Design guidanceCopy link to clipboard
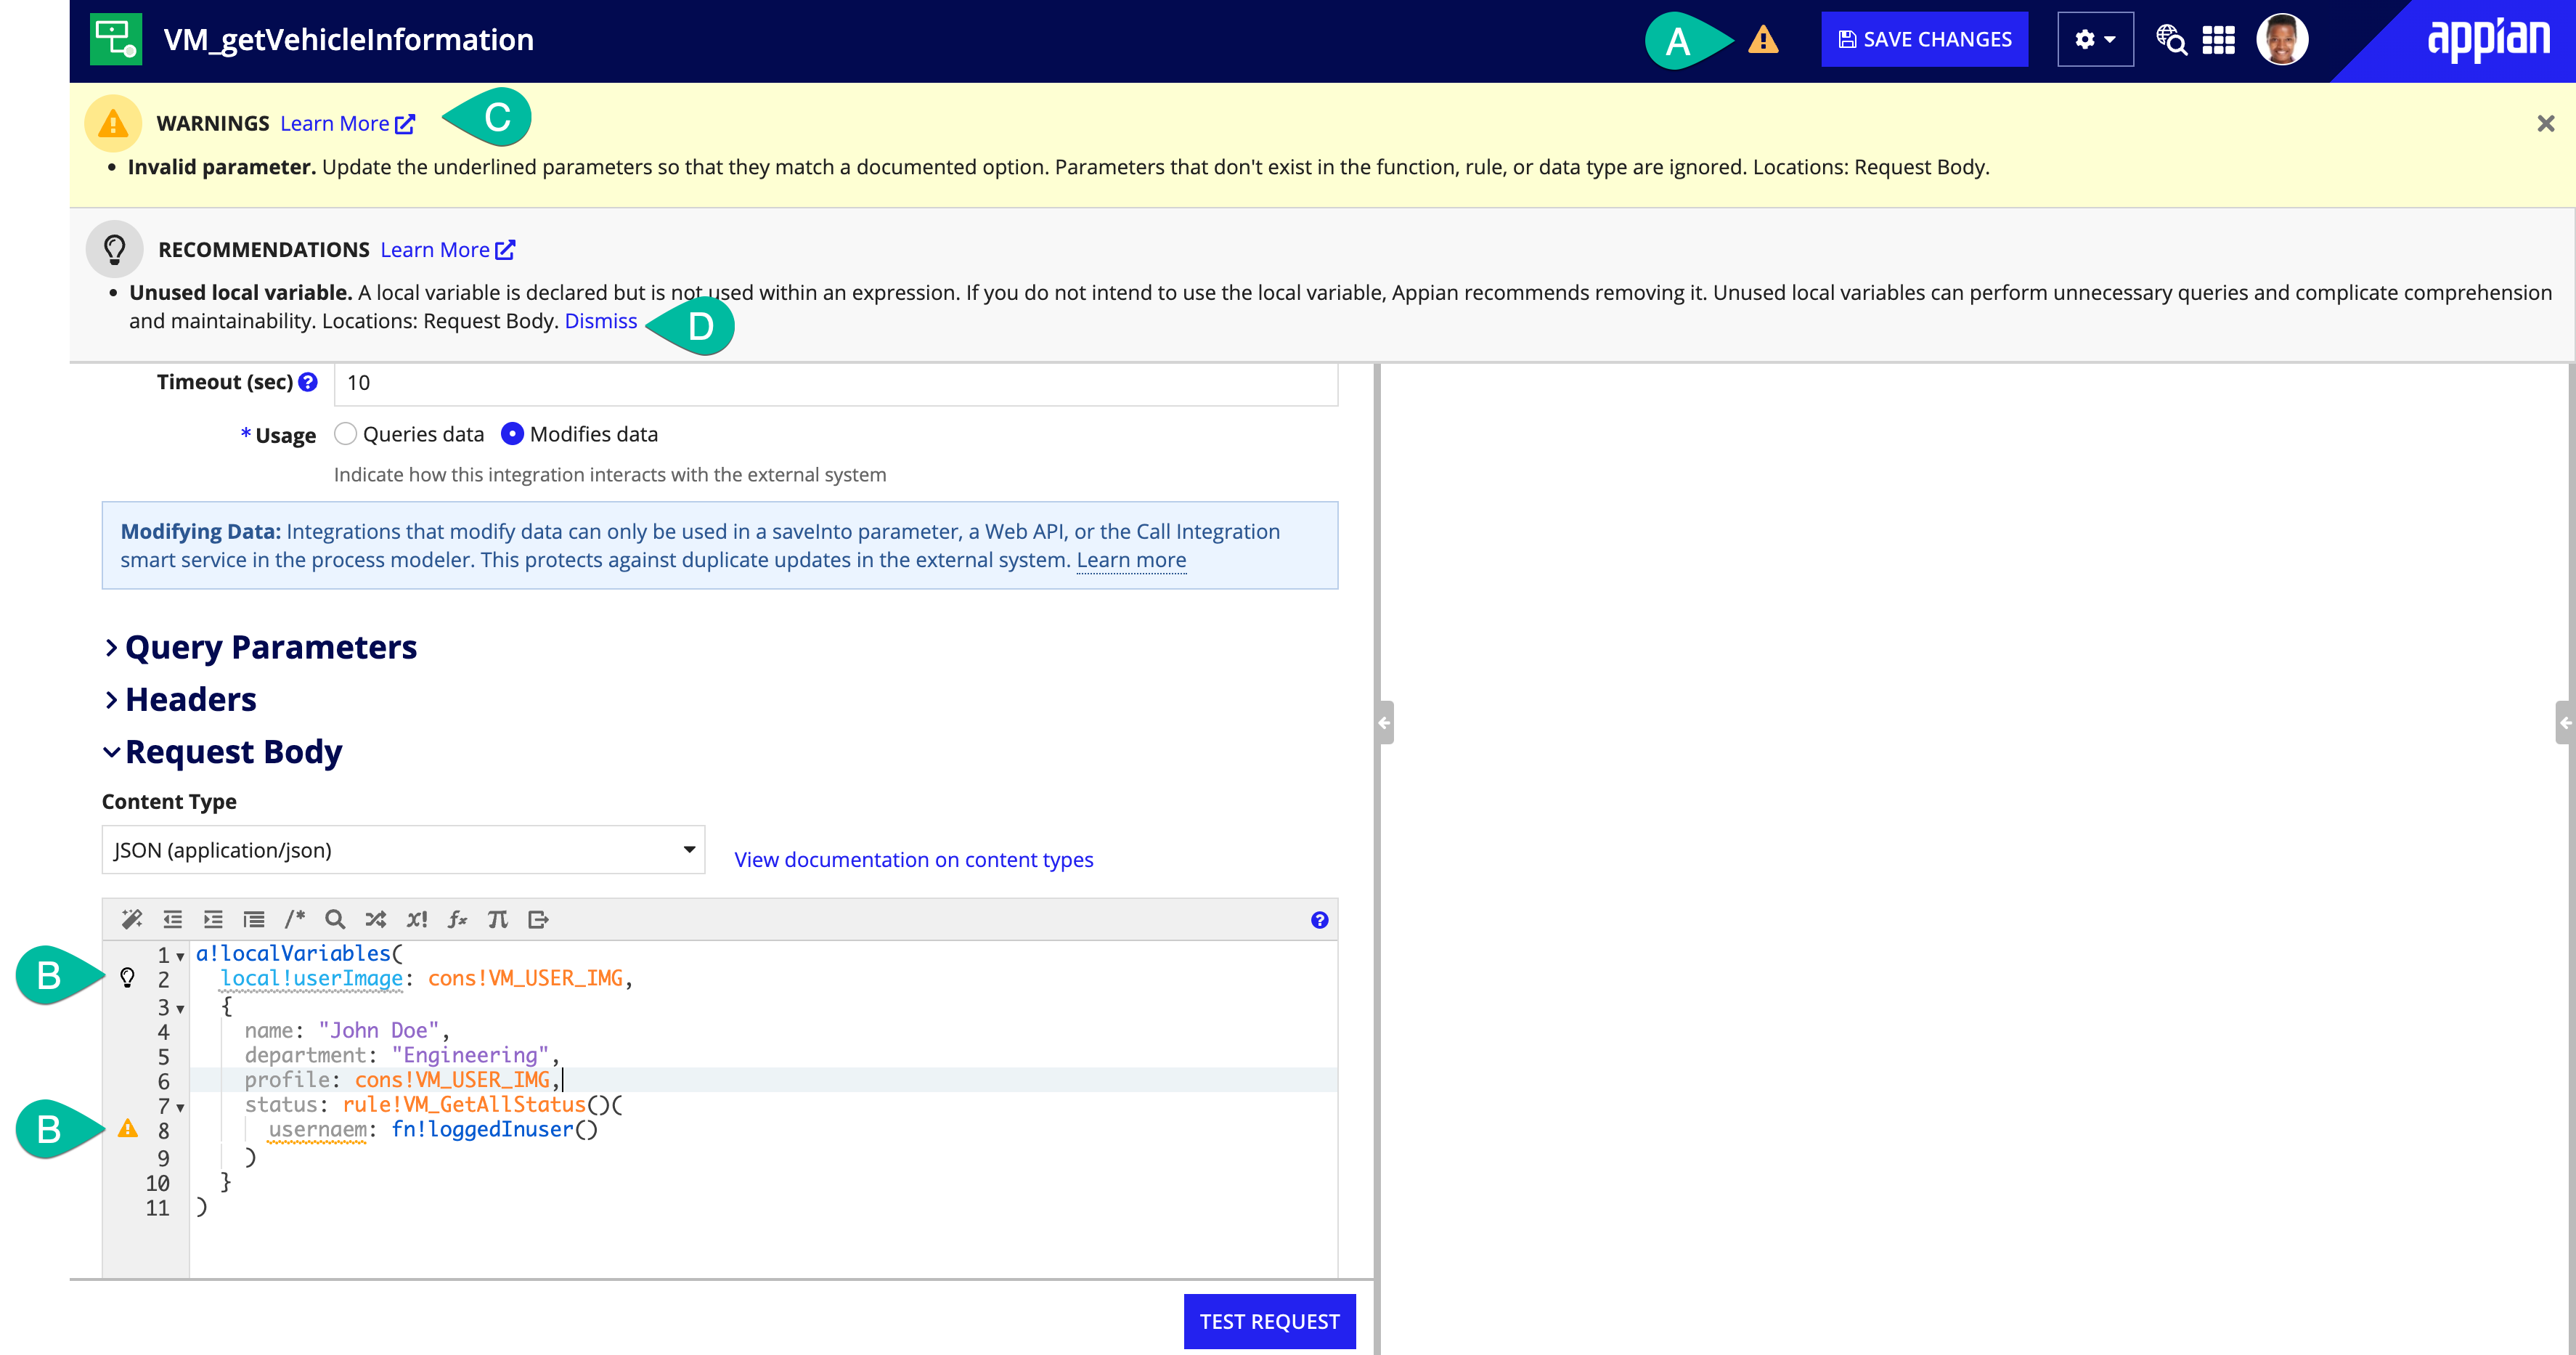
As you continue to modify and define your integration, you may encounter guidance. Appian design guidance reinforces best practice design patterns that should be implemented in your objects. Guidance is calculated while editing expressions within the integration or when a precedent of the integration is updated.
When a recommendation or warning is triggered you'll see an indicator icon in the header (A) and next to the corresponding line in the expression editor (B).
Click on the icon in the header to learn more about the suggested guidance (C) and how it can be addressed.
If a recommendation is not applicable to your use case, you can Dismiss (D) that individual recommendation for that integration. Learn more about recommendation dismissal. Warnings cannot be dismissed and should always be addressed to avoid complications when the logic in the object is executed.
Integration design guidance is also visible outside of the object on the Health Dashboard.
See design guidance for the full list of possible guidance.
Configure the HTTP integration definitionCopy link to clipboard
The configuration pane of the integration designer allows you to define the HTTP request details for your integration.
For more information about the integration definition fields, see Integration Objects.
Note: Below are details of an HTTP integration. The following screens will change depending on the selected connected system template
-
Select whether you want to use an existing connected system to share connection details across multiple integrations. If you created this integration directly from a connected system then this option will already be selected and the connected system will be pre-populated.

-
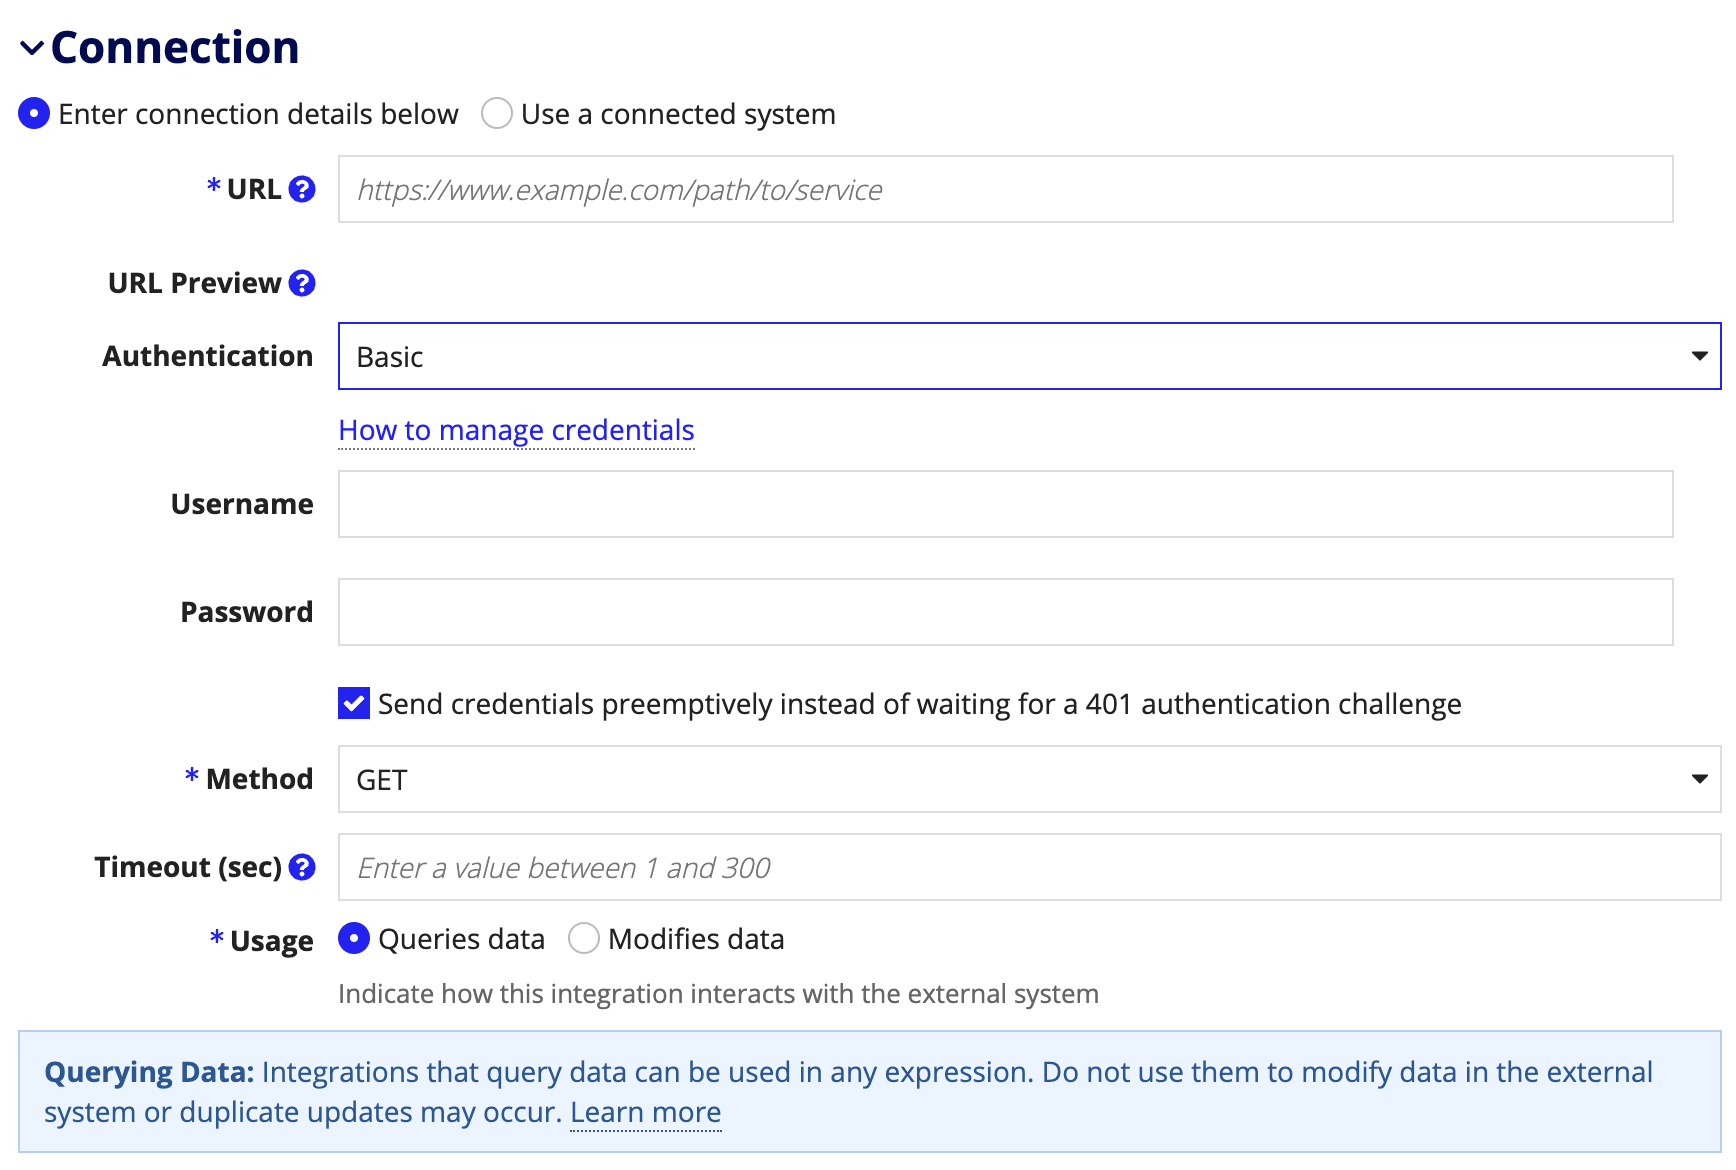
Fill out the Connection details. If you are using an existing connected system, select a Connected System using the picker. Otherwise, provide the Authentication details (if applicable) directly, as shown below.
-
Add Parameters and Headers.

-
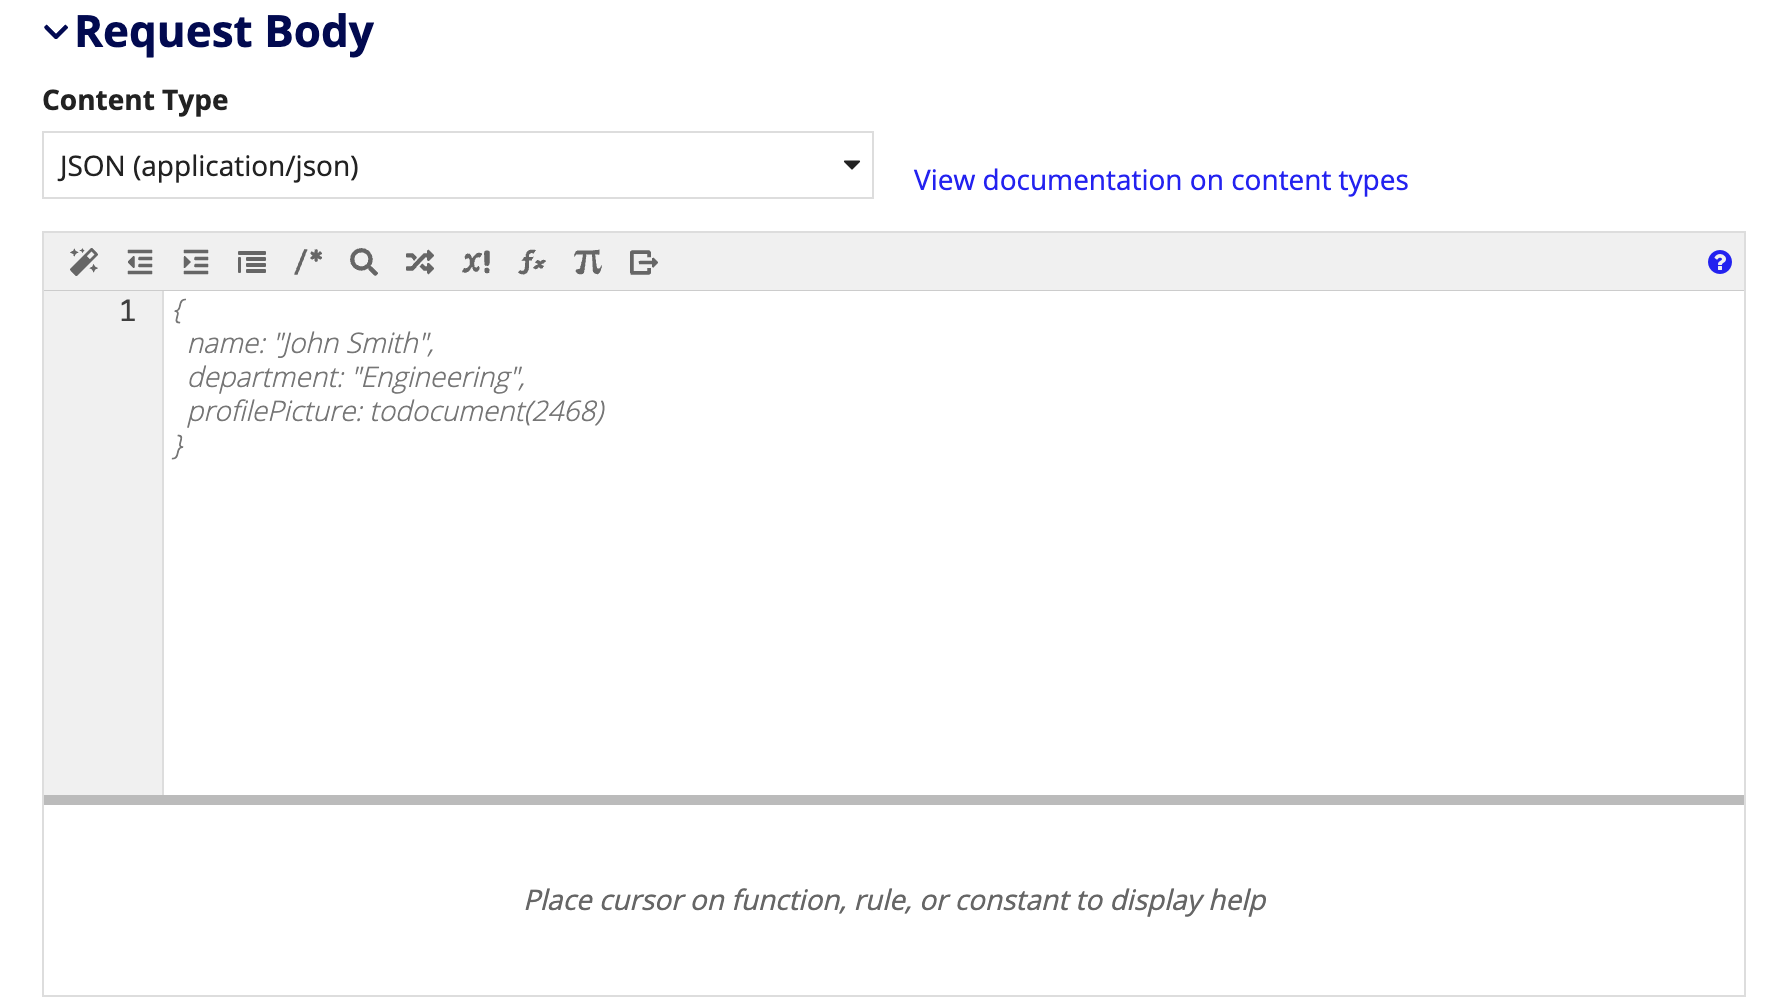
If the selected Method supports it, define the Request Body and Content Type.
Content Type selectionCopy link to clipboard
The Content Type field must be configured for integrations where the Method is set to POST, PUT, PATCH, or DELETE. Although the Content Type field is configured in the Body section of the configuration pane, it's actually sent as an HTTP header. This field indicates the media type of the resource(s) defined in the request Body. The selection is based upon the web service that you're integrating with. See the content types page for more information.
Add automatic parsingCopy link to clipboard
Once you've configured the integration definition, it's a good idea to configure response body parsing to automatically convert the JSON response body to an Appian value.
Note: Automatic parsing only applies to JSON responses.

Instead of having to write a wrapper rule, automatic parsing will convert the results into an Appian value. This will allow you to use dot notation and index() in another expression simply by passing in an integration rule.
Enable HTTP request/response loggingCopy link to clipboard
Finally, you should decide whether to enable HTTP request/response logging for the integration.
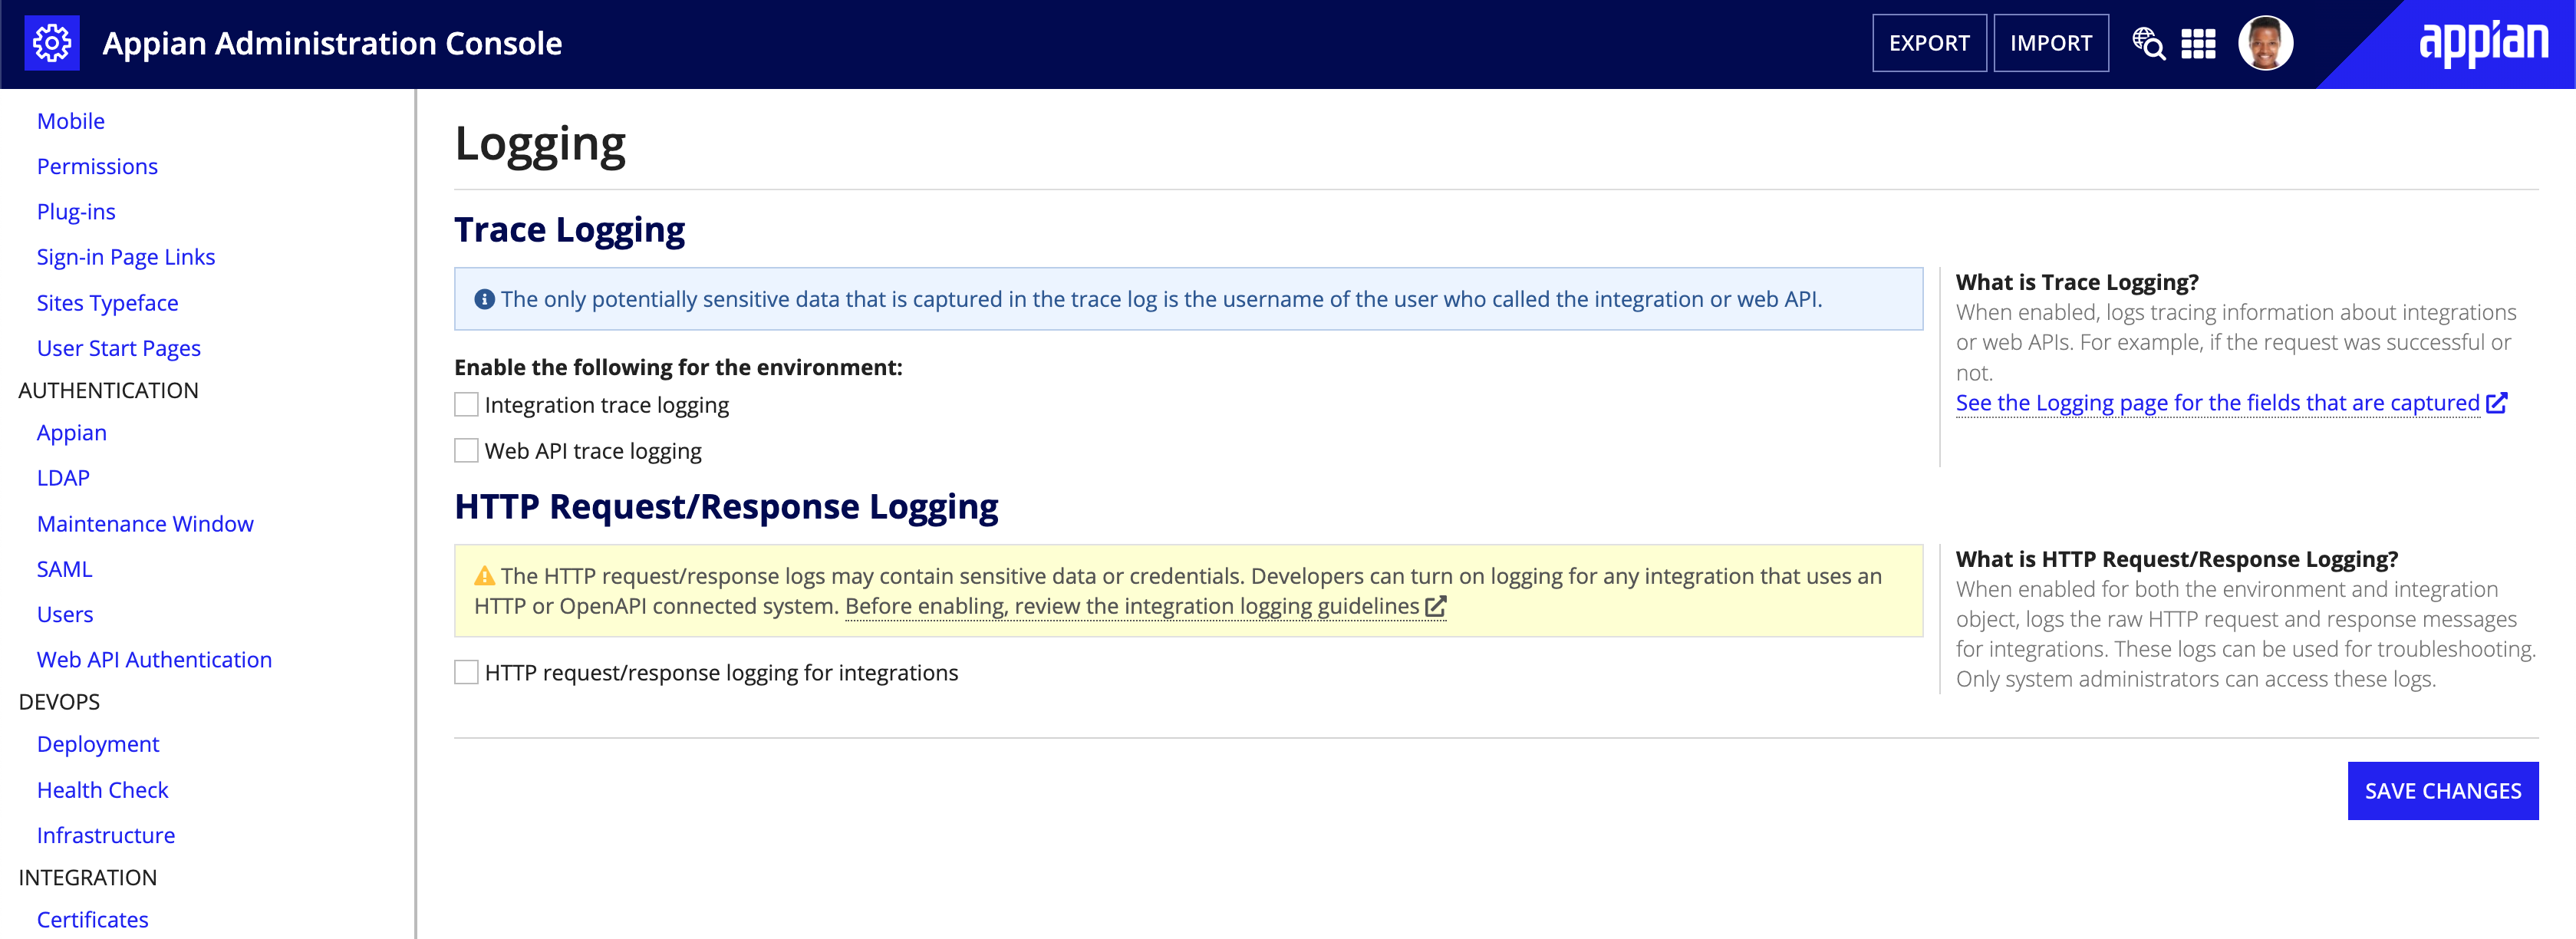
Ensure that you are familiar with the integration logging guidelines before making this decision.
If you do choose to enable HTTP request/response logging, it will only write to the integration_req_resp_activity.log log if that functionality is also enabled in the Admin Console. The dynamic message below the checkbox will tell you whether HTTP request/response logging is enabled for your environment.
Test the integrationCopy link to clipboard
Once you've finished configuring the integration definition, you'll want to test the integration and view details about the request and response.
-
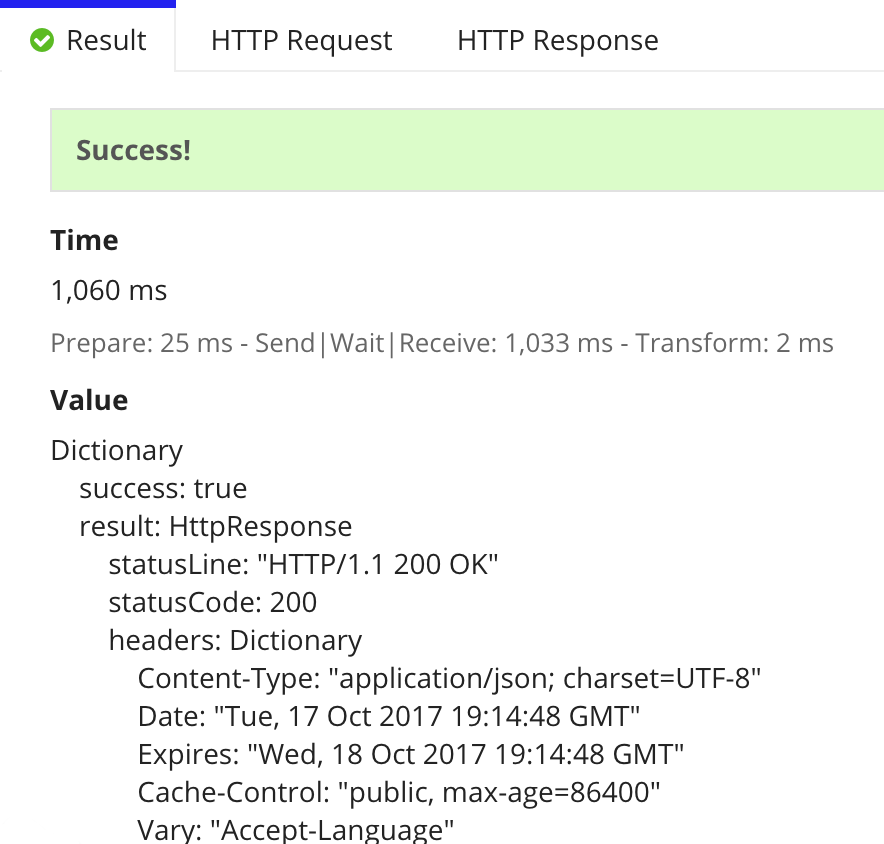
Click Test Request. The Result tab displays the Time taken for each phase of the integration and the resulting Value.
-
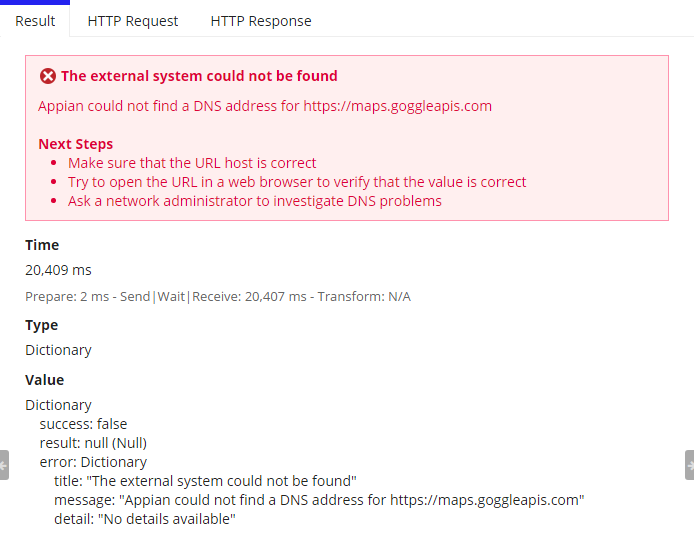
If an error occurs, the Result tab also displays the error details and recommended Next Steps.
-
The HTTP Request tab displays the raw request sent to the external system.

-
The HTTP Response tab displays the raw response received from the external system.
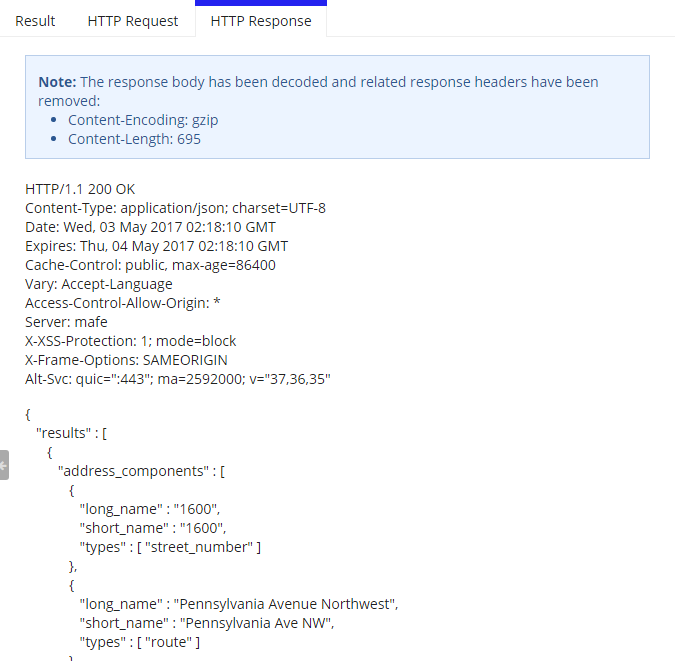
Note: Any request or response body content over 10 KB in size will be truncated in the integration designer. The complete body is available when the integration is called from other objects in your application.
Add custom error handlingCopy link to clipboard
By default, an integration will return an error when it's unable to connect or when the external system responds with an HTTP error status code. Even when the HTTP call succeeds, you may still need to check for error messages or unexpected content before using the response in your application.
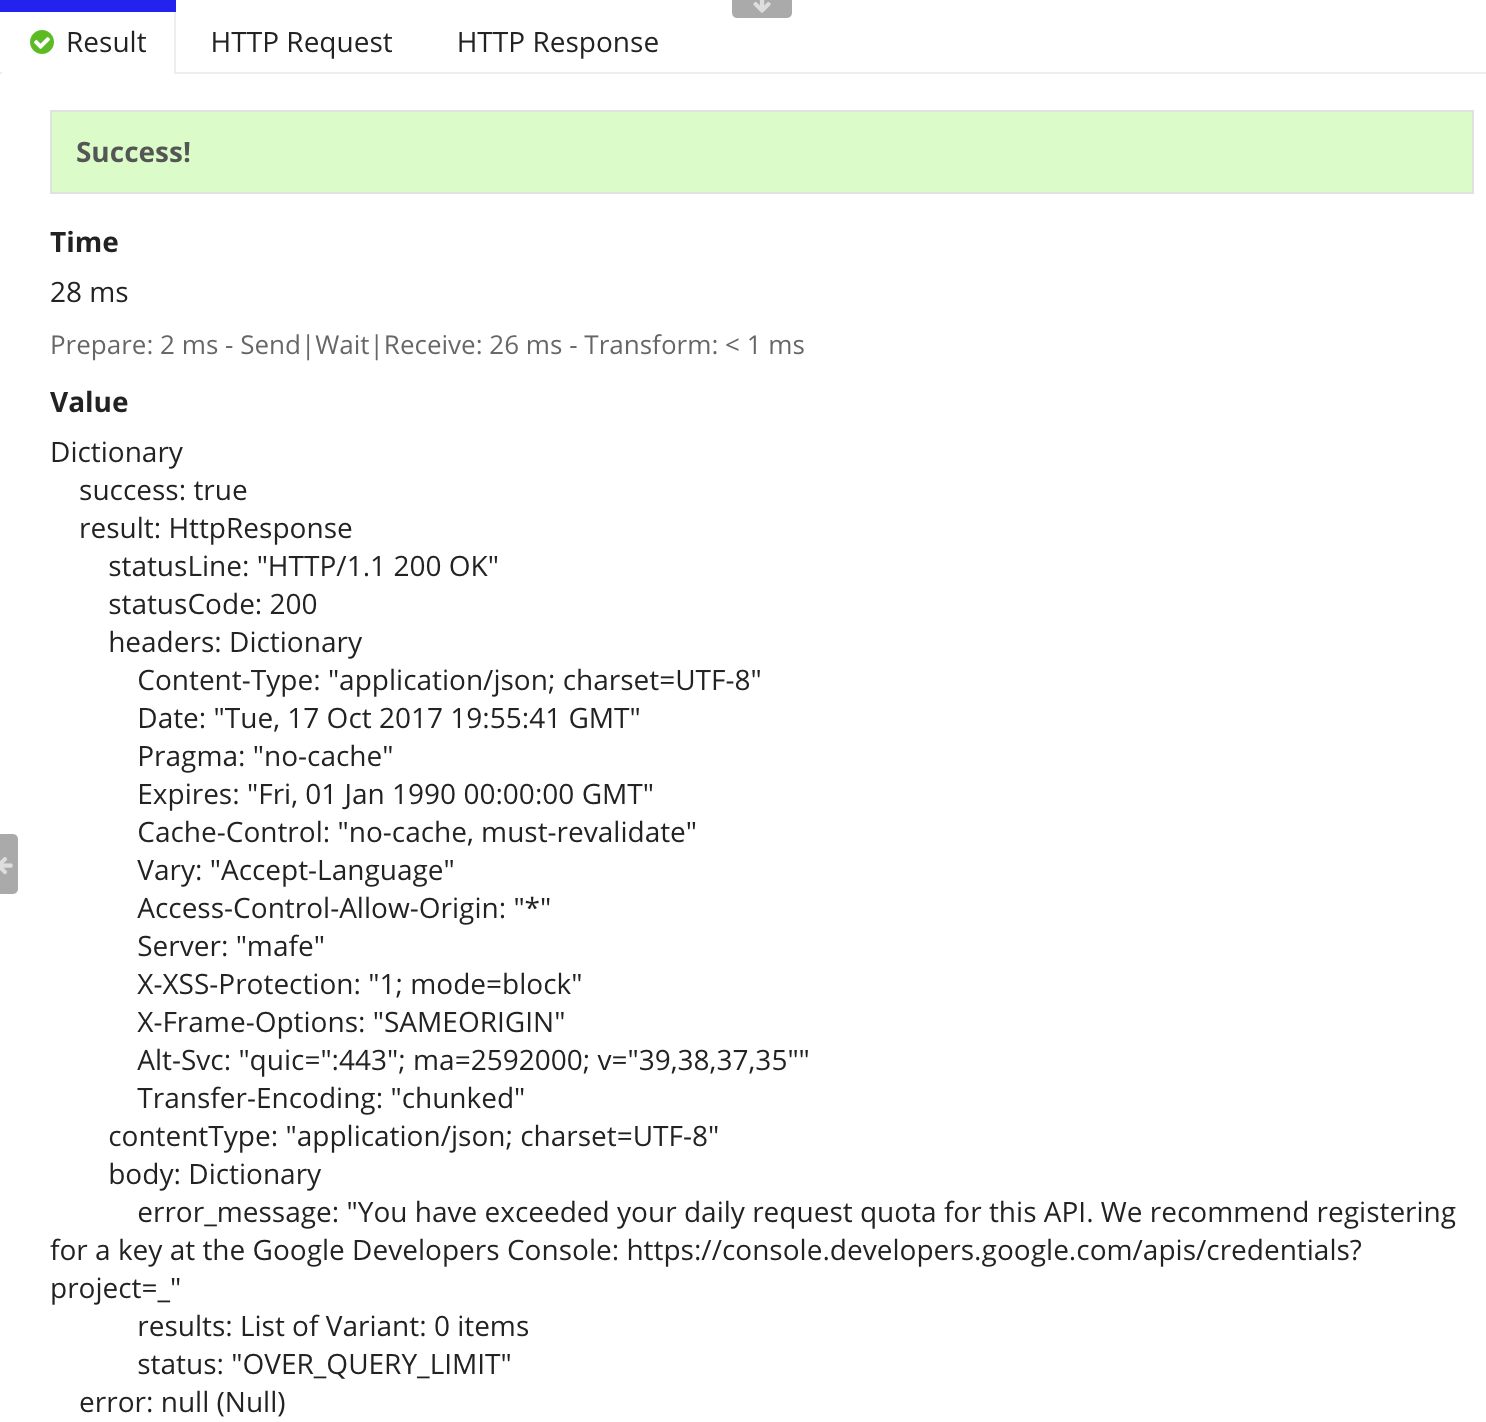
You can add custom error handling to an integration within the Error Handling section
- Select Override and define all error conditions.
- In the Success Criteria field, write an expression that returns
true.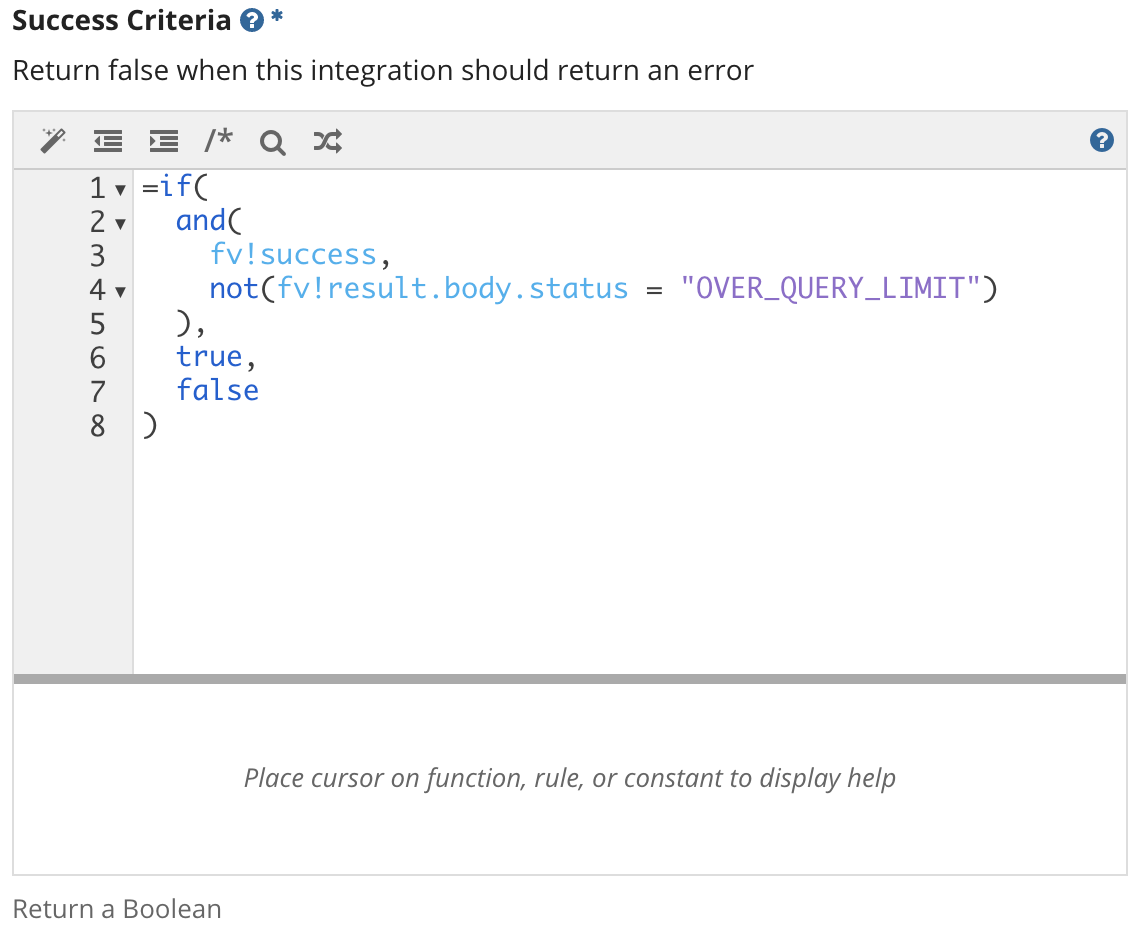
- In the Error Message field use
a!integrationError()to construct a custom error message.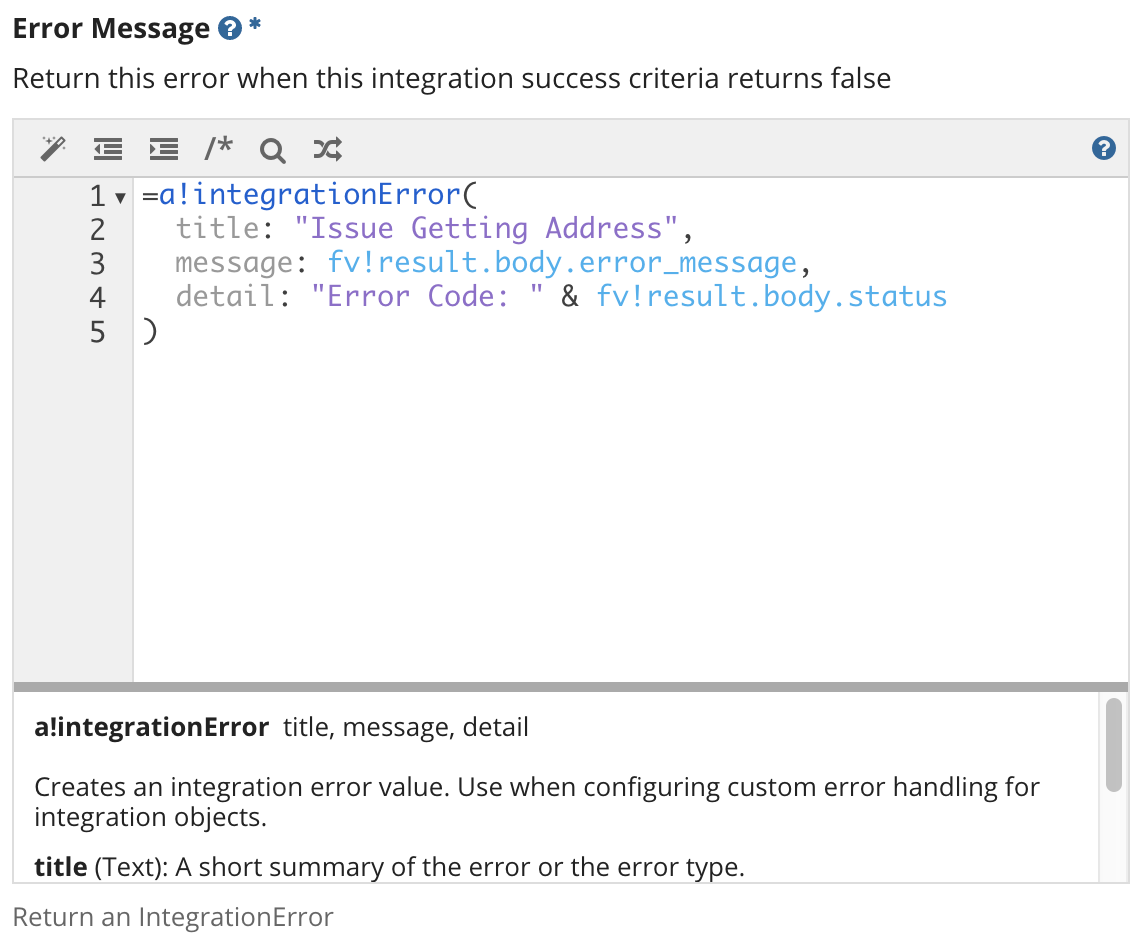
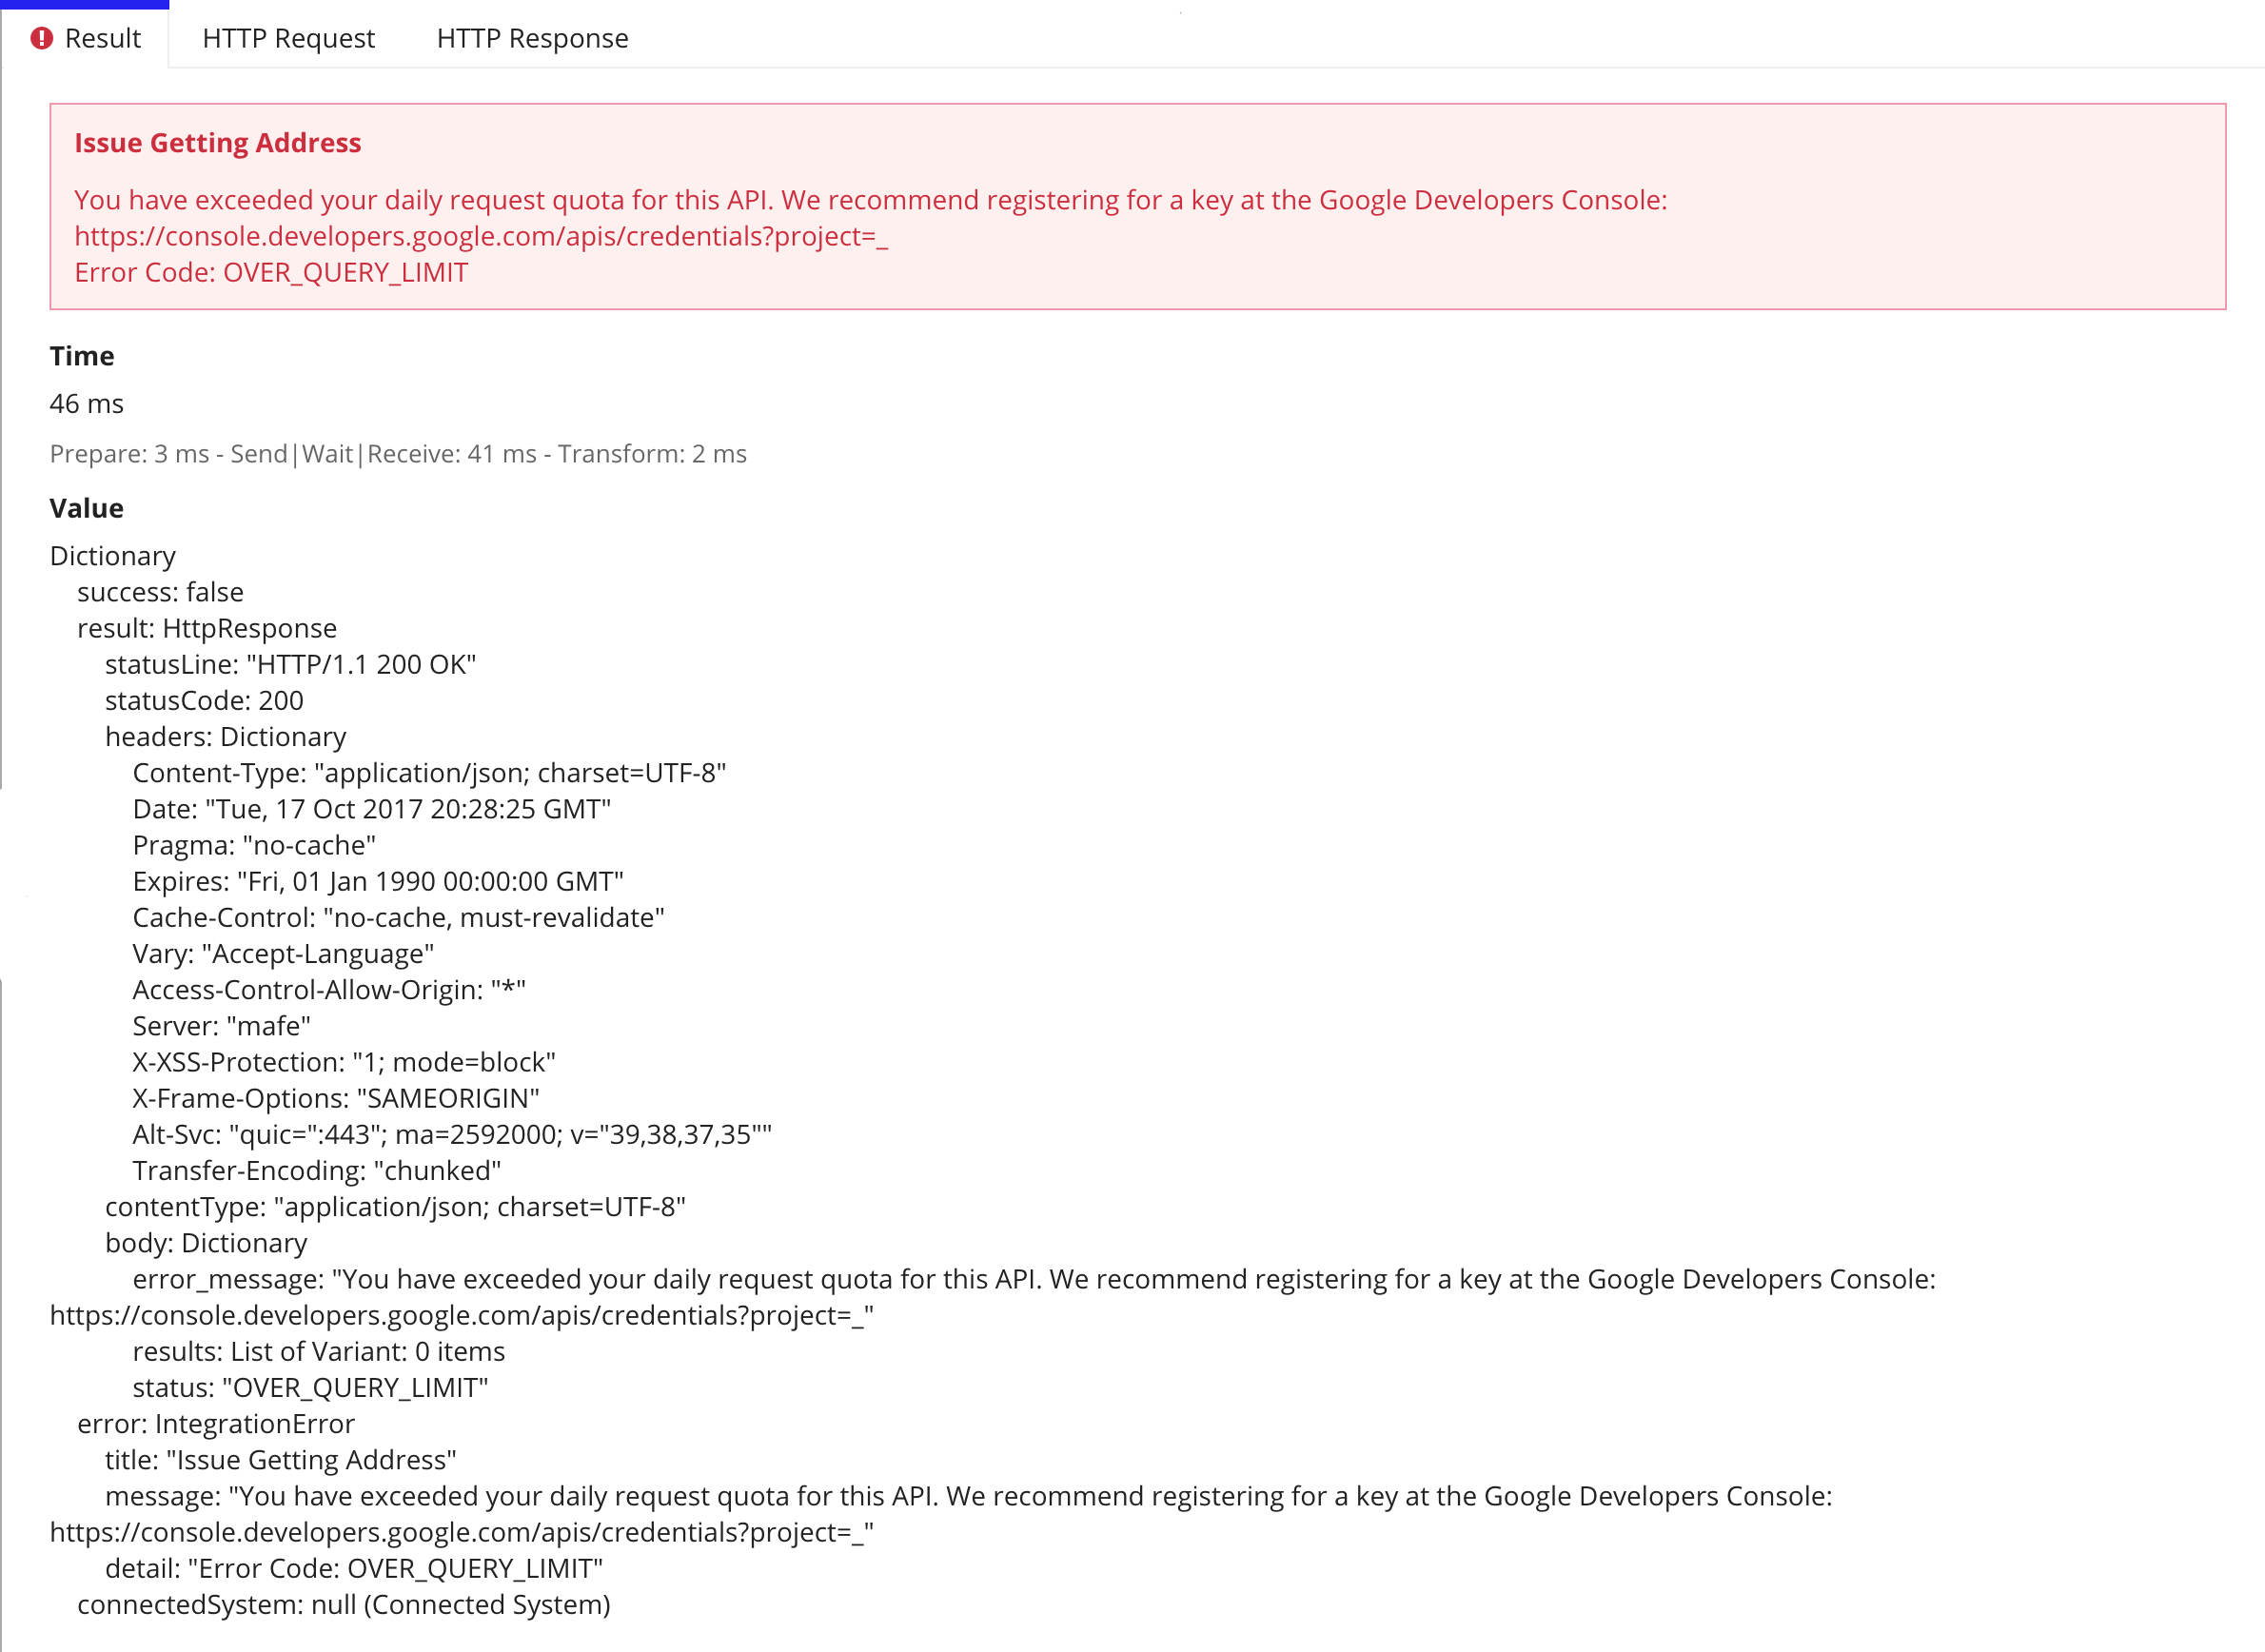
Instead of returning an unwanted success status, the integration will return an error, allowing you to more easily handle future error handling.
Define inputsCopy link to clipboard
After the integration is tested, you can define inputs that will allow you to reuse this object throughout your application.
-
Expand the inputs pane on the right hand side of the integration designer.
-
Click the + button in the top right-hand corner.
-
Configure the input Name, Description, Type, and whether or not it is an Array from the grid. You can also change the order of inputs using the up and down arrows.

-
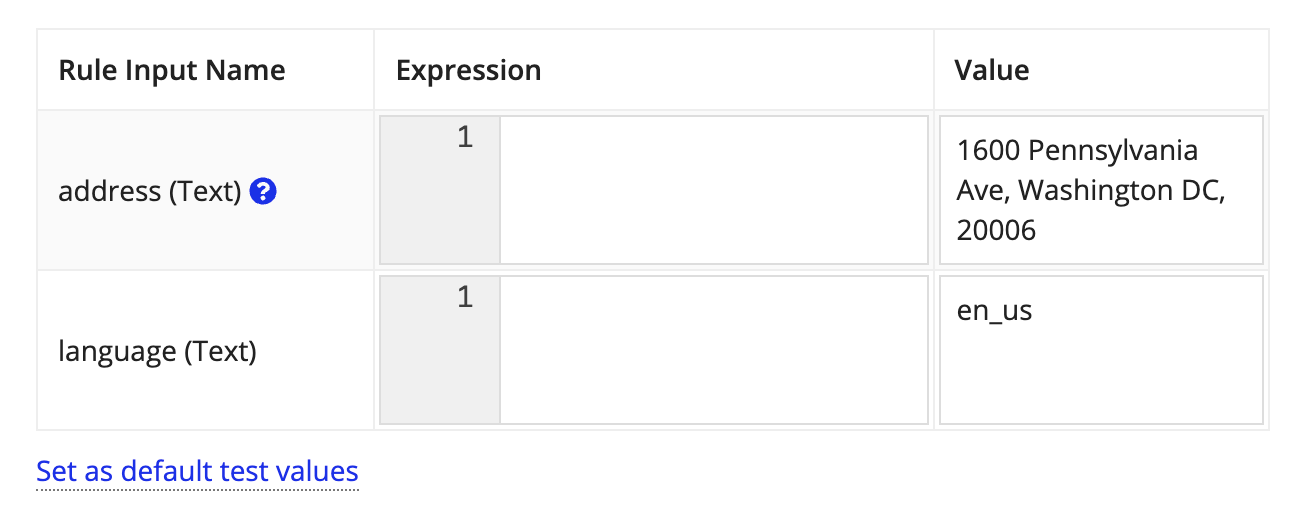
If you have one or more inputs, you can enter values for each input in the test inputs pane. These values are used when testing the integration.
-
To save the current input values as a set of default test values, click the Set as default test values link below the grid. Once set, the default values will be saved with the integration.

