| The capabilities described on this page are included in Appian's standard capability tier. Usage limits may apply. |
Robot pools are a design object that enable you to group robots based on their unique roles and capabilities. Robot pools ensure that there is always a robot available and ready to handle any robotic task execution. With several robots in each pool, each robot pool can even handle multiple executions simultaneously. Robot pools can also be used to improve security, as access to sensitive data can be restricted to specific robot pools. You can deploy, import, and export robot pools in the same way as other Appian objects, which makes the deployment experience consistent and familiar.
A robot pool is a group of robots. You assign robots to robot pools; however, you can only add robots that you have permission to view or initiate based on the robot's security. When you're creating or managing a robotic task, you get to choose the appropriate robot pool responsible for executing the task. This makes it easy for you to move robotic tasks to different robot pools if you need to improve performance or quickly make adjustments.
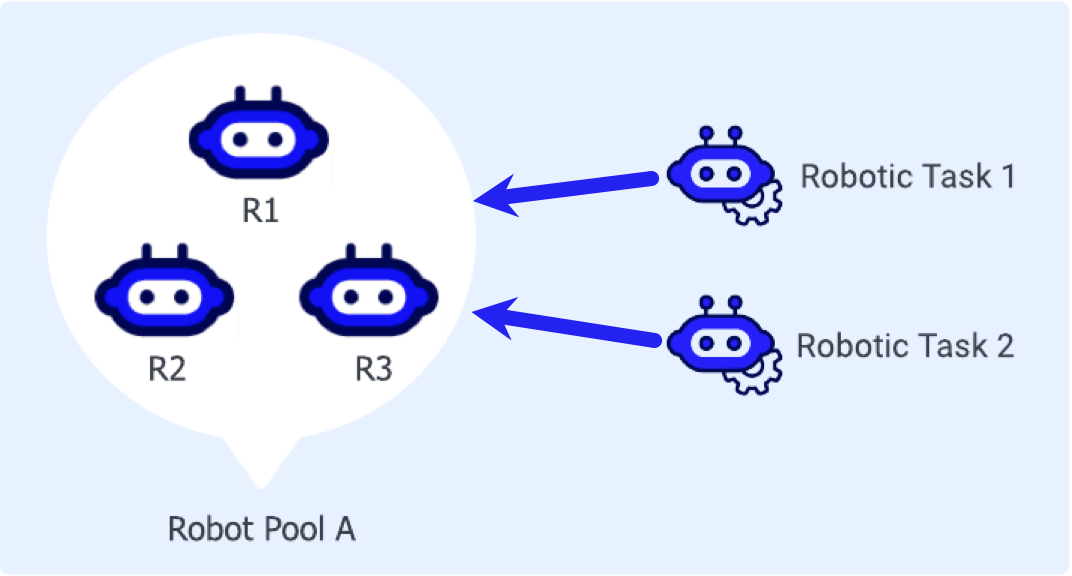
In the next picture, robots R1, R2, and R3, along with robotic tasks 1 and 2, are assigned to Robot Pool A. When task 1 is executed, the first available robot from Pool A performs it. Task 2 follows the same pattern with the next available robot.
A robot pool can have other robot pools within it, forming a hierarchy and keeping things organized. Circular membership is not allowed, meaning a pool can't be a member of itself or any other pool in its hierarchy. This rule ensures conflicts don't occur.
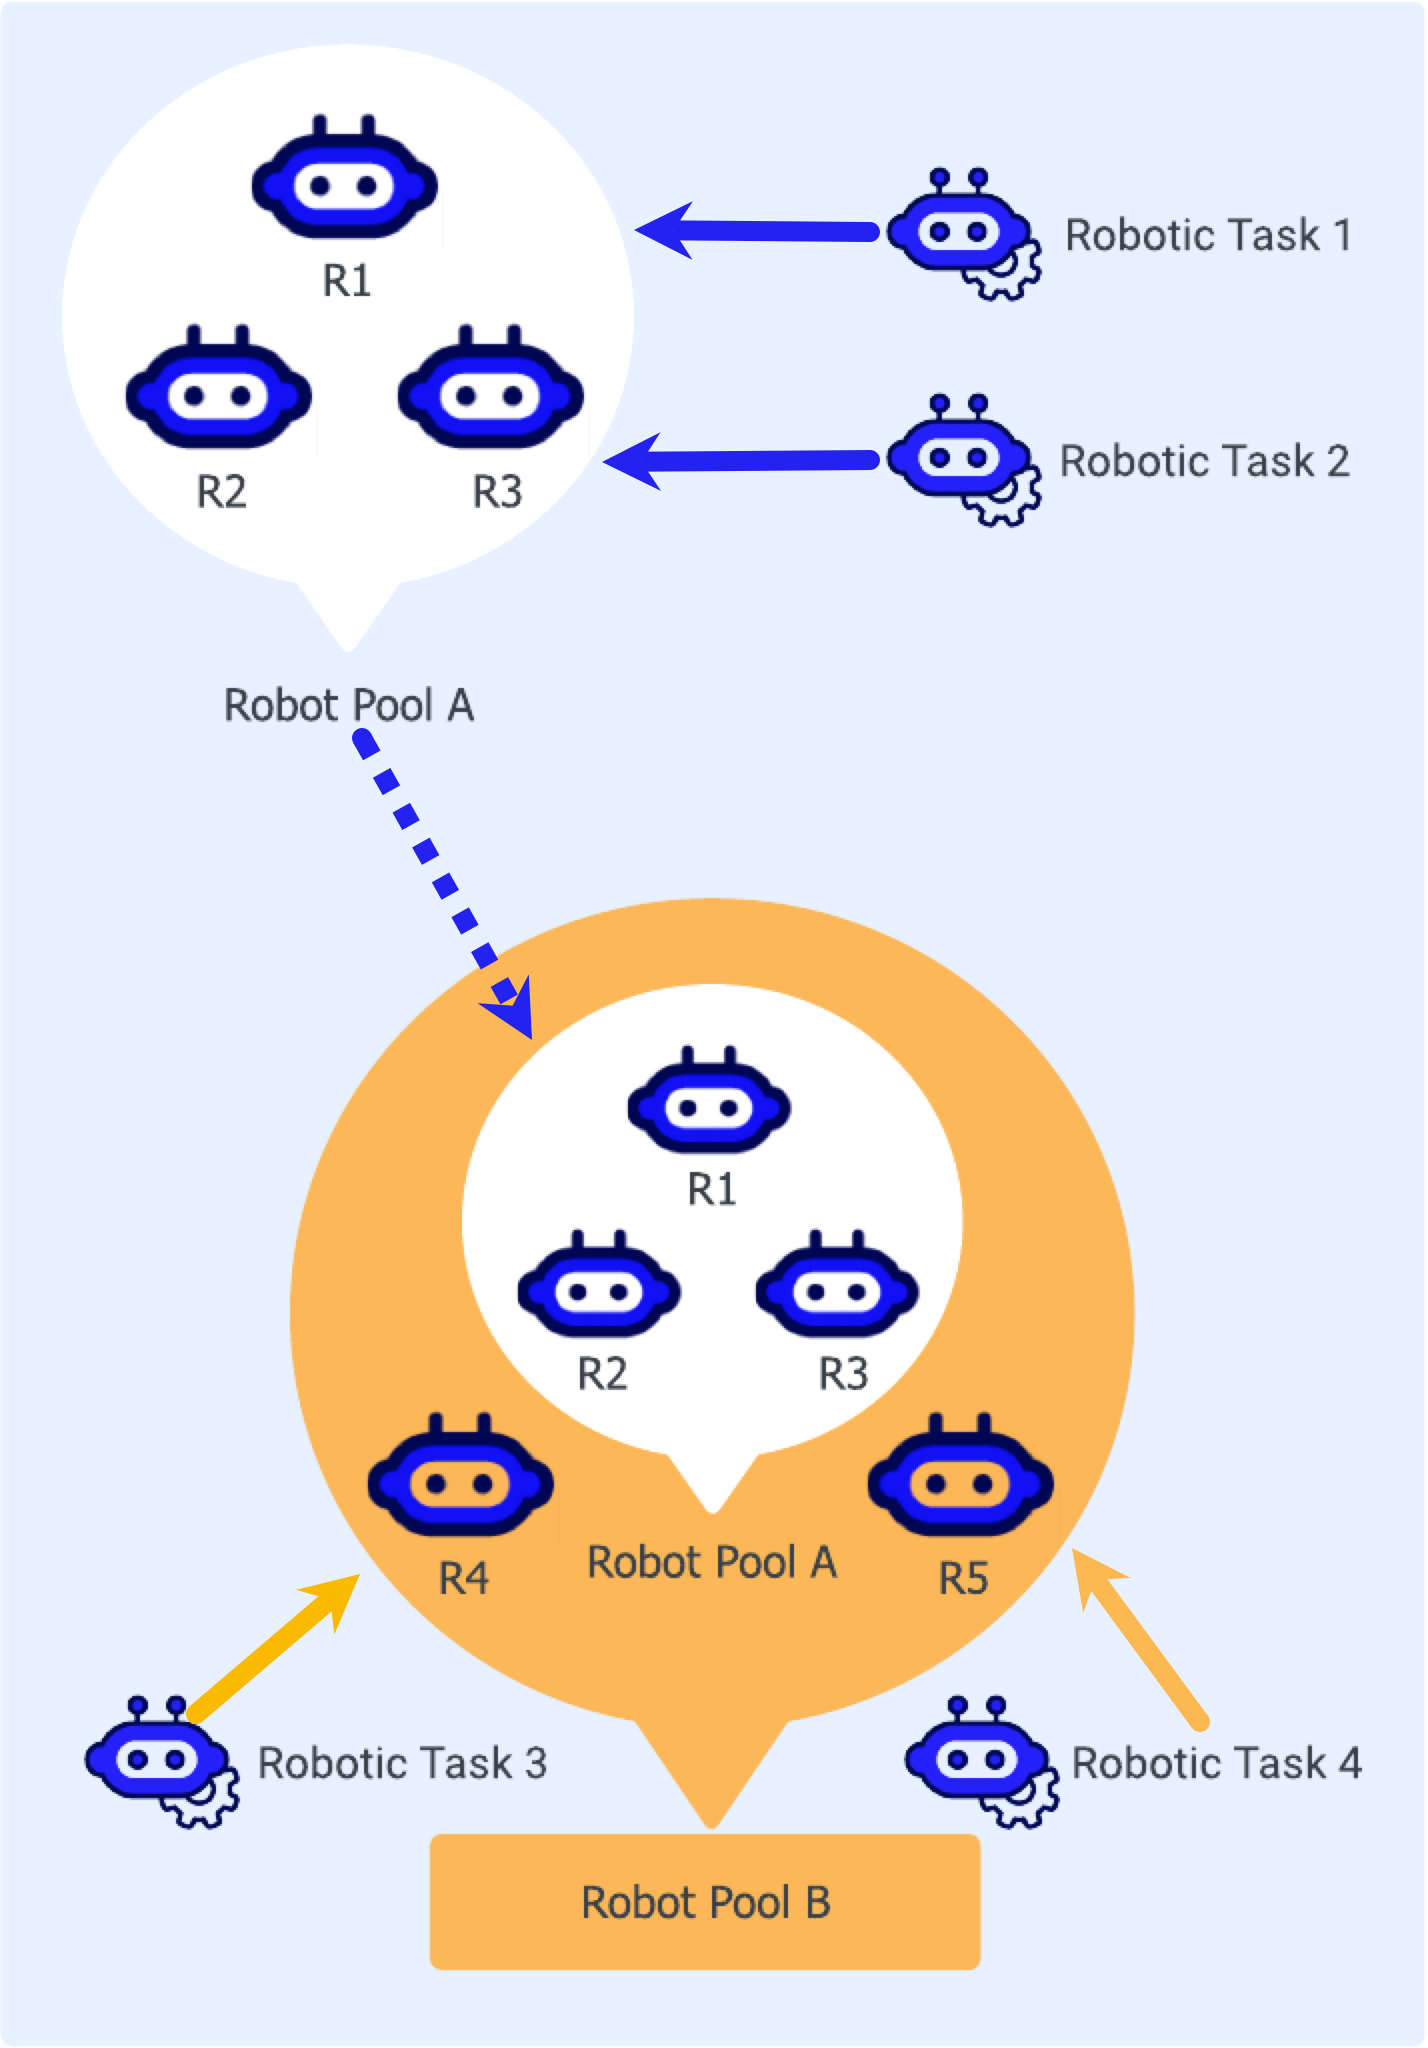
In the next picture, Robot Pool A is a member of Robot Pool B. When task 3 or 4 executes, the first available robot from Robot Pool B, including the robots from pool A, performs it.
Upgrading your Appian environment to version 23.3 or above, and RPA version 9.3.0 or above, kicks off the permission tag migration. The migration process only happens once and only applies if you created robotic tasks in previous versions of Appian RPA. This section describes what happens during the migration and the end result.
The tag migration process converts permission tags, used for assigning robots, into Robot Pools. Robot Pools are automatically created during this process to ensure all robotic tasks continue to execute on their designated robots.
Here is how it happens:
The migration process applies the following rules when there are mandatory permission tags.
| If a robotic task… | Then the migration process… |
| has no mandatory tags |
creates a robot pool for each non-mandatory tag. Each robot that shares the non-mandatory tag and has no other mandatory tags is added to the pool. |
| has mandatory tags | creates a robot pool with the name of all assigned mandatory tags. If multiple mandatory tags are present, the name of the robot pool is a concatenation of all the tags. Only robots that contain all of the same mandatory tags as the robotic task are added to the robot pool. |
Here are some examples of what the Robot Pools look like after migration.
Example A
In this first example, we have one robotic task and four robots before the migration.
| Robotic Task | Tags |
| Robotic Task | operations and finance |
| Robots | Tags |
| RobotOps | operations |
| RobotFinance | finance |
| RobotOpsFin | operations and finance |
| RobotOpsFinHR | operations, finance, hr! |
After the migration, there are two robot pools. Notice that the RobotOpsFin robot belongs to both pools and that the RobotOpsFinHR robot is not included because it has a mandatory tag.
| Robotic Task with Tags… | Creates Robot Pools… | With Robot Pool Members |
operations and finance |
operations and finance |
operations: RobotOps and RobotOpsFinfinance: RobotFinance and RobotOpsFin |
Example B
In this second example, there's a robotic task with three tags, two of which are mandatory. And there are four robots.
| Robotic Task | Tags |
| Robotic Task | operations, hr!, and legal! |
| Robots | Tags |
| Robot HR | hr! |
| Robot HRLegal | hr!, legal! |
| Robot HRLegalMarketing | hr!, legal!, and marketing! |
After the migration, there is one robot pool. Since robots must have all of the same mandatory tags as the robotic task to be added to the robot pool, only one robot became a robot pool member.
| These mandatory Robotic Task Tags… | Become Robot Pool… | With Robot Pool Members |
hr!, and legal! |
hr!legal! |
hr!legal!: Robot HRLegal |
Following the migration, you may notice a lot of robot pools, potentially more than necessary. Be sure to review and modify these robot pools to ensure they match your requirements.
Required role: Developer or Administrator
Robot pools are created in Appian Designer.
To add a new robot pool:
Configure the following properties:
| Property | Description |
|---|---|
| Name | Name to identify the robot pool. This value must be unique. Spaces are supported. It is a best practice to preface the name with the application specific prefix. |
| Description | Supplemental information about the robot pool that is displayed in the Appian Designer Objects view. |
Complete the following steps to add or remove robot pool members:
Complete one of the following tasks.
| To… | Select… |
| Add members | the Add Members button. The add robot pool members dialog displays. Enter the name of the robot(s) and robot pool(s) you want to add then click ADD. You are brought back to the robot pool page and the robot(s) or robot pool(s) you added display in the list.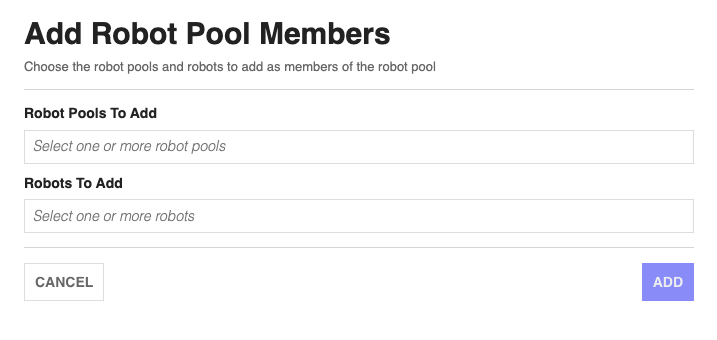 |
| Remove members | the checkbox(es) next to the robot(s) or robot pool(s) you want to remove then click the Remove Members button. The robot(s) or robot pool(s) are removed and do not display in the list.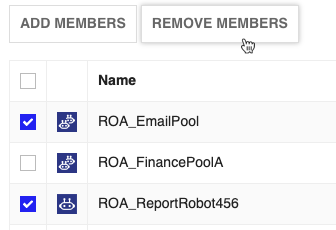 |
You can deploy your robot pools across environments like any other object. These instructions describe how to do this using Appian Designer.
Robot pools are imported and exported as part of a package in Appian Designer. Packages are a tool for building your applications and ensuring successful deployments.
When importing a Robot Pool into an environment where a pool with the same UUID already exists, all properties of the inbound object overwrite the properties in the destination object except for pool membership. Instead, the inbound pool and the target pool member lists are merged.
When importing into any environment, references to member pools that do not exist in the destination environment are discarded.
Learn more about the entire process of importing and exporting objects on the Deploy to Target Environments page.
Required role: Developer or Administrator
Before you can import a robot pool, you must export the existing robot pool as part of a package. To export a robot pool, complete the following steps:

Required role: Developer or Administrator
To import a robot pool that is part of a package, complete the following steps:
The security role map of a robot pool controls whether users can modify it and its properties. Unlike some other objects, Robot Pools never inherit security.
The following table outlines the actions that can be completed for each permission level in a robot pool's security role map:
| Actions | Administrator | Viewer |
|---|---|---|
| View robot pool membership | Yes | Yes |
| Add and remove robot pool members | Yes | No |
| View and modify robot pool security | Yes | No |
| Configure membership rules | Yes | No |
| Configure properties and attributes | Yes | No |
| Create a new pool as a child of the current pool | Yes | No |
| Delete the robot pool | Yes | No |
