| This content applies solely to Award Management, which must be purchased separately from the Appian base platform. This content was written for Appian 23.2 and may not reflect the interfaces or functionality of other Appian versions. |
AM comes with robotic process automation (RPA) capabilities. When you configure RPA for your AM solution, you can create robotic tasks that perform repetitive activites based on the rules you define. See the Appian RPA documentation for guidance and examples of how to use robotic tasks to complement your AM solution.
You'll need to perform several setup steps to turn on the research process capability. This research process allows end users to submit requests for their vendor research to be completed. The AM solution then uses a robotic task to go to a specific website to look up vendor information and provide it back to the end users when it is done.
This page provides instructions for setting up a new deployment of RPA on your AM solution. You'll need to perform the following steps in order:
Throughout this document, we'll refer to the target environment that the robotic tasks will import into as <site>.appiancloud.com, for example, your-site.appiancloud.com.
When following these instructions, note which steps you need to complete in your Appian environment versus which steps you need to complete on your local machine. Also, note that some sections require access to your local machine and Appian environment, so note these sections as you walk through this setup.
Now, let's get started.
If you're deploying a new RPA package to your AM solution version 1.4 or later, follow the steps below.
Note: The deployment steps differ for earlier versions of AM. You can view the documentation for an unsupported version of Award Management by accessing the release notes and downloading a PDF copy of the documentation from the solution's Release History table. See the release history page for more information.
First, you'll need to use your local machine to retrieve and download the AM RPA package from My Appian.
To retrieve the RPA package:
<bot-directory>.GSAeLibraryContractorLookup.zip: GSA robotic task package to import into AppianContractDirectorySearch.zip: Contract directory robotic task package to import into Appian.Fapiis-Process.zip: Federal Awardee Performance and Integrity Information System robotic task package to import into Appian.Fapiis-Process.properties: The FAPIIS RPA customization file for configuring the FAPIIS bot.SBALookup.zip: Small business robotic task package to import into Appian.GAM-IE11-WebDriver.zip: The driver package to the robotic task configuration for IE11.In order to use the robotic tasks, you'll need to create a service account and an API key in the Appian Console. Be sure to complete these steps before configuring the RPA console.
The steps in this section are only necessary if your environment is currently on Appian version 20.1 or 20.2 and you're upgrading to version 20.3+. If your Appian environment is on version 20.3 or later, skip this section and continue with Update Fapiis-Process.properties.
To upgrade your Appian environment:
<site> and navigate to the RPA Console.https://<site>/rpa-repo/repository/jidoka/https://<site>/rpa-repo/repository/jidoka-snapshots/Next, you'll update the Fapiis-Process.properties file on your local machine.
To update the file:
<bot-directory> and open the Fapiis-Process.properties file.#, and input the appropriate values:
...endpointUpload=https://<site>/suite/webapi/fapiis
<site> to your target environment....username=<serv-acc-username>
rpa.user to the appropriate username....password=<serv-acc-api>
Now you're ready to import the robotic tasks that AM will use to retrieve vendor information.
To import robotic tasks:
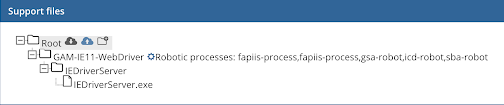
<site> and navigate to the RPA Console.GAM-IE11-WebDriver.zip file and ensure the Unzip on server checkbox is selected.GAM-IE11-WebDriver is listed under the Root directory and has Robotic processes gsa-robot, icd-robot, fapiis-process, and sba-robot.
The results should look like this:
The final step is to update the RPA connected system with the API key generated when you created your service account in Step 2.
To update the RPA connected system:
<site> and navigate to the Appian Designer.Connection successful.Setting Up Robotic Process Automation
