OverviewCopy link to clipboard
Process Reports can expose process model, process, or task data that can be queried and displayed as reports.
This page explains how to create and configure a process report so you can query data about a process using the a!queryProcessAnalytics() function. Then, we’ll display this data in a grid in an interface.
There are several out-of-the-box system default reports available to use. If you decide to go with one of these process reports, skip to the Calling the Process Report section.
Create a process reportCopy link to clipboard
Let's start by creating a process report.
For this example, we’ll create a process report that collects information on orders placed today.
To create the process report:
- In your application, go to the Build view.
- Click NEW > Process Report.
-
In the Create Process Report dialog, we’ll use the following values:
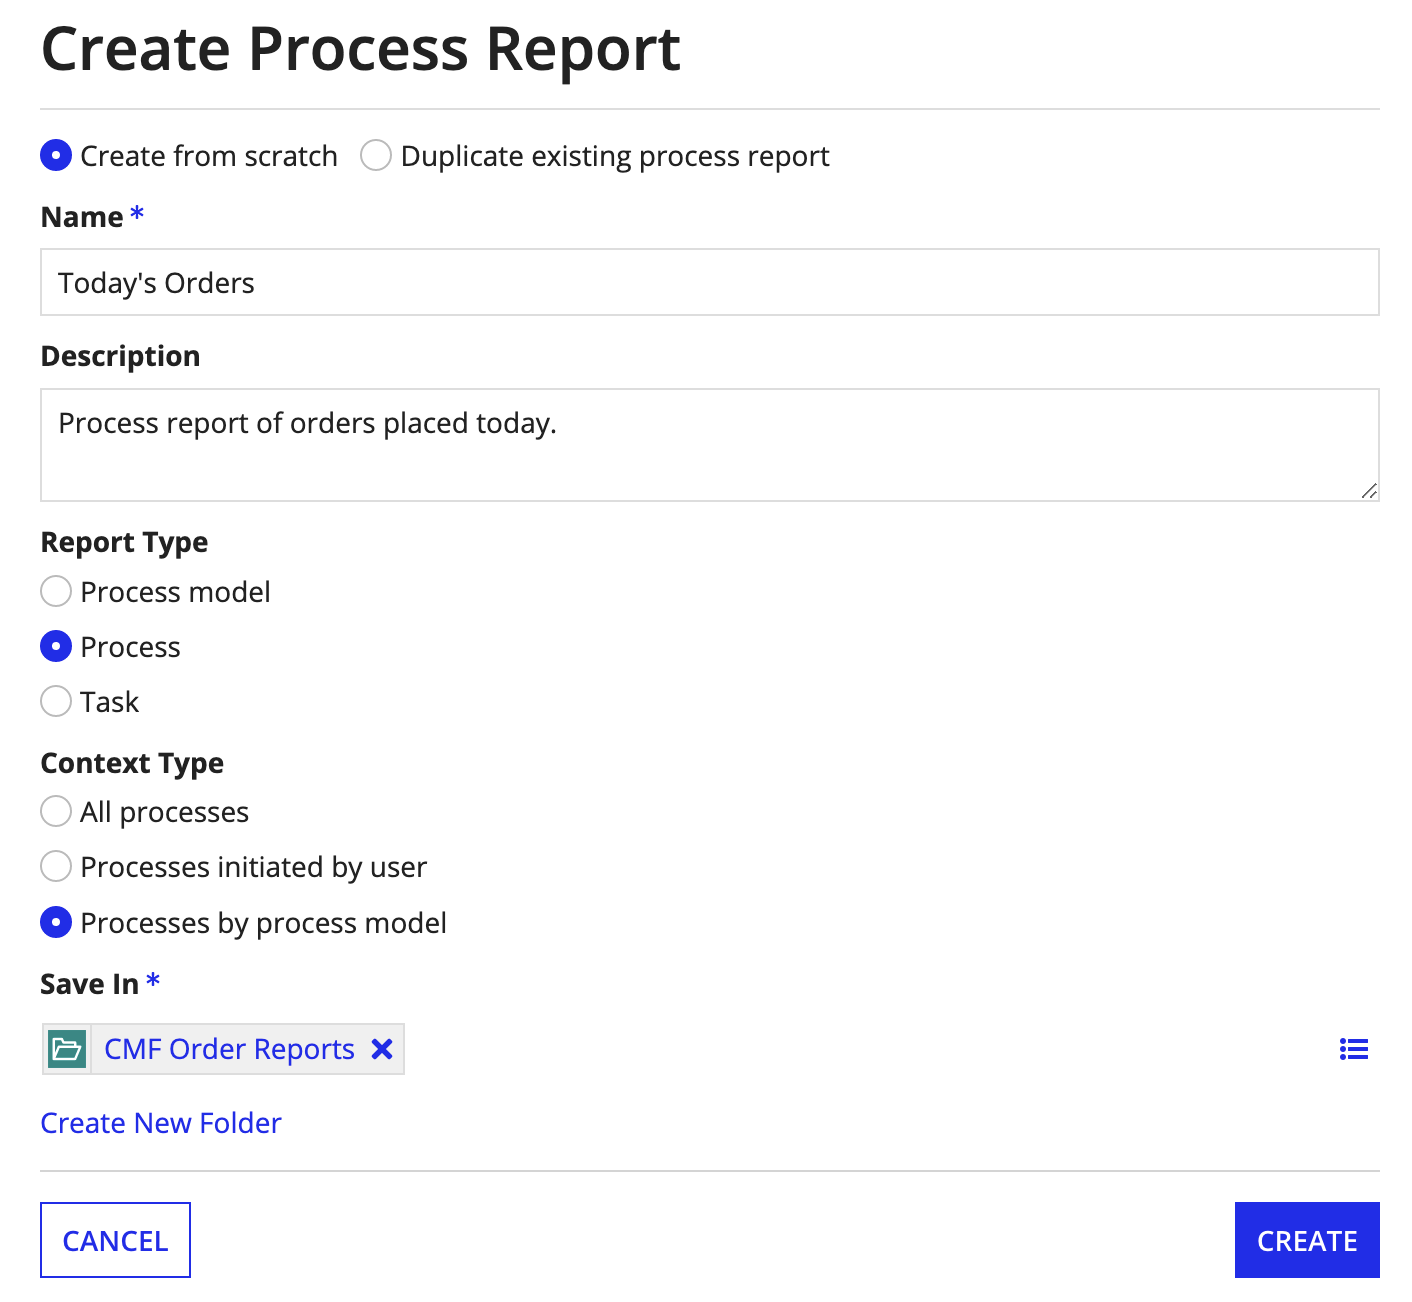
Tip: Not familiar with these properties? Learn about them here.
- Click CREATE. The new report displays in the list of objects.
Since we selected a Context Type of Processes by process model, we will need to to select a process model to compare in our report.
To select the process model:
- Open the new process report.
- In the Choose Process Models dialog, select the process model you want to compare.
- Click OK. The report will populate with data from the selected process model.
Add report columnsCopy link to clipboard
By default, the process report displays the process name, status, and start time. We’ll go ahead and add another column to the report.
To add a column to a process report:
- In the report toolbar, click Edit.
- In the Report Options dialog, go to the Data tab.
-
Click New Data.
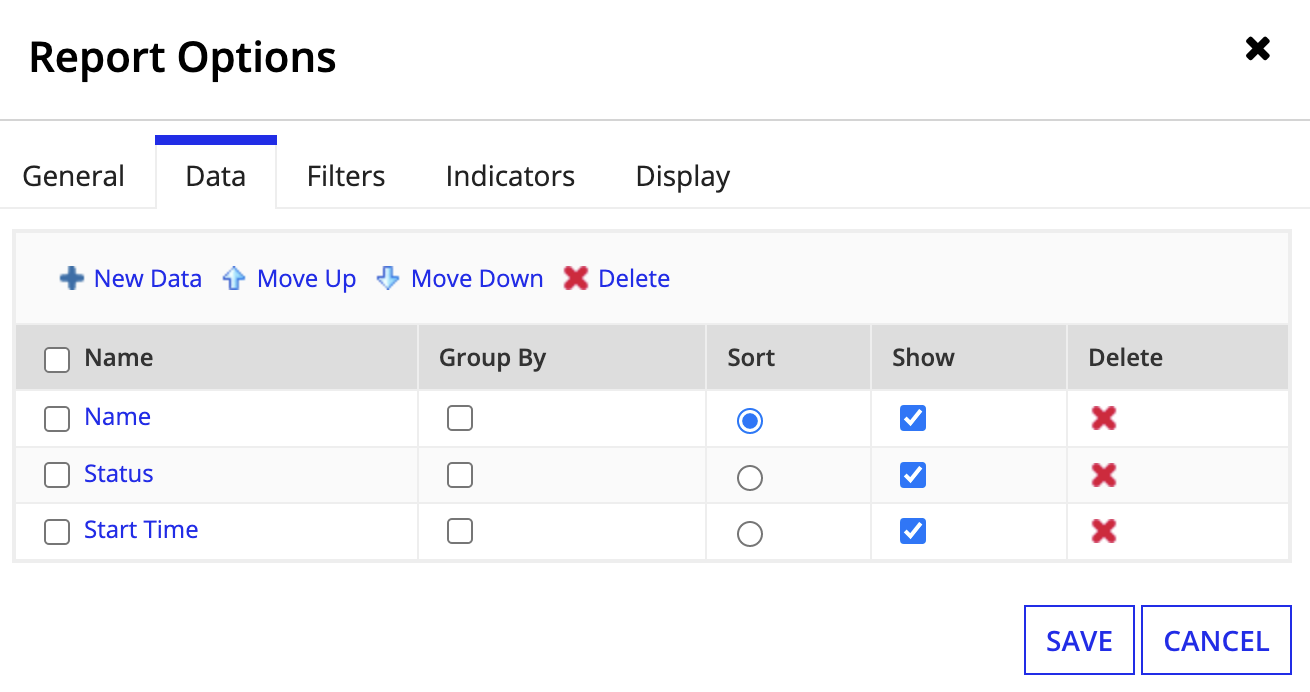
-
In the Add/Edit Data dialog, configure the following properties:
Properties Description Display Name The name of the new column. Definition The expression defining the data displayed in the new column. You can use process properties, process variables, or process metrics in the definition. If you use a variable of type record data type, you must pass the entire variable into the definition; you cannot index into specific record fields from the report. Formatting The format in which the data is displayed in the column of the process report. This formatting will not apply when querying the process data using a!queryProcessAnalytics().Link to More Information Links to other useful data points. However, for the purpose of this report, we don't need to specifically link to other process data.
These links will return in the d(n) part of the datasubset when we usea!queryProcessAnalytics(), which can be used to create links to other things. Specifically, when creating task reports, linking totp!idcan be useful to create a link to a task in someone's task queue. Learn more about using task prefixes.For example, we’ll add a new column called Order, which will populate with the value stored in the Order process variable from our process model.
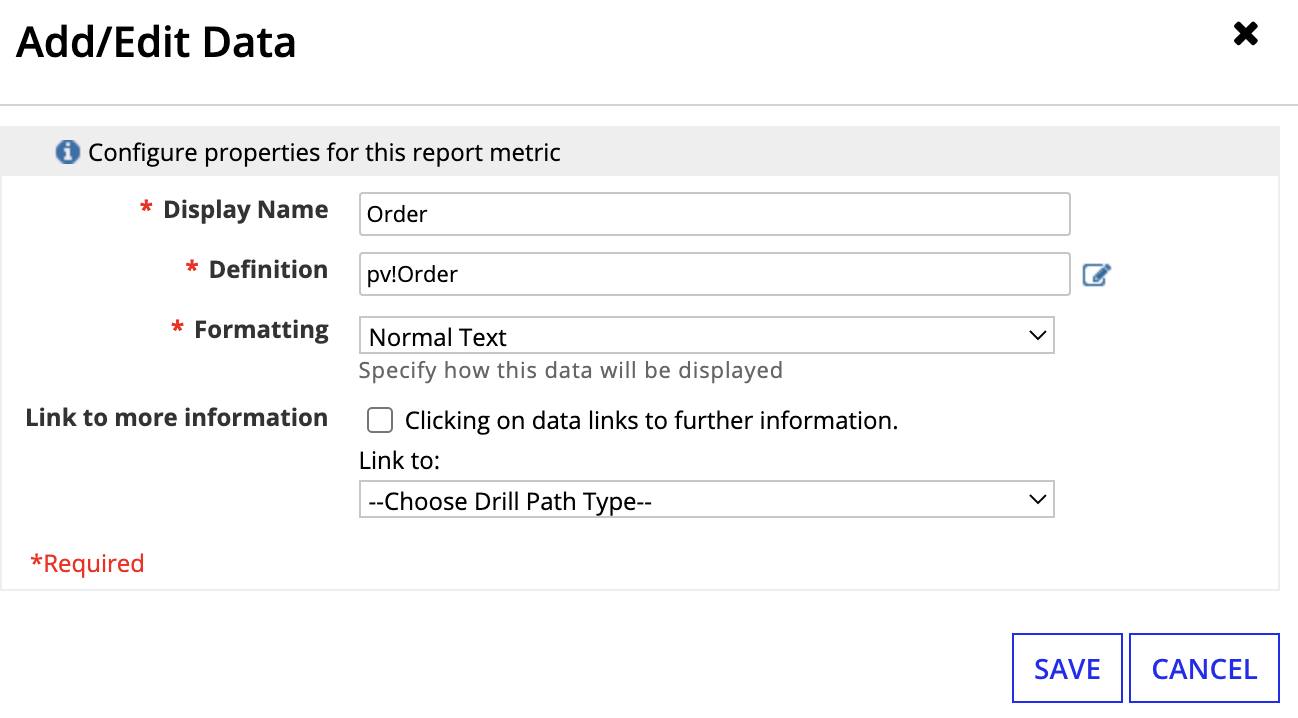
- Click SAVE to close the Add/Edit Data dialog.
- Click SAVE to close the Report Options dialog.
The new column displays in the report.
Note: If you referenced a record data type as a column in the report, it will not display in the report designer; however, you can still query this data using a!queryProcessAnalytics().
Set up a report filterCopy link to clipboard
Now that we've added the columns we want, we will filter our report so it only returns orders placed today. We’ll use default filters in the report to accomplish this.
To configure a new filter:
- In the report toolbar, click Edit.
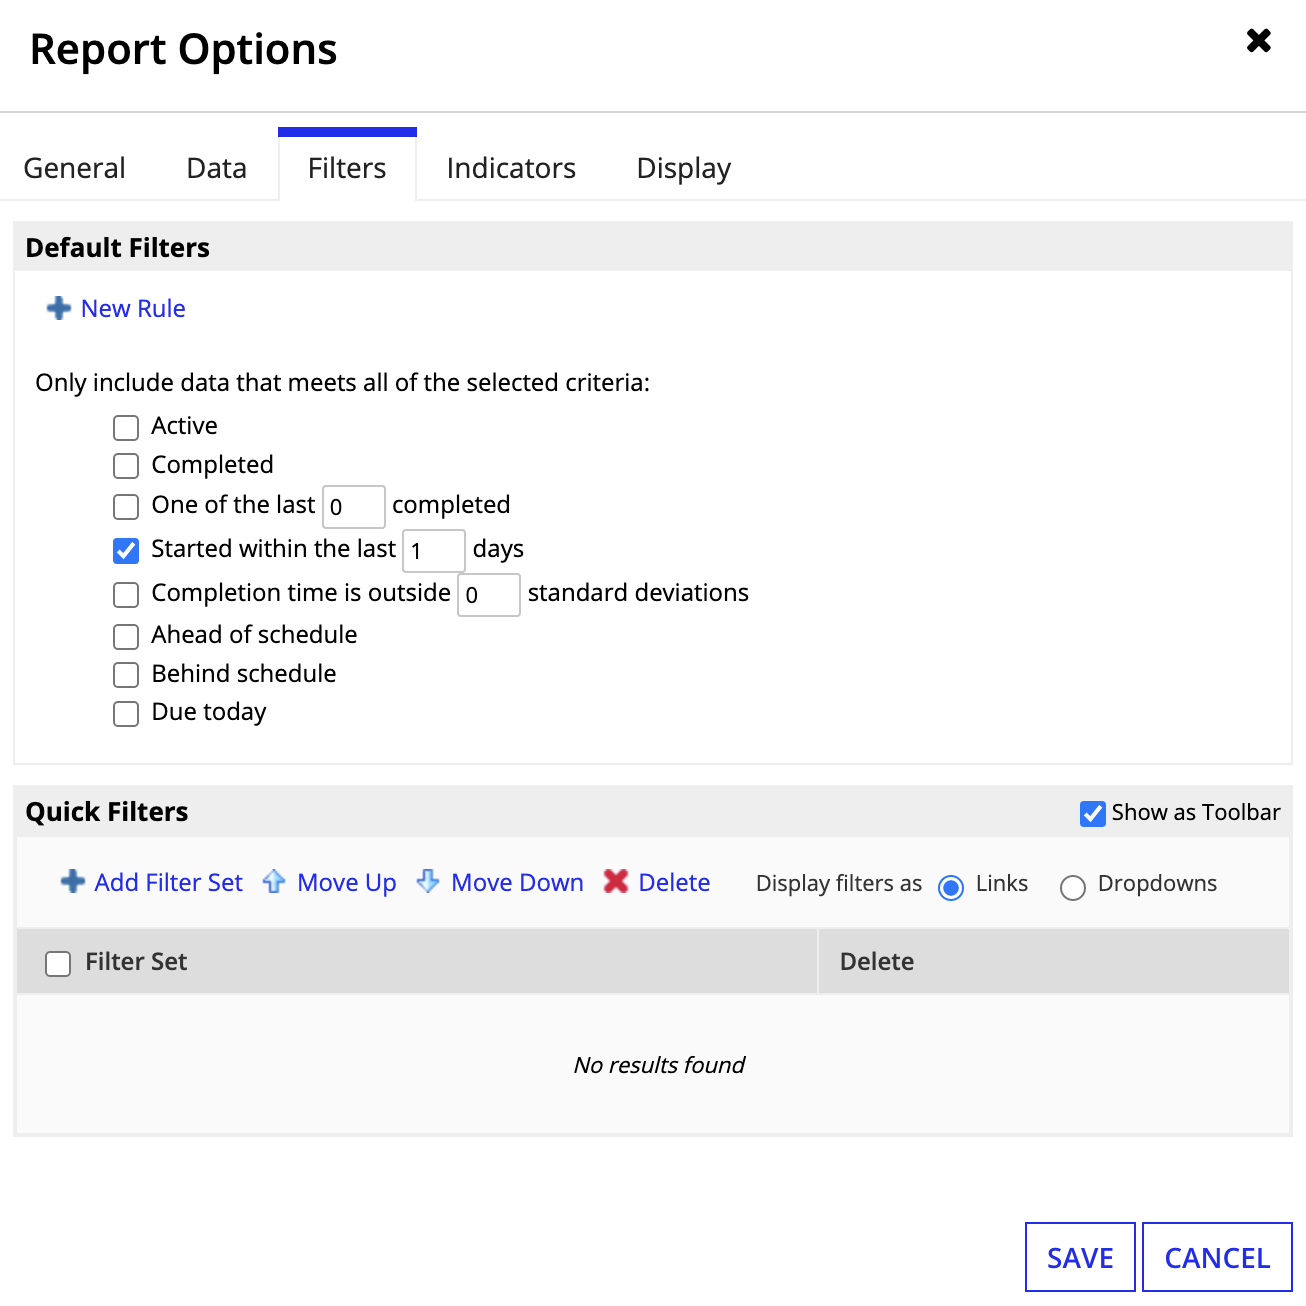
- In the Report Options dialog, go to the Filter tab.
- To only include orders created today, select Started within the last 0 days.
-
In the text box, enter
1.
- Click SAVE.
- In the report toolbar, click to save the process report.
Now that we have our process report configured, let’s use it to query process data and display the data in an interface.
Call the process reportCopy link to clipboard
To query our process report, we’ll use the a!queryProcessAnalytics() function. This function executes a process report and returns the resulting data.
To use this function, we first need to create two new constants:
- One constant that points to our process report.
- Another that points to the contextual process model.
Once we have our constants, we’ll create a new expression rule and call the a!queryProcessAnalytics() function.
Create constantsCopy link to clipboard
To create a constant for the process report:
- In the Build view, click NEW > Constant.
-
In the Create New Constant dialog, configure the following properties:
Property Description Name The name of the constant. Description A short description about the constant. Type Select Document. Value Select the newly created process report. Save In The folder to save the constant in. - Click CREATE.
Next, create a constant for the process model used in the report:
- In the Build view, click NEW > Constant.
-
In the Create New Constant dialog, configure the following properties:
Property Description Name The name of the constant. Description A short description about the constant. Type Select Process Model. Value Select the process model used as context in your report. Save In The folder to save the constant in. - Click CREATE.
Create an expression ruleCopy link to clipboard
Now that we have our constants, let’s create a new expression rule and query our process report:
- In the Build view, click NEW > Expression Rule.
- Name and create your new rule.
-
In the expression box, enter
a!queryProcessAnalytics()and use your new constants to populate the report and contextProcessModels parameters.For example:
1
2
3
4
 a!queryProcessAnalytics(
   report: cons!CMF_TODAYS_ORDERS,
   contextProcessModels: cons!CMF_NEW_ORDER_MODEL
 )
Copy - To page through the results in a read-only grid, we’ll add paging information using the query parameter and a rule input:
- In the RULE INPUTS pane, click New Rule Input.
- For Name, enter
pagingInfo. - For Type, choose the PagingInfo data type.
- In the
a!queryProcessAnalytics()function, add the query parameter. - In the query parameter, enter
a!query( pagingInfo: ri!pagingInfo).
The expression currently looks like this:
1
2
3
4
5
6
7
a!queryProcessAnalytics(
  report: cons!CMF_TODAYS_ORDERS,
  contextProcessModels: cons!CMF_NEW_ORDER_MODEL,
  query: a!query(
    pagingInfo: ri!pagingInfo
  )
)
Copy
Test the expressionCopy link to clipboard
With your function configured, let’s test out our report results.
To test the expression:
-
In the Test Inputs, for the pagingInfo rule input, enter the following:
1
2
3
4
 a!pagingInfo(
     startIndex: 1,
     batchSize: 10
 )
Copy -
Click TEST RULE.
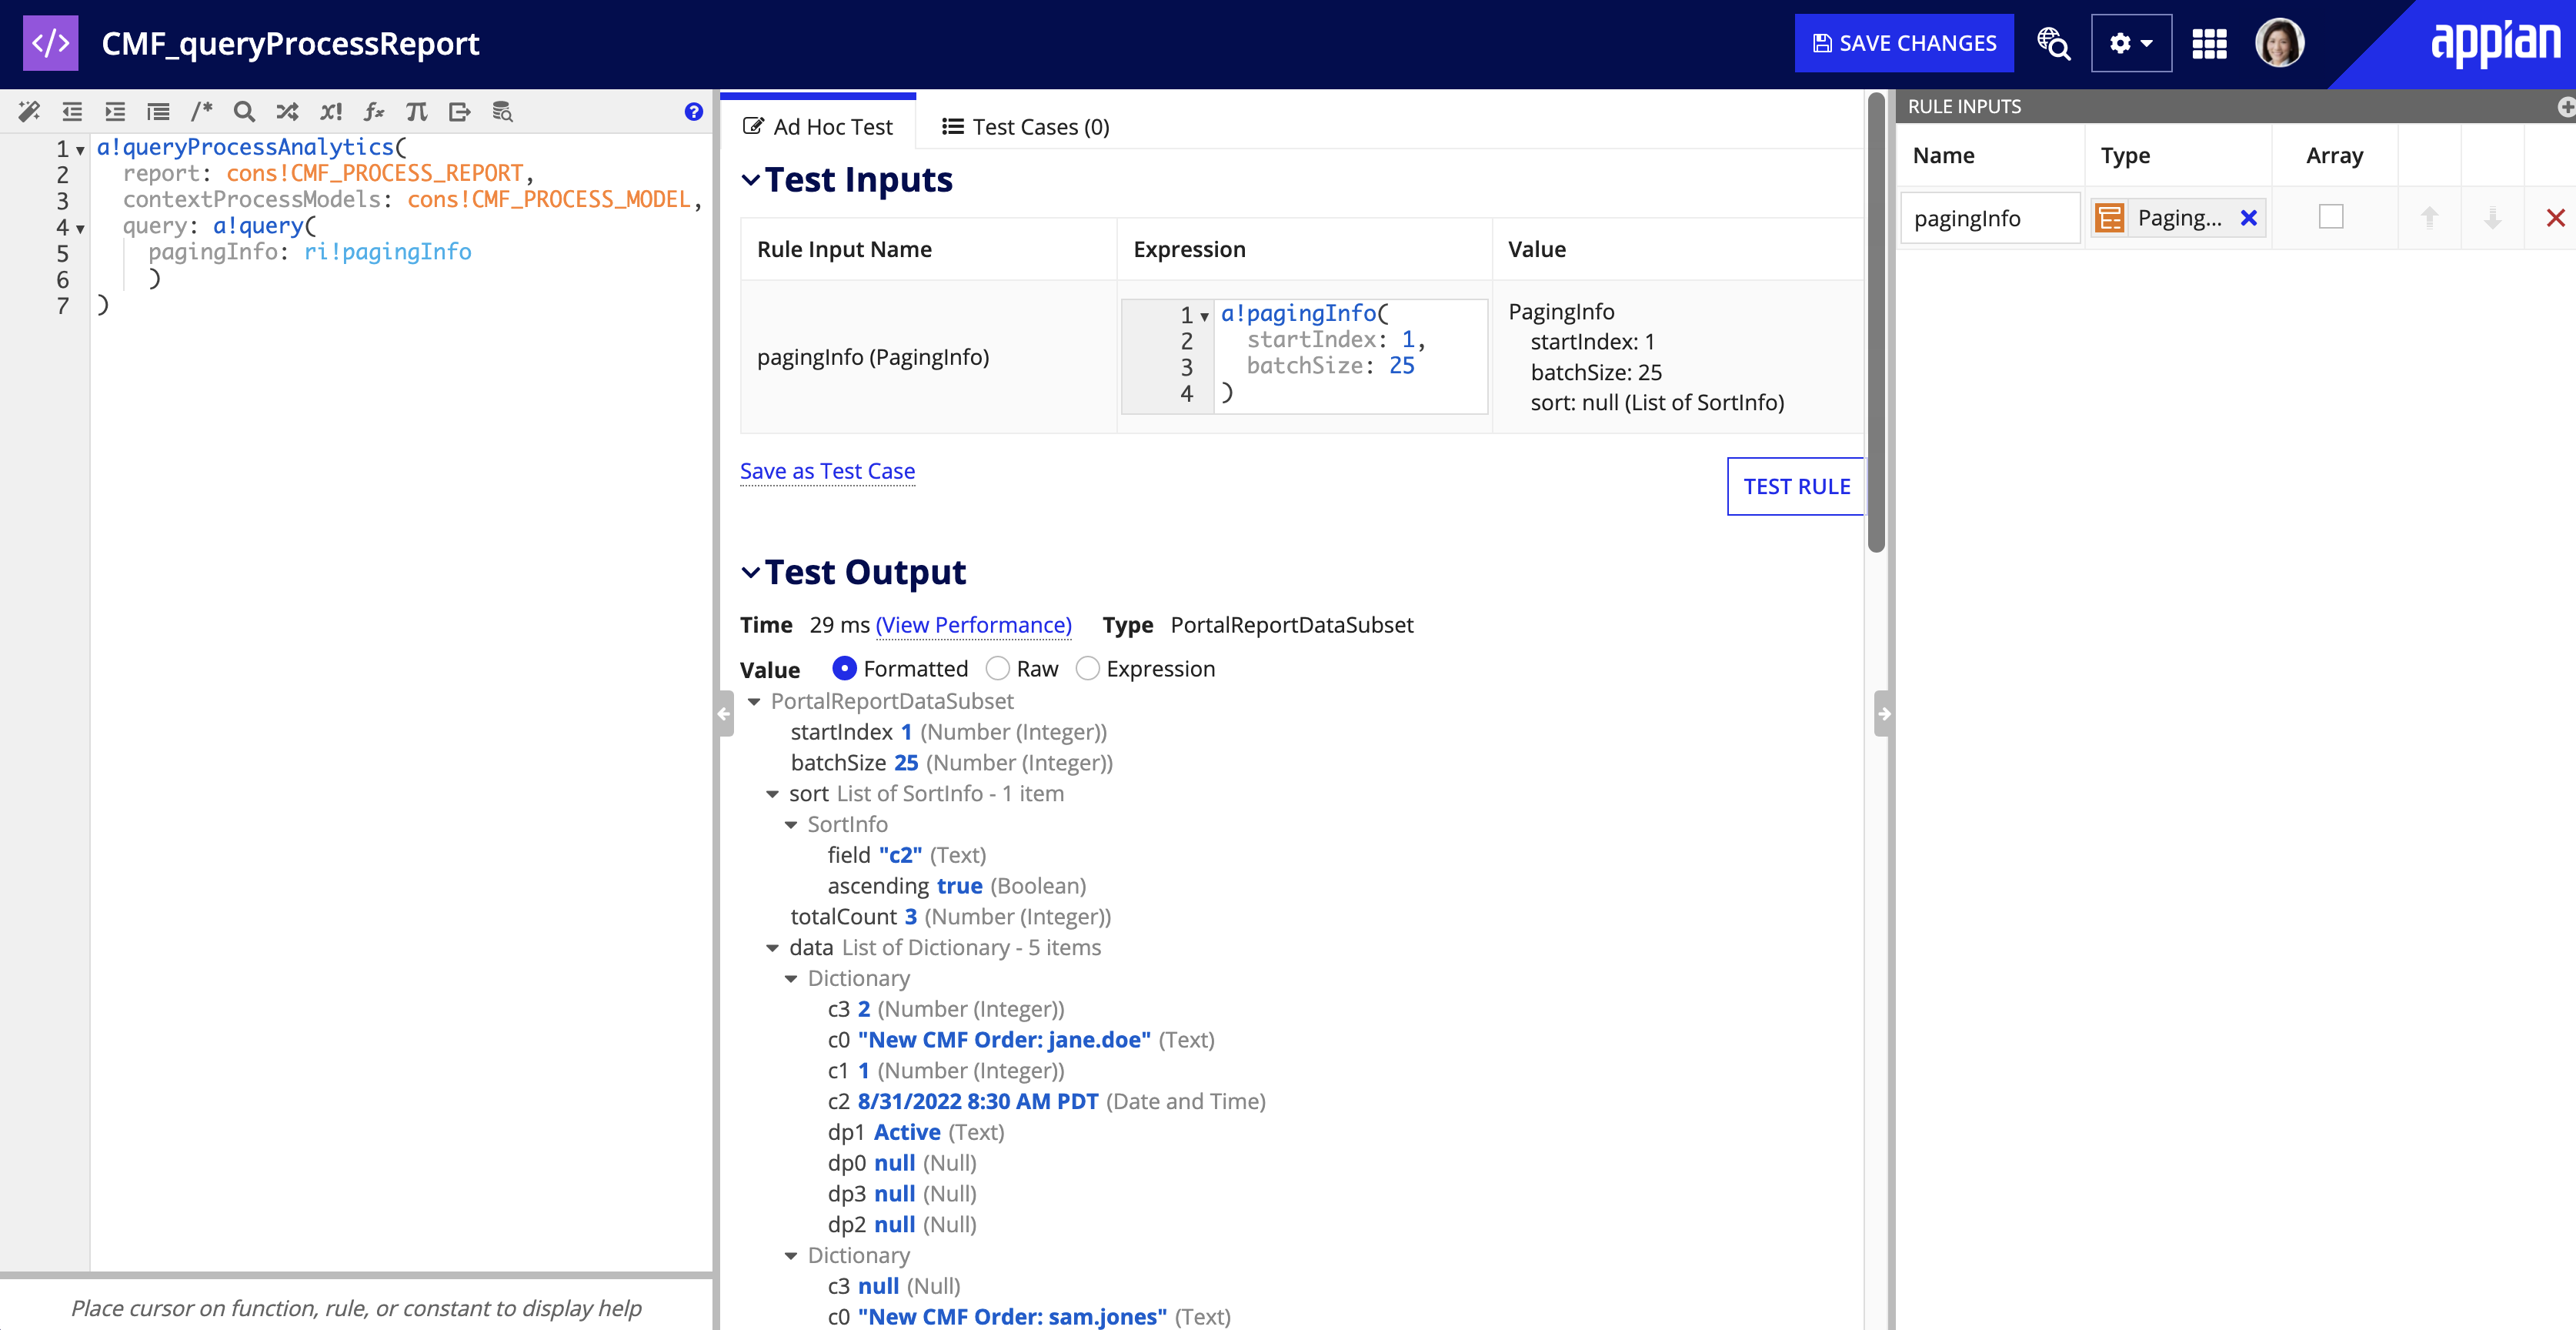
The results will look something like this:
Display report data in an interfaceCopy link to clipboard
Now that we’ve queried data about our process, we can display that data however we want in an interface.
To reference the process data in an interface, we’ll call our expression rule as a local variable and use it to display data using the process report datasubset.
A process report datasubset is almost identical to a typical datasubset with two exceptions:
- The process report datasubset also contains the
name,description, andcolumnConfigsfields. ThecolumnConfigfields help identify which data is which. - The
datafield will always havec(n)andd(n)subelements:c(n)refers to the data columns we started with and added to the process report.d(n)refers to linked data on any columns where designers selected Link to more information option.
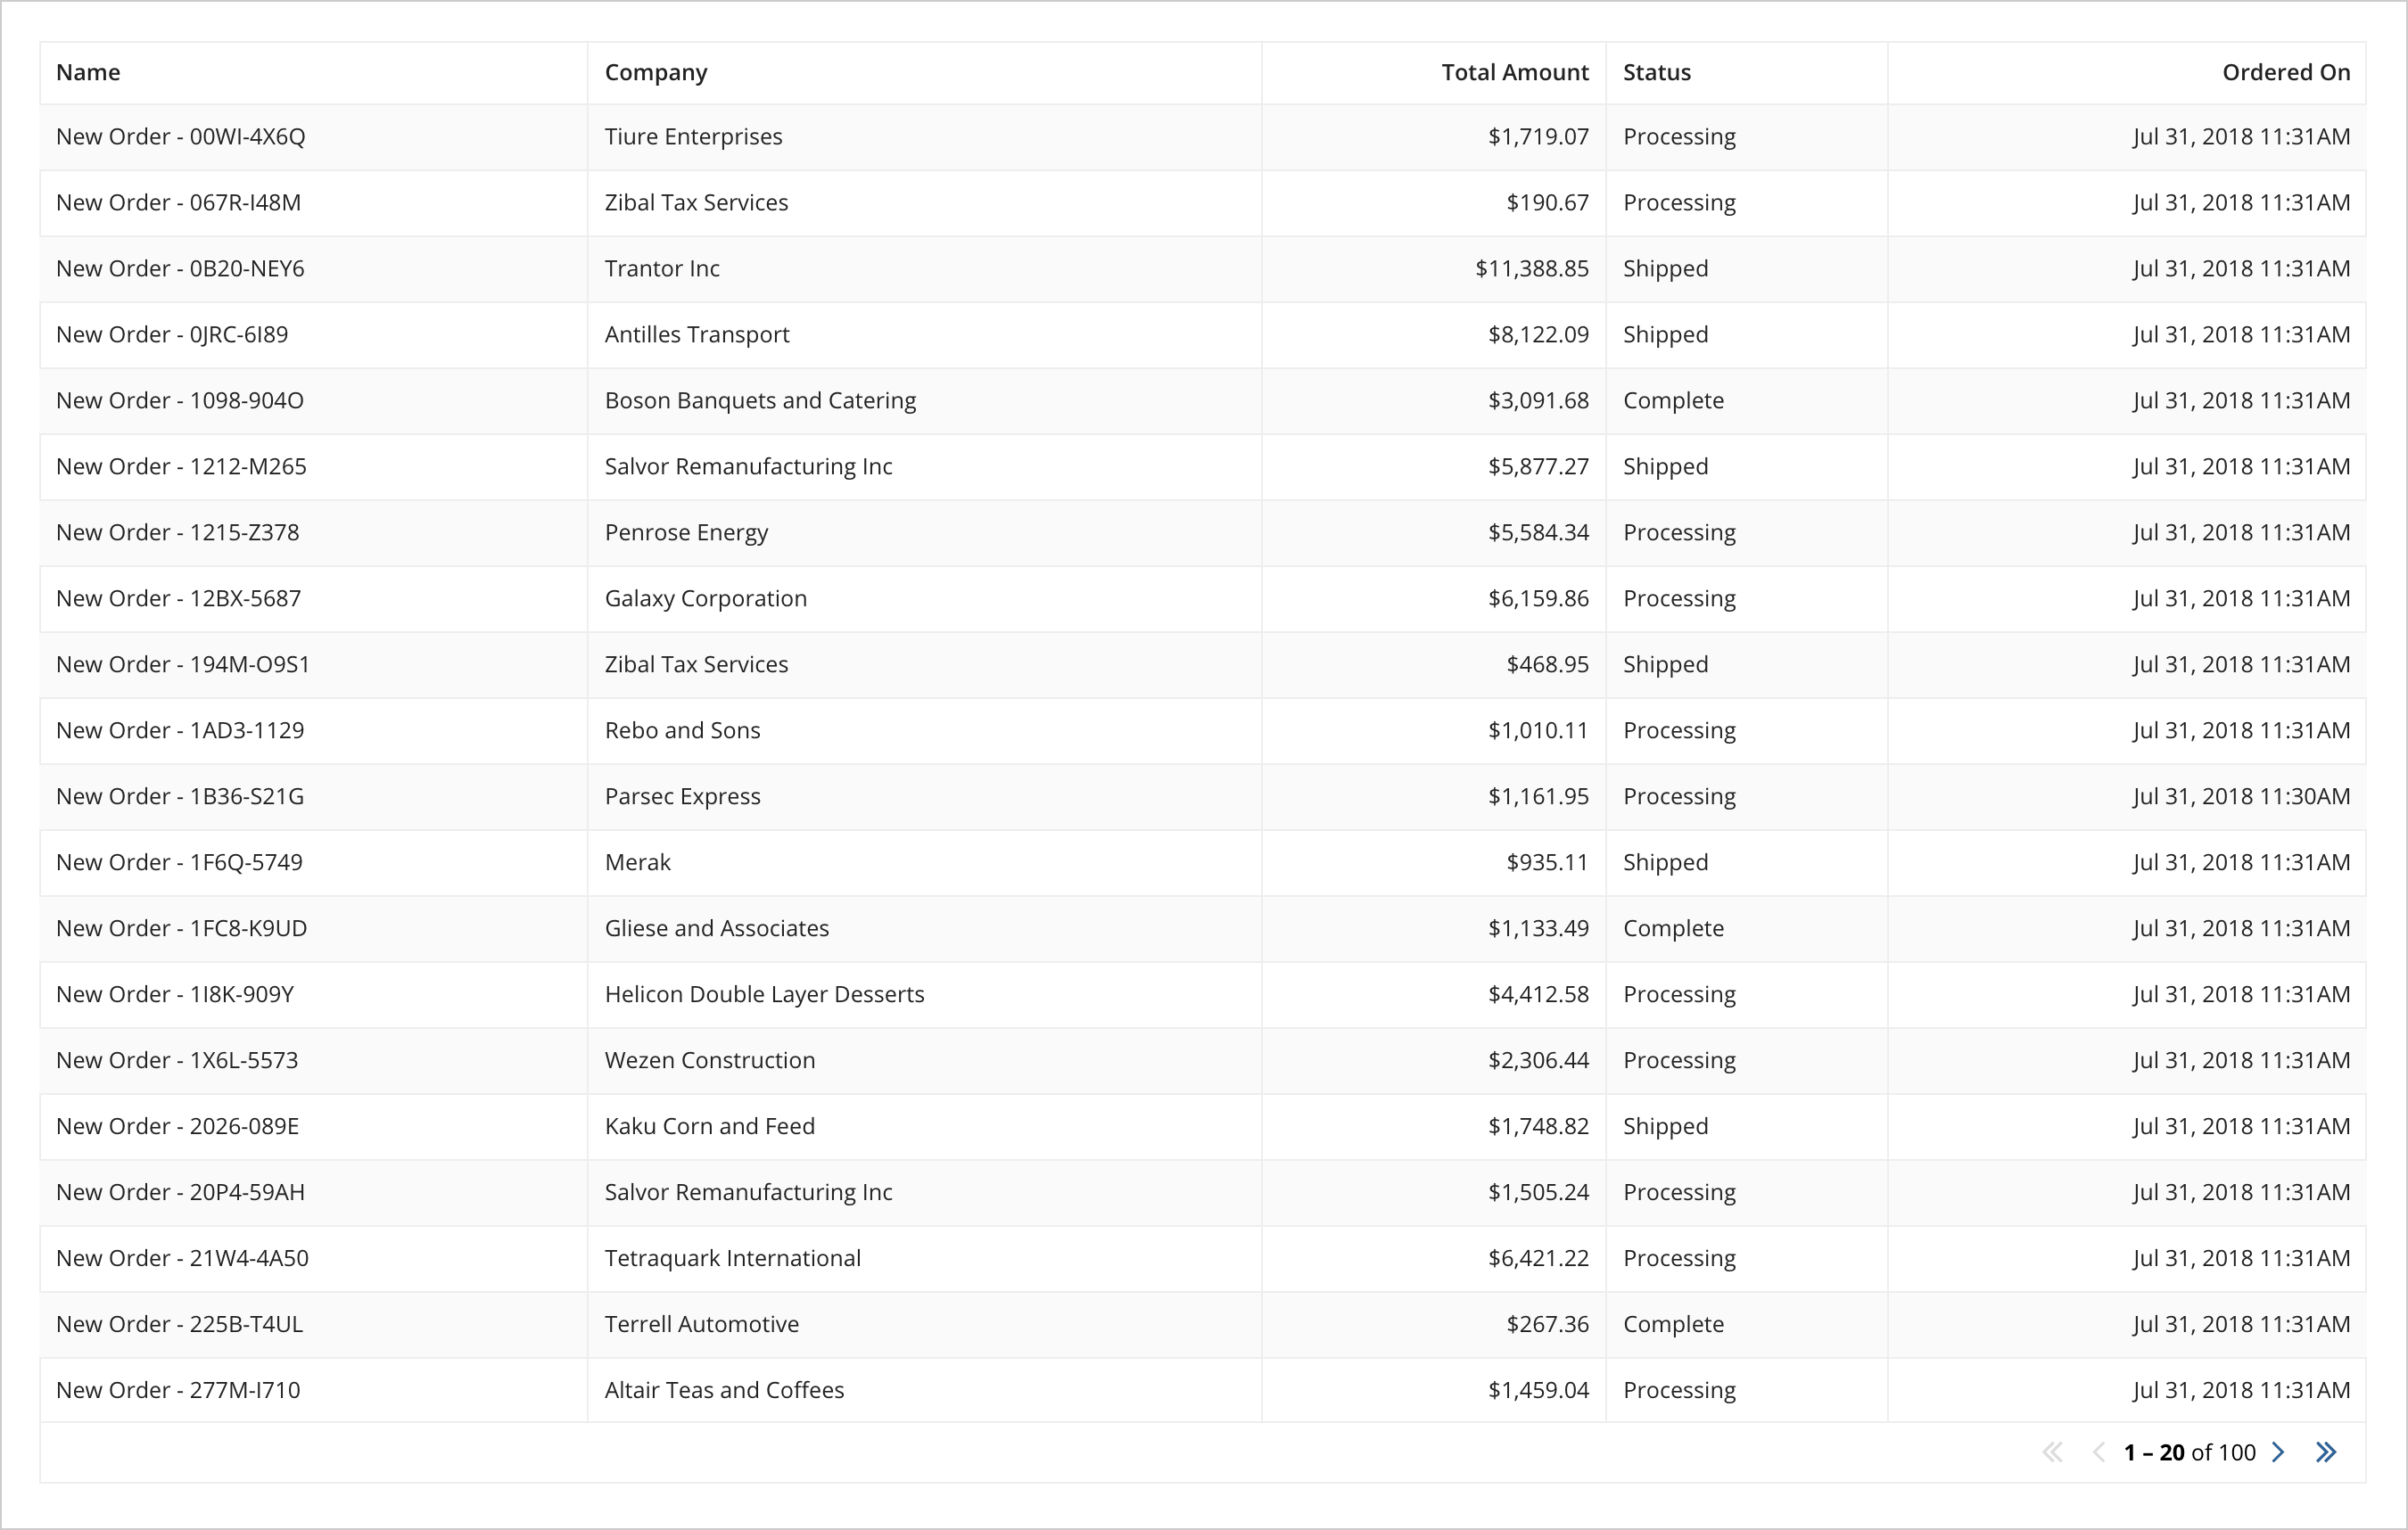
In this example, we’ll reference the name, company, totalAmount, status, and orderDate in a read-only grid.
To create this grid:
- From the Build view, click NEW > Interface.
- Click EXPRESSION.
-
Create a local variable to reference your expression rule.
For example:
1
2
3
4
5
 a!localVariables(
 local!datasubset: rule!CMF_queryProcessReport(
    pagingInfo: a!pagingInfo(startIndex: 1, batchSize: -1)
  )
 )
Copy
This local variable is how we'll reference our process data in the interface.
-
Add an a!gridField() function and use the local variable in the data parameter. Append
.datato the end of the local variable to only return the data property from the datasubset.For example:
1
2
3
4
5
6
7
8
9
 a!localVariables(
 local!datasubset: rule!CMF_queryProcessReport(
     pagingInfo: a!pagingInfo(startIndex: 1, batchSize: -1)
  ),
 a!gridField(
    label: "Sample data",
    data: local!datasubset.data,
  )
 )
Copy - Add the columns parameter to
a!gridField(). -
For each column in the grid, use the a!gridColumn() function. For the value parameter, use the index() function to display each row data from a specific field from the datasubset.
For example, to display the Name column:
1
2
3
4
 a!gridColumn(
     label: "Name",
     value: index(fv!row, "c0", null)
 )
Copy
If the column is of type record data type, you'll need to index into the column and then index into the specific record field reference. For example, to display the order date from the Order column:
1
2
3
4
5
6
7
8
  a!gridColumn(
  label: "Ordered On",
  value: index(
      index(fv!row, "c3", null),
      recordType!Order.fields.orderDate,
      null
   )
  )
Copy
The finished grid would look something like this:


