OverviewCopy link to clipboard
This tutorial will guide you through the steps to create a process model that end users can start using a record list action.
The process model we're creating in this tutorial will allow users to create new employees in the Employee record type. The form for Employee information contains several inputs that are saved into a process variable so we can use them later.
We'll add a process flow that lets the user cancel their request to add an new employee. For the last step, we'll set up an automatic email to the HR manager letting them know a new employee was added to the system.
Tip: If you have a database-backed record type with data sync enabled, Appian can automatically configure your processes for you when you generate a record action.
Before you beginCopy link to clipboard
- Complete the Interface Tutorial first, so that you have the Appian Tutorial application, the Employee record type, and the AT_employeeForm interface needed to complete this tutorial.
- Make sure you're a member of the Process Model Creators system group. Contact your system administrator if you are unsure if you belong to this system group.
Create the process modelCopy link to clipboard
Let's start by creating the process model object. We'll also use the AT_employeeForm interface as the start form to automatically populate our variables.
To create the process model:
- In the Appian Tutorial application, go to the Build view.
- Click NEW > Process Model.
- In the Create Process Model dialog, configure the following properties:
- Leave Create from Scratch selected.
- For Name, enter
AT Create New Employee. - For Save In, use the default AT Process Models folder.
- Click CREATE.
- In the Review Process Model Security dialog, update the default security as follows:
- For AT Users, set the Permission Level to Initiator.
- For AT Administrators, leave the Permission Level as Administrator.
- Click SAVE. The Appian Process Modeler opens automatically and displays the AT Create New Employee process.
- From the menu bar, click File > Properties.
- Click the Process Start Form tab.
- For Interface, select AT_employeeForm.
-
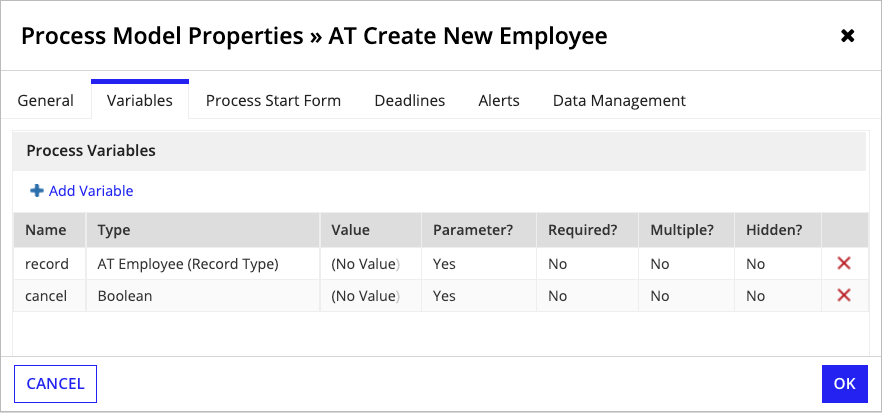
On the Create Process Parameters dialog, click Yes. The
recordandcancelprocess variables are created. You can see these variables if you go to the Variables tab. - Click OK.
- From the menu bar, click File > Save & Publish.
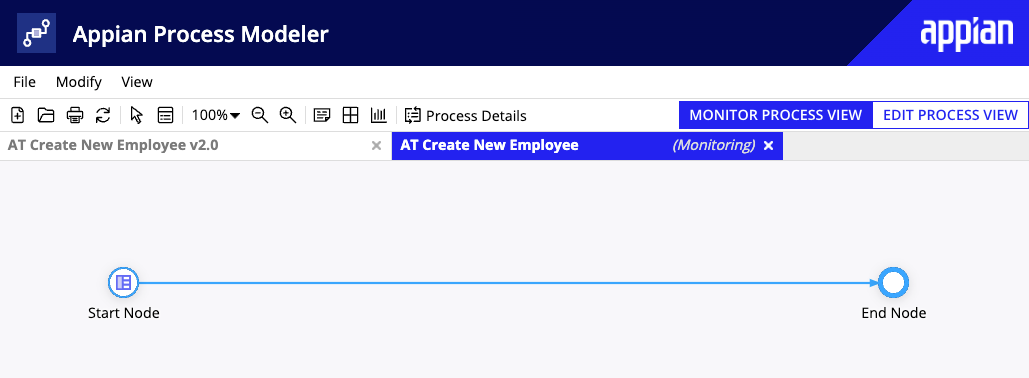
Your process model will look like this:
You can leave the modeler tab open, because we'll be returning to it in a moment.
Create a record list actionCopy link to clipboard
Now that we have a process model to build on, we'll configure a new record list action so users have a way to initiate the process.
To create the record list action:
- In the Build view, open the AT Employee record type.
- In the record type, go to Actions.
- Under Record List Actions, click CONFIGURE NEW ACTION MANUALLY. The Create New Action dialog appears.
- For Display Name, enter
New Employee. - For Icon, keep the default
plusicon. - For Process Model, enter
AT Create New Employee. - Click OK.
- Click SAVE CHANGES.
Test the record list actionCopy link to clipboard
Now that we have a process model to build on, let's see what happens if we run the record list action in this basic state.
To test out the action:
- In the record type, go to List.
- Under the Record List section, click the URL. The record list opens in a new tab.
-
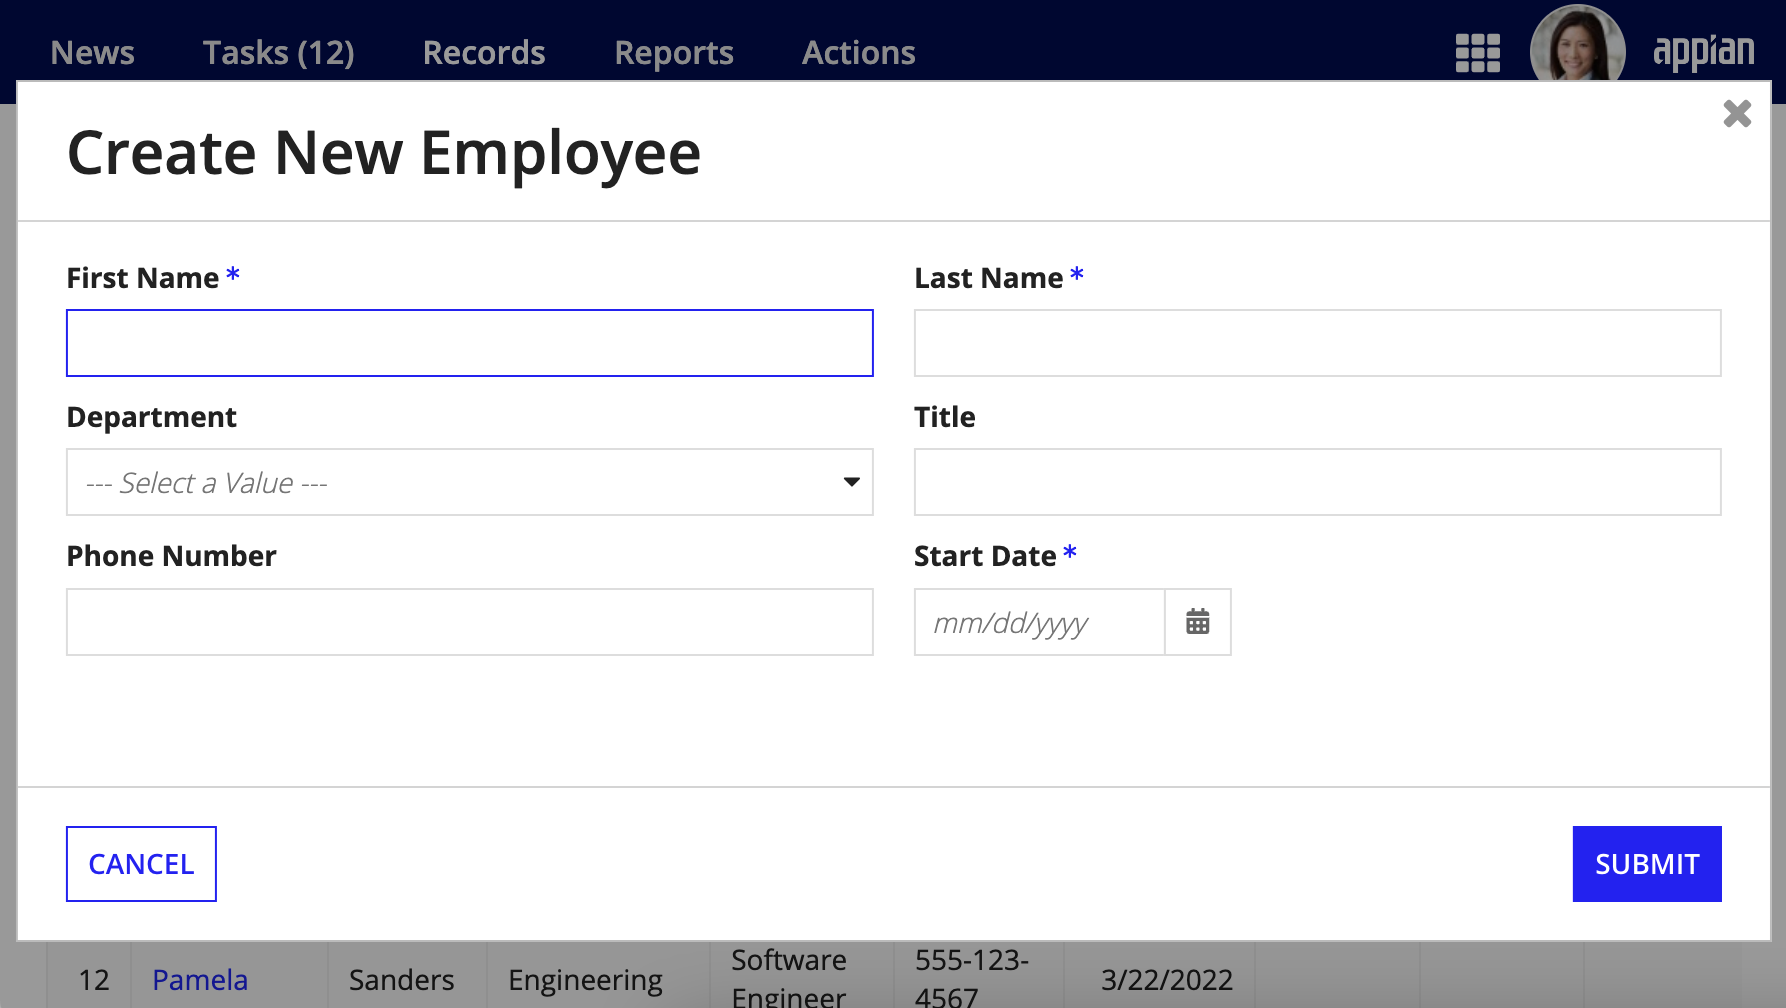
Click + NEW EMPLOYEE. You should see the following:
-
Complete the form. For example, you could enter:
Field Value First Name Deborah Last Name Geary Department Sales Title Account Executive Phone Number 123-555-0987 Start Date any future date - Click SUBMIT.
- Return to the Appian Tutorial application, and click Monitor in the navigation pane.
- Go to PROCESS ACTIVITY to view the list of processes.
-
In the list, click the process instance with the name AT Create New Employee. This action opens the monitoring view of the process instance in the Process Modeler. The flow that your process instance followed is highlighted in blue.
In this case, the flow was straightforward: it started at the Start Node and successfully continued to the End Node.
-
In the toolbar, click Process Details. By default, the Process History tab is active.
In this example, you can see each event Appian logged as you started the record list action, completed the input fields, and submitted the form.
-
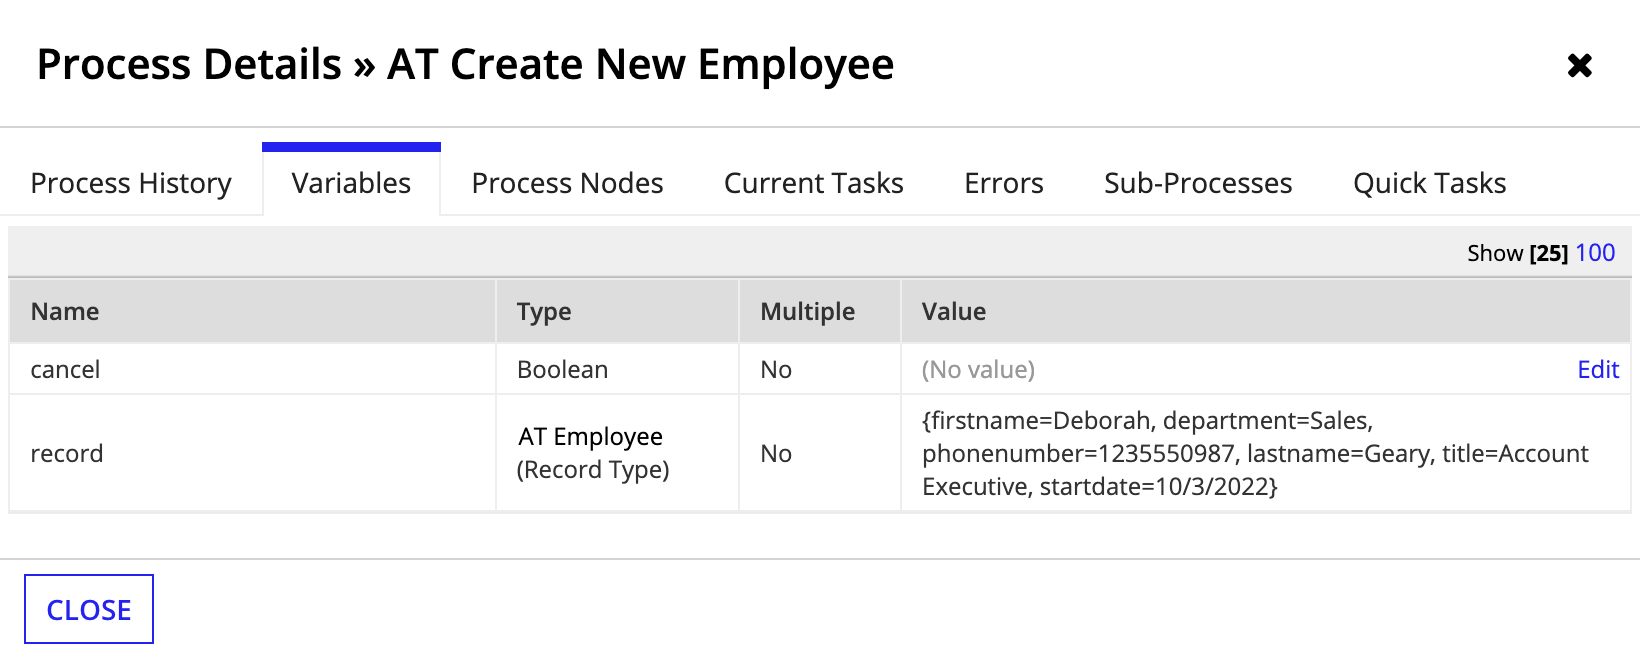
Click the Variables tab. This tab displays the values that Appian populated to the process variables based on your field inputs.
- Click CLOSE.
- Close the monitoring view for this process instance.
Make process instance names dynamicCopy link to clipboard
In the PROCESS ACTIVITY list, you might have noticed that the process name is just Create New Employee. As more employees are created and other applications are introduced into this environment, it will become difficult to distinguish processes from each other if the process instance names are generic.
Let's update the name to include information that's specific to each process instance.
To make the process instance names dynamic:
- Return to the Create New Employee process model.
- From the menu bar, click File > Properties.
- On the General tab, next to Process Display Name, click Edit as Expression.
-
In the Expression Editor dialog:
- Enter
"New Employee: " &. - On the Data tab, expand the Process Variables and record lists.
- Click firstName to add the record field reference to the expression.
- Enter
& " " &. - From the record list, click lastName.
This expression adds employee information to the display name of every process instance.
- Enter
- Click SAVE AND CLOSE.
- Click OK to close the Process Model Properties dialog.
- From the menu bar, click File > Save & Publish.
-
Test the record list action again. This time, in the Monitor view, notice that the process name includes the value from the Expense Item field of the input form:
Add a cancel flowCopy link to clipboard
We've enabled our users to create a new employee, but we still need to handle the case when the user starts to fill out the form, but then wants to cancel the action.
We'll do that by adding a cancel flow to the process.
A cancel rule input is part of the two-column form template used for the AT_employeeForm interface. When we chose the interface as the process start form, a corresponding cancel process variable was automatically created. At this point though, nothing in the workflow uses that variable.
If a user clicks CANCEL, ri!cancel is set to true and the AT Create New Employee process is started with pv!cancel also set to true. Now, we just need to add a gateway to direct the process flow based on the value of pv!cancel.
Add a gateway nodeCopy link to clipboard
Gateways let you route the flow to different paths of your process model based on logic you define. In this case, the gateway uses the value of pv!cancel to select the appropriate workflow path.
To add a gateway node:
- In the Create New Employee process model, drag an XOR node from the palette to the canvas, and drop it on top of the existing connector between the Start Node and End Node. The connector turns blue to indicate that you can add the node to the existing flow.
- Click the label of the new XOR gateway and change it to
Cancel?. - Drag an End Event node from the palette to the bottom of the
Cancel?gateway. A red dot appears indicating that these two nodes will be connected. - Drop the End Event node on the red dot. The two nodes are now connected.
- Rename this node
Cancel End Event. - Double-click the flow connector between the Cancel node and the End Node, and set the Label property to
No. - Click OK to close the Flow Properties dialog.
- Double-click the flow connector between the Cancel node and the Cancel End Event node, and set the Label property to
Yes. -
Click OK.
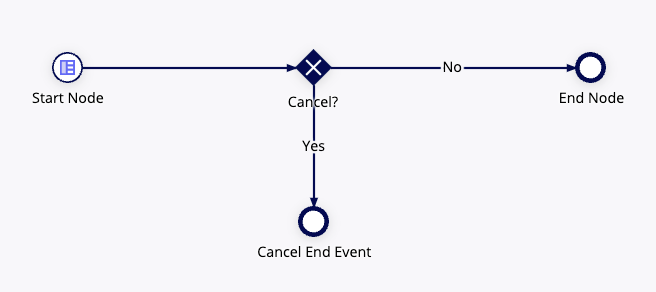
The process model should look like this:
Configure the decision logicCopy link to clipboard
Now let's define the logic within the Cancel? gateway using the cancel process variable.
To configure the gateway decision logic:
- Double-click the Cancel? node.
- On the Configure Cancel? dialog, click the Decision tab.
- Click NEW CONDITION.
- Configure properties for the new condition:
- For Condition, enter
pv!cancel. - For Result, in the go to dropdown list, select Cancel End Event.
- For Condition, enter
- Configure properties for the Else if none are TRUE condition:
- For Result, in the go to dropdown list, select End Node.
- Click OK.
- In the menu bar, click File > Save & Publish.
-
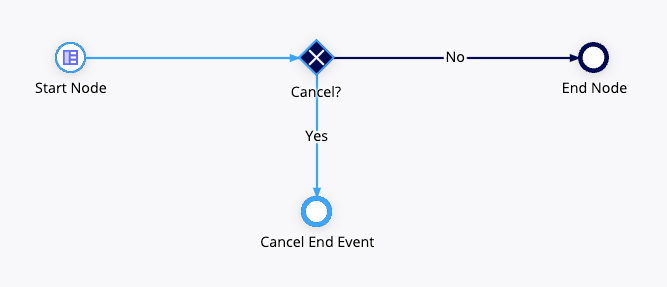
Test the record list action again, but click CANCEL instead of SUBMIT. In the Monitor view, click the process instance to review the process flow. You can see that the process followed the cancel flow:
Configure the end nodesCopy link to clipboard
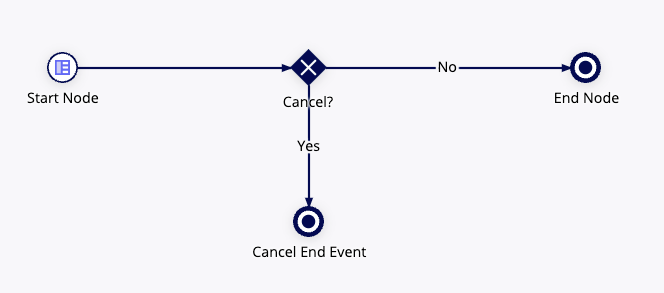
It's a best practice to formally terminate a process when it reaches an end event node. We'll configure both the End Node and the Cancel End Event to terminate the process on completion of the node action.
In the process model, do the following for each of these nodes:
- Double-click the node.
- Click the Results tab.
- Click Terminate Process.
- Click OK. Your end nodes should now look like this:
- From the menu bar, click File > Save & Publish.
Write employee data and send a notificationCopy link to clipboard
Each new employee created with the form needs to be saved in the database that backs our Employee record type. The Write Records smart service can take the information stored in the pv!record variable and add it to the record type's data source.
Configure a Write Records nodeCopy link to clipboard
To configure a Write Records node:
- In the Create New Employee process model, expand the DATA SERVICES section of the palette.
- Drag a WRITE RECORDS node to the canvas and drop it on the connector between the Cancel? (XOR) node and End Node.
- Click the label and change it to
Write Employee Record. - Double-click the Write Records node.
- Go to the Data tab.
- In the Node Inputs pane, click Records.
- For the Value field, use the dropdown to select
record. The field is automatically populated with the correct process variable syntax. - Click OK.
- From the menu bar, click File > Save & Publish.
- Test the record list action again.
- In the Monitor view, click the process instance to review the process flow. You can see that the process followed the flow to add a new employee.
Store the outputCopy link to clipboard
Let's say the manager of the team using our application wants to be notified by email when new employees are added. We can use a Send E-mail smart service node to meet this requirement. First, we need to get the output of the Write Records node so we can pass the new employee record to the next part of the process.
To store the Write Records output:
- In the Create New Employee process model, double-click the Write Employee Record node.
- Go to the Data tab.
- Go to the Output tab.
- In the list of Node Outputs, click Records Updated.
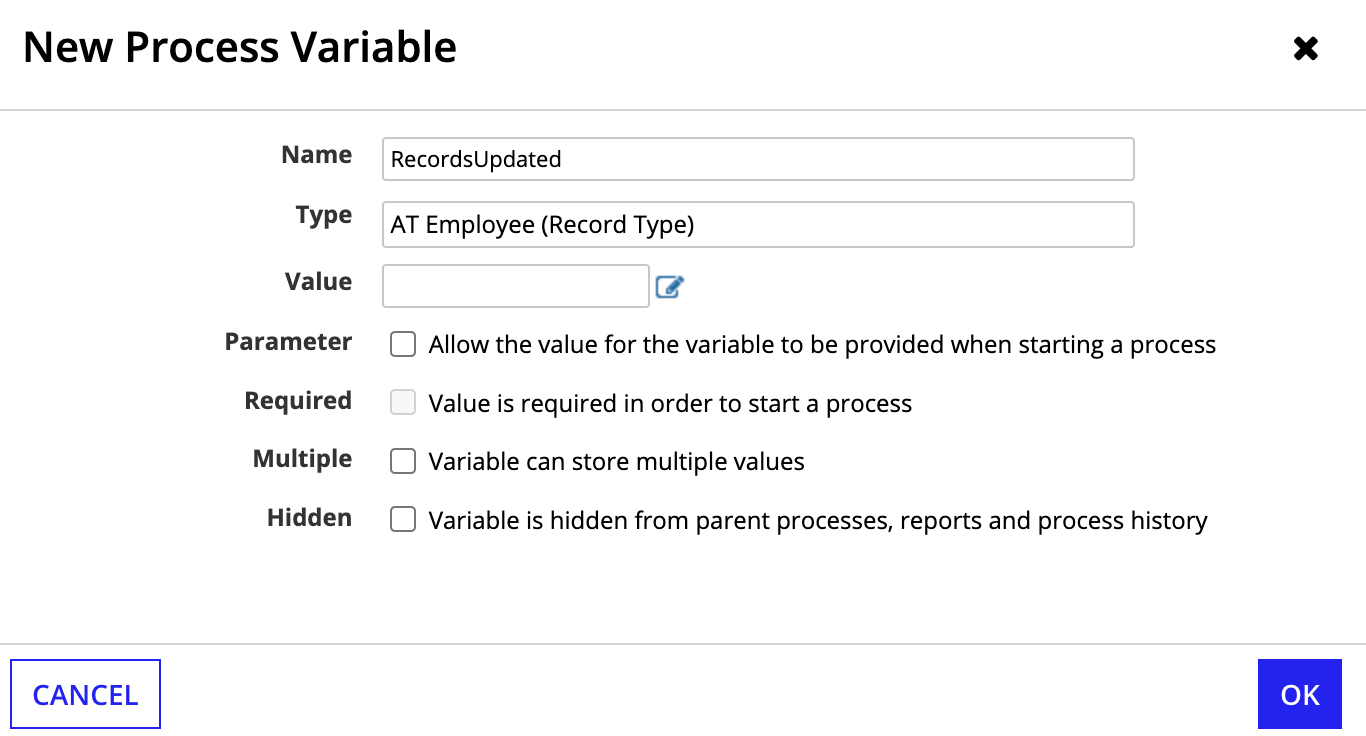
- For the Target field, click New Process Variable.
- In the New Process Variable dialog, keep the default Name
RecordsUpdated. -
For Type, enter
ATand select AT Employee (Record Type) from the list of options. - Click OK.
- To close the Configure Write Employee Record dialog, click OK.
- From the menu bar, click File > Save & Publish.
Configure an email nodeCopy link to clipboard
Now that we have the employee record stored in a process variable, we can set up the email notification.
To configure the Send E-mail node:
- Drag a SEND E-MAIL node from the COMMUNICATION section of the palette to the canvas, and drop it on the connector between the Write Employee Record node and End Node.
- Double-click the Send E-Mail node.
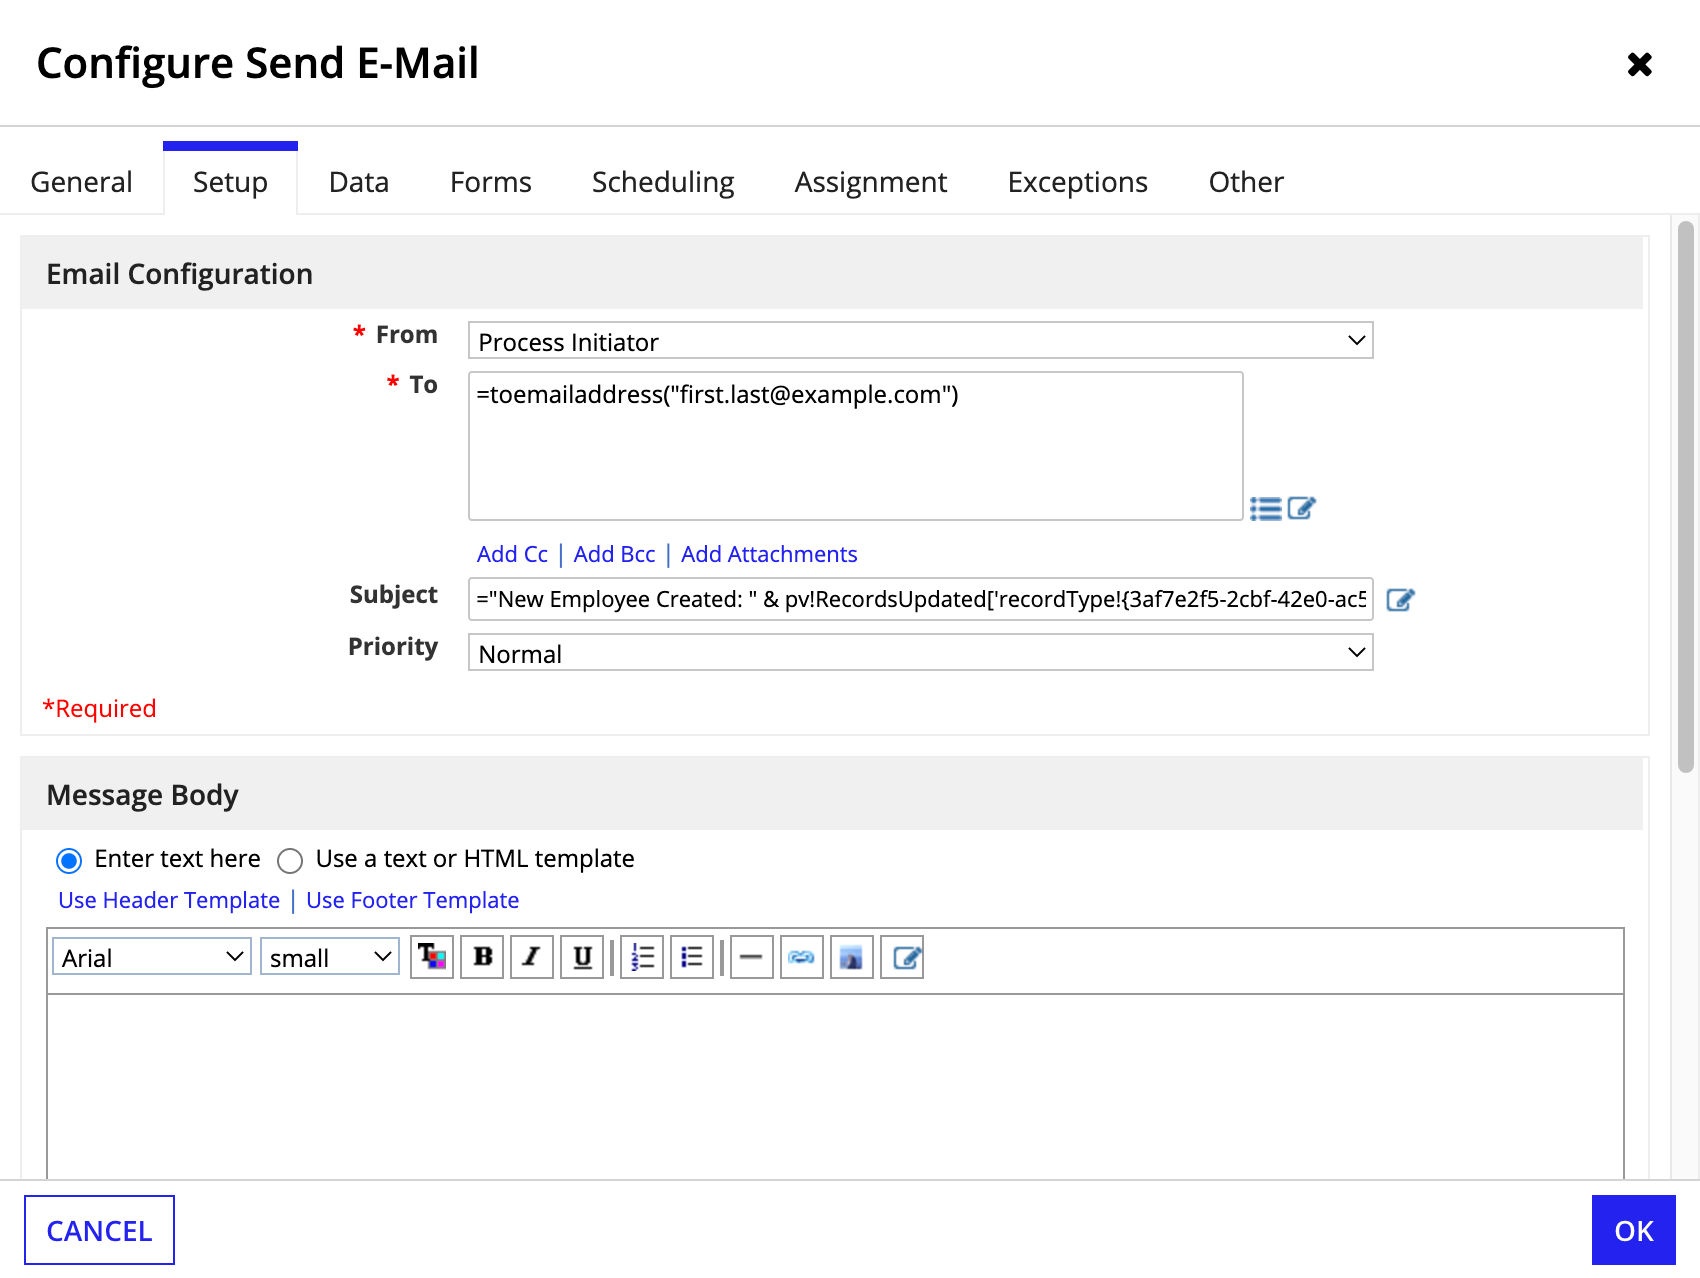
- In the Configure Send E-Mail dialog, go to the Setup tab.
- For From, select Process Initiator from the dropdown list. This sends the email as the user who created the new employee record. This way, the manager knows which member of their team completed the form.
- For To, click Edit as Expression.
- In the expression editor, enter
toemailaddress()and set your email address as the value (for example,toemailaddress("first.last@example.com")). We're manually setting our own email for testing purposes. In a production app, you could select Appian users by entering their names in the To field. - Click SAVE AND CLOSE.
- For Subject, click Edit as Expression.
- In the Expression Editor dialog:
- Enter
"New Employee Created: " &. - On the Data tab, expand the Process Variables and RecordsUpdated lists.
- Click firstName to add the record field reference to the expression.
- Enter
& " " &. - From the RecordsUpdated list, click lastName.
- Enter
- Click SAVE AND CLOSE.
-
Click OK.
- In the Configure Send E-Mail dialog, click OK.
- From the menu bar, click File > Save & Publish.
Test the full workflowCopy link to clipboard
Our process model now contains a few steps. To initiate the process, we enter the employee information as an action. Then, the process model automatically adds the employee to the database and sends an email. Now it's time to test the whole process.
To test the full workflow:
- Add a new employee:
- On the Employee record list, click NEW EMPLOYEE.
- Complete and submit the form.
- Check your email and verify that you received a message about the new employee.
- Check out the detailed results of the process flow:
- Return to the Appian Tutorial application, and click MONITOR in the left navigation pane.
- Click PROCESS ACTIVITY to view the list of processes.
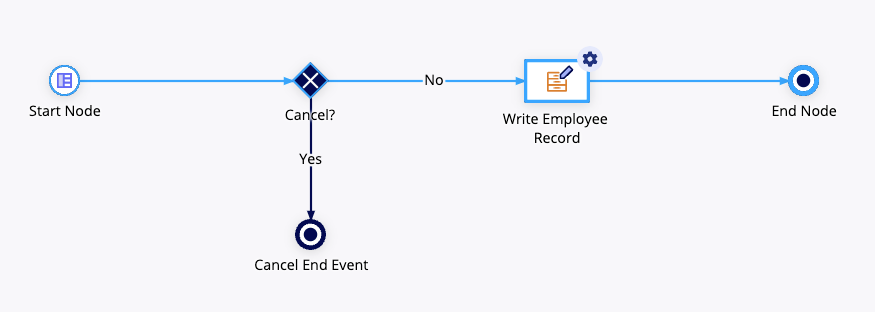
- Click your process instance. You should see the following:
-
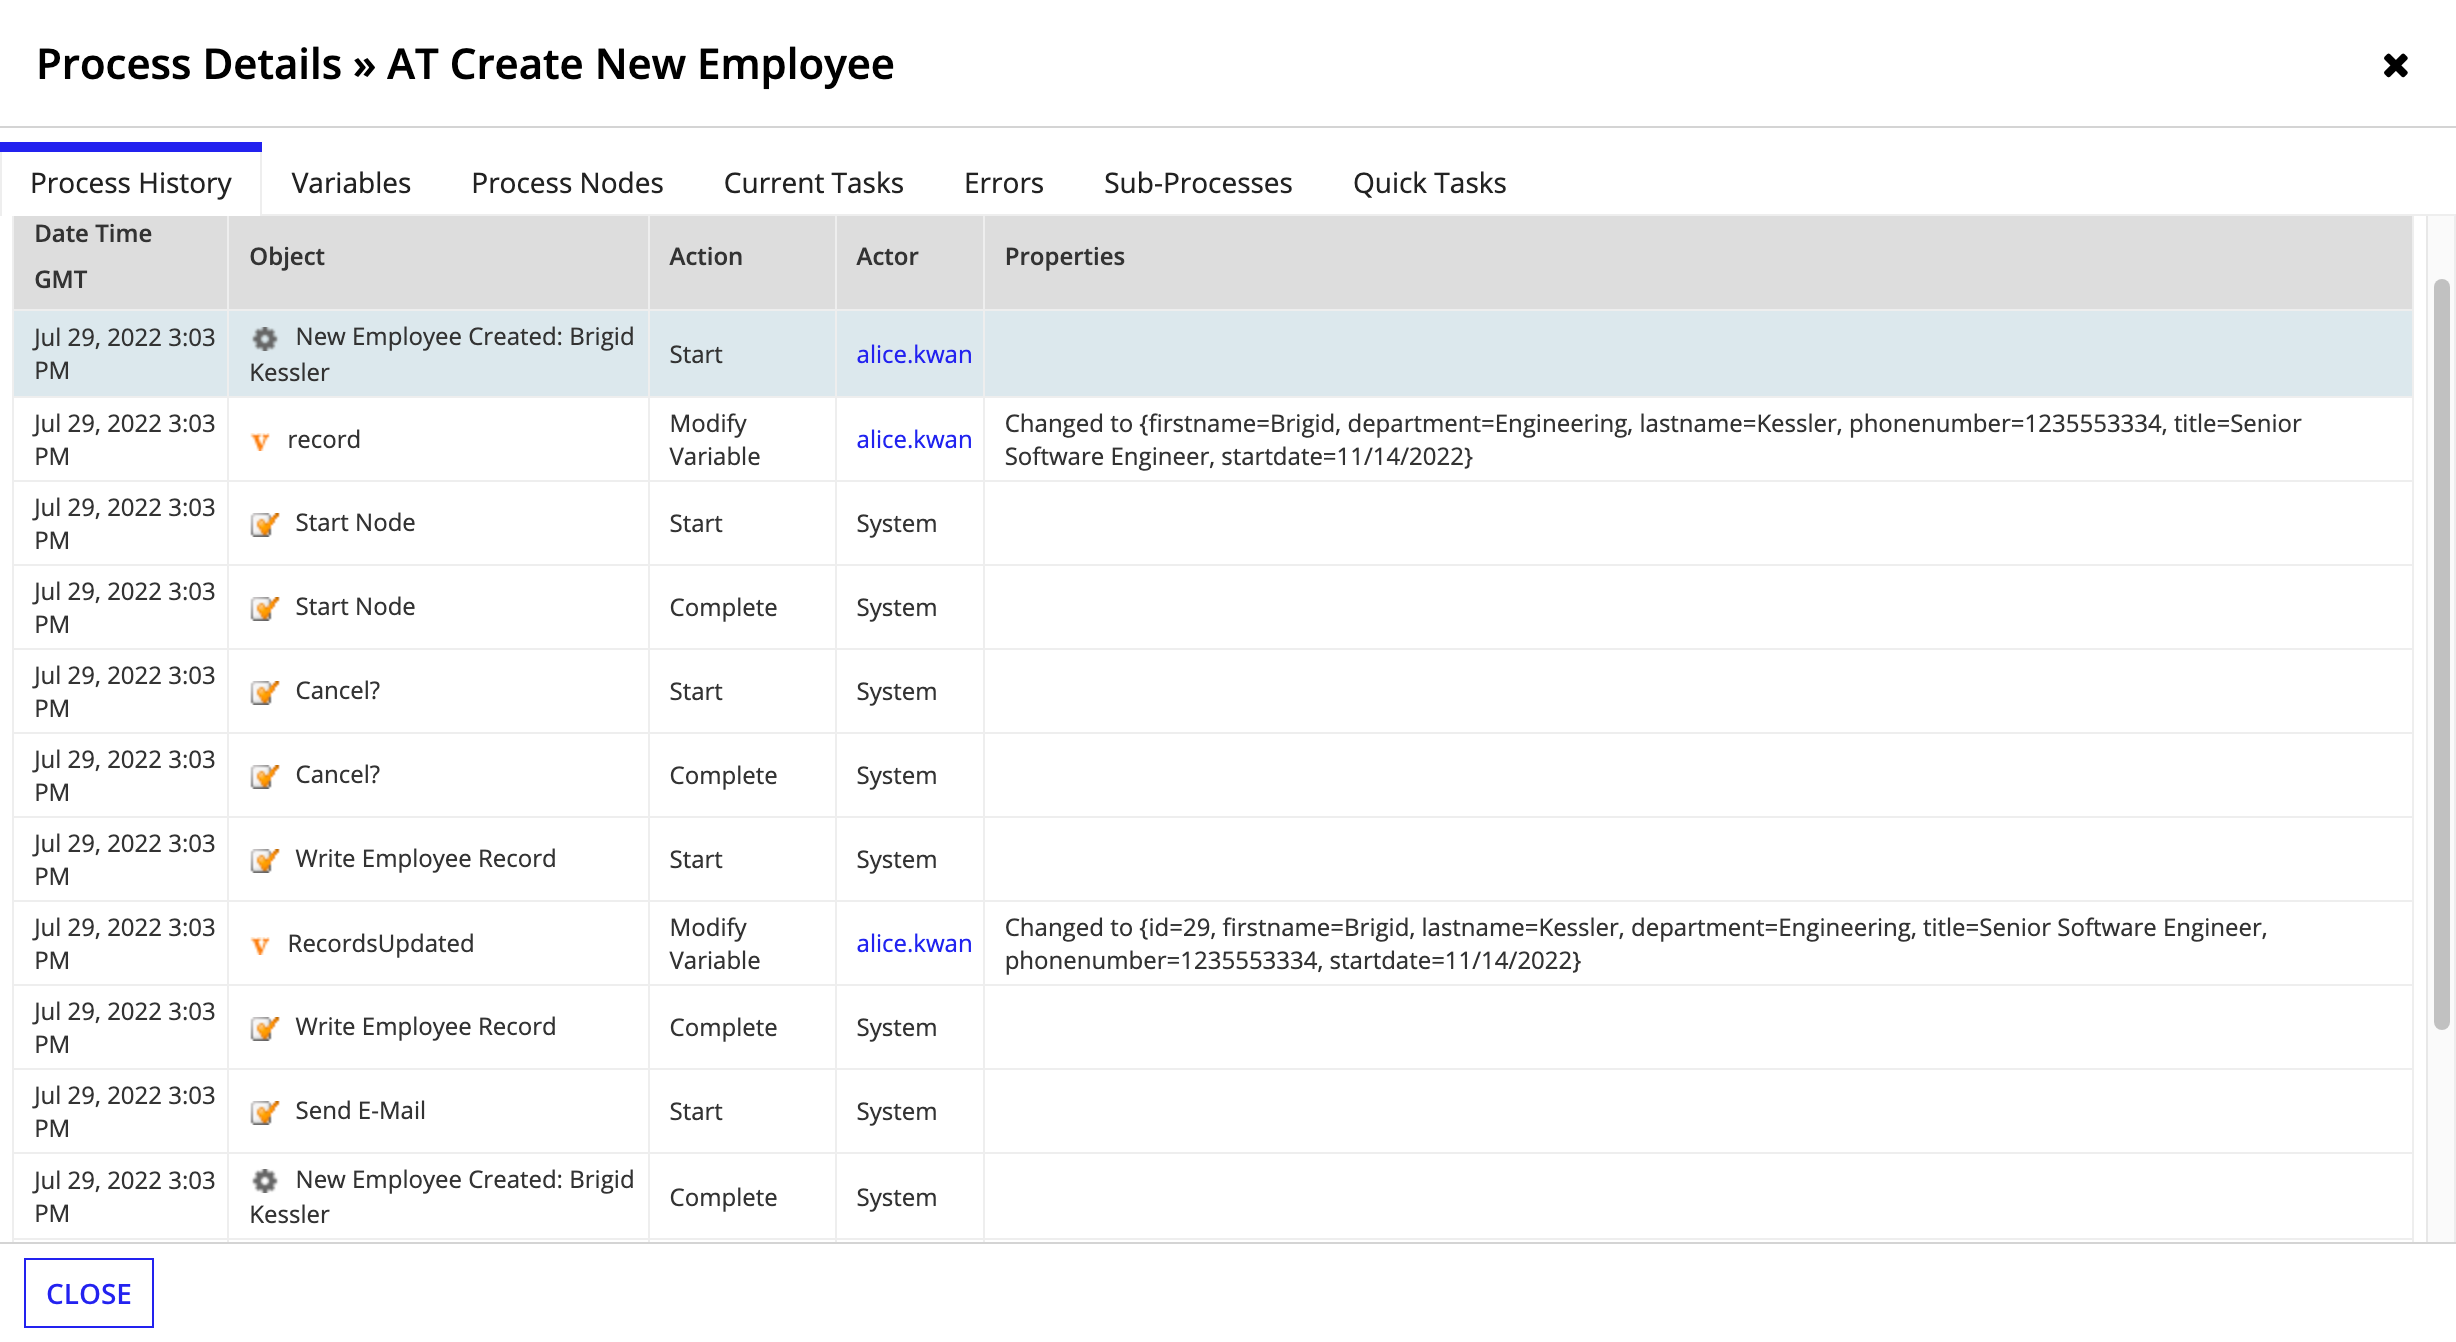
In the toolbar, click Process Details. The RecordsUpdated variable should include the
idof the new Employee record.For example:
Congratulations!Copy link to clipboard
Your process model now collects data for a new employee, saves the data to your record type data source, and alerts the HR manager that the data has been created.

