| This content applies solely to CampusPass, which must be purchased separately from the Appian base platform. This content was written for Appian 21.4 and may not reflect the interfaces or functionality of other Appian versions. |
After you have installed or received your CampusPass site, there are a few steps to take to quickly get up and running with it.
This page walks you through the remaining steps to set up CampusPass.
If you face any issues along the way, please contact our CampusPass solution support team.
Reach us by phone:
Reach us by email: support@appian.com
Note: If you make any changes to CampusPass that are not outlined in the CampusPass documentation on this site, you may not be able to upgrade or hotfix the solution without losing the changes. This includes any changes to the database. Please contact our CampusPass support team with any questions about this.
Users that you want to act as administrators should be added to the administrators group. This group receives emails when there are errors in the solution processes so that they can monitor and respond to these errors.
In order to manage users and groups that control access to CampusPass, these users should also be System Administrators. System Administrators are users that can manage users and have access to the Admin Console and Appian Designer.
Tip: To restrict access to sensitive information, members of the administrators group do not have access to the content on the Response Hub, even though they can see it. See the Groups Reference Page for more information about the access that members of each group have.
To set up admin users as System Administrators and add them to the administrators group:
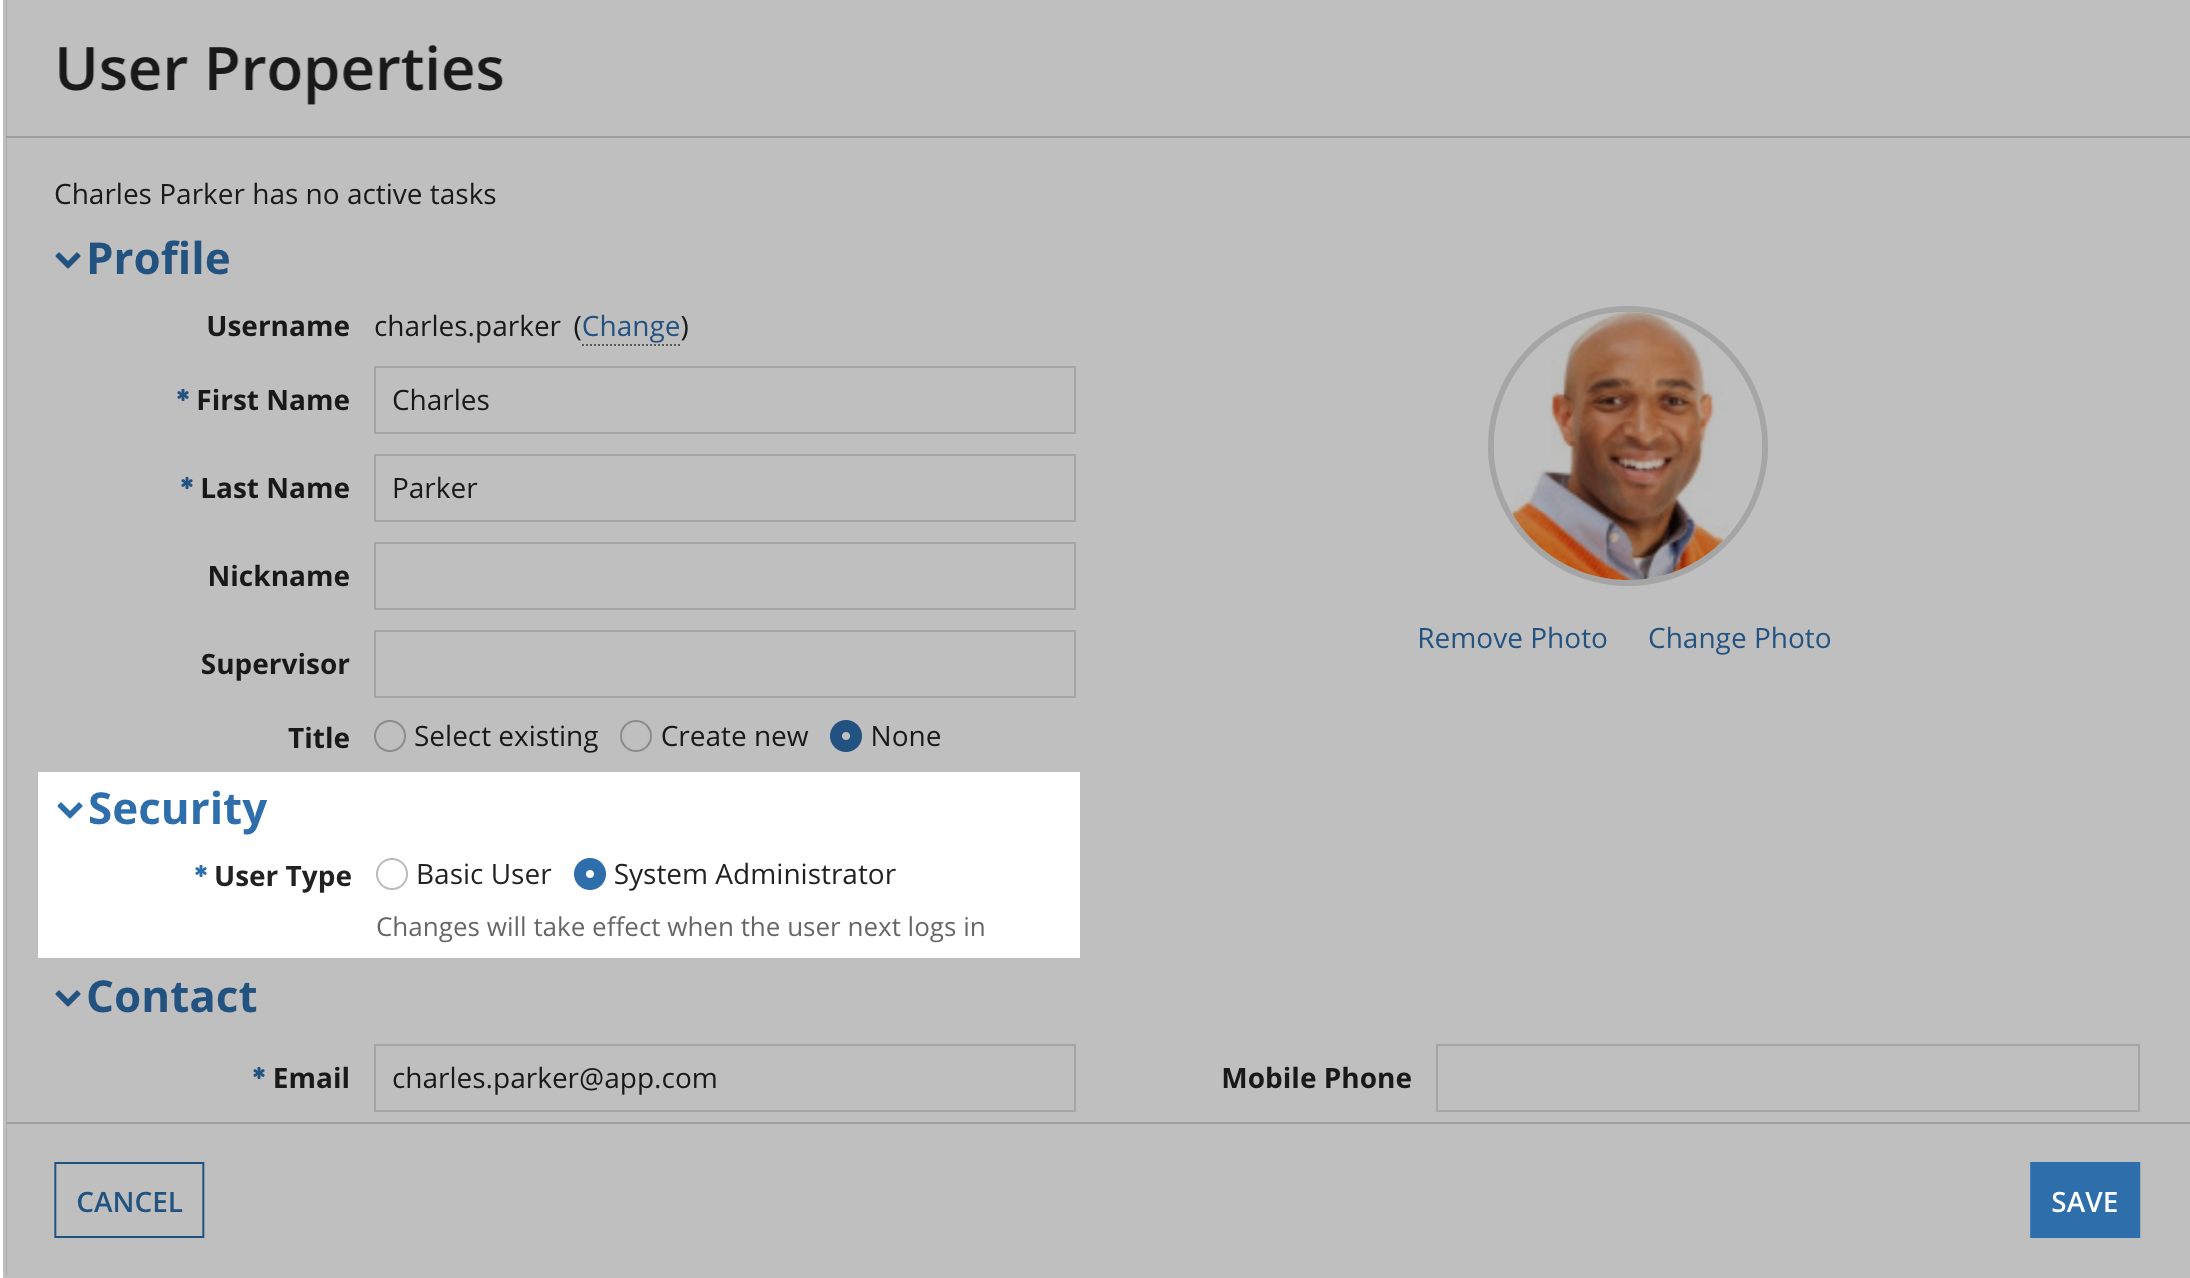
Find and open the user.
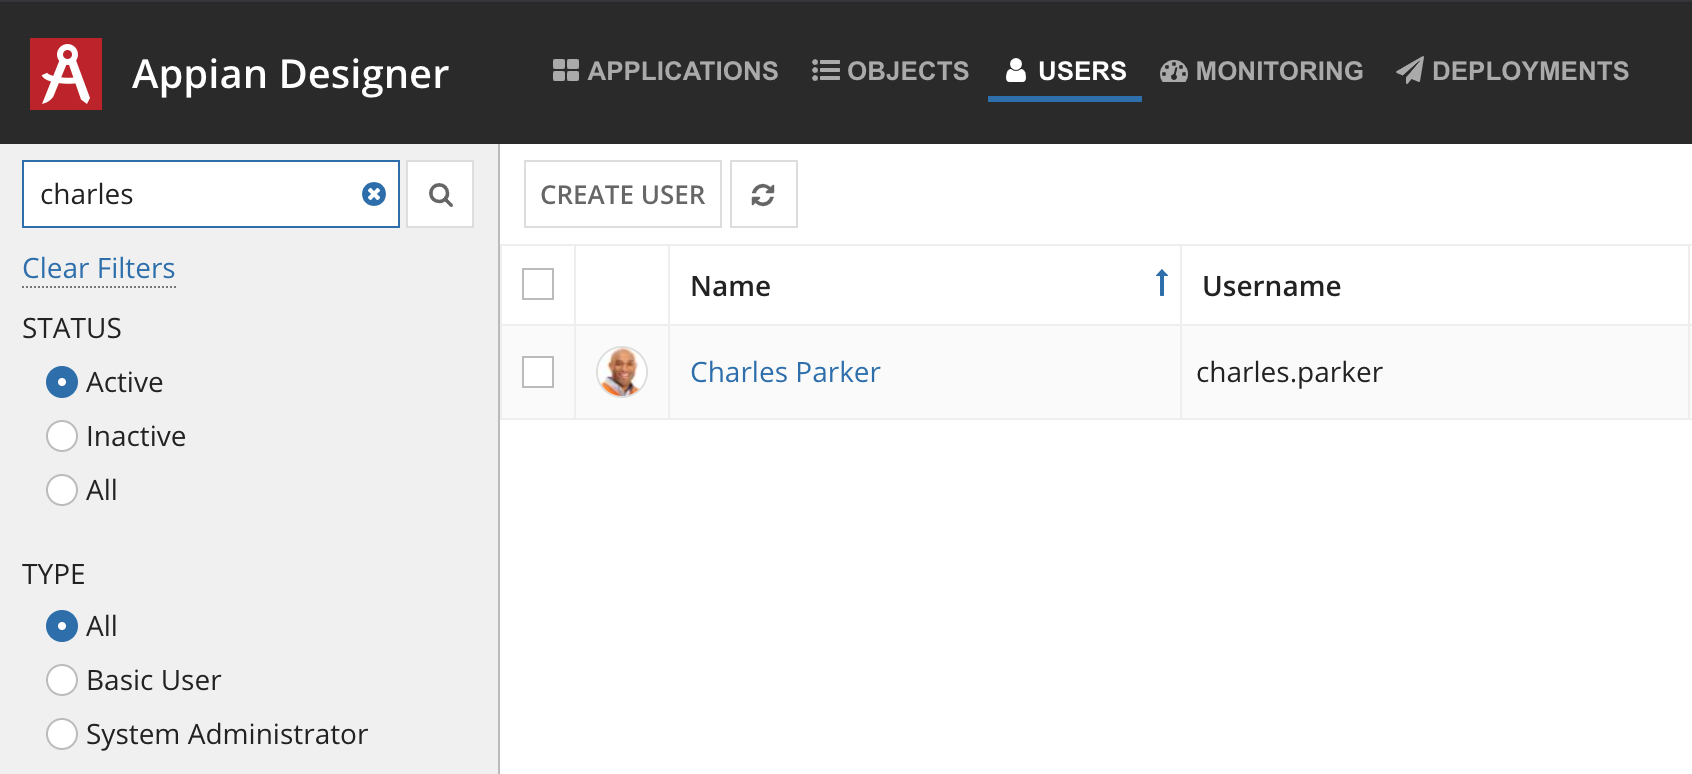
Verify that the User Type is System Administrator. If not, select System Administrator and click Save.
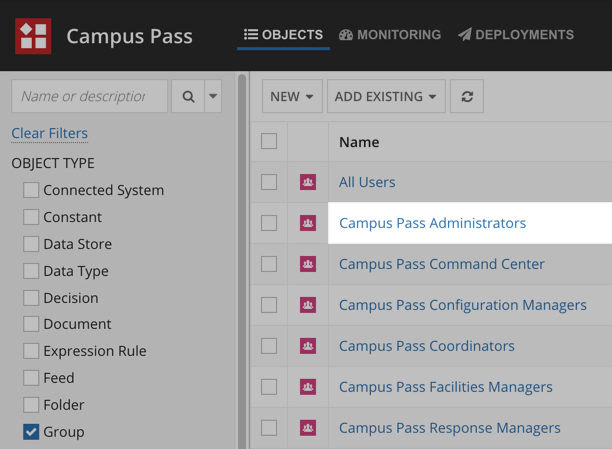
Find and open the Campus Pass Administrators group.
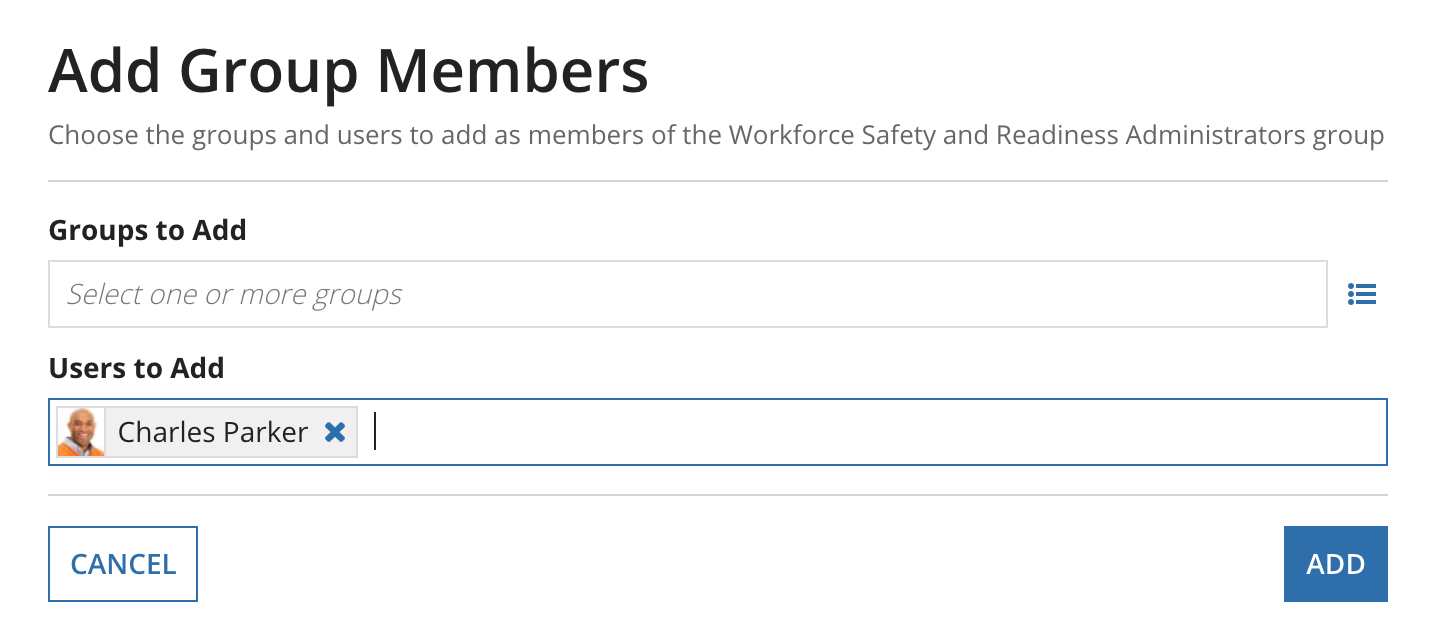
Use the Users to Add picker to select the user or users, and click ADD.
You will need to update several settings in the Admin Console, including setting the user start pages and default language. We also recommend turning on the Prompt Users to Download App setting in order to provide a quick way for users to download the mobile app.
A user start page is the default page that displays for users when they first log in to Appian. If your users will use CampusPass as their primary Appian site, we highly recommend setting the user start page for all of your users to either the COVID-19 CampusPass site or the Response Hub site.
To set the user start page:
https://your-appian-instance.com/suite/sites/A8DpA4P9. Replace your-appian-instance.com with your site URL.Campus Pass Command Center.https://your-appian-instance.com/suite/sites/z1ck30E1. Replace your-appian-instance.com with your site URL.Campus Pass Users.Click SAVE CHANGES.
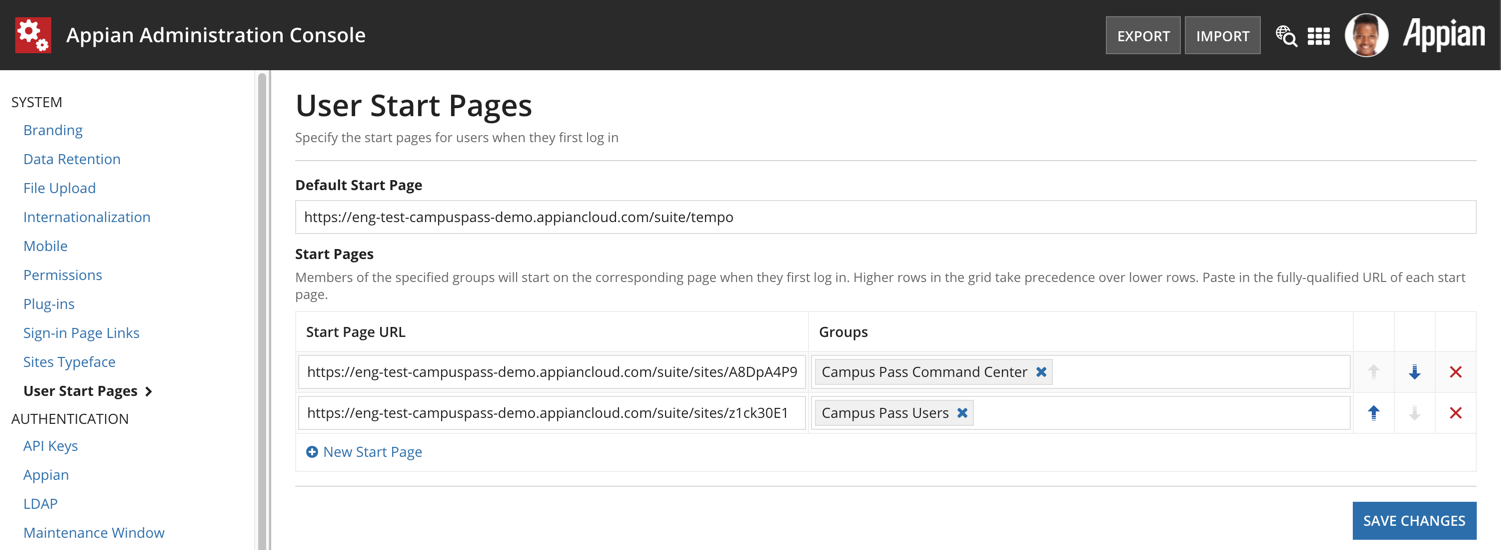
Tip: If the https://your-appian-instance.com/suite/tempo/news site displays when a user logs in, they can go to the CampusPass site by clicking > COVID-19 CampusPass or Response Hub.
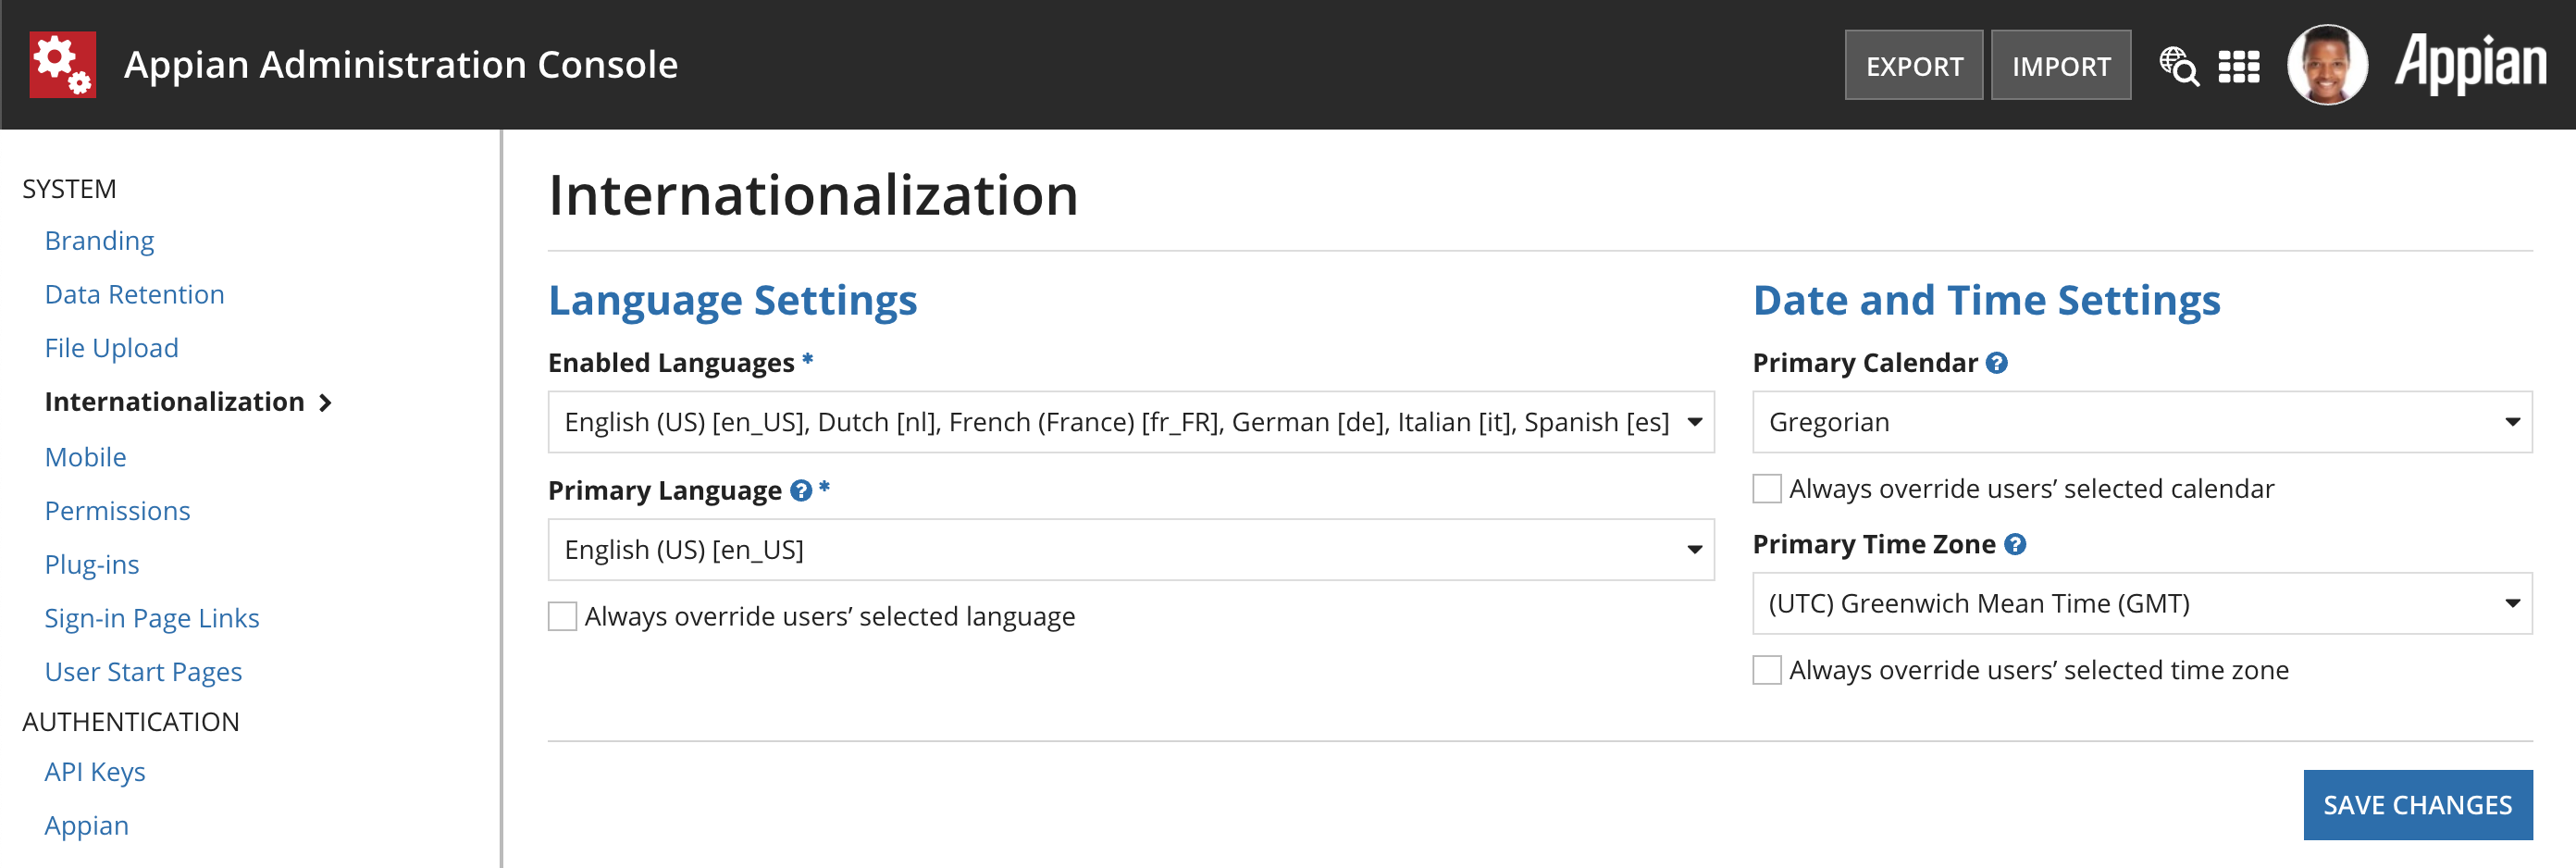
If you want users to set their default language to one of the multiple languages supported by CampusPass, you will need to set the language settings in the Admin Console. See Internationalization for more information on language settings.
If you only need to display the solution in English, you can skip this step.
To set the language settings:
Click SAVE CHANGES.
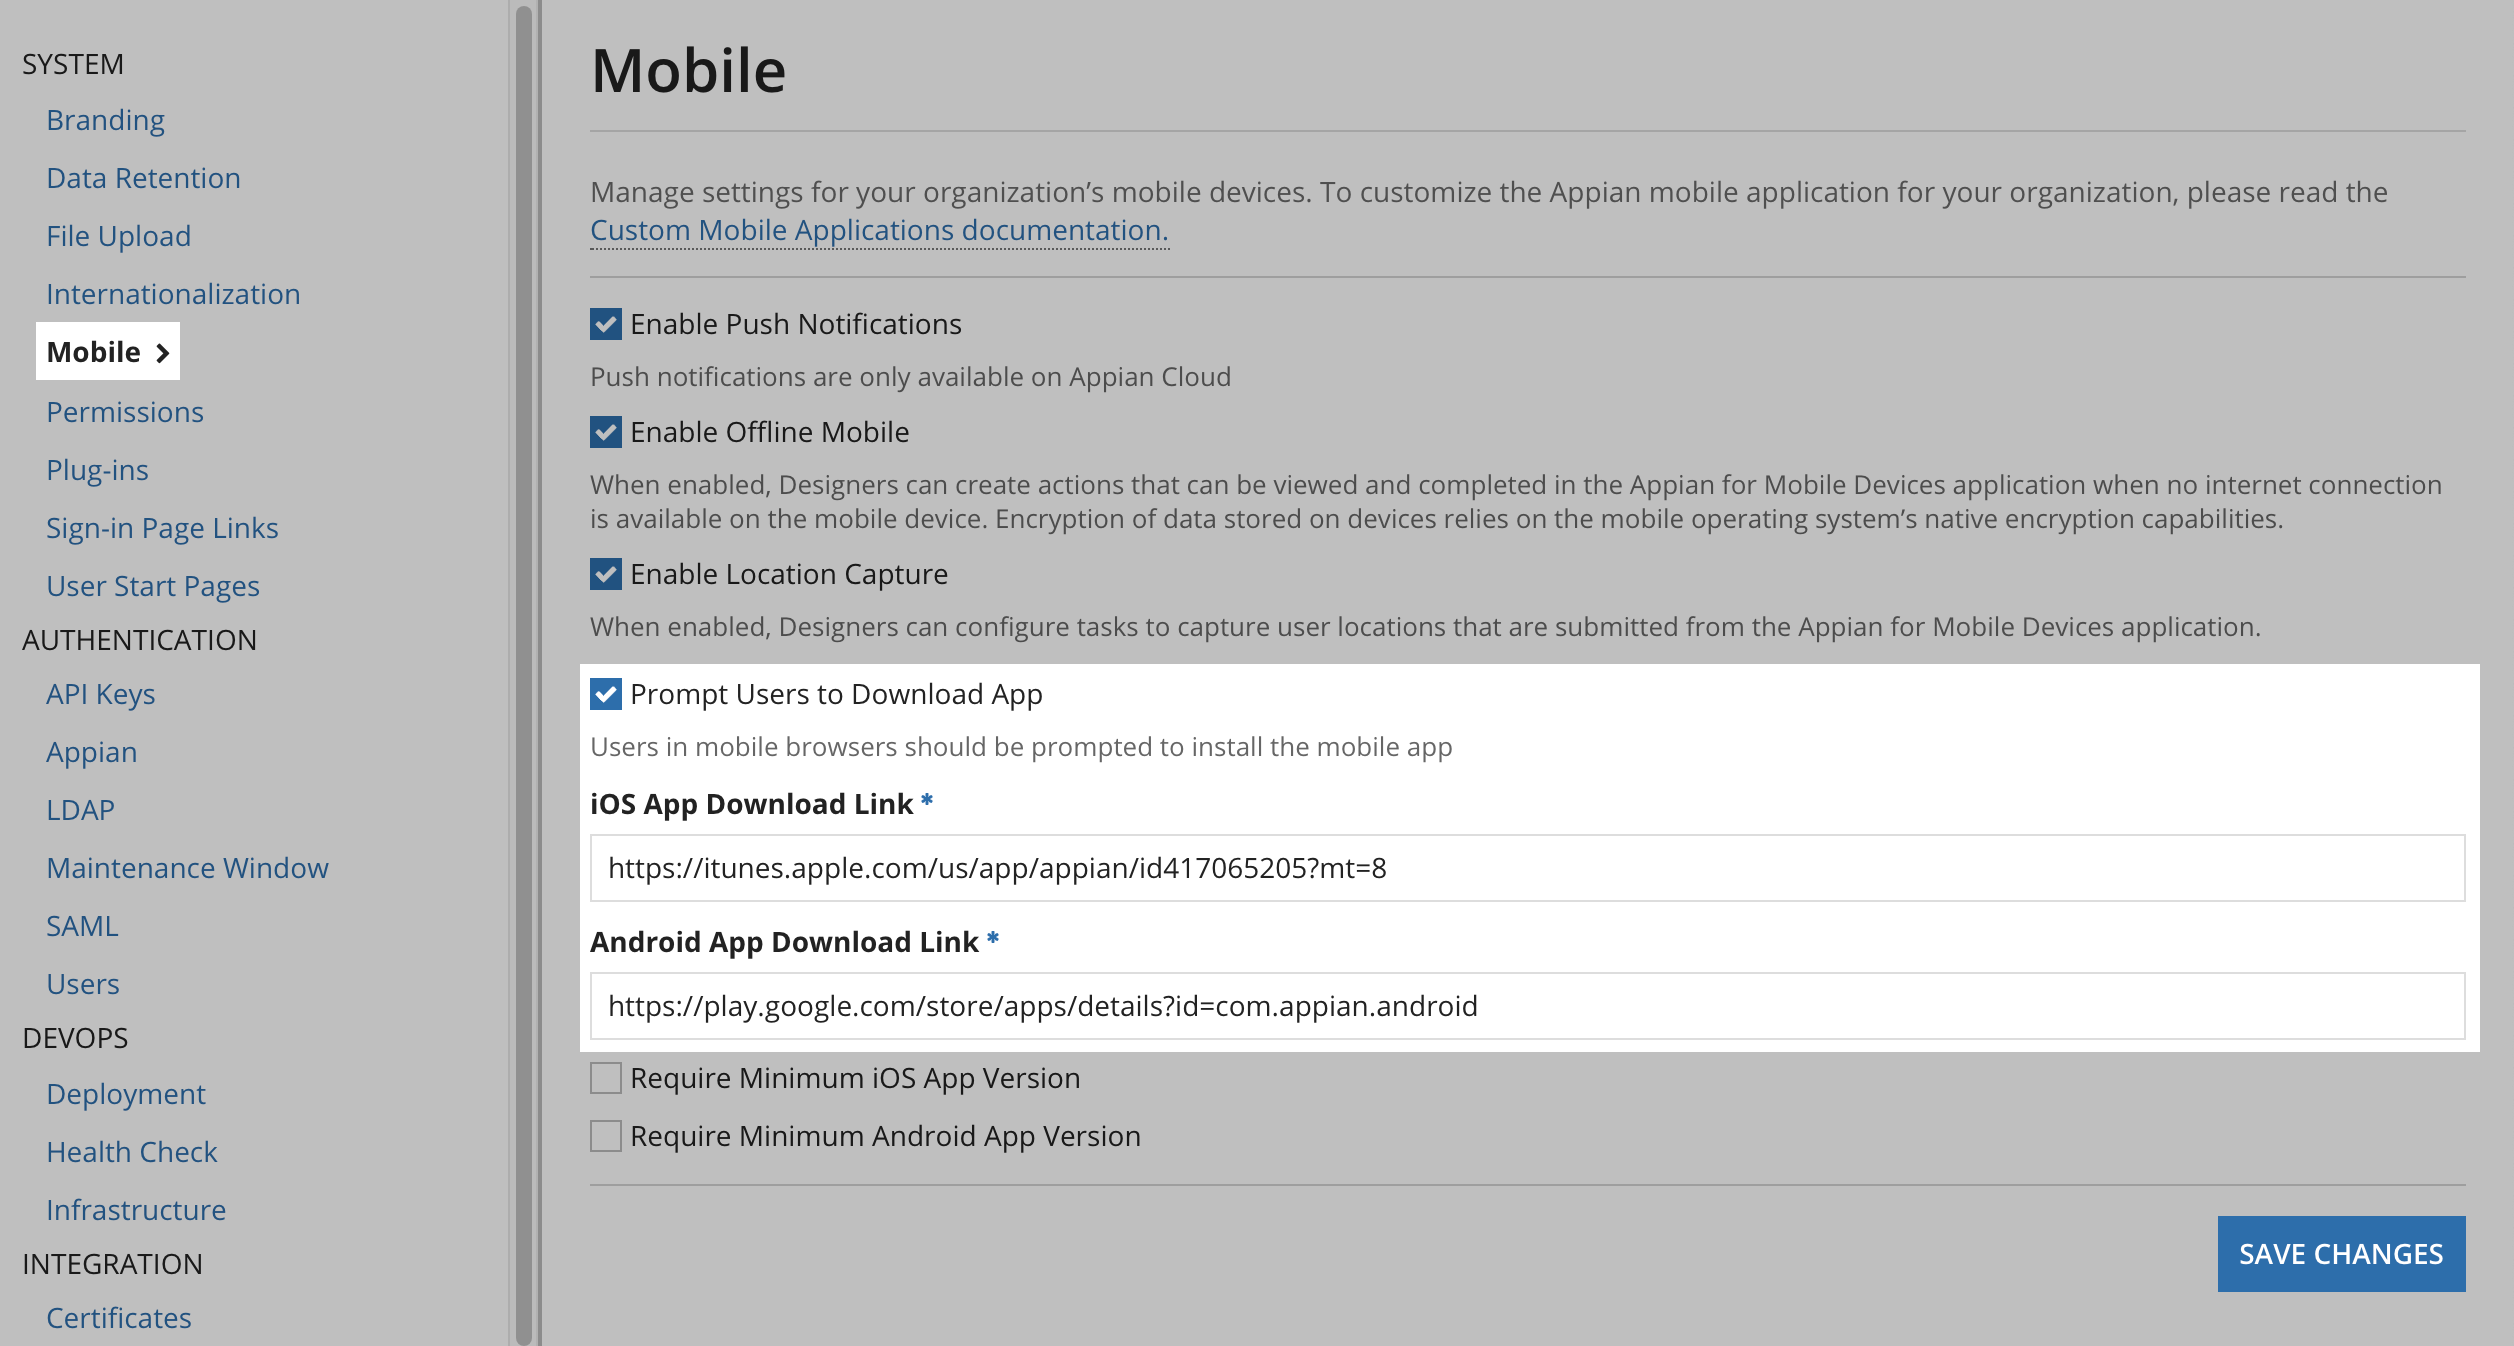
On mobile devices, CampusPass works best in the Appian mobile app, instead of a mobile browser. Some institutions may even decide to create their own custom version of the Appian application with their own branding.
Whatever your case is, to help drive mobile app adoption, and create a better mobile experience for users, we recommend turning on the Prompt Users to Download App setting in the Admin Console mobile settings. Enabling this setting will prompt users to download the mobile app when they access CampusPass from a mobile browser.
To turn on the Prompt Users to Download App setting:
Click SAVE CHANGES.
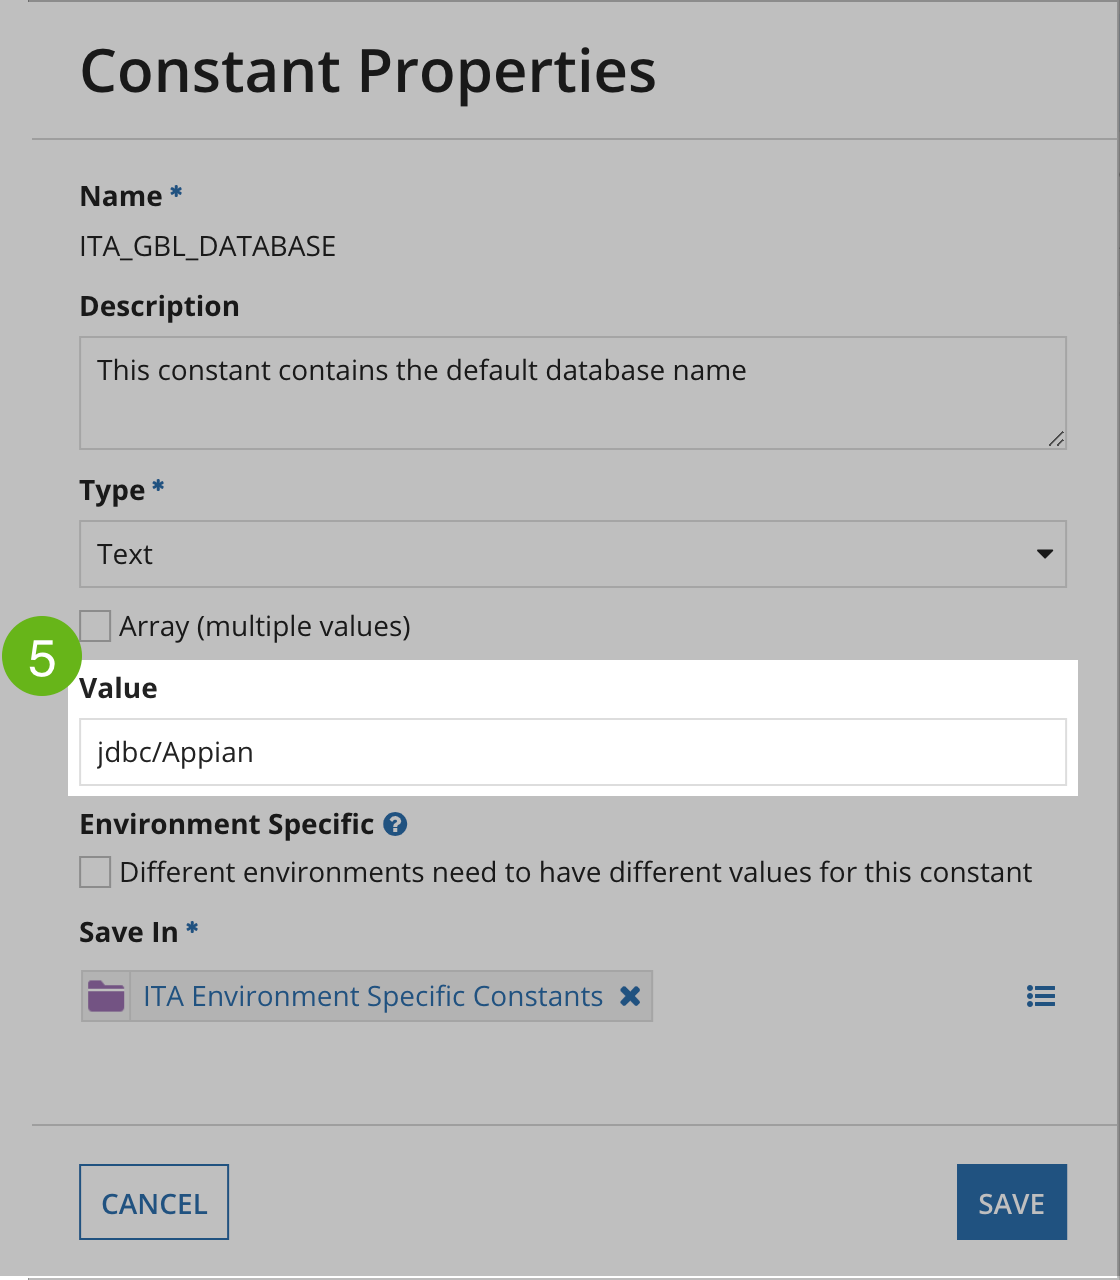
The CampusPass application contains an object called a constant that tells the application what the name of your database is.
First, you need to determine what the name of your database is. If it isn't jdbc/Appian, you will need to update the constant so that it uses your database's name.
To determine the name of your database:
If the name is jdbc/Appian, you can skip to Step 4. If it isn't, write down the database name and continue with this section.
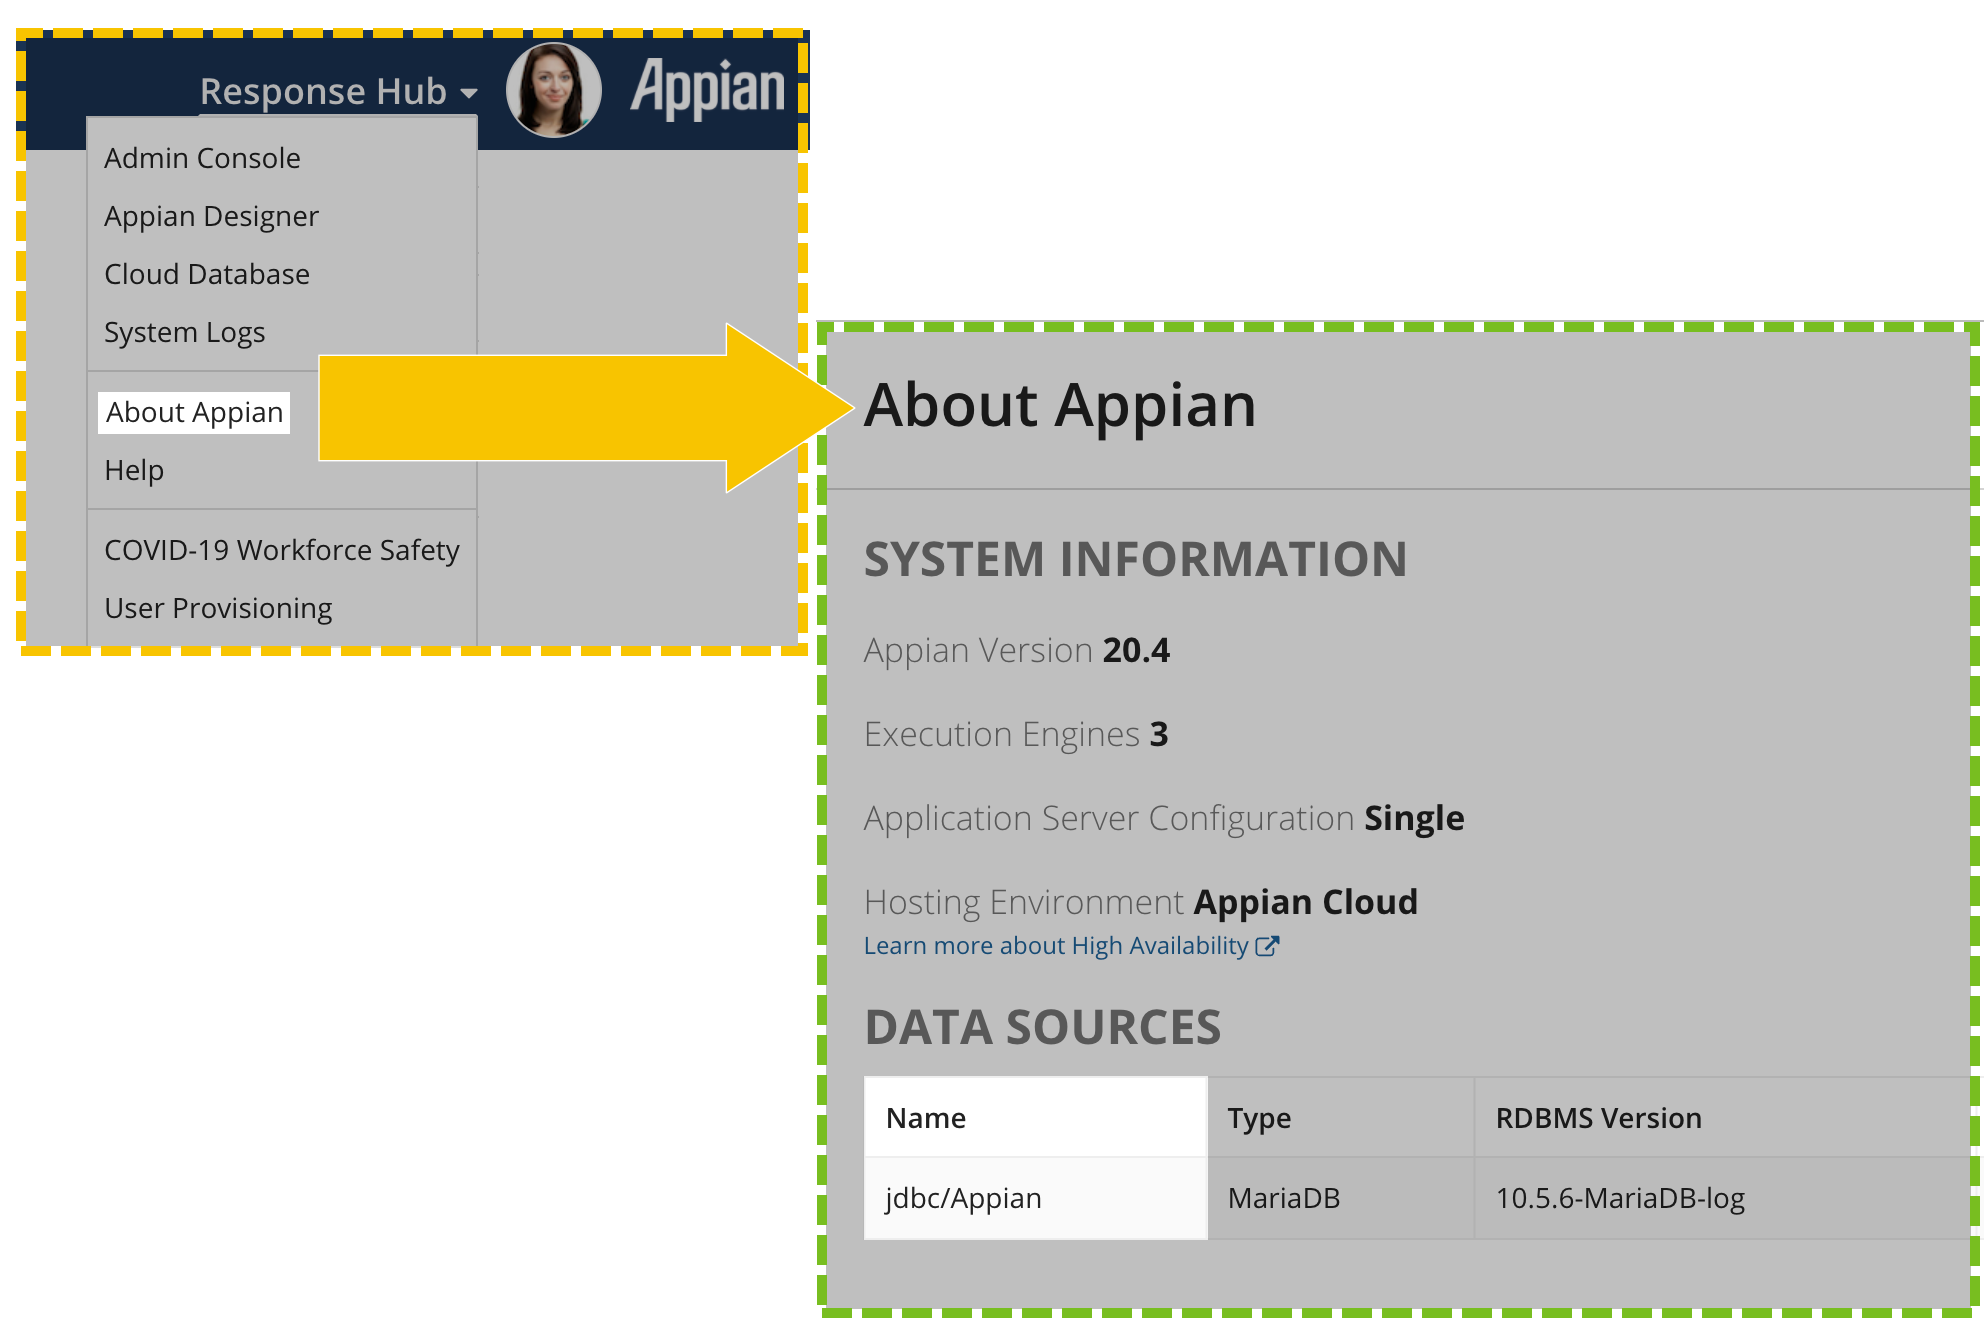
To update the name of the database in the constant:
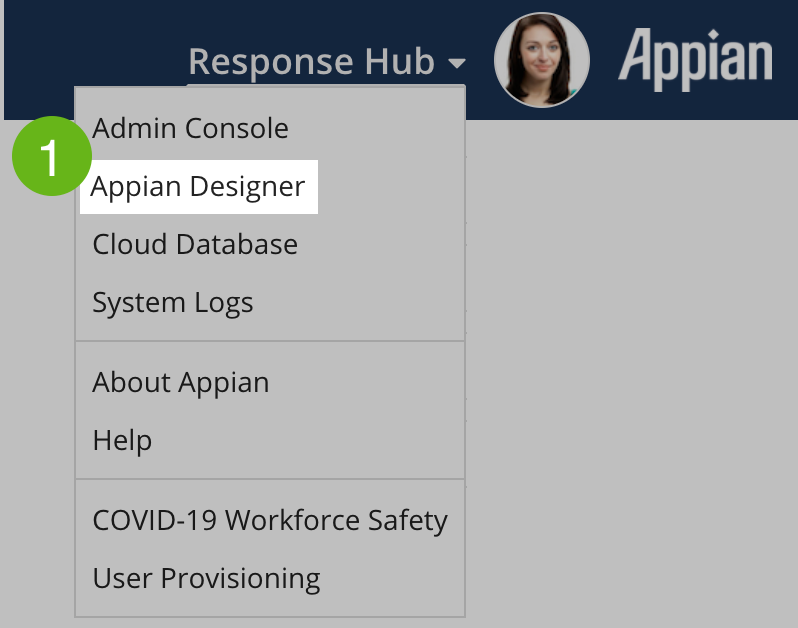
Go to the navigation menu and select Appian Designer.
ITA_GBL_DATABASE.Click ITA_GBL_DATABASE to edit the constant.

In the Value field, update the name to match the data source name from the About Appian dialog box and click SAVE.
System Administrators can add users to CampusPass and put them in the appropriate groups. For instructions on this, see User Management.
Please contact support if you need assistance.
After you've added members to the response managers group, they can log in and customize with information relevant to your institution.
Follow the instructions on the Configure the Site page to configure CampusPass.
Once all of the above steps are complete, you can notify your users to start using CampusPass. Reach out to Appian Support at any time if you have any questions.
Setup Guide
