Free cookie consent management tool by TermsFeed Integrating SharePoint with Appian's Connected System [Integrations]
Integrating SharePoint with Appian's Connected System
The capabilities described on this page are included in Appian's standard capability tier. Usage limits may apply.

Overview

In this article, you will learn about how to set up SharePoint to work with Appian using a SharePoint connected system. This integration allows users to create and access documents on SharePoint via Appian.

For more information about connected systems and their configurations options, see Connected System Objects.

Setting up your application registration

Before setting up SharePoint to work with the connected system, you’ll need to complete Microsoft’s application registration process.

To set up application registration:

  1. Log in to Microsoft Azure Admin portal with an admin account.
  2. Go to App Registrations and click on New Registration.
  3. In Name, enter the name of the application.
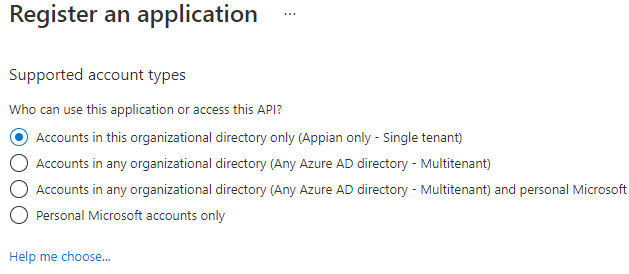
  4. Select Accounts in this organizational directory only as the Supported account type.

    sharepoint_register_an_app.png

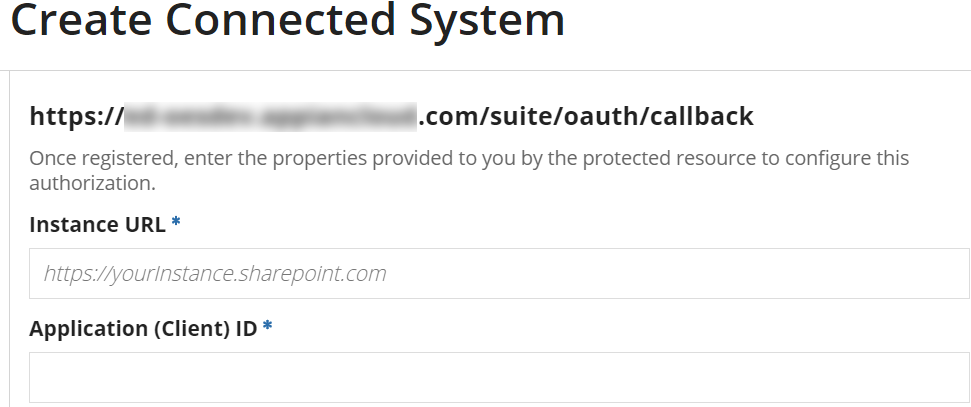
  5. Enter the Redirect URI.

    sharepoint_enter_redirect_uri.png

    You can find the Redirect URI when you create the SharePoint connected system in Appian.

    sharepoint_create_connected_system.png

  6. Click Register.
  7. Record the Application (Client) ID and the Directory (tenant) ID.
    • You can find this information by clicking on the newly registered application and selecting Overview from the left pane. You will need this information when you set up the connected system in Appian.
  8. From the left navigation pane, click on Certificates and Secrets to generate a client secret for this app.
  9. Click on New Client Secret.
  10. Add a Description of the client secret.
  11. Select a timeframe for Expires and click Add.
  12. Click Save Value to copy and save the values for your records. You will need this information when you set up the connected system in Appian.

Configuring the API permissions

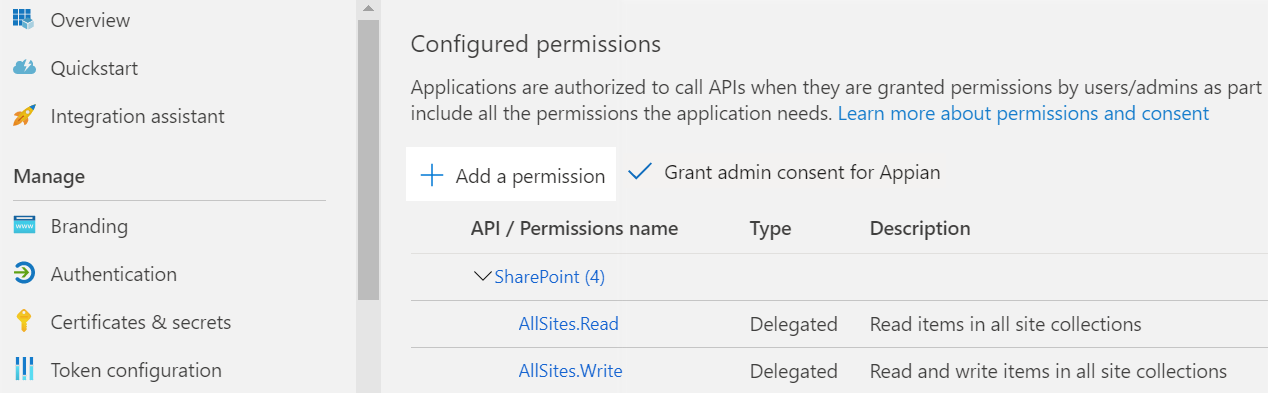
After registering the application, you need to configure API permissions for this app in Microsoft Azure.

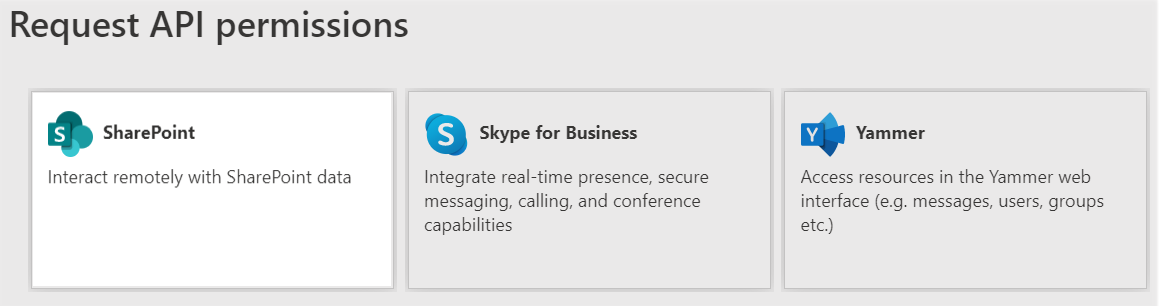
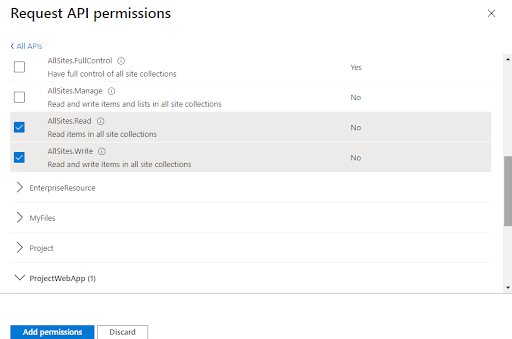
To configure API permissions:

  1. From the left navigation pane, click on API Permissions for the application.
  2. Click Add Permission.

    sharepoint_add_permission.png

  3. Select SharePoint as the Microsoft API.

    sharepoint_request_api_permission.png

  4. Click Delegated Permissions.
  5. Select the following permissions:
    • All Sites.Read
    • All Sites.Write

      sharepoint_request_API_permissions_settings.png

  6. Click Add Permissions.
  7. Click Add Permission again.
  8. Select SharePoint as the Microsoft API.
  9. Click Application Permissions.
  10. Select the following permissions:
    • Sites.Read.All
    • Sites.ReadWrite.All
  11. Click Add Permissions.
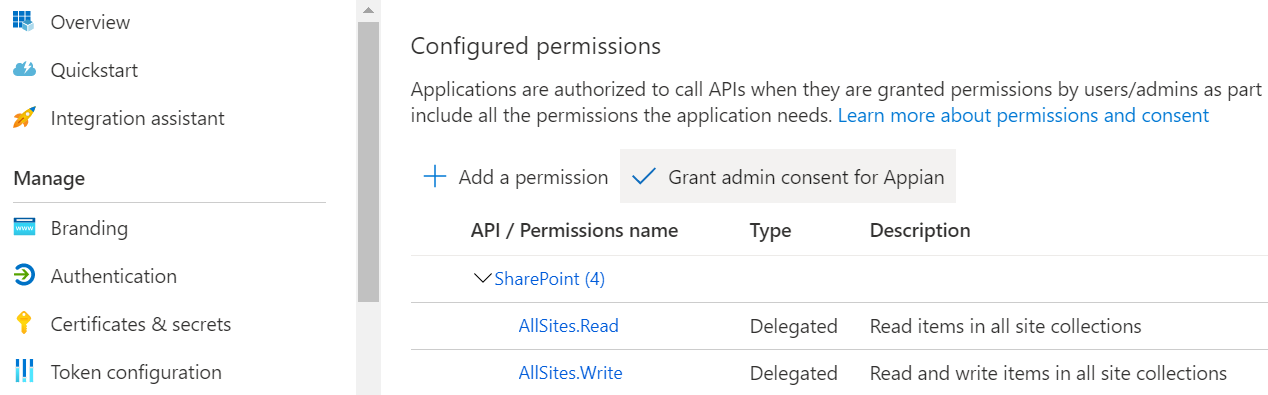
  12. From API Permissions, click Grant admin consent for <domain name>. Note that Office 365 Global Admin permission is required to perform this step.

    sharepoint_add_api_permissions_extend.png

Configuring application properties

To configure application properties:

  1. From the Azure portal, click on Enterprise Applications.
  2. Locate the application you registered in Setting up Application Registration.
  3. From the left navigation pane, select Properties.
  4. Set Enabled for users to sign-in to Yes.
  5. Set User assignment required to No.
  6. Set Visible to users to Yes.
  7. Click Save.

Setting up SharePoint Connected System in Appian

The final step is to set up a SharePoint connected system in Appian.

When setting up the connected system, if you select the OAuth 2.0 Authorization Code Authentication option, each user that accesses SharePoint through the connected system will be required to authorize access. To enable this, you will need to provide the authorization link on an interface within your application that users can access to provide the authorization.

Open in Github Built: Thu, Mar 28, 2024 (08:18:08 PM)

Integrating SharePoint with Appian's Connected System

FEEDBACK