
OverviewCopy link to clipboard
Embedded interfaces are one of the user experience options available in Appian, alongside Tempo, sites, and portals. Embedded interfaces allow Appian interfaces to be embedded in external web pages. This lets users interact with Appian forms and interfaces directly within those external pages, without navigating to a distinct Appian environment like a site. In fact, users may not even realize they are interacting with an Appian-powered interface, especially if a custom theme is applied.
The following types of Appian interfaces can be embedded in external web pages:
- Tasks
- Actions
- Related actions
- Reports (including task reports)
- Record views
Embedded interfaces offer the same dynamic capabilities as sites. However, they are displayed without the surrounding header bar and background, allowing the host web page to maintain its own navigation. Similar to sites, embedded interfaces are responsive to browser window width, ensuring they appear optimized regardless of the screen size. For the best responsive experience, we recommended allocating as much of the browser window’s width as possible to the embedded content.
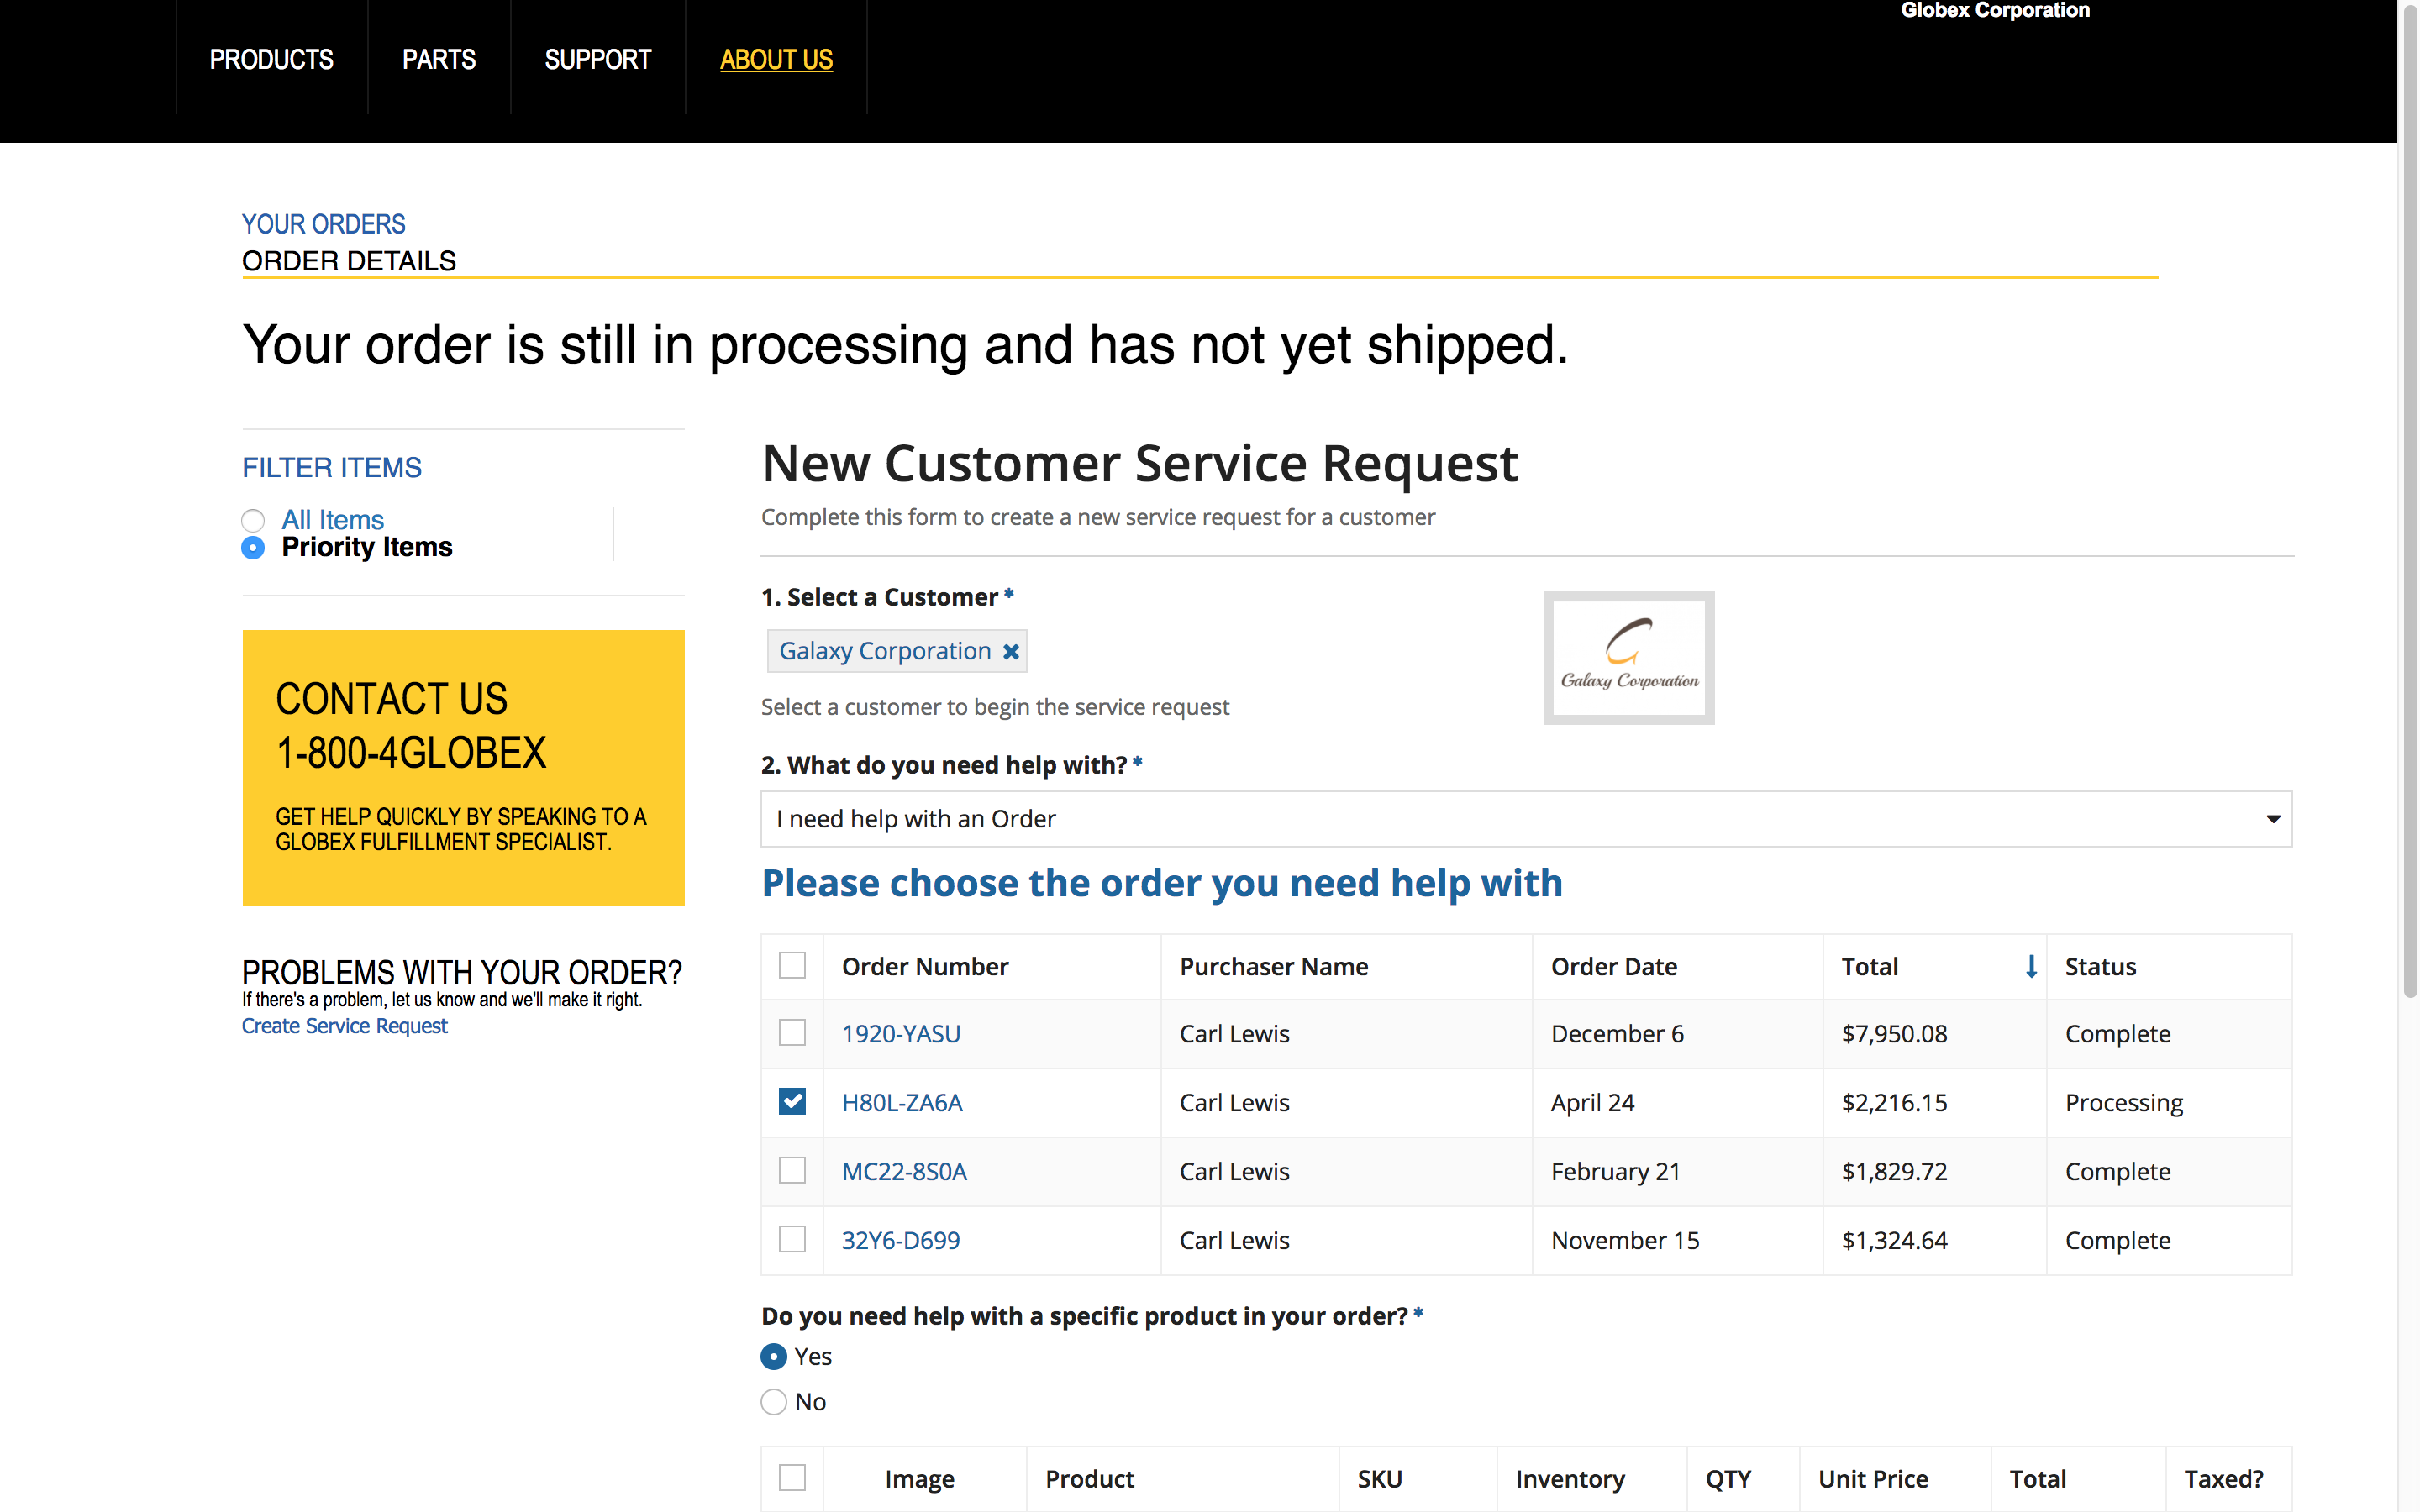
Below is an example of an embedded related action, where the interface is used to request customer service for an existing order.
Tip: You can also display a portal page in an external website using iframes, as long as you add the external website to the Origins list in the Admin Console. This is different than embedding an Appian interface, but it is an option if you want a portal to appear within your external website.
Is embedded a good fit?Copy link to clipboard
Embedded interfaces may be a good option if you need Appian functionality to be part of a larger user experience that you control. By embedding Appian interfaces in an external web page, you maintain full control over the larger experience, while still leveraging Appian to manage your business processes and build your user interfaces. These interfaces can also be reused in other user experience options, such as sites.
However, there are a number of advantages that sites have over embedded interfaces. Unlike sites, embedded interfaces necessitate custom development, including CSS and JavaScript expertise, SSO setup, URL management, and more.
Note: We strongly recommend that you consider sites first and only use embedded interfaces if your use case cannot be addressed by sites.
Below is a summary of the technical requirements for embedded interfaces that are not needed for sites, followed by a more detailed explanation of some of the considerations.
- Custom code development
- CSS expertise
- JavaScript expertise
- SSO setup
- URL and navigation management
- Additional performance tuning
- Additional development for mobile support
- Additional development for accessibility
- Additional development for responsive UI
Level of effortCopy link to clipboard
Compared to sites, embedded interfaces require significantly more effort to implement. Consider whether you have the required authentication and web development expertise on your team to set up the integration between your website and Appian and to embed the Appian interfaces into your web pages. We recommend that you strongly consider sites first and only use embedded if you have requirements that sites cannot satisfy.
Browser supportCopy link to clipboard
Embedded interfaces are supported in all Appian-supported web browsers. If you cannot control what web browsers your users use and may have users that are using unsupported or outdated browsers, then embedded may not be a good option.
Also, if you have Safari users, then you will need to do an extra bit of setup to ensure that embedded interfaces work for them.
If you choose to use embedded despite the fact that some of your users may be on unsupported browsers, we have provided an example of how you may customize the user's experience based on whether they are using a supported browser.
Styling controlCopy link to clipboard
Embedded interfaces allow some custom styling in order to make the Appian interfaces blend into the host web page. You can do this by configuring an embedded theme and then applying it to the interfaces that you embed in your web page.
While embedded themes allow some customization of fonts and colors of your embedded interfaces, it does not provide pixel-perfect styling. If you have strict and detailed styling requirements, embedded may not be sufficient and you may need to resort to custom web development. If you decide to go with custom web development, you can still use Appian in the background and use web APIs to expose the data that you need from Appian.
If you use embedded, we do not recommend overriding the Appian styles via CSS overrides because this may incur high maintenance and upgrade costs in the future.
Prerequisite setupCopy link to clipboard
Before you embed any interfaces, you must do a couple of things to get your system ready for a successful embedded implementation.
AuthenticationCopy link to clipboard
The request to load an Appian interface must come from an authenticated user of the Appian system, even if that Appian interface will be embedded within a non-Appian web page.
Note: Appian strongly recommends use of the same external authentication system (i.e., single sign-on) for both the non-Appian website and the Appian environment in order to achieve a seamless user experience. The same authentication system used for the host website should be configured to pre-authenticate users to Appian so that once the user has logged into the non-Appian website, they can access Appian content within that website without having to log in again.
See SAML for Single Sign-On for guidance on how to set up SSO for Appian using SAML. We recommend that you confirm a successful SSO setup before continuing on to embedding Appian interfaces.
Note: Compatibility limitations:
- Embedded interfaces are not compatible with Login.gov authentication because Login.gov does not support initiating the login sequence from an iframe.
- The login.microsoftonline.com authentication flow is not supported in an iframe from Appian embedded interfaces.
To use a non-default identity provider, use the optional data-signin optional configuration.
If SSO is not configured, users will be prompted to log in to Appian before they can access any embedded interfaces.
See the sequence diagram for embedded authentication below for more details.

Cross-origin resource sharingCopy link to clipboard
To render an Appian interface, the web component must load JavaScript from the Appian server and make AJAX calls back to it. If the external site and the Appian site are on different hosts, the web browser will block these requests by default due to the same-origin policy of web application security. This applies to differences not just in the top-level domain but anywhere in the host and port.
Note: Appian recommends that your Appian site be set up to be on the same domain as the host web page, which will allow users to interact with any embedded interfaces regardless of their browser cookie settings.
If it is not possible to have the Appian site on the same host as the parent website, then you must enable cross-origin resource sharing from your Appian server. To do so, navigate to the Embedded Interfaces page of the Admin Console and add the parent site's host to the list of allowed origins.
Embedding an interfaceCopy link to clipboard
Appian interfaces are embedded using HTML tags and render as web components by leveraging HTML5 custom elements. At minimum, you must do the following things to embed an interface in an HTML page:
- Load Appian's web components using a
<script>element. - Include a custom HTML element to specify the Appian interface to embed.
The custom element makes the AJAX calls that load an Appian interface from the Appian server directly on to the non-Appian web page. If needed, you can also add event handling to trigger a behavior on the page after an event like form submission. A basic example of the markup required to embed an interface appears below:
1
2
3
4
5
6
7
8
9
10
11
<!DOCTYPE html>
<html>
  <head>
    <!-- This script loads the Appian Web components; change it to your Appian server's domain -->
    <script src="https://appian.example.com/suite/tempo/ui/sail-client/embeddedBootstrap.nocache.js" id="appianEmbedded"></script>
  </head>
  <body>
    <!-- This custom HTML element specifies an Appian report to embed on the HTML page -->
    <appian-report reportUrlStub="DtJN3Q"></appian-report>
  </body>
</html>
Copy
Load Appian's web componentsCopy link to clipboard
To use Appian's web components, you must include a single script file, embeddedBootstrap.nocache.js, in the <head> element. The embeddedBootstrap.nocache.js file is a part of every Appian environment and is found in the tempo/ui/sail-client directory. The following script tag loads the file from an Appian server at appian.example.com using the default application context suite:
1
<script src="https://appian.example.com/suite/tempo/ui/sail-client/embeddedBootstrap.nocache.js" id="appianEmbedded"></script>
Copy
This file must be accessed from its location on the Appian server and will not function correctly if a local copy is made or it is otherwise cached. Note that you only need to do this once, even if you are embedding multiple Appian interfaces onto your web page.
Include a custom HTML elementCopy link to clipboard
The custom HTML elements for each Appian object are described below along with a static example of each element. Because these custom elements act like any other HTML element, they can be generated dynamically, allowing you to define the necessary attributes on demand; see Dynamic Embedding and Integrated jQuery Example for examples.
Per the HTML5 specification, custom tags must have both a begin and an end tag rather than a single self-closing tag. Here is an example of an <appian-report> element with a begin and an end tag:
1
<appian-report reportUrlStub="DtJN3Q"></appian-report>
Copy
ActionCopy link to clipboard
The <appian-action> element is used to embed an action. Any process model with a start form may be embedded.
The attributes for the <appian-action> element are listed below.
| Attribute | Description | Required |
|---|---|---|
| processModelUuid | The UUID of the process model that is launched by this action. The UUID is found in the process model documentation. | Yes |
ExampleCopy link to clipboard
The example below is a static example of the <appian-action> element.
1
<appian-action processModelUuid="0001d6e9-c04f-8000-f92f-7f0000014e7a"></appian-action>
Copy
To use this static example for testing, simply replace the value of the processModelUuid attribute with a value from your environment.
Record viewCopy link to clipboard
The <appian-record-view> element is used to embed a record view. The Summary view, News view, and any custom record views may be embedded. Embedding is not supported for the Related Actions view, nor is it supported for any record views for the User record type. Related action shortcuts within a record view are supported and activity-chaining from related actions is supported.
The attributes for the <appian-record-view> element are listed below.
| Attribute | Description | Required |
|---|---|---|
| recordTypeUrlStub | The URL stub of the record type. The URL stub is visible in the record type designer. | Yes |
| recordIdentifier | The record identifier of a visible record. | Yes |
| recordViewUrlStub | The URL stub of the record view. Go to the record type and click Views to find the URL stub for each record view. | Yes |
ExampleCopy link to clipboard
The example below is a static example of the <appian-record-view> element.
1
<appian-record-view recordTypeUrlStub="U1TzGg" recordIdentifier="112" recordViewUrlStub="summary"></appian-record-view>
Copy
To use this static example for testing, simply replace the values of each attribute with values from your environment. Use the URL stub of the record type, the record identifier of a visible record, and the URL stub of the record view that you want to embed.
Related actionCopy link to clipboard
The <appian-related-action> element is used to embed a related action. Any SAIL related action that is mapped to a process model may be embedded. Embedding is not supported for non-SAIL related actions or for quick task related actions.
The attributes for the <appian-related-action> element are listed below.
| Attribute | Description | Required |
|---|---|---|
| recordTypeUrlStub | The URL stub of the record type. The URL stub is visible in the record type designer. | Yes |
| recordIdentifier | The record identifier of a visible record. | Yes |
| processModelUuid | The UUID of the process model that is launched by this related action. The UUID is found in the process model documentation. | Yes |
ExampleCopy link to clipboard
The example below is a static example of the <appian-related-action> element.
1
<appian-related-action recordTypeUrlStub="U1TzGg" recordIdentifier="112" processModelUuid="0001d6e9-c04f-8000-f92f-7f0000014e7a"></appian-related-action>
Copy
To use this static example for testing, simply replace the values of each attribute with values from your environment. Use the URL stub of the record type, the record identifier of a visible record, and the UUID of the process model that is configured to be launched by the specified related action.
ReportCopy link to clipboard
The <appian-report> element is used to embed a report or task report.
The attributes for the <appian-report> element are listed below.
| Attribute | Description | Required |
|---|---|---|
| reportUrlStub | The URL stub of the report or task report. | Yes |
ExampleCopy link to clipboard
The example below is a static example of the <appian-report> element.
1
<appian-report reportUrlStub="DtJN3Q"></appian-report>
Copy
TaskCopy link to clipboard
The <appian-task> element is used to embed a task. Any task that uses an interface can be embedded. Activity-chaining is supported for embedded tasks. Task management, including preview, saving, acceptance and unacceptance, reassignment, and rejection, are all supported for embedded tasks.
The attributes for the <appian-task> element are listed below.
| Attribute | Description | Required |
|---|---|---|
| taskId | The ID of the task. Note: Dynamically providing a user's tasks to an external Web page requires the use of a Web API or a servlet plug-in; see the Integrated jQuery Example for more information. |
Yes |
ExampleCopy link to clipboard
The example below is a static example of the <appian-task> element.
1
<appian-task taskId="145"></appian-task>
Copy
To find a valid task ID for testing purposes, open a task in the Appian environment. Once loaded, the task ID is visible in the URL: /suite/sites/sitename/page/pagename/task/[task ID]. Note that after the form is submitted, the task ID will no longer be valid.
TroubleshootingCopy link to clipboard
This section offers general guidelines to help you diagnose and resolve some common issues.
Embedded content not availableCopy link to clipboard
If you receive an error that an action, record view, related action, report, or task is not available, there may be an attribute or permission that is not configured properly. Refer to the table below for what to check.
| Embedded Content | Check the Following Attributes | Check the Following User Permissions |
|---|---|---|
| Action | Process Model UUID | Process Model |
| Record View* | Record Identifiers | Record Type and Record View |
| Related Action* | Record Identifiers | Record Type and Process Model |
| Report | Report URL Stub | Report |
| Task | Task ID | Task |
| *Also verify the record is not filtered out by the record type’s default filter. | ||
Embedded interface does not appear when using cross-origin resource sharingCopy link to clipboard
If you are using cross-origin resource sharing and nothing seems to happen, check the following:
- Your browser's JavaScript console for cross-origin resource sharing errors
- The Admin Console for the correct configuration
CSS styles surrounding interface not displaying correctlyCopy link to clipboard
If the content surrounding an embedded interface uses CSS rules applied to tags without any other selectors, these styles may be impacted by the embedded interface.
If you do not have control over all of the content in order to alter the CSS (for example, you are embedding into Sharepoint), consider wrapping the embedded interface in an iframe to isolate its styling from the rest of the web page. Note that iframes restrict responsive behavior, so avoid using them unless necessary.
Web browser issuesCopy link to clipboard
Users may encounter issues with embedded Appian content if they have disabled cookies in their web browser. They must set their web browsers to accept third-party cookies.
Handling eventsCopy link to clipboard
You may have a requirement to have interface lifecycle events such as form submission trigger a behavior on the host web page. For example, a task and its surrounding elements might be removed from the page so that a task list or a success message can be displayed. To support these and similar uses, Appian's custom HTML elements raise the following JavaScript events:
submit: When the action, related action, or task has been submitted and there is no further activity-chaining.error: When the Appian system has encountered an unrecoverable error rendering the interface.dismiss: When the user clicks "Go Back" from previewing a group-assigned task, or when the user returns a previously accepted task to its original assignees.open-task-link: When the user clicks on a task link in an embedded interface.open-record-link: When the user clicks on a record link in an embedded interface.open-startprocess-link: When the user clicks on a start process link in an embedded interface.open-report-link: When the user clicks on a report link in an embedded interface.
The submit, error, and dismiss events are only raised in cases when the interface is no longer displayed. If the events are not caught, a generic message is displayed to the user about the submission, error, or dismiss status. Errors that do not take the user away from the task, such as certain submission-related errors, do not raise these events.
The following code provides an example of how to trigger a JavaScript function after the submission of a task:
1
2
3
4
5
6
7
8
9
10
11
12
<script>
	function submitted() {
		// Place appropriate submit handling here
		alert("The task has been submitted!");
	}

	window.onload = function() {
		document.getElementById("embeddedTask").addEventListener("submit", submitted, false);
	}
</script>

<appian-task id="embeddedTask" taskId="536872316"></appian-task>
Copy
For simplicity, the above example uses a static <appian-task> element and basic JavaScript event handling mechanisms, but since these are normal JavaScript events, any JavaScript library's event handling mechanism should work.
These events can have a detail field that contains attributes to provide greater flexibility. The following table identifies the available attributes by event:
| Event | Attributes | Example |
|---|---|---|
| submit | - | - |
| error | title, message, details, code | event.detail.title |
| dismiss | action | event.detail.action |
| open-task-link | taskid | event.detail.taskid |
| open-record-link | recordTypeUrlStub, recordIdentifier, recordViewUrlStub | event.detail.recordTypeUrlStub |
| open-startprocess-link | processModelUuid | event.detail.processModelUuid |
| open-report-link | reportUrlStub | event.detail.reportUrlStub |
The open-task-link, open-record-link, open-startprocess-link, and open-report-link events can be used to provide an alternative navigation experience from the default one. For example, you can use JavaScript to replace the current embedded interface with the linked content instead of the default behavior of opening in a new browser tab. See example provided in the Dynamic Embedding section below.
Optional configurationsCopy link to clipboard
Apply a theme to an embedded interfaceCopy link to clipboard
To apply custom styling to the Appian interfaces embedded in a host web page, add a data-themeidentifier attribute to the script tag specifying the theme to apply to the embedded interfaces. Here is an example of a script tag with a theme specified:
1
<script src="https://appian.example.com/suite/tempo/ui/sail-client/embeddedBootstrap.nocache.js" id="appianEmbedded" data-themeidentifier="corporateTheme1"></script>
Copy
If the data-themeidentifier attribute is not included or the value provided is null or invalid, then no theme will be applied and the embedded interface will have the default Appian styling.
Banner positionCopy link to clipboard
There are times when a banner is displayed on top of an Appian interface to convey some information to the user. For example, upon successful completion of a related action, a confirmation banner with text "Action completed successfully" is displayed to the user.
By default, all banners display at the top of the relevant embedded interface. However, if you want banners to display at the top of the host web page or if you do not want banners to appear at all, you can add an optional data-bannerposition attribute to the embedded script tag. The data-bannerposition attribute has the following valid values:
- "embeddedInterface": Banners are shown at the top of the relevant embedded interface.
- "webPage": Banners are shown at the top of the host web page. If you've placed the embedded interface within an iframe, then the banner will appear at the top of the iframe, which isn't necessarily the top of the web page.
- "hidden": Banners are not shown.
Here is an example of how you would configure your script tag such that all banners for the embedded interfaces appear at the top of the web page:
1
<script src="https://appian.example.com/suite/tempo/ui/sail-client/embeddedBootstrap.nocache.js" id="appianEmbedded" data-bannerposition="webPage"></script>
Copy
The value configured in the script tag applies to all embedded interfaces on the host web page. If the data-bannerposition attribute is not included or the value provided is null or invalid, then the default value of "embeddedInterface" is applied and banners will be shown at the top of the relevant embedded interface.
Z-index range of popup contentCopy link to clipboard
There may be times when you want to adjust the z-index of popup content (for example, dialogs) in Appian embedded interfaces to ensure that certain content on the host page appears in front of or behind it. For example, you may want to ensure that certain popup notifications from the host page always appear in front of any Appian dialogs such as the authentication dialog. In order to make this happen, the host page popups must have a higher z-index than the Appian popup content.
By default, Appian popup content has a z-index range of 2,000,000 to 2,000,100. If you need to adjust this range, you can add an optional data-startzindex attribute to the embedded script tag.
Here is an example of how you would shift the z-index for Appian embedded content to be 3,000,000 to 3,000,100:
1
<script src="https://appian.example.com/suite/tempo/ui/sail-client/embeddedBootstrap.nocache.js" id="appianEmbedded" data-startzindex="3000000"></script>
Copy
The value provided for data-startzindex must be an integer no larger than 2,000,000,000. Anything larger is not allowed because it could result in a z-index higher than the maximum integer value.
Safari setupCopy link to clipboard
If you have users who will be using Appian embedded content in a Safari browser, you will need to do one of two things to ensure that they are able to authenticate with Appian and access the embedded content successfully. This is because Safari (unlike other browsers) has a default browser setting that only allows cookies from websites that the user has visited before.
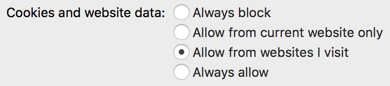
If you have control over your users' Safari browser settings, your first option is to change the value of the above browser setting from "Allow from websites I visit" to "Always allow".
If you don't have control over your users' Safari browser settings, your web page containing the Appian embedded content will need to quickly visit Appian behind the scenes when a user first lands on the page. Consequentially, Safari will accept cookies from Appian going forward.
To do so, your web page should set the window location to the following end point: /suite/embedded/redirect?redirectTarget=
NotesCopy link to clipboard
- The window whose location is being set must be the top-level web page's window, not a window inside an iframe.
- Set up the redirect to only occur when a user first arrives at your web page in order to avoid an infinite loop of redirects.
- The end point is unauthenticated, so the user will not be asked for their credentials. If the user is still unauthenticated when viewing embedded content, then he/she will be asked to authenticate.
- This setup must be done regardless of whether the embedded content is inside an iframe.
Unsupported browser detectionCopy link to clipboard
If some of your users use web browsers that are not supported by Appian, then you may want to detect that and provide an alternate experience for those users. By default, Appian displays a message in place of the embedded interface when viewed in an unsupported browser.
The example below shows a JavaScript code snippet that detects the browser that a user is using. If the user is on an Appian supported browser, the appropriate Appian report is embedded in the host page. Otherwise, an alternate experience can be provided. The JavaScript references a container element on the host page with an id of appianContainer.
1
2
3
4
5
6
7
8
9
10
11
12
13
14
15
16
17
18
19
20
const container = document.getElementById('appianContainer');
const userAgent = navigator.userAgent;
const isSupportedBrowser = userAgent && userAgent.includes('Mozilla/') && (
    userAgent.includes('Chrome/') ||
    userAgent.includes('Firefox/') ||
    userAgent.includes('Safari/') ||
    userAgent.includes('Edge/') ||
    userAgent.includes('Mobile/'));
if (isSupportedBrowser) {
  const appianBootstrap = document.createElement('script');
  appianBootstrap.setAttribute('type', 'text/javascript');
  appianBootstrap.setAttribute('src', 'https://appian.example.com/suite/tempo/ui/sail-client/embeddedBootstrap.nocache.js');
  appianBootstrap.setAttribute('id', 'appianEmbedded');
  container.appendChild(appianBootstrap);
  const appianReport = document.createElement('appian-report');
  appianReport.setAttribute('reportUrlStub', 'DtJN3Q');
  container.appendChild(appianReport);
} else {
  // Inject alternate behavior for unsupported browsers here
}
Copy
Setting a non-default SAML identity provider for authenticationCopy link to clipboard
When configuring SAML for Single Sign-On, if not all users authenticate through the same identity provider, you need to configure a default sign-in page. If you have embedded users that do not authenticate through the default sign-in page, you will need to use the data-signin attribute.
To use the attribute, set data-signin to the web address identifier corresponding to the user's identity provider. When set, Appian will send the user to the configured identity provider for authentication. Your script tag will look similar this:
1
<script src="https://appian.example.com/suite/tempo/ui/sail-client/embeddedBootstrap.nocache.js" id="appianEmbedded" data-signin="employee"></script>
Copy
If you have users across multiple identity providers accessing the same embedded page and need to dynamically set the data-signin attribute, you will need to dynamically add the entire script tag to your HTML page.
Dynamic embeddingCopy link to clipboard
Because Appian Web components act like ordinary HTML elements, they can be created using normal DOM manipulation techniques. The following example code dynamically embeds a task using only JavaScript:
1
2
3
4
5
6
7
8
9
10
11
12
13
14
15
16
17
18
19
20
21
22
23
24
25
26
27
28
29
<!DOCTYPE html>
<html>
  <head>
    <!-- This script loads the Appian Web components; change it to your Appian server's domain -->
    <script src="https://appian.example.com/suite/tempo/ui/sail-client/embeddedBootstrap.nocache.js" id="appianEmbedded"></script>
    <script>
      /* This function dynamically inserts an <appian-task> element into the page with the user-specified taskId */
      function addTask() {
        var taskId = document.getElementById('new-task').value;
        if (taskId) {
          var newTask = document.createElement('appian-task');
          newTask.setAttribute("taskId", taskId);
          newTask.addEventListener("submit", handleSubmit, false);
          document.body.insertBefore(newTask, document.getElementById('insertPoint'));
        }
      }

      /* This function is called by the submit event listener */
      function handleSubmit() {
        alert("The task has been submitted!");
      }
    </script>
  </head>
  <body>
    <input id="new-task" />
    <button onclick="return addTask();">Embed This Task</button>
    <div id="insertPoint"></div>
  </body>
</html>
Copy
To try it out, change the domain referenced in the initial script element to that of your Appian server and then load the page. Put a valid task ID number into the input box, and then click the button.
That example used only JavaScript, but any web development framework can manipulate Appian web components. Here is the same example modified to dynamically embed the task using jQuery:
1
2
3
4
5
6
7
8
9
10
11
12
13
14
15
16
17
18
19
20
21
22
23
24
25
26
27
<!DOCTYPE html>
<html>
  <head>
    <script src="https://appian.example.com/suite/tempo/ui/sail-client/embeddedBootstrap.nocache.js" id="appianEmbedded"></script>
    <script src="https://code.jquery.com/jquery-1.11.1.min.js"></script>
    <script>
      /* This function dynamically inserts an <appian-task> element into the page with the user-specified taskId */
      function addTask() {
        var taskId = $("#new-task").val();
        if (taskId) {
          $('<appian-task />').attr("taskId", taskId).on("submit", handleSubmit).appendTo("#taskContent");
        }
      }

      /* This function is called by the submit event listener */
      function handleSubmit() {
        alert("The task has been submitted!");
      }
    </script>
  </head>
  <body>
    <div id="inputs">
      <input id="new-task" /><button onclick="return addTask();">New Task</button>
    </div>
    <div id="taskContent"></div>
  </body>
</html>
Copy
The following example uses JavaScript to render a task report and then opens the selected task in the same embedded interface instead of opening it in a new browser tab:
1
2
3
4
5
6
7
8
9
10
11
12
13
14
15
16
17
18
19
20
21
22
23
24
25
26
27
28
29
30
31
32
33
34
35
36
37
38
39
40
41
42
43
44
45
46
47
48
49
50
51
52
53
54
55
56
57
58
59
60
61
62
63
64
65
66
67
68
<!DOCTYPE html>
<html>
  <body>
    <div id="embeddedDiv"></div>
    <script src="https://appian.example.com/suite/tempo/ui/sail-client/embeddedBootstrap.nocache.js" id="appianEmbedded"></script>
    <script>
      var embeddedTaskId = 'embeddedTask';
      var embeddedTaskReportId = 'embeddedTaskReport';
      var container = document.getElementById('embeddedDiv');

      function taskSubmitted() {
        console.log("An Appian task was submitted!");

        // Remove the appian-task tag
        var taskTag = document.getElementById(embeddedTaskId);
        if (taskTag) {
          taskTag.destroy();
          container.removeChild(taskTag);
        }

        // Re-add the appian-report tag
        addTaskReport();
      }

      function taskLinkOpened(event) {
        // Prevent the Appian default behavior of opening a new tab
        event.preventDefault();

        // Pull off taskId attribute from the event
        var {taskId} = event.detail;
        console.log('An Appian task link was clicked [taskId= ' + taskId + '].');

        // Create the appian-task embedded tag
        var taskTag = document.createElement('appian-task');
        taskTag.setAttribute('id', embeddedTaskId);
        taskTag.setAttribute('taskId', taskId);

        // Listen for submission events
        taskTag.addEventListener('submit', taskSubmitted, false);

        // Remove the appian-report tag and add the task tag in its place
        var reportTag = document.getElementById(embeddedTaskReportId);
        if (reportTag) {
          reportTag.destroy();
          container.removeChild(reportTag);
        }
        container.appendChild(taskTag);
      }

      function addTaskReport() {
        // Build the appian-report tag for the task report
        var taskReportTag = document.createElement('appian-report');
        taskReportTag.setAttribute('id', embeddedTaskReportId);

        // Replace this URL stub with your report's URL Stub
        taskReportTag.setAttribute('reportUrlStub', 'ChangeToYourValidReportUrlStub');

        // Listen for clicks on task links
        taskReportTag.addEventListener("open-task-link", taskLinkOpened, false);

        // Add the tag to the dom for display
        container.appendChild(taskReportTag);
      }

      addTaskReport();
    </script>
  </body>
</html>
Copy
To try it out, change the domain referenced in the initial script element to that of your Appian server and then change the report URL Stub to point to a valid report that contains process task links.
Cleanup after removing embedded interfaceCopy link to clipboard
If an embedded interface is removed from the host Web page (and not re-added in a different location), you must trigger cleanup of timeouts. This will prevent unexpected behavior like the appearance of a session expiration prompt after the Appian interface is no longer embedded. To trigger cleanup, call the destroy JavaScript function on the Web component before removing it from the Web page. The following example demonstrates finding the Web component on the page and calling destroy on it.
1
2
3
var dialog = document.getElementById('dialog');
var task = dialog.querySelector('appian-task');
task.destroy();
Copy
Integrated jQuery exampleCopy link to clipboard
In the interest of simplicity, the examples up to this point have used identifiers that were either hardcoded or provided by the user. Providing the user's tasks to an external web page requires the use of a Web API or a servlet plug-in, such as the task list plug-in provided as an example in the servlet plug-in documentation.
The following jQuery example calls the task list servlet plug-in and uses the results to build a list of linked task names. When a task name is clicked, it replaces the task list with the task itself via the <appian-task> element. When the task is submitted, it again calls the plug-in and shows the task list.
1
2
3
4
5
6
7
8
9
10
11
12
13
14
15
16
17
18
19
20
21
22
23
24
25
26
27
28
29
30
31
32
33
34
35
36
37
38
39
40
41
42
43
44
45
46
47
48
49
50
<!DOCTYPE html>
<html lang="en">
  <head>
    <meta charset="utf-8">
    <title>Task List Demo</title>
    <script src="https://code.jquery.com/jquery-1.11.1.min.js"></script>
    <script src="https://appian.example.com/suite/tempo/ui/sail-client/embeddedBootstrap.nocache.js" id="appianEmbedded"></script>
    <script>
      function showTask(taskId) {
        $("#tasks").empty();
        $('<appian-task />').attr("taskId", taskId).on("submit", handleSubmit).appendTo("#tasks");
      }

      function handleSubmit() {
        $("#tasks").empty();
        showTaskList();
      }

      function showTaskList() {
        $.ajax({
          type: 'GET',
          url: "https://appian.example.com/suite/plugins/servlet/tasklist",
          dataType:"json",
          contentType: 'application/json',
          xhrFields: {
            withCredentials: true
          }
        })
        .done(function(data) {
          $("<h1>").text("Appian Tasks").appendTo("#tasks");
          $.each(data, function(i, item) {
            $("<a>").attr("href", "#")
            .text(item.DisplayName)
            .click(function() { showTask(item.Id); })
            .appendTo("#tasks");
          });
        });
      }
    </script>
    <style>
      body { background-color: #fff; font-family: Sans-Serif; width: 1000px; margin: 0 auto !important; }
      h1 { color: #333; font-size: 24px; font-weight: bold; margin: 20px 0; }
      #tasks a { font-size: 14px; line-height: 18px; font-weight: bold; color: #285fab; text-decoration: none; display: block; margin: 0 0 8px; }
      #tasks a:hover, #tasks a:focus { color: #ee6615; }
    </style>
  </head>
  <body onload="showTaskList();">
    <div id="tasks"></div>
  </body>
</html>
Copy