An End Event (without a trigger) is used to denote the end of a process flow within a process model. The process remains active until all active paths in the process arrive at an end event.
Each new Process Modeler canvas includes a Start Event and an End Event.
Right-click an End Event on the designer canvas and select Results. You can also double-click an End Event on the designer canvas. The Edit End Event dialog is displayed, which provides the following tabbed property sheets.
This section contains tab configuration details specific to this smart service. For more information about common configurations see the Process Node Properties page.
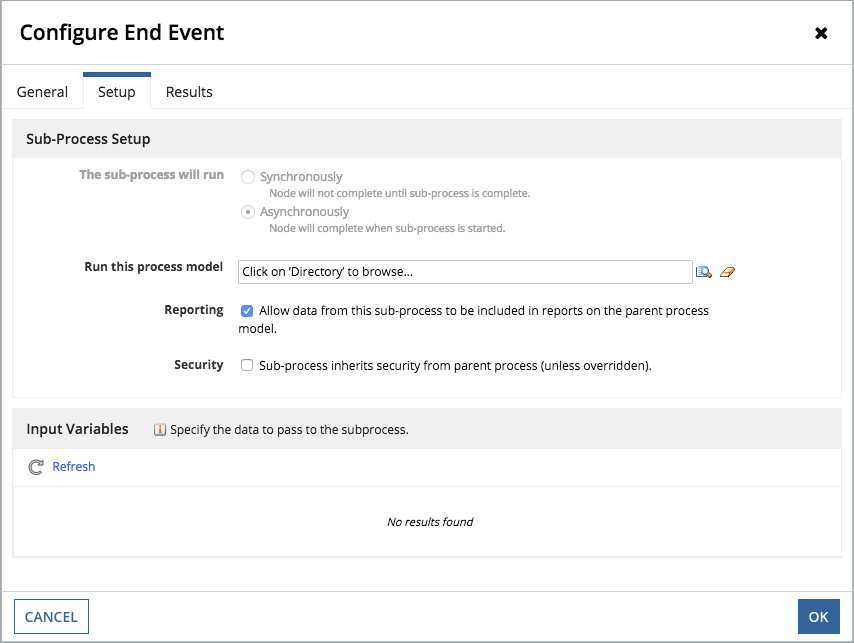
After your process flow reaches the End Event node, you can launch a subprocess that runs after the parent process (Asynchronously). Only an Asynchronous Subprocess can be launched from an End Event.
See the Configuring a Subprocess Activity help topic for more information.
Click the Directory button next to the Run this process model field. Locate and select the process model you want to run as a Subprocess. The Process Variables used by the parent process appear in the Node Variable list.

If none are listed, click  on the toolbar. A Node Input (also called an Activity Class Parameter) functions as a connection to a process variable, allowing you to read it or change it.
 The Process Variables for the Subprocess are displayed.
By default, end events do not have any triggers. However, you can add the following triggers to an end event as needed:
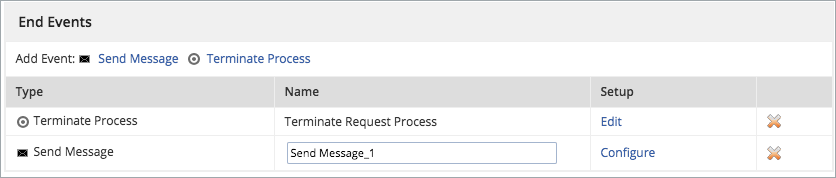
See the Send Message Event help topic for more information on configuring this trigger.
End events that are configured to send a message display the following marker.

Type the purpose of the Terminate Process trigger in the Description field.
End events that are configured with a Terminate Process event, display the following marker.

When more than one trigger is added to an end event, the following marker is displayed on the event.

Adding multiple triggers to an end event is especially useful when multiple messages need to be generated at the end of a process, or process flow.
All triggers configured within an end event are activated and executed before the event completes. Therefore, adding a Send Message trigger and a Terminate trigger to an end event results in a message being sent before the process is terminated.
You cannot use a record data type in this event. This means you cannot reference a process variable of type record data type, use a record field reference, or use a record type constructor; otherwise, an error will occur.
End Event
