| Process Mining is deprecated with Appian 24.2 and will no longer be available in an upcoming release. Instead, we encourage customers to use Process HQ to explore and analyze business processes and data. |
This page describes how to generate a process model in a new Appian application from Process Mining.
With Process Mining, you can generate a process model inside a new Appian application based on a discovered process. For example, let's say you have a legacy process that you want to modernize in Appian.
Instead of manually re-building your process from scratch, you can automatically generate it. To do this, load an event log into Process Mining that describes your legacy process and click GENERATE WORKFLOW from the discovered model.
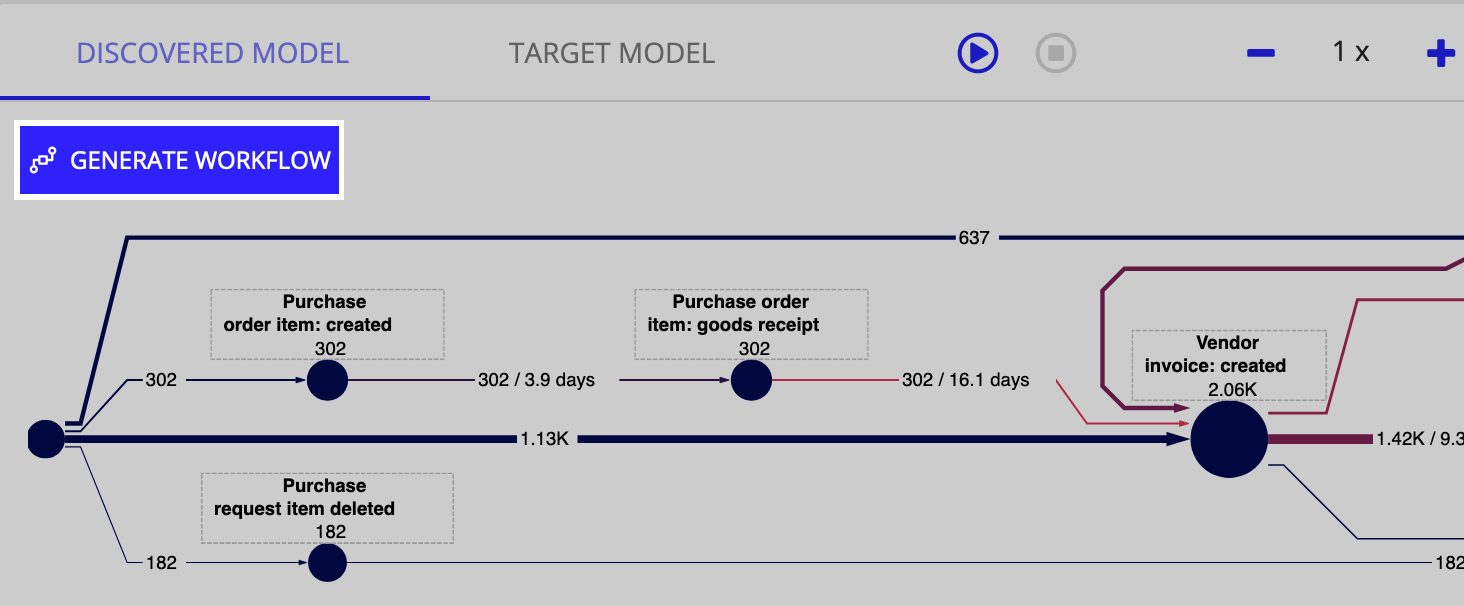
Generate workflow to create a new Appian application and process model based on your discovered process. As long as you can view a discovered model, you can generate workflow from it. Appian will generate:
Tip: The newly generated application is named after the event log that represents your process. The process model is also named after the event log with controller appended to it. If you want to name these something else, consider renaming your event log prior to generating a workflow.
To generate a workflow:
Now, you can begin configuring the process nodes.
Note: Each time you click GENERATE WORKFLOW, Process Mining will generate a new process model and a new application.
Once you've generated your workflow, your next steps should be configuring the process nodes in your new process model.
Depending on the activity, you can use Subprocess Activity nodes to run other process models you've created, or you can replace these nodes with smart services.
Configure conditions for the XOR gateways to determine the execution path your process will follow. In some instances, the generated XOR gateways may have multiple incoming paths, otherwise known as converging gateways. You should delete these converging gateways before configuring the rest of your process. We also recommend renaming each gateway so you'll know at a glance the conditions you've configured.
See Process Modeling with Appian for more information.
To set up the GENERATE WORKFLOW action for the first time, follow these steps:
Note: A system admin should perform these steps. To access the Administration Console in Appian Designer, you need to have the System Administrator role. To access the User Management page in Process Mining, you need to have either the User Admin or Super Admin roles.
Once this initial setup is complete, any user in your organization can generate workflows without any further configuration.
You need to create a service account in Appian Designer to make the connection to Process Mining. A System Administrator should perform this task.
To add a Process Mining service account and generate an API key, see Create a service account. Return with your service account's API key for the next step.
Next, you need to add the service account you created to the Process Mining Workflow Converters system group so it has permission to create the necessary objects. Any additional users that you add to this group can access the objects that this capability generates.
To add the service account to the necessary system groups:
Process Mining Workflow Converters in the filter pane.You can also control individual user's access to the generated objects with the Process Mining Workflow Converters system group. See Permissions for more information.
Once you have an API key from the previous step, you are ready to connect your organization to Appian Designer. A User Admin or Super Admin should perform this task.
Before you begin these steps, make sure you have a service account API key.
To connect your organization to Appian Designer:
https://mysite.appiancloud.com.You're done! Now, any user in your organization can generate workflow from Process Mining into Appian Designer.
To control users' access to the generated workflow objects and application, you can add users and groups to the Process Mining Workflow Converters system group. Any user or group you add to this system group are granted Administrator and Viewer permissions.

