
| The capabilities described on this page are included in Appian's advanced and premium capability tiers. Usage limits may apply. |
OverviewCopy link to clipboard
Sending an email is a common step in many case management processes. It could be to notify the submitter of an update to the case, remind the case assignee of an upcoming task, or send the submitter the result of their application. These emails need to be sent out at a specific step of the workflow, and the body of the email should be standardized and consistent across your cases.
To send emails directly from a task in your case workflow, you can add email templates to tasks in a case type workflow. When the workflow is in progress, the send email task prompts the task assignee to send an email using the standardized template configured for that task. The task assignee can also fine-tune the email content to make ad-hoc adjustments, provide relevant details, and fit the specific needs of each case.
This page will provide a brief overview of what email templates are, how they can be used in tasks, and how to create and configure them.
What are email templatesCopy link to clipboard
Email templates are reusable no-code templates that allow you to easily create standardized emails to send out in case workflows through tasks of the send email task type. To ensure emails have the right information for every case and recipient every time, emails are sent out through tasks that use email templates and require human input or approval. This allows you to add personalized information like the recipient or case submitters name, or even a case ID.
Email templates have their own page and the following image highlights the actions you can do on the EMAIL TEMPLATES page:
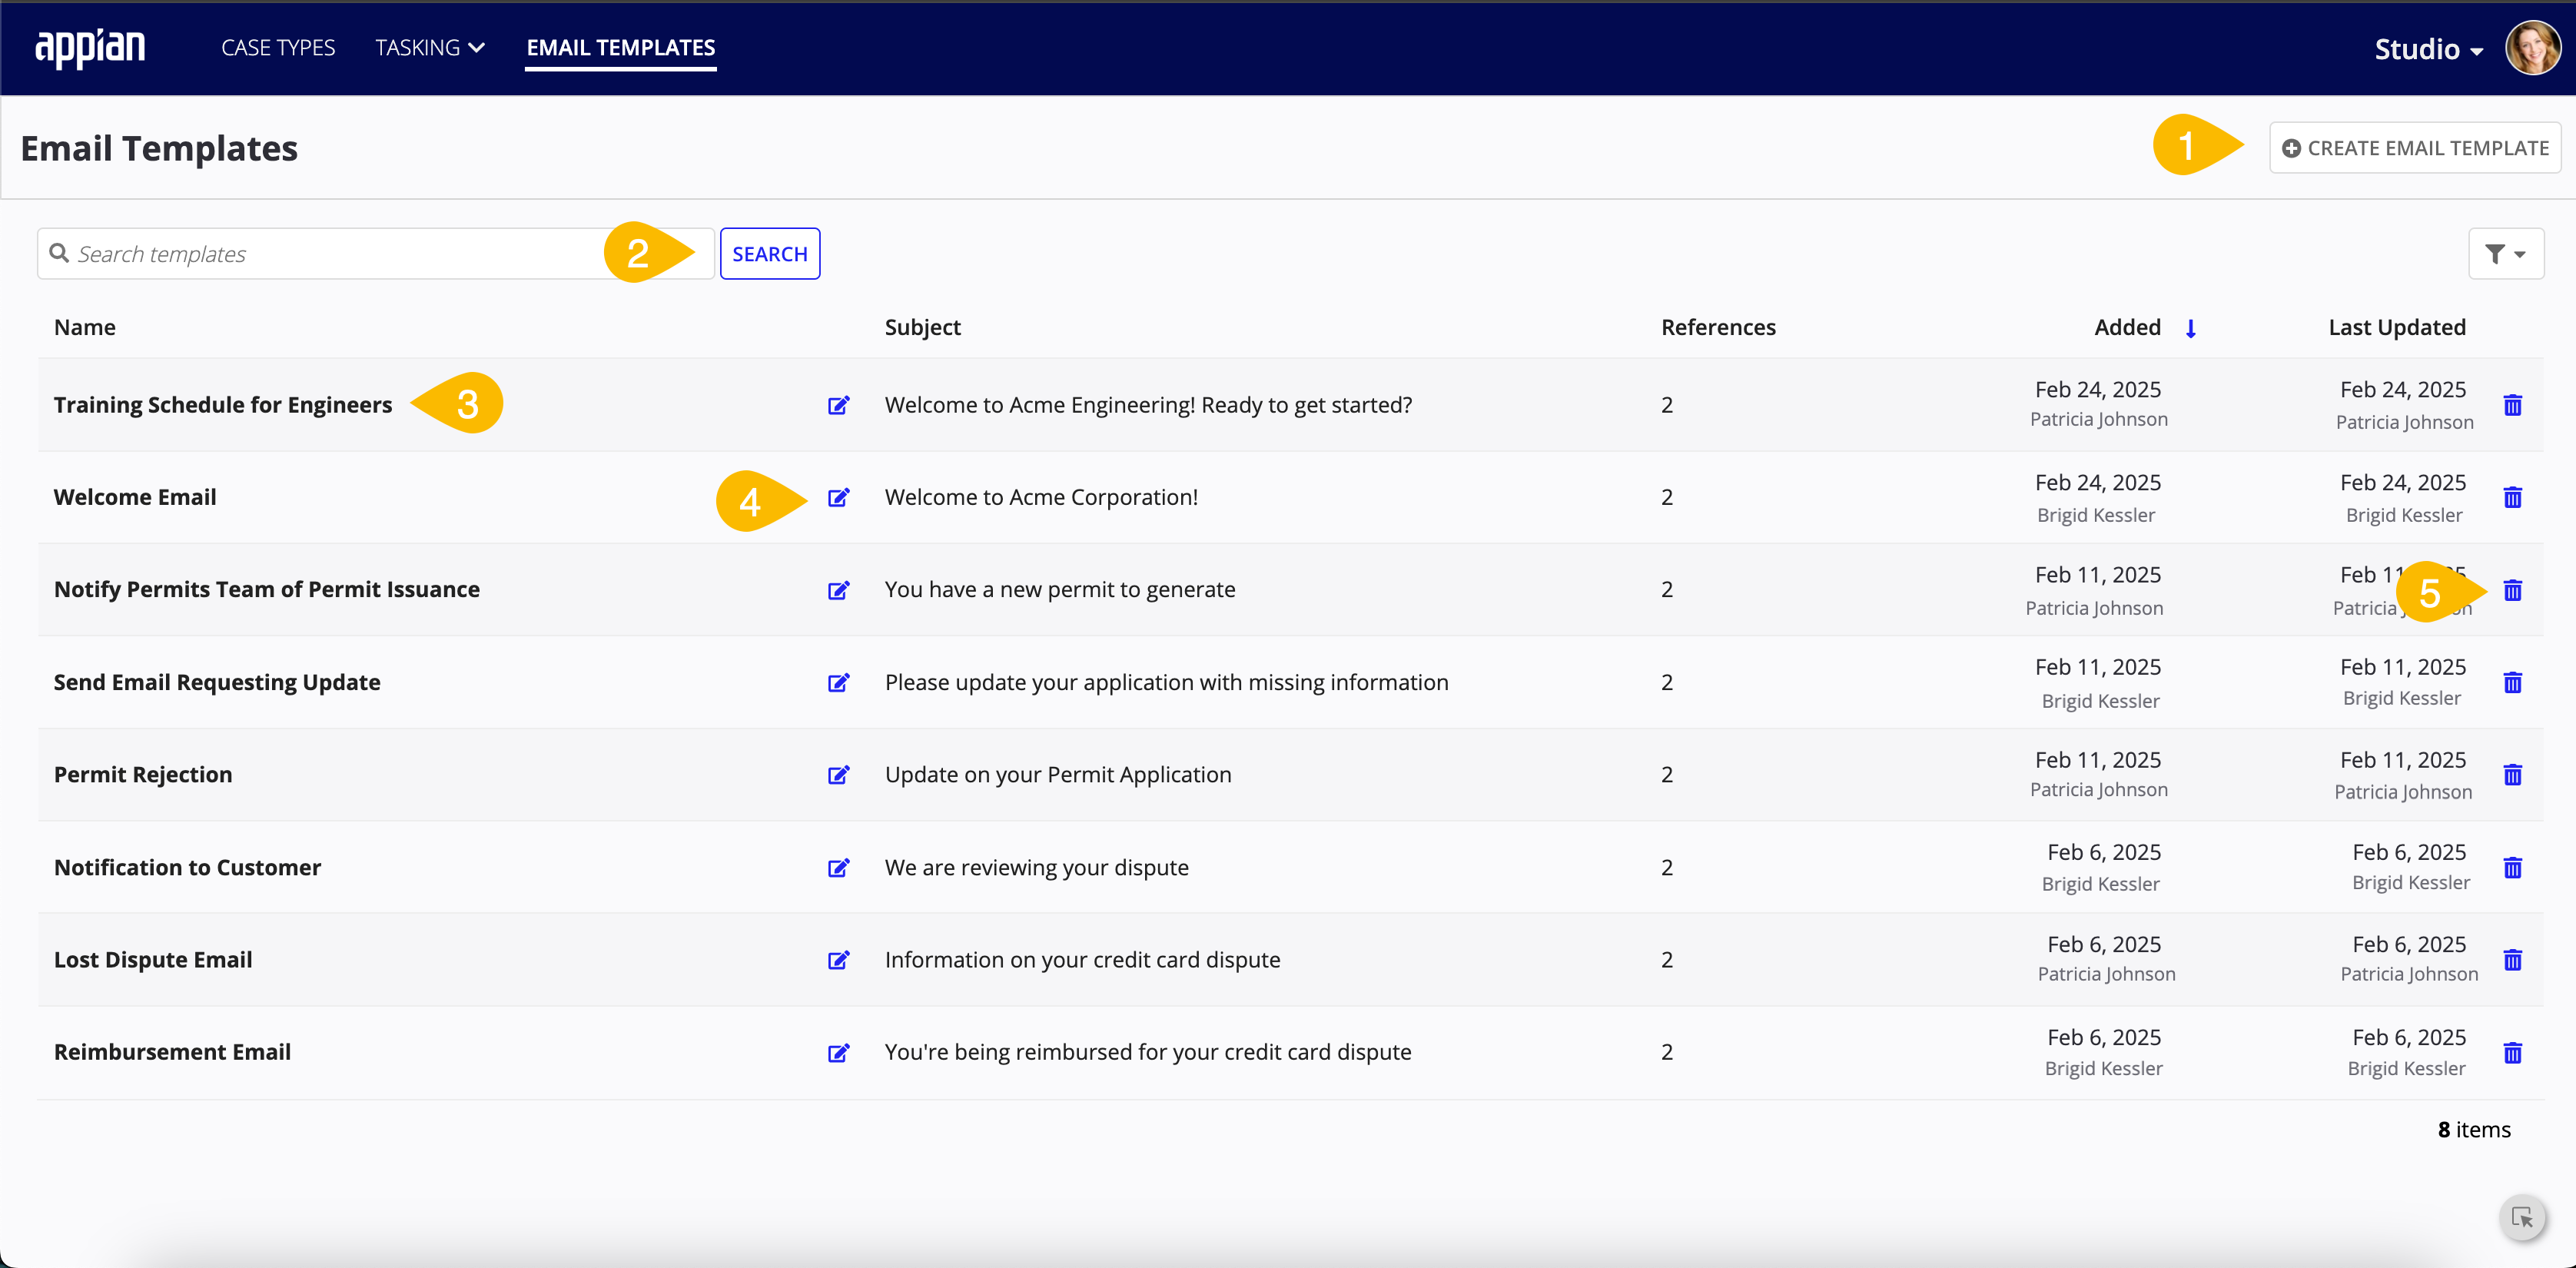

| # | Action |
|---|---|
| 1 | Create new email templates. |
| 2 | Search for email templates. |
| 3 | View all email templates. |
| 4 | Edit email templates. |
| 5 | Delete email templates. |
Note: All emails sent using Case Management studio workflows are sent from a no-reply email.
Creating an email templateCopy link to clipboard
You can create email templates from the email template page in Studio or directly from a task, either on the Tasks page or in a task within a case workflow.
Creating an email template from the email template pageCopy link to clipboard
To create an email template directly from the Email Templates page:
- Click + CREATE EMAIL TEMPLATE.
-
Configure the following template properties.
Property Description Name The name of the email template. Subject The subject line of the email. Body The content of the email. - You can optionally add supporting documents.
- Click CREATE.
Creating an email template from within a taskCopy link to clipboard
To create an email from within a task:
- Create a new task and select Send Email as the Task Type.
- Under Email Template, click + CREATE TEMPLATE.
-
Configure the following template properties.
Property Description Name The name of the email template. Subject The subject line of the email. Body The content of the email. - You can optionally add supporting documents.
- Click CREATE.
- Configure the rest of the task properties.
- Click CREATE.
Email template examplesCopy link to clipboard
You can use emails in different ways depending on your workflow, ranging from straightforward notifications, to friendly welcomes, to information dense communications. Below are a few examples of how the templates for these emails might look.
Welcome to engineering emailCopy link to clipboard
This is a helpful and informative welcome email that not only serves as a friendly welcome to an organization, but also provides information on training scheduling.
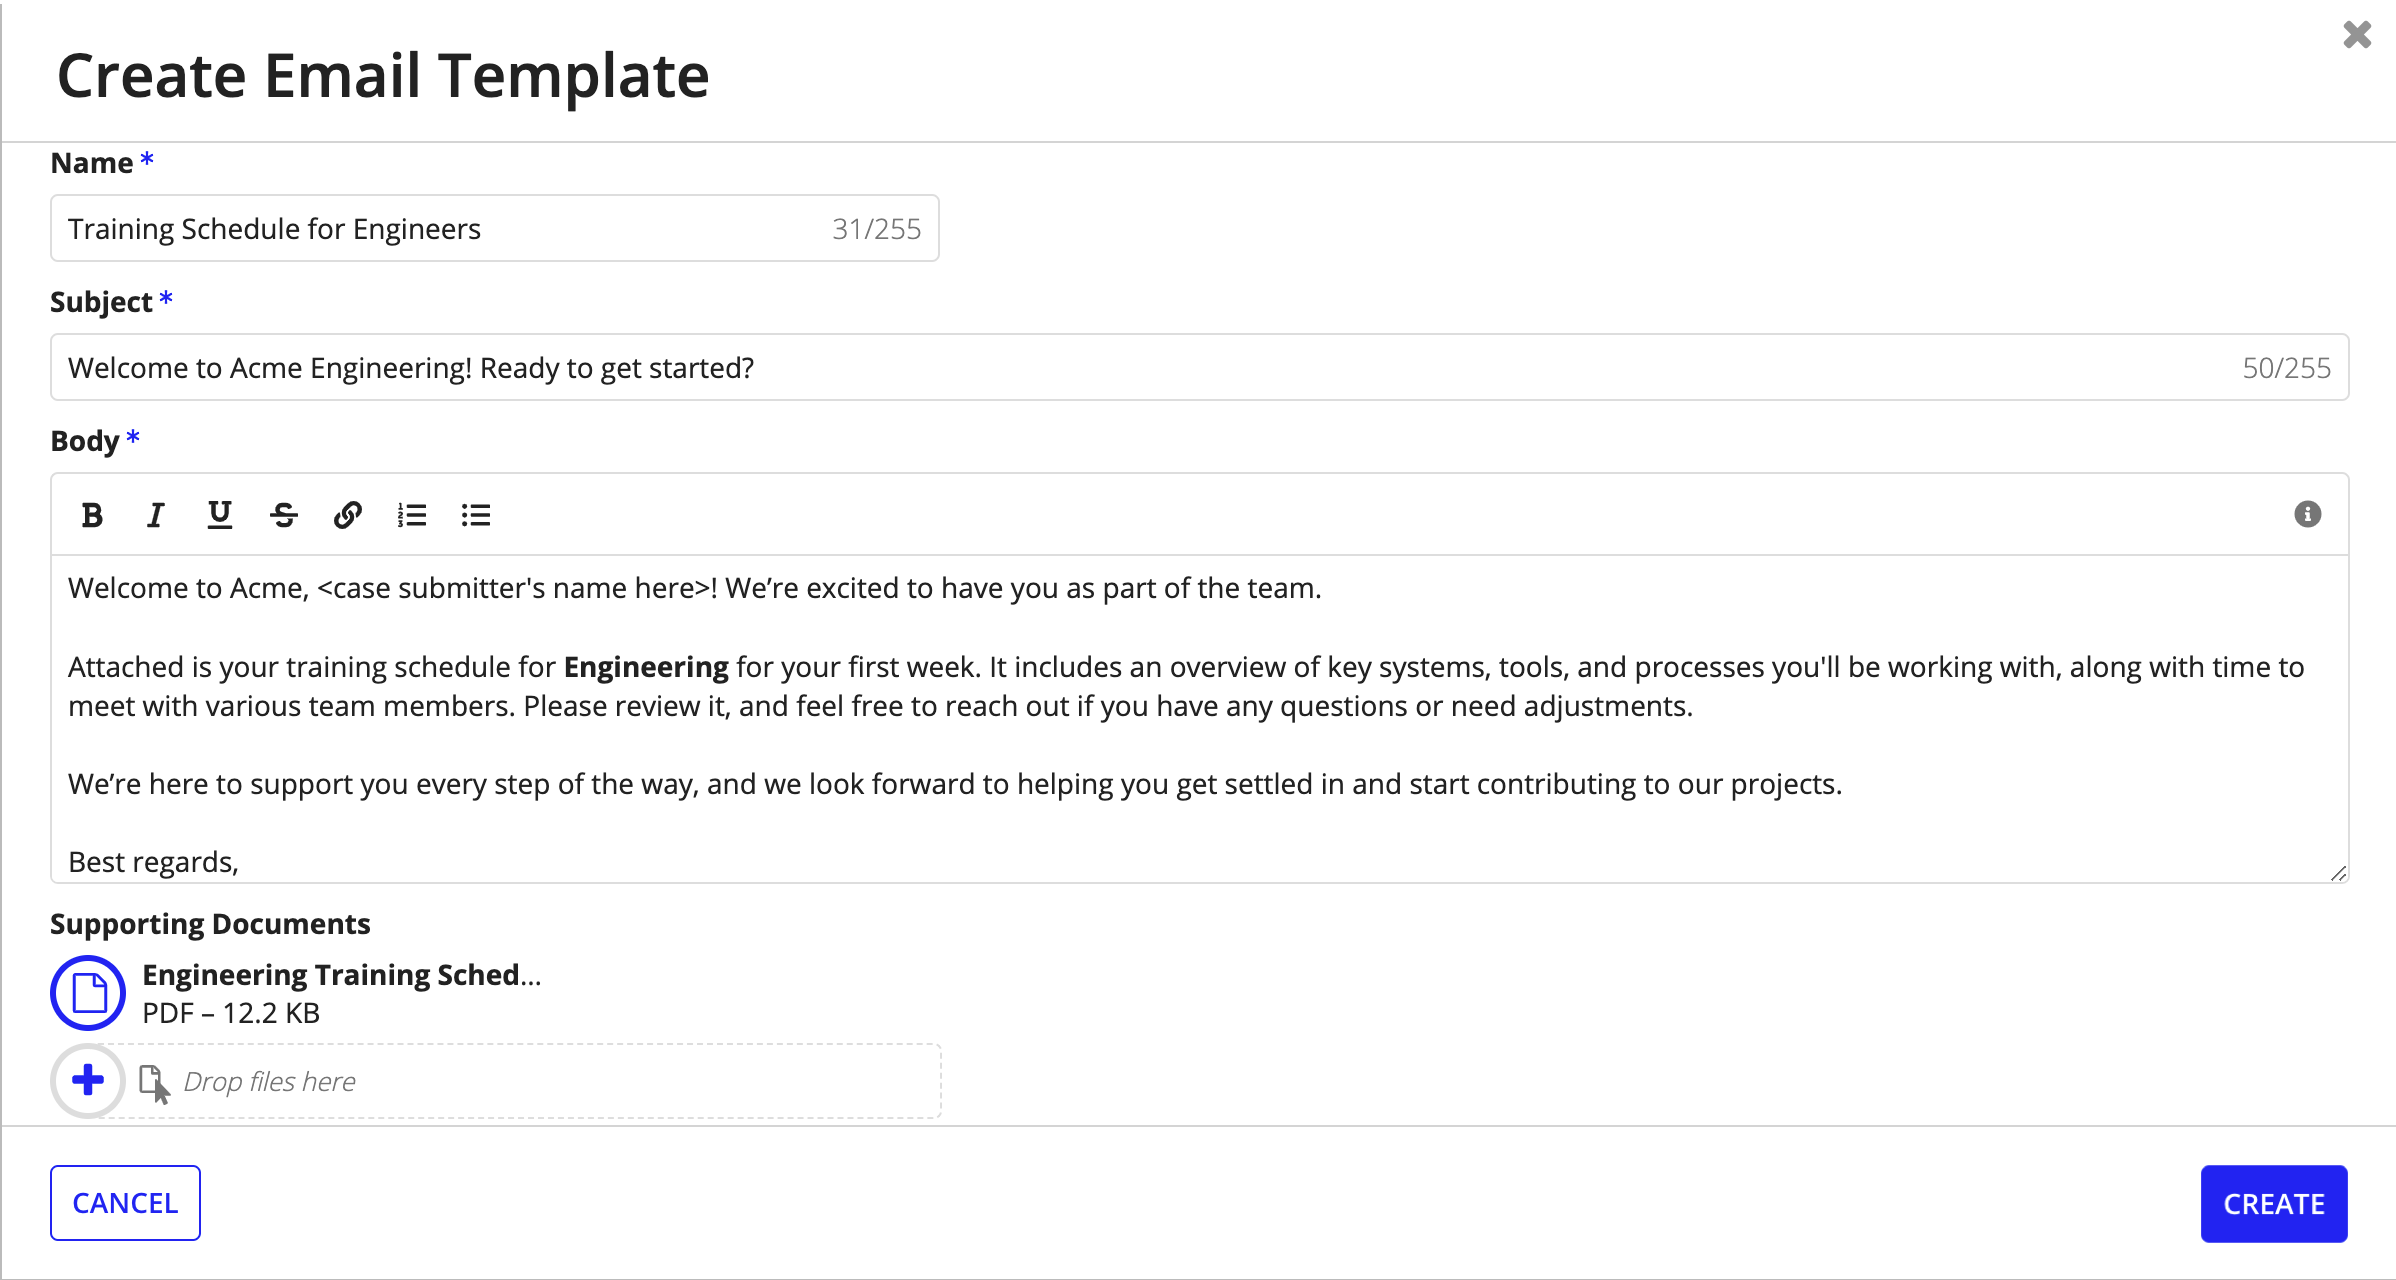
Notice that there is a note in the <> to signal to the task assignee that they need to put case specific information here. For this email, it's the case submitter's name. While it may not be necessary to include case submitter's name in a welcome email, personalizations can help recipients feel more positively about the interaction.
Generate permit notificationCopy link to clipboard
This is a simple notification that lets the user that submitted the application know that they can now generate a permit for their application, as well as provides additional instructions for how to do it.
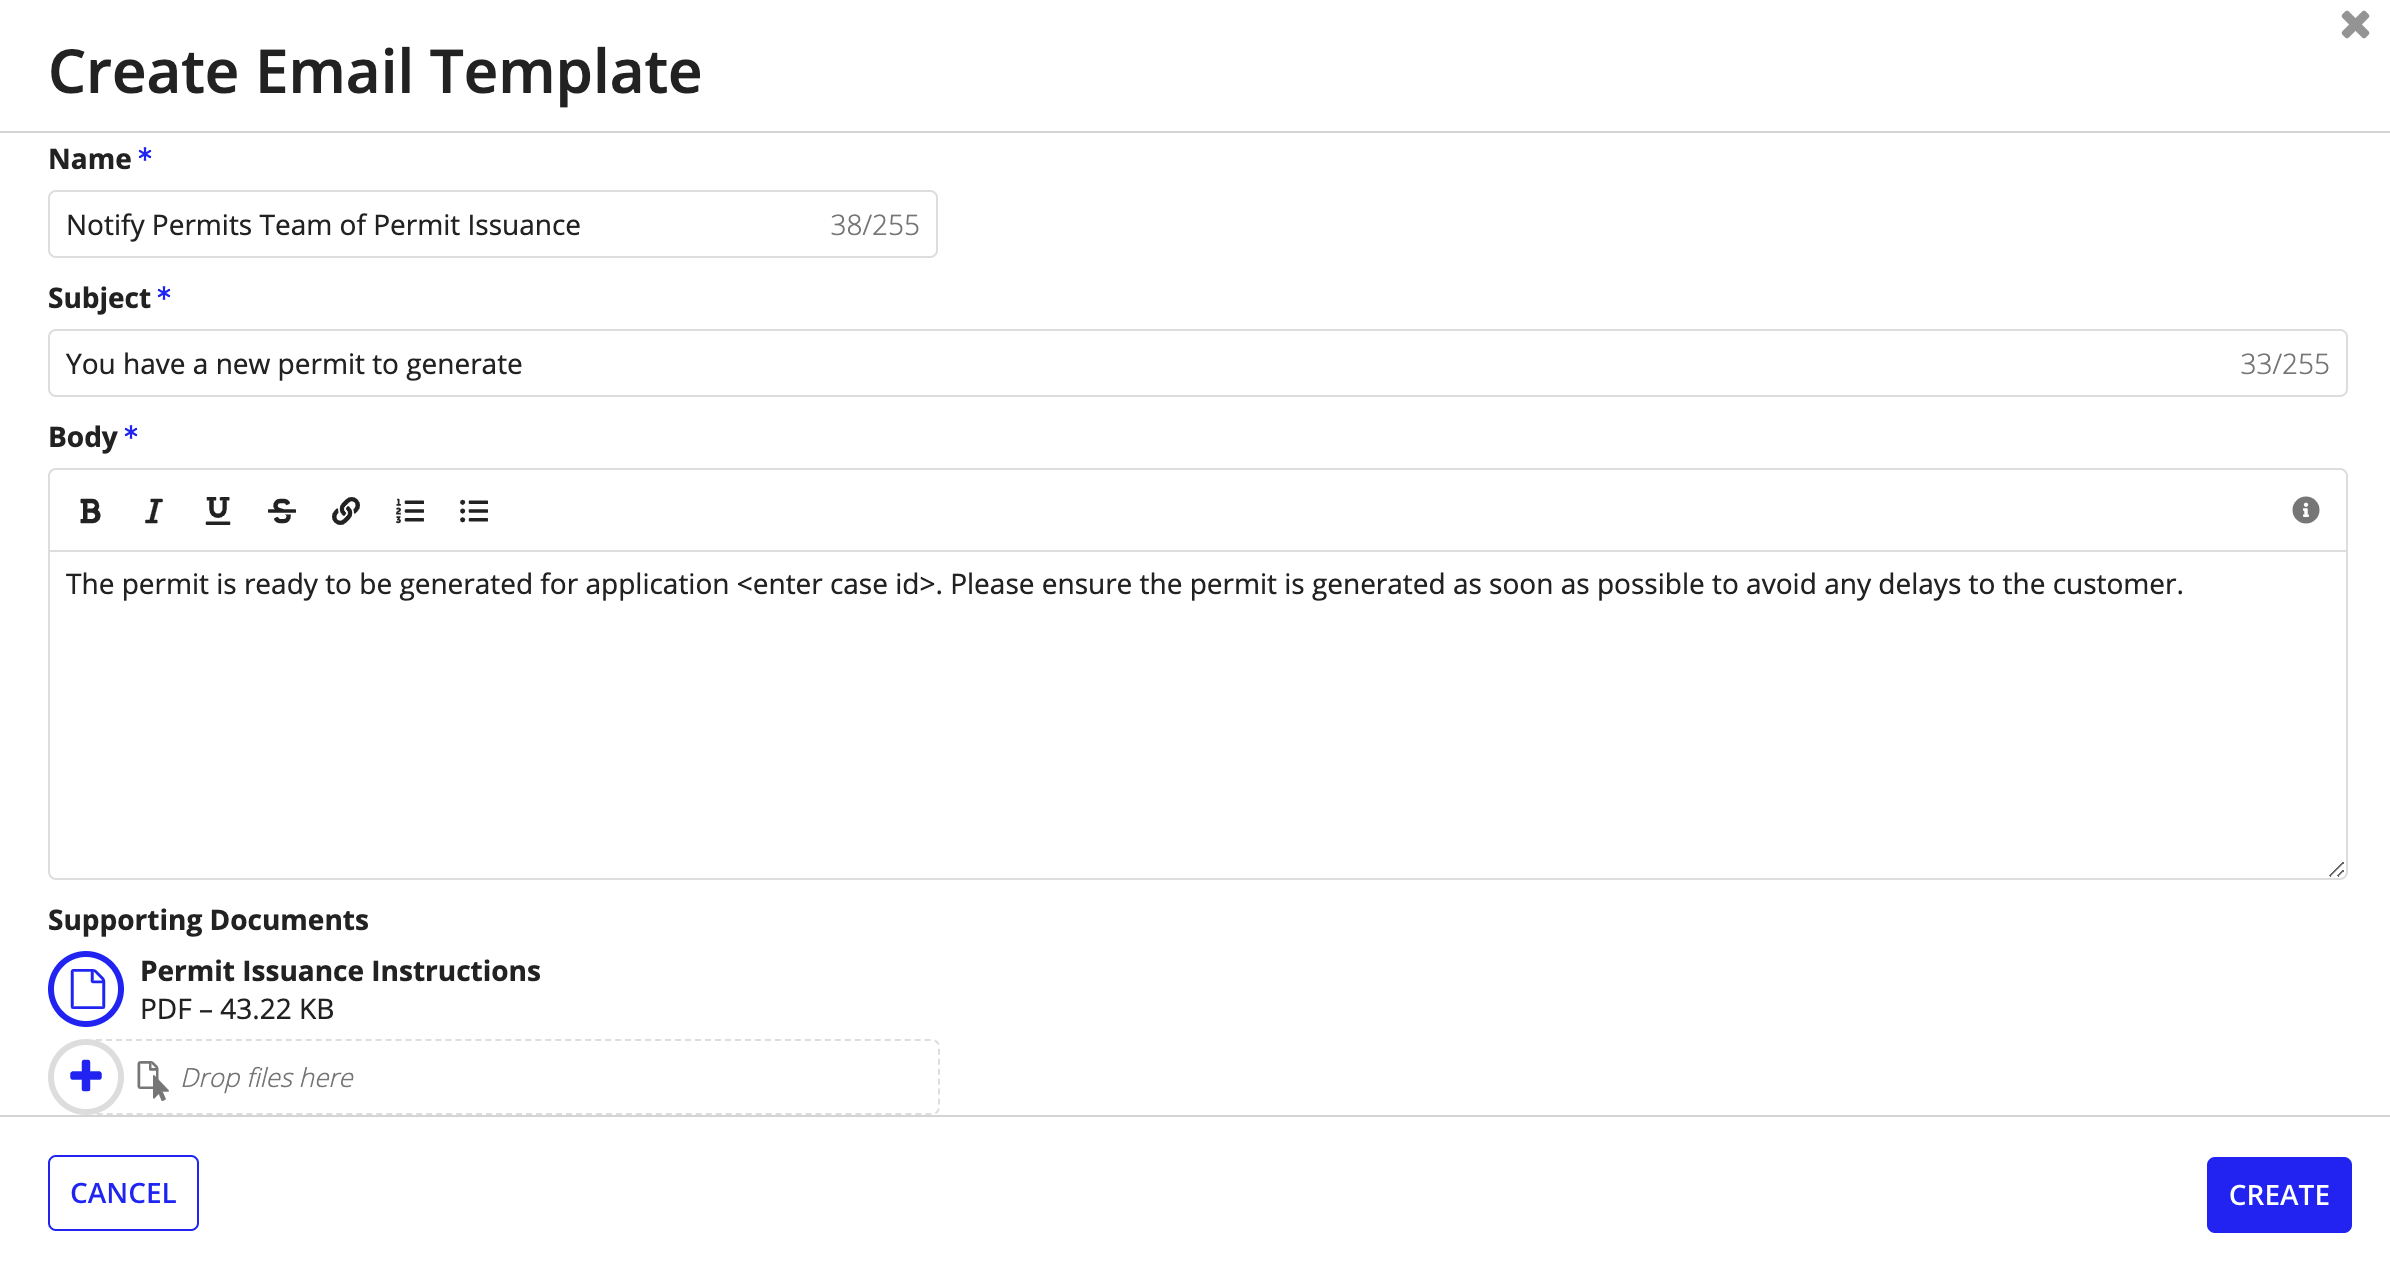
Notice that there is a note in the <> to signal to the task assignee that they need to put case specific information here. For this email, it's the case ID, which allows the user who submitted the application to quickly identify which application they need to take action on.