| This content applies solely to Contract Writing, which must be purchased separately from the Appian base platform. This content was written for Appian 23.1 and may not reflect the interfaces or functionality of other Appian versions. |
If you're new to the Appian Contract Writing solution and want to quickly get started using it to manage your acquisition life cycle, then the Contract Writing (CW) Quick Start Guide is for you.
This guide walks you through the most common views and actions you’ll use to manage your procurement processes and activities. It’s designed to get you up and running so that you can use CW to keep track of all of your procurements and quickly execute your tasks.
After reviewing this guide, you’ll understand how to:
Before you begin using CW, be sure you have access to the appropriate user groups for viewing and editing the awards you manage. See the Groups Reference Page for more information about group types and visibility.
When you log in to the CW solution, it opens on the MY WORKSPACE page, which gives you immediate access to all of your active solicitations, awards, and open tasks.
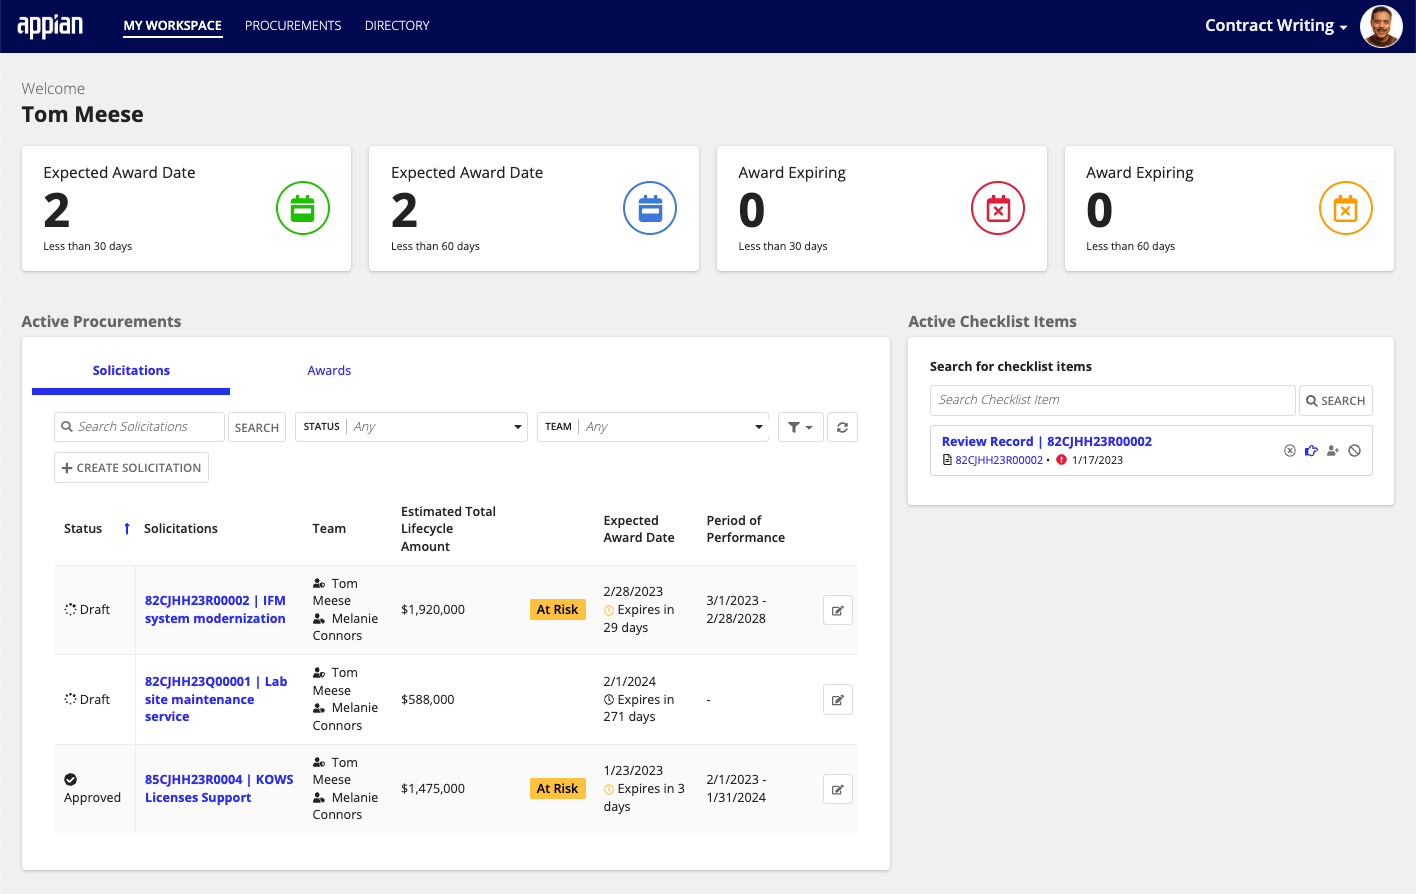
Under Active Procurements, click between the Solicitations and Awards tabs to see:
Use this real-time data to quickly evaluate where your solicitations, awards, and associated checklist items are at any point in the acquisition process.
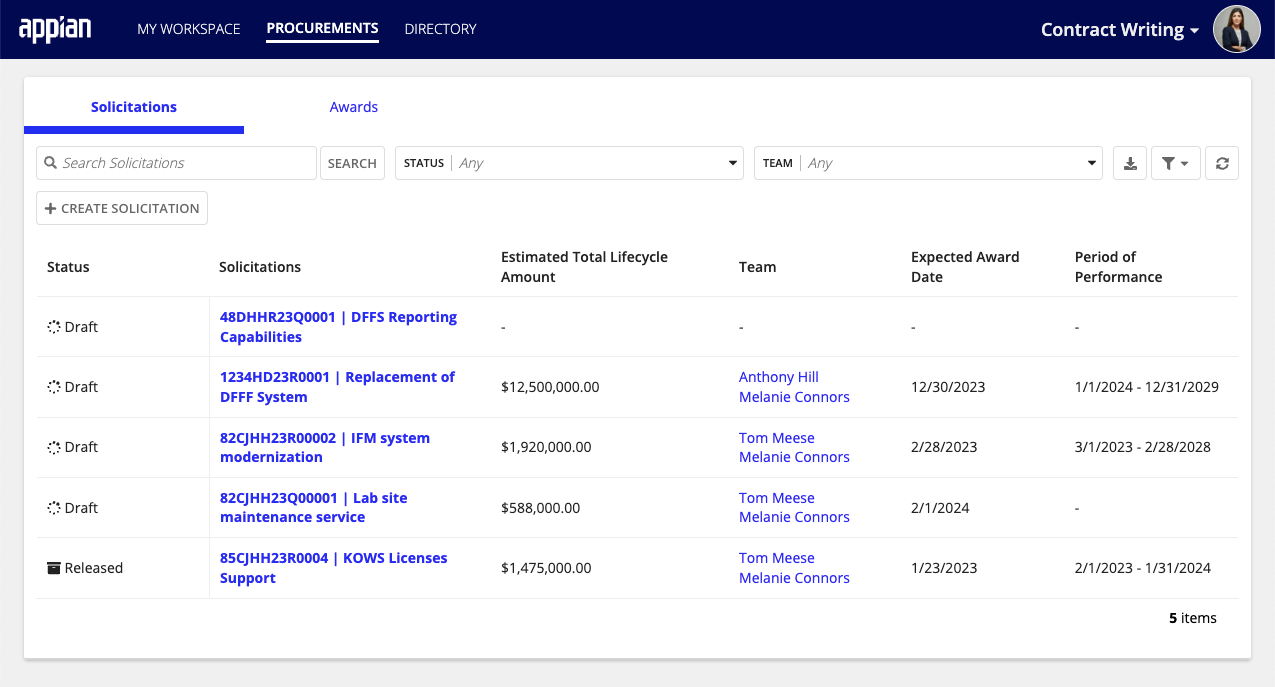
Select the PROCUREMENTS page to see a complete list of all of your organization's solicitations and awards. From this page, you can easily:
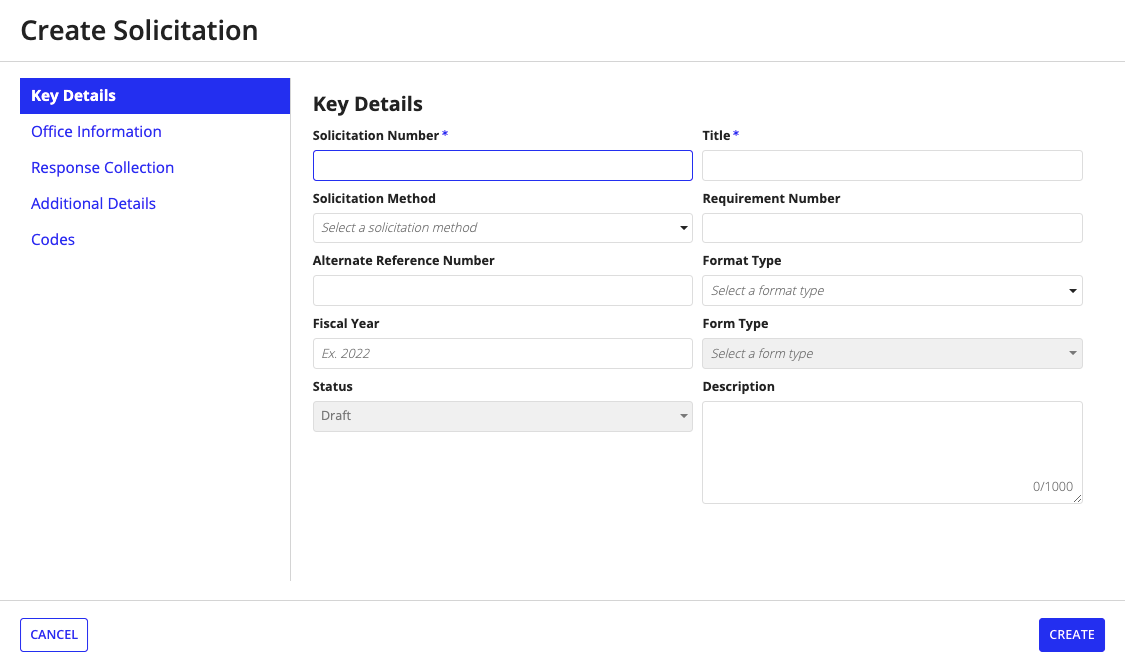
Creating a new solicitation is one of the first tasks you may need to tackle in your organization's contract writing process. Manually creating a solicitation can be extremely time-consuming. Contract Writing simplifies this process by providing a guided experience that walks you through inputting the solicitation data.
To create a new solicitation:
Click CREATE SOLICITATION under Solicitations. A guided configuration walks you through the process of entering the solicitation data required to create a new solicitation record.
When you've finished creating a new solicitation, the Solicitation Confirmation dialog provides a link that allows you to go directly to the solicitation Summary view and confirm the solicitation data you entered.
You can take a closer look at your solicitations by clicking on the Solicitations tab to access a complete list of your active solicitations. You can also search and filter awards from the list to display the solicitations you want to see.
Want to see more details about a specific solicitation? Simply click a solicitation link from the list to access additional information, including the status, description, duration, line items, assigned team members, and much more.
Quickly take action on a solicitation, like assigning a checklist item, initiating a review process, creating an amendment, or creating an award.
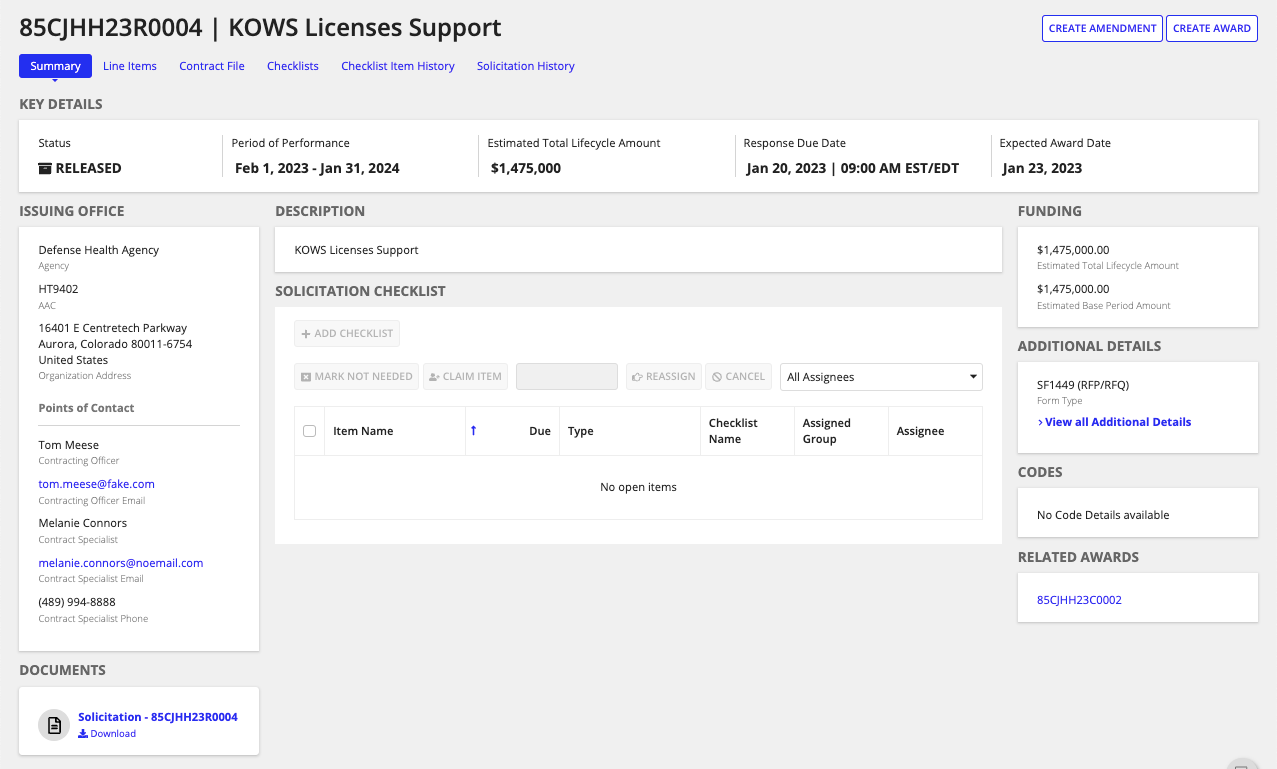
Under Line items, you can see the breakdown of line items for the solicitation. Here you can search, filter for, and drill down to each line item to view more information. If the solicitation is in draft status, you can update, add, or delete line items from the solicitation from this view.
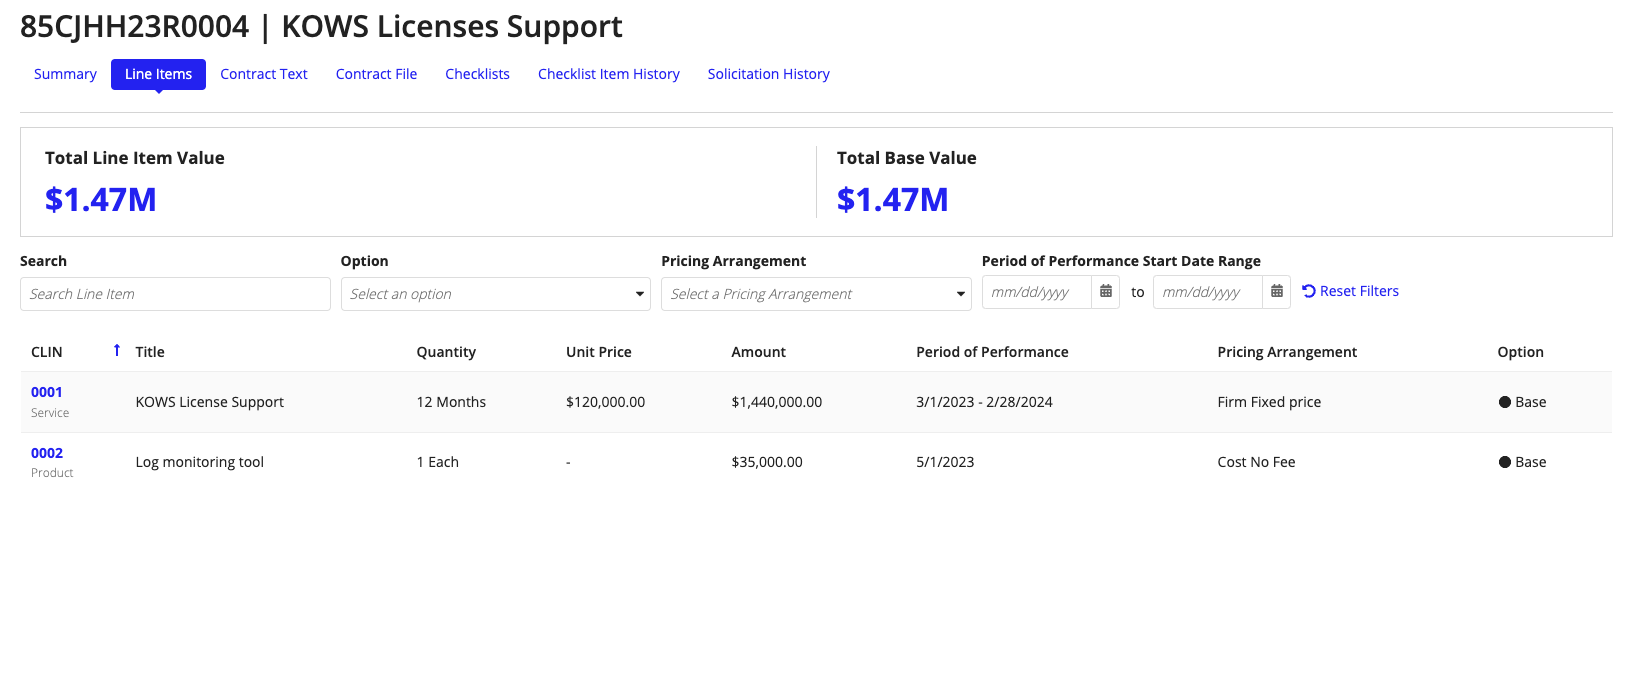
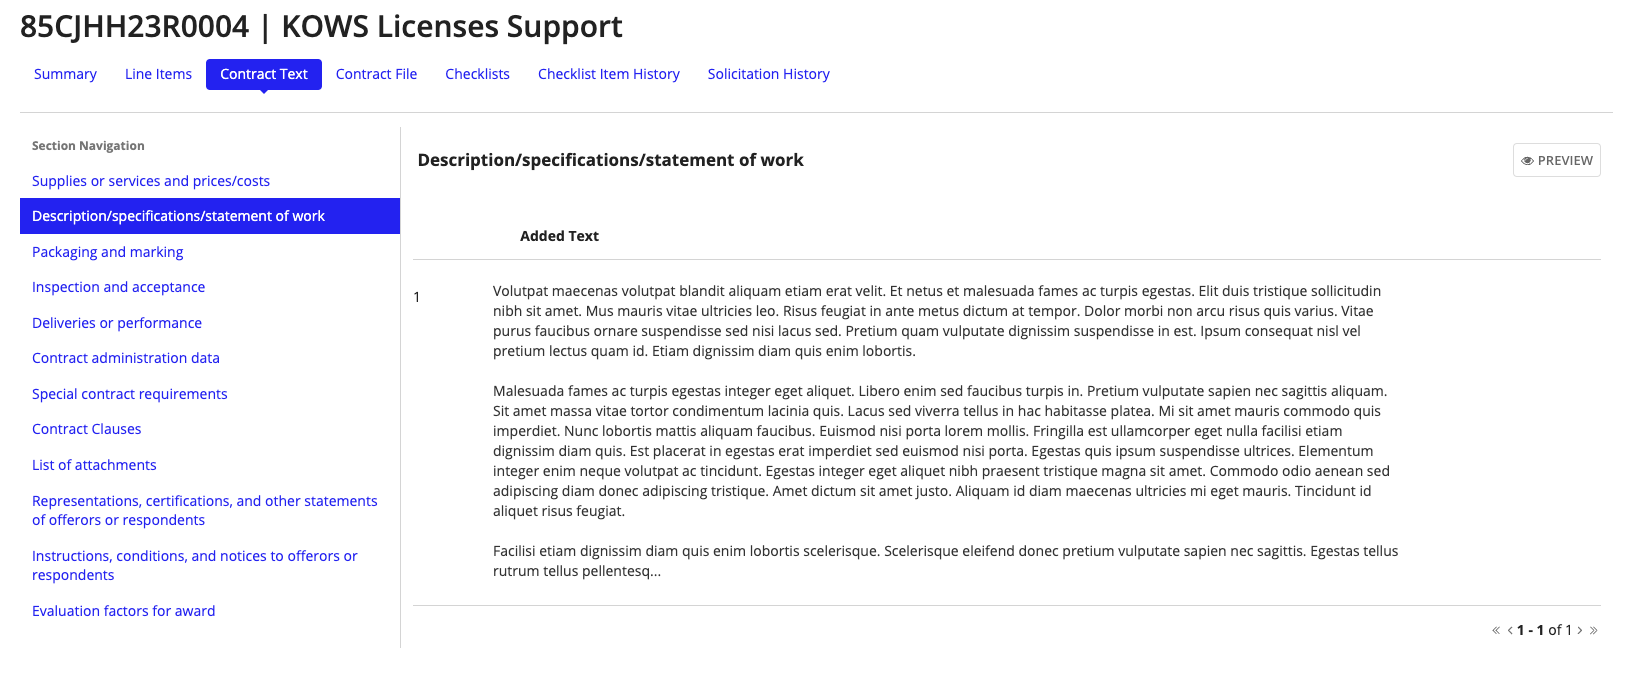
The Contract Text section displays the contracts related to the solicitation. If the solicitation is in draft status, you can select a contract and click +ADD TEXT to add contract information.
Once the contract is finalized, an award can be created and awarded to the vendor. CW simplifies this process by providing a guided experience that walks you through inputting the award data.
To create a new award:
Click CREATE AWARD under Awards. A guided configuration walks you through the process of entering the award data required to create a new award record.
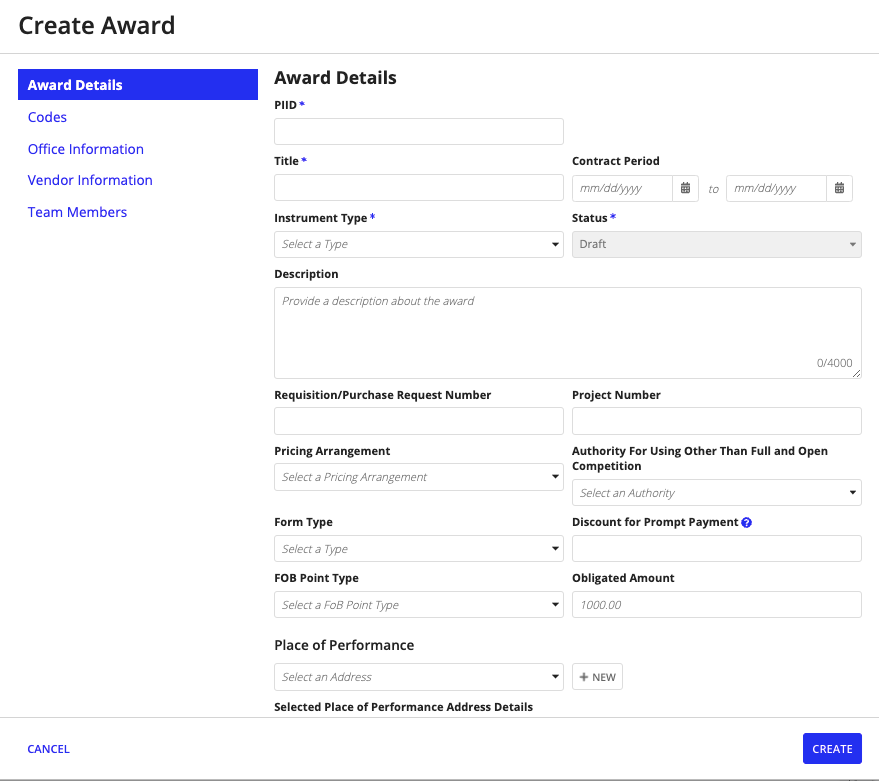
An award can also be created directly from the solicitation summary view. To create an award, go to the summary view of a solicitation, click on the … icon, and click Create Award. Some award information will be populated based on the solicitation.
From the Awards tab, you can view a complete list of your organization's awards. Use the Search box, filters, or both to narrow down the list and display only the awards you want to see.
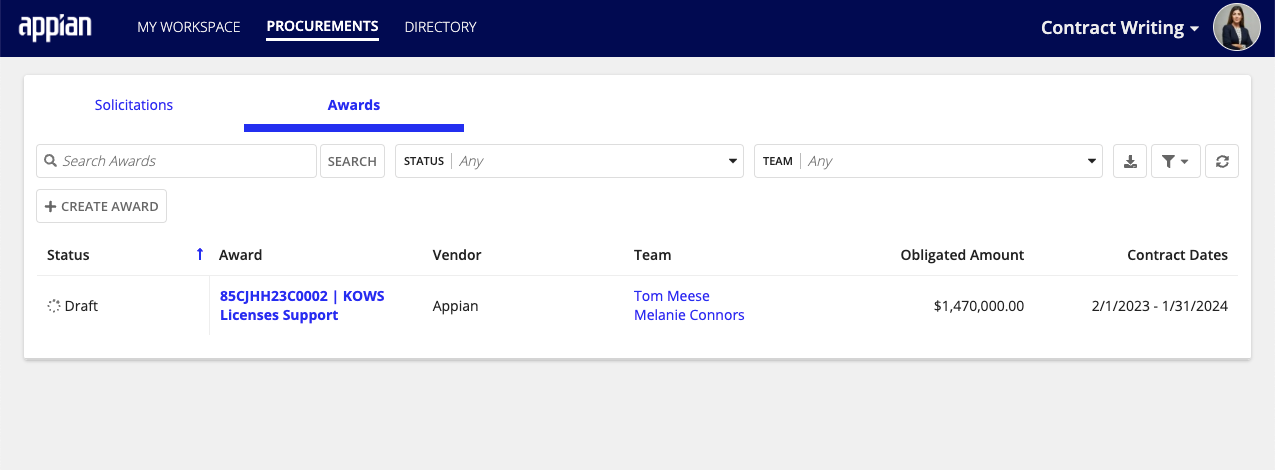
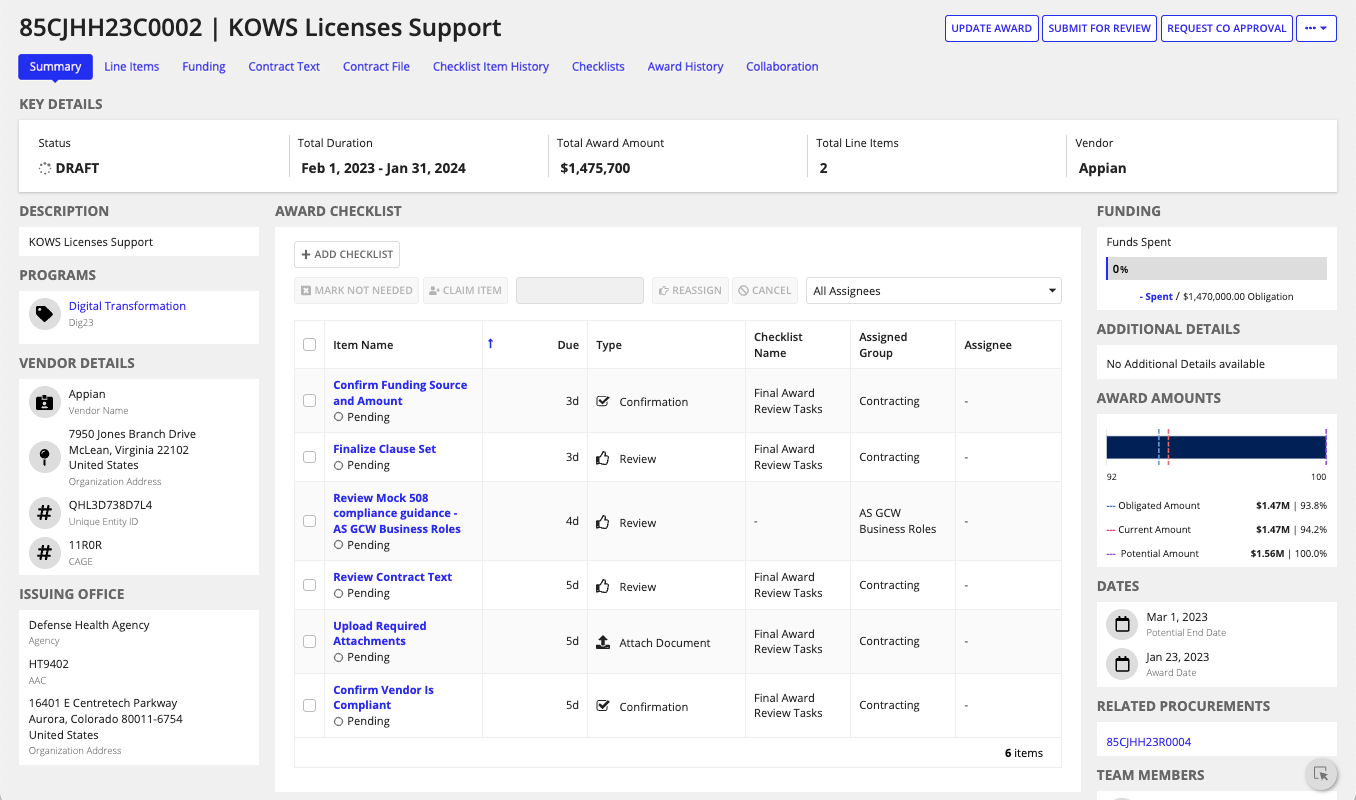
From the Awards list, you can drill down into a specific award to access its Summary page by clicking the award link. From here, you can quickly see the award details such as total amount, vendor, line item, and contract text
You can also take action from the summary page to upload documents, add checklist items, or update the award.
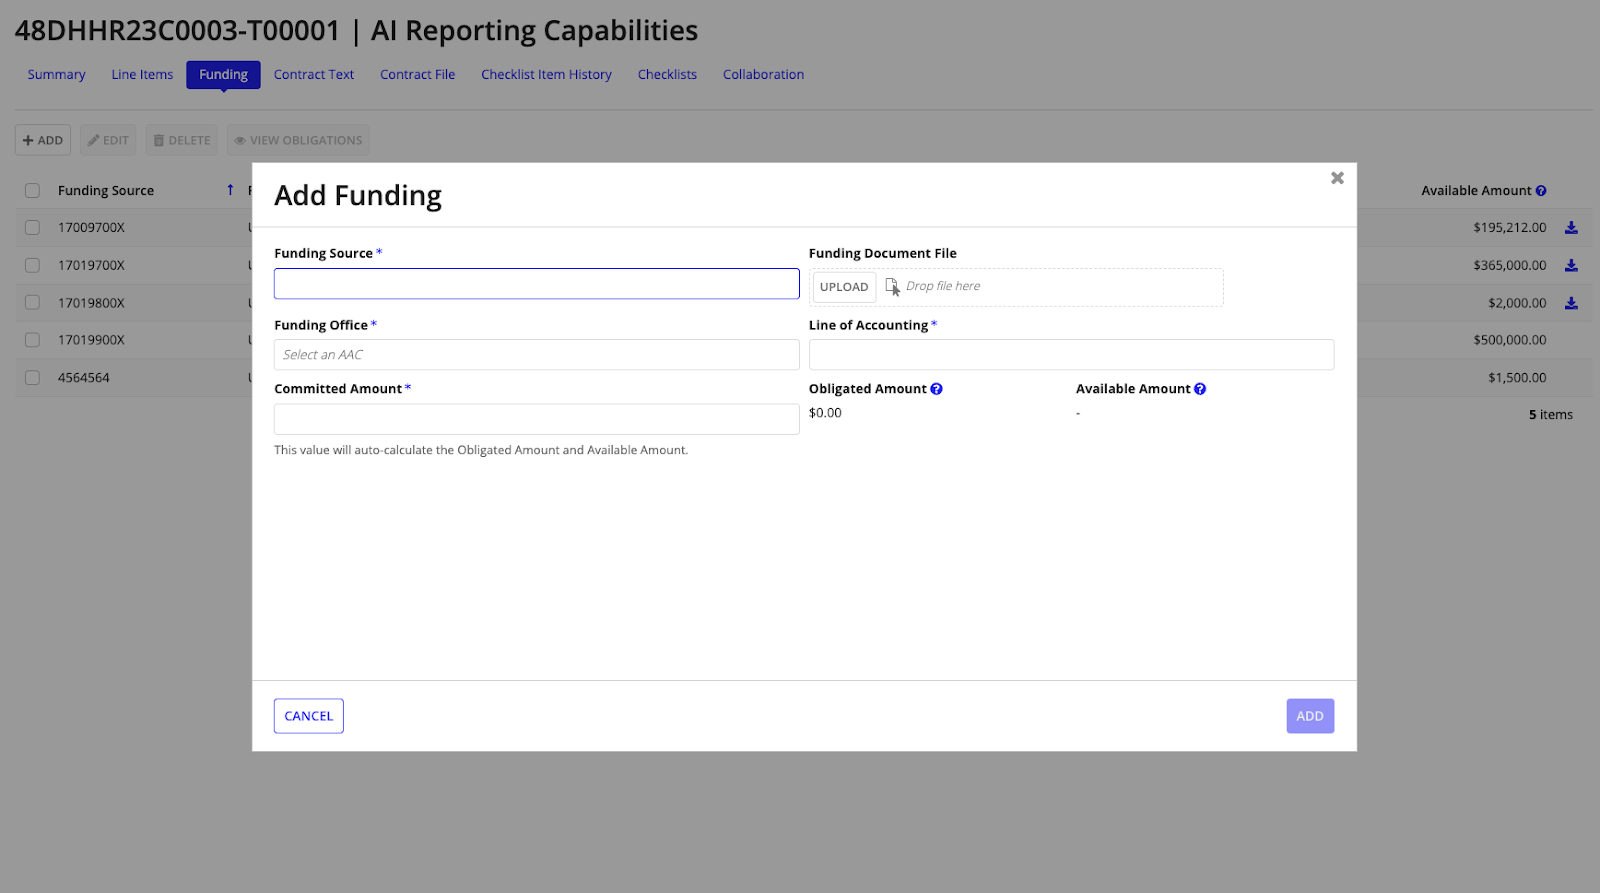
From the Funding tab, you can enter and manage the details of the Funding Sources used for the Award. You can add funding to an award if it is in draft status. To add funding, click +ADD and capture the details of the fund.
Adding a funding source makes it available to obligate on the line items for that Award. The Obligated Amount and the Available Amount are automatically calculated based on obligations you make at the line item level.
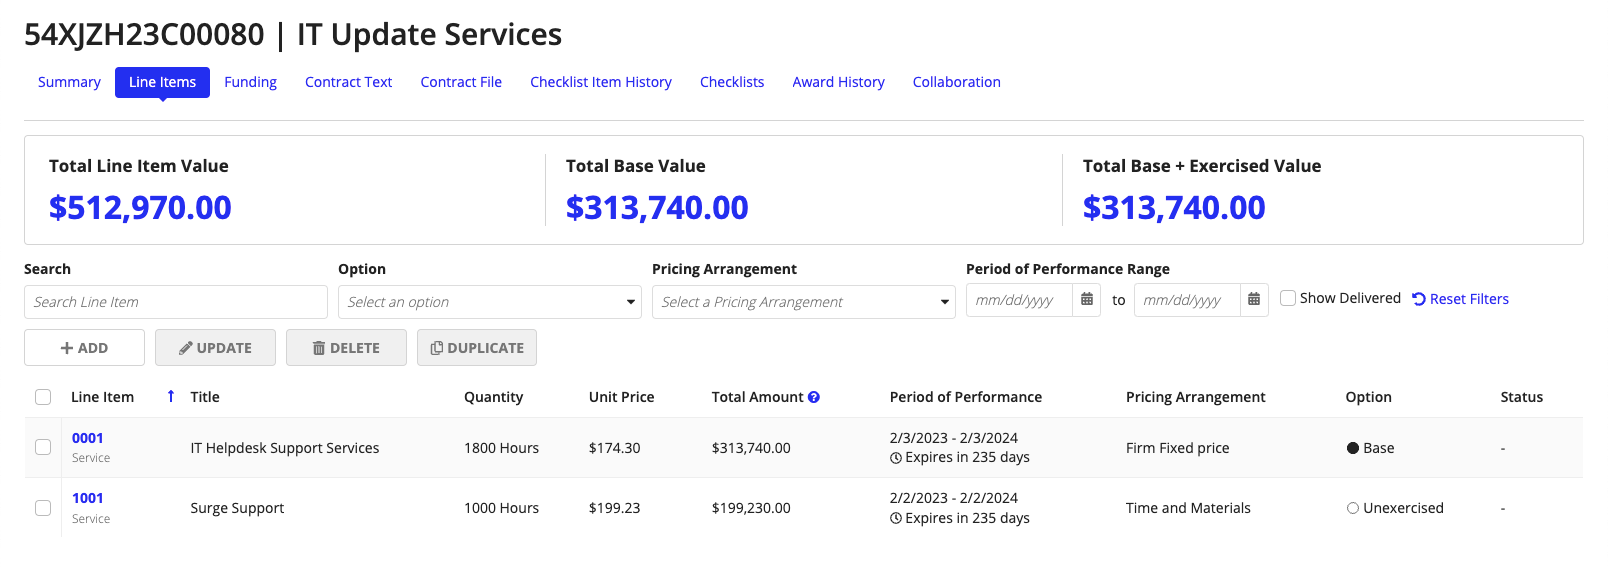
Under Line items, you can see the breakdown of line items for the award. Here you can search, filter, and drill down to each line item to view more information. If the award is in draft status, you can update, add, delete, duplicate, and obligate funding for your line item. Contracting personnel can create subline items (SLINs) underneath contract line items (CLINS), which provides more flexibility and granularity in tracking the goods or services expected to be delivered as part of the award.
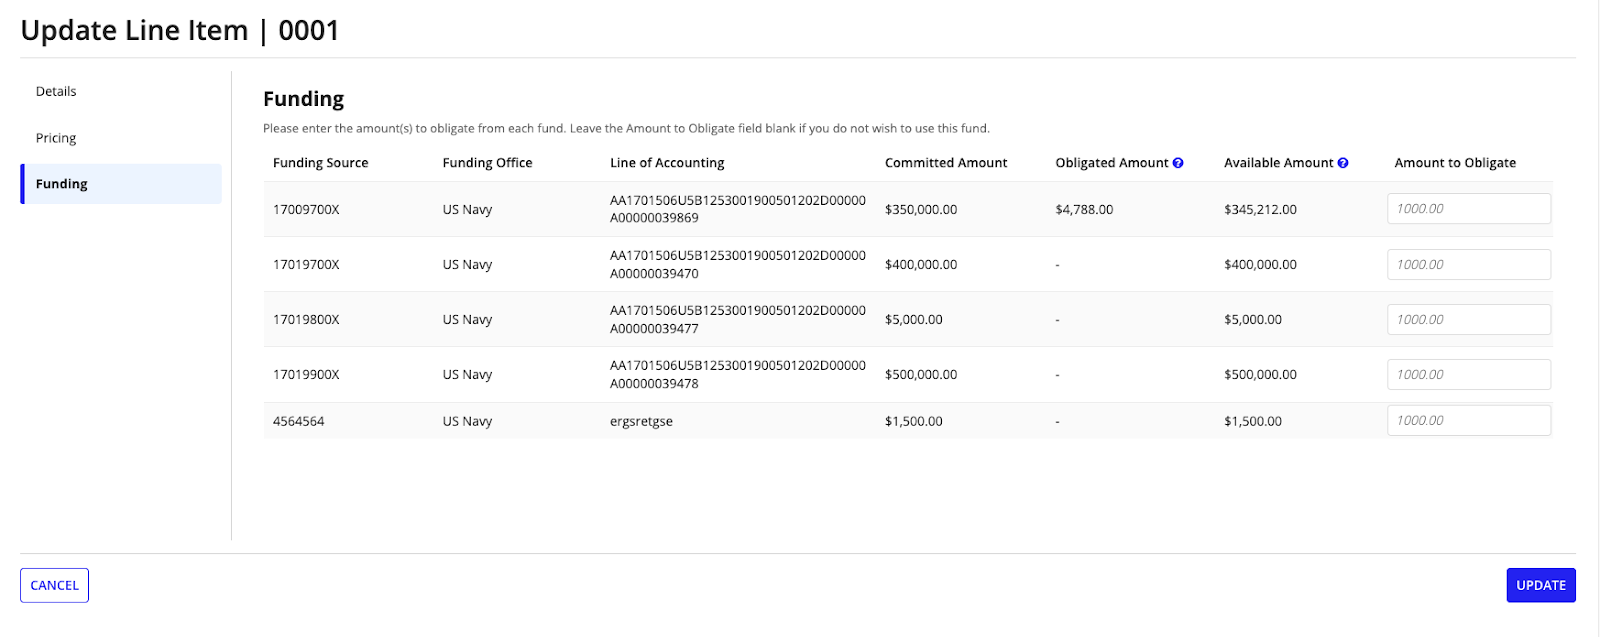
Funding sources that are added to the Funding tab are made available to obligate at the line item level. When an award is in draft, you can obligate these funds by selecting the line item you want to update and clicking on UPDATE. You an also click +ADD from the Funding section on the line item summary.
Simply enter the amount you wish to obligate from each funding source and click UPDATE. Funding sources without an amount entered will not be obligated. Once added, the solution will update the balance of the total Obligated Amount and total Available amount for that funding source.
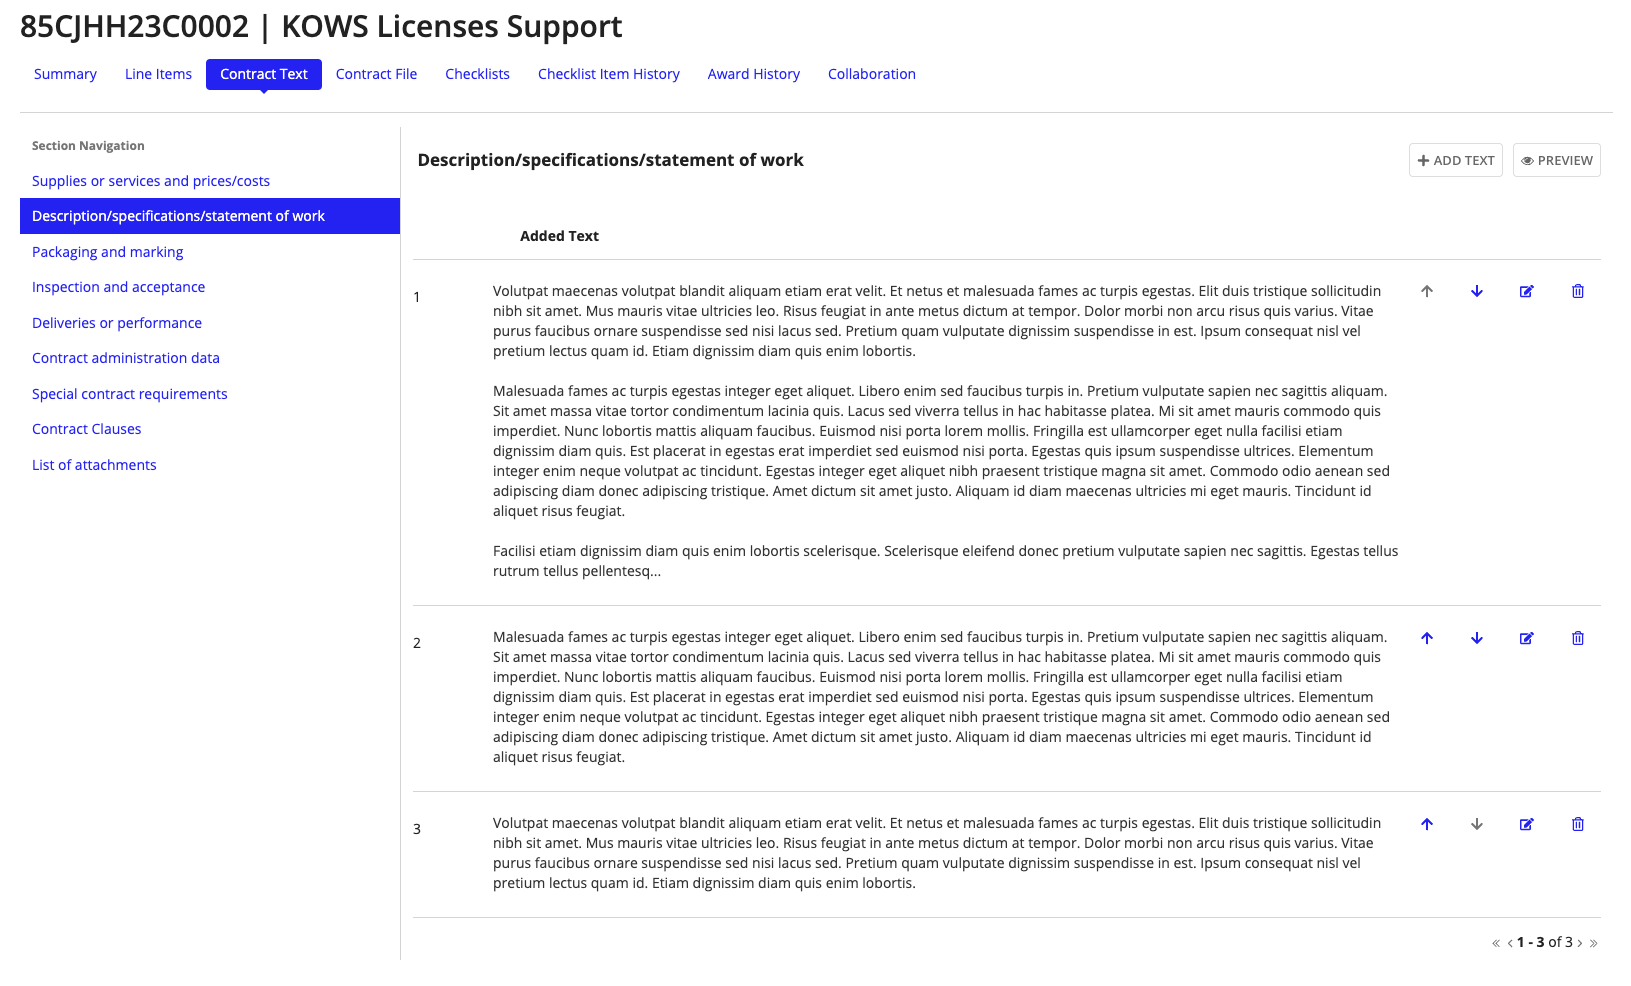
The Contract Text section displays any custom contract text to be included in the generated award documentation. If the award is in draft status, you can select a contract text section and click +ADD TEXT to enter the text.
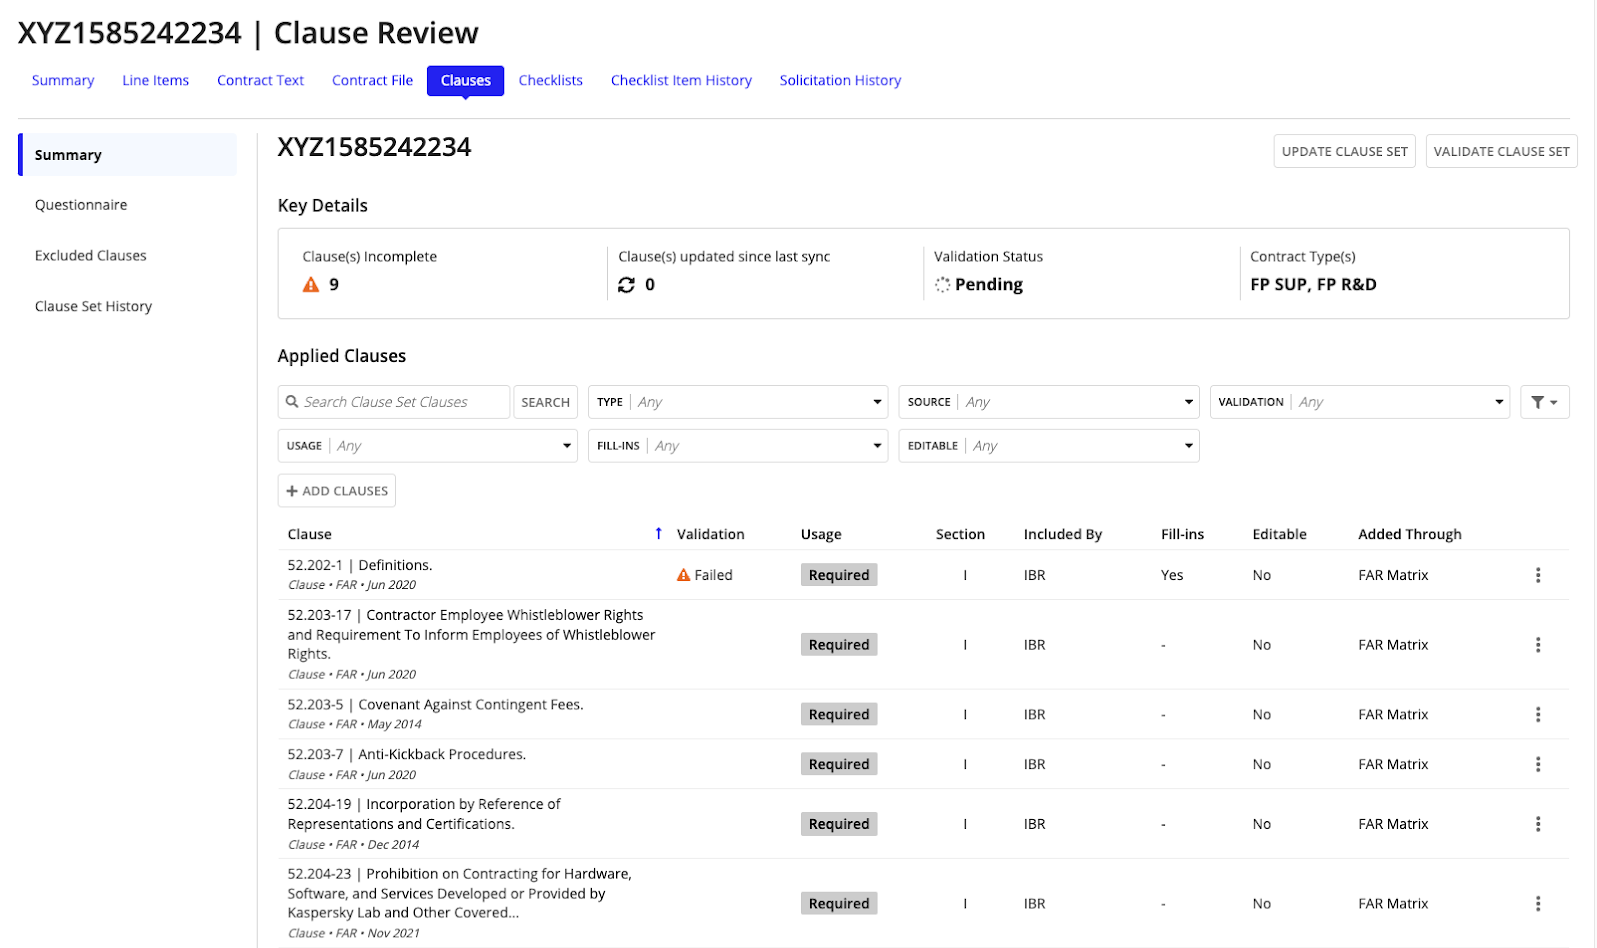
If you also have purchased Government Clause Automation Solution (GCA) in addition to Contract Writing, the Clauses tab will appear on both your Solicitation and Award records.
From this tab, you can conveniently access the full power of our Clause Automation solution from within Contract Writing. This includes the ability to quickly create, validate and manage clause sets. Clauses added in your clause set are automatically included in your system-generated contract documentation.
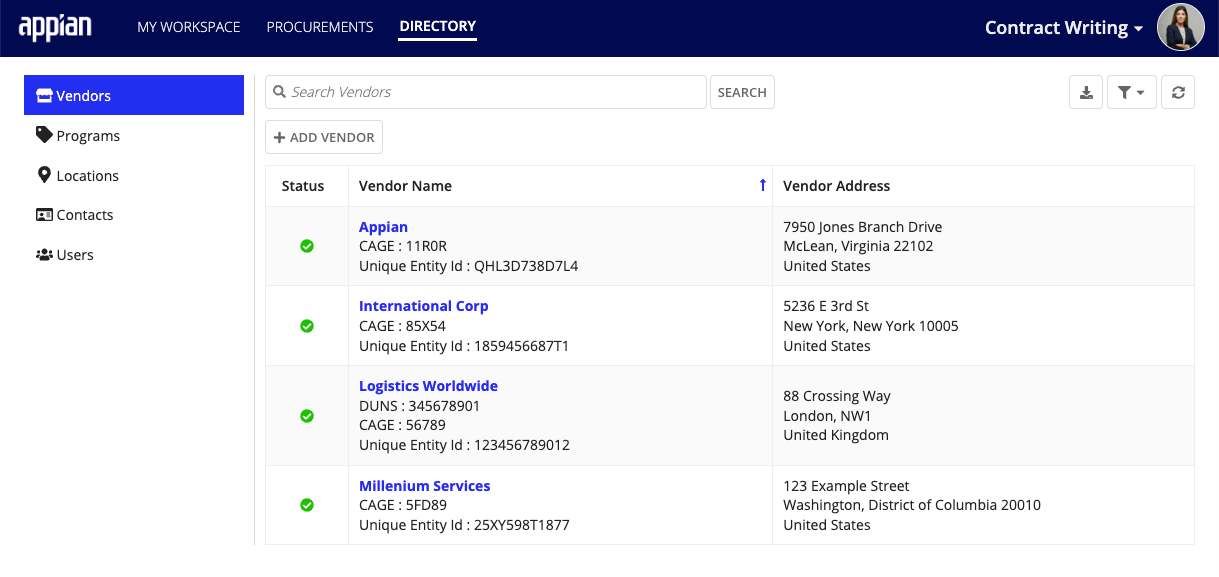
Select the DIRECTORY page to view a complete list of all of your organization's vendor, program, location, contact, and user records.
Contract Writing Quick Start User Guide
