Free cookie consent management tool by TermsFeed Excel License Required Actions [Appian RPA v9.9]
Page not found in the selected version; redirected to the home page.
Excel License Required Actions
The capabilities described on this page are included in Appian's standard capability tier. Usage limits may apply.

Overview

Microsoft Excel is a widely used spreadsheet program available in most business settings. It's likely that you use Excel to complete a variety of tasks, such as data analysis, financial modeling, and project management, among others. With just a few clicks, Appian RPA can automate tedious and time-consuming tasks in Excel. This means the Excel: License Required module can read, write, and manipulate data within an Excel workbook for you.

Because the strategy you use to interact with Excel depends on your purposes and the data involved, we've assembled guidance and tips to improve your design experience. Learn more about the many ways to use Excel with Appian, based on your goals.

Note:  The Excel: License Required module is only available on Windows machines.

The Excel License Required module is compatible with the following Excel file types.

  • Workbook (.xlsx)
  • Excel 97-2003 Workbook (.xls)
  • Macro-Enabled Workbook (.xlsm)
  • Excel Binary File Format (.xslb)
  • Comma-separated Values (.csv)

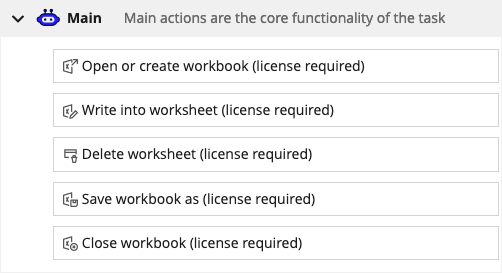
Excel actions are listed in the Excel: License Required area of the palette. The actions described in this section require a licensed version of Excel on the host machine.

Tip:  You can't mix low-code actions from the Excel: Licensed Not Required and Excel: License Required modules together. The technologies used in each module can't interact with the same workbook at the same time.

Does your host machine have a licensed version of Excel? Then use the
No Excel: License Not Required module.
Yes Excel: License Required module.

The Excel: License Required module can complete more advanced actions and is better at managing large (in terms of file size or number of rows) Excel files.

Note: The Excel: License Required module is only available on Windows machines.

Example

excel-action-example.png

Clear data filters

This action allows you to reset tables and ranges to their unfiltered state.

Configuration

In the CONFIGURATION area of the action pane, configure the following parameters:

  • Clear Filters From: Choose whether you want to clear filters from a Table or a Range.
    • If you choose Table, you're also prompted to enter the Table Name for the table to clear its filters.
    • If you choose Range, the filters from the range you specify in the start and end cells will be removed.

After completion

In the AFTER COMPLETION area of the action pane, configure the following parameters:

  • Wait before executing next action (seconds): Enter the number of seconds the robotic task waits before it continues to the next action in the robotic task definition.
  • Take a screenshot: If you select this option, the robotic task takes a screenshot of the host machine after the action completes. If the action failed, the screenshot is taken immediately before the exception is thrown and cleanup is started. If the action completed successfully, the screenshot is taken immediately after the action is performed.

Clear pivot table filters

This action allows you to reset pivot tables to their unfiltered state.

Configuration

In the CONFIGURATION area of the action pane, configure the following parameter:

  • Pivot Table Name: Enter the name of the pivot table for which you want to remove filters.

After completion

In the AFTER COMPLETION area of the action pane, configure the following parameters:

  • Wait before executing next action (seconds): Enter the number of seconds the robotic task waits before it continues to the next action in the robotic task definition.
  • Take a screenshot: If you select this option, the robotic task takes a screenshot of the host machine after the action completes. If the action failed, the screenshot is taken immediately before the exception is thrown and cleanup is started. If the action completed successfully, the screenshot is taken immediately after the action is performed.

Close workbook

This action closes the Excel workbooks that you choose and can optionally save changes.

Configuration

In the CONFIGURATION area of the action pane, configure the following parameter:

  • Close: Select whether you want to close the Active workbook, a Specific workbook, or All workbooks opened by robot during the robotic task execution. If you choose to close a specific workbook, you will also be prompted to enter the path to the workbook including the workbook's name.
  • Save changes on close: If you select this checkbox, the robotic task saves the file when it closes. This checkbox is selected by default.

After completion

In the AFTER COMPLETION area of the action pane, configure the following parameters:

  • Wait before executing next action (seconds): Enter the number of seconds the robotic task waits before it continues to the next action in the robotic task definition.
  • Take a screenshot: If you select this option, the robotic task takes a screenshot of the host machine after the action completes. If the action failed, the screenshot is taken immediately before the exception is thrown and cleanup is started. If the action completed successfully, the screenshot is taken immediately after the action is performed.

Copy and paste

This action allows you to copy and paste data from a specific cell, column, or range.

Configuration

In the CONFIGURATION area of the action pane, configure the following parameters:

  • Source Type: Choose what you want to copy: Cell, Column, or Range. Depending on the source you choose, additional parameters display.

    Source Type Additional Parameter(s)
    Cell Cell: This field identifies the cell you want to copy. This field lets you enter a text string, choose a variable, or use the expression editor.
    Column Column: This field identifies the column you want to copy. This field lets you enter a text string, choose a variable, or use the expression editor.

    Copy only visible values: When this checkbox is selected and the column's data is filtered, only values from the visible rows (in other words, rows that aren't hidden) are copied.
    Range Starting Cell: This is the first column letter and row number for the cell range you want to copy.

    Ending Cell: This is the last column letter and row number for the cell range you want to copy.

    You can enter a text string, choose a variable, or use the expression editor for these parameters.

    Copy only visible values: When you select this checkbox and the data in the range is filtered, only values from the visible rows and columns are copied.
    Row Row: This field identifies the row you want to copy. This field lets you enter a text string, choose a variable, or use the expression editor.

    Copy only visible values: When this checkbox is selected and the row's data is filtered, only values from the visible columns (in other words, columns that aren't) are copied.
  • Paste into different workbook: Mark this checkbox to display a field called Destination Workbook Path where you can specify the path including the name of the target workbook for pasting. If unchecked, the robotic task will paste in the current workbook.
  • Destination Worksheet Name: This is the name of the worksheet into which you want to paste the copied data. This field lets you enter a text string, choose a variable, or use the expression editor.
  • Destination: This is the first column letter (if you selected column), row number (if you picked row), or cell (if you picked cell or range) where you want to start pasting the copied data. This field lets you enter a text string, choose a variable, or use the expression editor.
  • Paste Options: This dropdown menu lets you select which elements to keep when you copy and paste. Options include the following:
    • All: Every aspect of the cell contents (this is the default option).
    • Formulas: Just the formulas, with no associated formatting or comments.
    • Formatting: Exclusively the formatting of the copied cells.
    • Values: Only the results of formulas, excluding any formatting or comments.
    • Values and Number Formats: Both the values and their number formats.
  • Transpose: When this checkbox is marked, the robotic task switches the orientation of copied cell content during pasting. Data from rows is pasted into columns and data from columns is pasted into rows. This parameter only applies when the source type is Range.

After completion

In the AFTER COMPLETION area of the action pane, configure the following parameters:

  • Wait before executing next action (seconds): Enter the number of seconds the robotic task waits before it continues to the next action in the robotic task definition.
  • Take a screenshot: If you select this option, the robotic task takes a screenshot of the host machine after the action completes. If the action failed, the screenshot is taken immediately before the exception is thrown and cleanup is started. If the action completed successfully, the screenshot is taken immediately after the action is performed.

Create worksheet

This action adds a new worksheet in the active workbook.

Configuration

In the CONFIGURATION area of the action pane, configure the following parameters:

  • Worksheet Name (Optional): This is the name of the new worksheet. If you don't specify a name, Excel will make a new sheet with the name Sheet#, using your language settings and regional formatting preferences.
  • Specify worksheet location: Mark this checkbox to indicate where you want to insert the new worksheet.

    If you… Excel will insert the new worksheet…
    mark the checkbox after the active worksheet that you specify in the Worksheet location. Depending on the Worksheet location you choose, you will enter the Worksheet index or Worksheet name after which you want to create the new worksheet.
    do not mark the checkbox before the active worksheet.

After completion

In the AFTER COMPLETION area of the action pane, configure the following parameters:

  • Wait before executing next action (seconds): Enter the number of seconds the robotic task waits before it continues to the next action in the robotic task definition.
  • Take a screenshot: If you select this option, the robotic task takes a screenshot of the host machine after the action completes. If the action failed, the screenshot is taken immediately before the exception is thrown and cleanup is started. If the action completed successfully, the screenshot is taken immediately after the action is performed.

Delete worksheet

This action deletes a worksheet within the Excel workbook.

Configuration

In the CONFIGURATION area of the action pane, configure the following parameters:

  • Select Worksheet Name or Index: Select whether you want to delete a worksheet according to its name or its index. Depending on the option you choose, you will fill in one of the following fields.
    • Worksheet Name: This is the name of the worksheet you want to delete.
    • Worksheet Index: This is the index of the worksheet you want to delete.

After completion

In the AFTER COMPLETION area of the action pane, configure the following parameters:

  • Wait before executing next action (seconds): Enter the number of seconds the robotic task waits before it continues to the next action in the robotic task definition.
  • Take a screenshot: If you select this option, the robotic task takes a screenshot of the host machine after the action completes. If the action failed, the screenshot is taken immediately before the exception is thrown and cleanup is started. If the action completed successfully, the screenshot is taken immediately after the action is performed.

Delete from row or column

This action deletes a row or column from the active worksheet. Any data that comes after the deleted rows or columns will move up or left to fill the empty space. So, you don't have to worry about the data getting lost. It automatically adjusts itself to fit the new layout of the worksheet.

Configuration

In the CONFIGURATION area of the action pane, configure the following parameter:

  • Component Type: Select the component type you want to delete: Column or Row. Depending on the component you choose, additional parameters display.

    Component Additional Parameter(s)
    Column Starting Column: This field identifies the column you want to delete. This field lets you enter a text string, choose a variable, or use the expression editor. If you want to delete a range of columns, also mark the Specify ending column checkbox and fill in the Ending Column field.

    Ending Column: This field identifies the last column you want to delete and lets you enter a text string, choose a variable, or use the expression editor. If not specified, only the Starting Column is deleted.
    Row Starting Row: This field identifies the row you want to delete. This field lets you enter a text string, choose a variable, or use the expression editor. If you want to delete a range of rows, also mark the Specify ending row checkbox and fill in the Ending Row field.

    Ending Row: This field identifies the last row you want to delete and lets you enter a text string, choose a variable, or use the expression editor. If not specified, only the Starting Row is deleted.

After completion

In the AFTER COMPLETION area of the action pane, configure the following parameters:

  • Wait before executing next action (seconds): Enter the number of seconds the robotic task waits before it continues to the next action in the robotic task definition.
  • Take a screenshot: If you select this option, the robotic task takes a screenshot of the host machine after the action completes. If the action failed, the screenshot is taken immediately before the exception is thrown and cleanup is started. If the action completed successfully, the screenshot is taken immediately after the action is performed.

Filter data

The Filter data action filters cell values within a designated range or table. If a table lacks a filter, it automatically adds one to the table header. This action can streamline tasks such as transferring data. For instance, if your team maintains a monthly worksheet and wants to transfer data to a centralized database at the end of each month or move specific entries to another sheet for quarterly analysis, the Filter data action facilitates this. By refining and organizing the data first, the transfer to the database or between sheets becomes more efficient.

When you apply multiple filter actions to a range, they are cumulative, meaning each new filter is combined with the previous filters using an AND operation.

Tip:  If you need to clear filters before applying new filters, use the Clear data filters action.

Configuration

In the CONFIGURATION area of the action pane, configure the following parameters:

  • Range or Table: Select whether you want to filter a specific Range or Table. Depending on the option you choose, additional parameters display.

    Option Additional Parameter(s)
    Range Starting Cell: This field identifies the row and column where your range starts. This field lets you enter a text string, choose a variable, or use the expression editor.

    Ending Cell: This field identifies the last row and column of the range you want to sort. This field lets you enter a text string, choose a variable, or use the expression editor.
    Table Table Name: The name of a specific table within the worksheet. This field lets you enter a text string only.
  • Filter Type: Select whether you want to filter columns that contain Date values, Number values, or Text values.
  • Filter by Column: Use this field to specify the column you want to filter by. Use its reference, like C. Ensure the column contains only text values.
  • Operator: This field identifies how the data will be filtered. The options in this dropdown list are determined by the Filter Type you select.

    • Date Operators
      • Equals
      • Before
      • After
    • Number Operators
      • Equals
      • Does not equal
      • Greater than
      • Less than
      • Less than or equal to
      • Greater than or equal to
    • Text Operators
      • Equals
      • Does not equal
      • Begins with
      • Ends with
      • Contains
      • Does not contain
  • Filter Value: This field identifies the specific value(s), either numbers or text, to be used with the Operator.
  • Custom Filter: This optional checkbox allows you to add additional filter criteria. When you add this custom filter, it works in tandem with what's already set, refining the data progressively. After you mark the checkbox, the following additional parameters display.
    • Logical Operator: This parameter determines how the filtering conditions should be combined. Options are AND and OR.
    • Operator: This parameter defines the nature of the comparison. Options are Equals, Does not equal, Greater than, Less than, Less than or equal to, and Greater than or equal to.
    • Filter Value: This field identifies the specific values, either numbers or text, to be used with the Operator.

After completion

In the AFTER COMPLETION area of the action pane, configure the following parameters:

  • Wait before executing next action (seconds): Enter the number of seconds the robotic task waits before it continues to the next action in the robotic task definition.
  • Take a screenshot: If you select this option, the robotic task takes a screenshot of the host machine after the action completes. If the action failed, the screenshot is taken immediately before the exception is thrown and cleanup is started. If the action completed successfully, the screenshot is taken immediately after the action is performed.

Filter pivot table

The Filter pivot table action allows you to create filters on a pivot table. It lets you focus on specific sections of your dataset by adding filters. This action ensures that your pivot table displays only the necessary data, making the information clear and concise.

Tip:  If you need to clear filters before applying new filters, use the Clear data filters action.

Configuration

In the CONFIGURATION area of the action pane, configure the following parameters:

  • Pivot Table: The name of a specific pivot table within the worksheet. This field lets you enter a text string, choose a variable, or use the expression editor.
  • Filter By Field: Use this parameter to specify the field you want to filter by. Since the field is part of a pivot table, provide the column's name as it is defined in the pivot table. This field lets you enter a text string, choose a variable, or use the expression editor.
  • Filter Value(s): This field identifies the specific value(s) to be used with the Operator. This field lets you enter a text string, choose a variable, or use the expression editor.

After completion

In the AFTER COMPLETION area of the action pane, configure the following parameters:

  • Wait before executing next action (seconds): Enter the number of seconds the robotic task waits before it continues to the next action in the robotic task definition.
  • Take a screenshot: If you select this option, the robotic task takes a screenshot of the host machine after the action completes. If the action failed, the screenshot is taken immediately before the exception is thrown and cleanup is started. If the action completed successfully, the screenshot is taken immediately after the action is performed.

Find range

This action retrieves the position of the first cell or the last cell within a range or the total number of rows or columns up to and including the last cell. The result is stored in a robotic task variable that you must create. You could use this action to determine the limits for a loop or use it with the Get Value action.

Configuration

In the CONFIGURATION area of the action pane, configure the following parameters:

  • Find Range Start or End: Select one of the following options.
    • Range Start: Select this option to find the first cell in a range. This option searches for the first cell containing a value, starting from the Starting Cell and moving across its row or down its column.
    • Range End: Select this option to find the last cell within a range or the total number of rows or columns up to and including the last cell in the range.
  • Starting Cell: This field identifies the row and column where your range starts. This field lets you enter a text string, choose a variable, or use the expression editor.
  • Search By: Select to search in a Row or Column.
  • Attribute to Return: This option only displays if you select Range End. Select the information you want to retrieve.
    • Ending cell in range
    • Count of columns or rows in range

Outputs

In the OUTPUTS area of the action pane, configure the following parameters to store this result:

  • Operator:
    • is stored as
    • is appended to
  • Target: Select the robotic task variable where you want to store the result.

After completion

In the AFTER COMPLETION area of the action pane, configure the following parameters:

  • Wait before executing next action (seconds): Enter the number of seconds the robotic task waits before it continues to the next action in the robotic task definition.
  • Take a screenshot: If you select this option, the robotic task takes a screenshot of the host machine after the action completes. If the action failed, the screenshot is taken immediately before the exception is thrown and cleanup is started. If the action completed successfully, the screenshot is taken immediately after the action is performed.

Find value

Use the Find value action to search a worksheet by cell value, with exact case or full content matching options.

Configuration

In the CONFIGURATION area of the action pane, configure the following parameters:

  • Search From: Enter where to start the search.
    • Beginning: This option starts the search from the very first cell in the worksheet.
    • Specific Cell: This option starts the search from a particular cell within the Excel worksheet. If you choose this option, you also need to provide the exact cell reference (e.g., B4 or G12) from which you want the search to begin.
  • Value: Enter the text value you want to search for.
  • Search Options:
    • Match by case: Mark this checkbox to ensure the text matches the exact capitalization.
    • Match entire cell contents: Mark this checkbox to search for a complete match. This option is not case-sensitive.

Outputs

The output is a list of the cells where the item is found (e.g., "C10", "D11") or an empty list if it is not found.

In the OUTPUTS area of the action pane, configure the following parameters to store this result:

  • Operator:
    • is stored as
    • is appended to
  • Target: Select the robotic task variable where you want to store the result.

After completion

In the AFTER COMPLETION area of the action pane, configure the following parameters:

  • Wait before executing next action (seconds): Enter the number of seconds the robotic task waits before it continues to the next action in the robotic task definition.
  • Take a screenshot: If you select this option, the robotic task takes a screenshot of the host machine after the action completes. If the action failed, the screenshot is taken immediately before the exception is thrown and cleanup is started. If the action completed successfully, the screenshot is taken immediately after the action is performed.

Format cells

This action customizes the format of a workbook's cells, including alignment and color. You can also use this action to merge and unmerge cells. Merging cells is often used to create headings or titles that span multiple columns or rows. It can also be used to format cells for a more organized and visually appealing layout, such as merging cells to create a larger blank space between two sets of data.

Configuration

In the CONFIGURATION area of the action pane, configure the following parameters:

  • Component Type: Select the component type that you want to format. Depending on the component you select, additional parameters display.

    Component Type Additional Parameter(s)
    Column Starting Column: This is the column letter; e.g., A, B, C, for the column you want to format.

    Specify Ending Column: Mark this checkbox if you want to format more than one column. When this checkbox is marked, the Ending Column field displays and you can enter the letter for the last consecutive column you want to format.

    You can enter a text string, choose a variable, or use the expression editor for these parameters.
    Cell Cell: This is the column letter and row number for the cell you want to format.

    This field lets you enter a text string, choose a variable, or use the expression editor.
    Row Starting Row: This is the number for the row you want to format.

    Specify Ending Row: Mark this checkbox if you want to format more than one row. When this checkbox is marked, the Ending Row field displays and you can enter the number for the last consecutive row you want to format.

    You can enter a text string, choose a variable, or use the expression editor for these parameters.
    Range Starting Cell: This is the first column letter and row number for the cell range you want to format.

    Ending Cell: This is the last column letter and row number for the cell range you want to format.

    You can enter a text string, choose a variable, or use the expression editor for these parameters.
  • Merge Options: This option is only available for the Column, Row, and Range components.
    • Merge: This option allows you to combine two or more adjacent cells into a single, larger cell. Excel merges cells by keeping the upper-left value and discarding the values in the other cells. For example, if you select cells A1:B2 and merge them, the value in cell A1 is saved and the values in cells B1, A2, and B2 are discarded.
    • Unmerge: If cells are already merged, this option allows you to split merged cells back into their original individual cells.
    • None: This is the default selection and does not make any changes.
  • Specify alignment: This option adjusts the horizontal position of the content in a cell. Options include Left, Center, or Right.
  • Fill Color: This option changes the background color of the cell(s). Provide the hexadecimal code for the color you wish to use. For example, #0000FF is the hexadecimal code for blue. This field lets you enter a text string, choose a variable, or use the expression editor.

After completion

In the AFTER COMPLETION area of the action pane, configure the following parameters:

  • Wait before executing next action (seconds): Enter the number of seconds the robotic task waits before it continues to the next action in the robotic task definition.
  • Take a screenshot: If you select this option, the robotic task takes a screenshot of the host machine after the action completes. If the action failed, the screenshot is taken immediately before the exception is thrown and cleanup is started. If the action completed successfully, the screenshot is taken immediately after the action is performed.

Get value

This action retrieves data from a workbook and stores it in a robotic task variable that you must create.

Configuration

In the CONFIGURATION area of the action pane, configure the following parameters:

  • Component Type: Select the component from which you want to retrieve data. Each component type returns a different type of data. Depending on the component you select, additional parameters display.

    Component Returns Additional Parameter(s)
    Cell primitive system data type Cell: This is the column letter and row number for the cell from which you want to return data. This field lets you enter a text string, choose a variable, or use the expression editor.
    Column an array with a data type determined by the file's content Column: This is the column letter; e.g., A, B, C, for which you want to return data. You can enter text or select a variable. This field lets you enter a text string, choose a variable, or use the expression editor.
    Range map array Starting Cell and Ending Cell: These fields represent the start and end of the range for which you want to return data. These fields let you enter a text string, choose a variable, or use the expression editor.
    Row map array Row: This is the row number; e.g., 1, 2, 3, for which you want to return data. You can enter text or select a variable. This field lets you enter a text string, choose a variable, or use the expression editor.
  • Specify header row: When this checkbox is marked, the robotic task uses the column headers as the key in the returned map. If the starting cell, ending cell, or any fields in the specified header row are empty, the column names (e.g., A, B, C) are the key in the returned map.

    • To use this parameter with the Range component, you also need to enter the Header Row Starting Cell and Header Row Ending Cell. These fields let you enter a text string, choose a variable, or use the expression editor.
    • To use this parameter with the Row component, you also need to enter the Header Row. This field lets you enter a text string, choose a variable, or use the expression editor.

Outputs

In the OUTPUTS area of the action pane, configure the following parameters to store this result:

  • Operator:
    • is stored as
    • is appended to
  • Target: Select the robotic task variable where you want to store the result.

Usage considerations

When storing custom-formatted numbers, particularly those representing currency, save them as decimal numbers rather than text to maintain accuracy.

After completion

In the AFTER COMPLETION area of the action pane, configure the following parameters:

  • Wait before executing next action (seconds): Enter the number of seconds the robotic task waits before it continues to the next action in the robotic task definition.
  • Take a screenshot: If you select this option, the robotic task takes a screenshot of the host machine after the action completes. If the action failed, the screenshot is taken immediately before the exception is thrown and cleanup is started. If the action completed successfully, the screenshot is taken immediately after the action is performed.

Get worksheet names

This action returns the worksheet names, including hidden worksheets, in the same order as they appear in the file. The returned value is an array of strings ordered by index; e.g., tab 1, tab 2, and is stored in a robotic task variable that you create.

Outputs

In the OUTPUTS area of the action pane, configure the following parameters to store this result:

  • Operator:
    • is stored as
    • is appended to
  • Target: Select the robotic task variable where you want to store the result.

After completion

In the AFTER COMPLETION area of the action pane, configure the following parameters:

  • Wait before executing next action (seconds): Enter the number of seconds the robotic task waits before it continues to the next action in the robotic task definition.
  • Take a screenshot: If you select this option, the robotic task takes a screenshot of the host machine after the action completes. If the action failed, the screenshot is taken immediately before the exception is thrown and cleanup is started. If the action completed successfully, the screenshot is taken immediately after the action is performed.

Insert row or column

This action inserts a row or column into the active worksheet.

Configuration

In the CONFIGURATION area of the action pane, configure the following parameters:

  • Component Type: Select the component type you want to insert: Row or Column. Depending on the Component Type you select, additional parameters display.

    Component Additional Parameter(s)
    Row Selected Row: Specifies where the row(s) should be inserted. This field lets you enter a text string, choose a variable, or use the expression editor.

    Number of Rows: Specifies the number of rows to be inserted. This field lets you enter a text string, choose a variable, or use the expression editor.

    Insert Options: Specifies whether the row(s) should be inserted above or below the Selected Row. Options are: Insert rows above selected row and Insert rows below selected row.
    Column Selected Column: Specifies where the column(s) should be inserted. This field lets you enter a text string, choose a variable, or use the expression editor.

    Number of Columns: Specifies the number of columns to be inserted. This field lets you enter a text string, choose a variable, or use the expression editor.

    Insert Options: Specifies whether the column(s) should be inserted to the right or to the left of the Selected Column. Options are: Insert columns right of selected column and Insert columns left of selected column.

After completion

In the AFTER COMPLETION area of the action pane, configure the following parameters:

  • Wait before executing next action (seconds): Enter the number of seconds the robotic task waits before it continues to the next action in the robotic task definition.
  • Take a screenshot: If you select this option, the robotic task takes a screenshot of the host machine after the action completes. If the action failed, the screenshot is taken immediately before the exception is thrown and cleanup is started. If the action completed successfully, the screenshot is taken immediately after the action is performed.

Open or create workbook

This action opens an existing Excel workbook or creates a new workbook.

Configuration

In the CONFIGURATION area of the action pane, configure the following parameters:

  • Workbook Action: Select from one of the following options. Depending on the workbook action you select, additional parameters display.

    Workbook Action Additional Parameters
    Open existing workbook
    File Path: This is the folder path and name of the Excel file, including its extension, to be opened. For example, C:\Users\YourUsername\Documents\ExcelFiles\SampleWorkbook.xlsx. This field lets you enter a text string, choose a variable, or use the expression editor.

    Sign in to protected workbook: If the Excel workbook is password-protected, this option allows you to enter the password. This field lets you enter a text string, choose a variable, or use the expression editor.
    Create new workbook Folder: This is the path to the folder where you want to save a new workbook. This field lets you enter a text string, choose a variable, or use the expression editor.

    File Name: This is the name of the new workbook you are creating. This field lets you enter a text string, choose a variable, or use the expression editor.

    File Type: This field identifies the Excel file type for the new workbook. Options include .xlsx, .xls, .xlsm, .xslb, or .csv. This field only displays if you are creating a new workbook.

After completion

In the AFTER COMPLETION area of the action pane, configure the following parameters:

  • Wait before executing next action (seconds): Enter the number of seconds the robotic task waits before it continues to the next action in the robotic task definition.
  • Take a screenshot: If you select this option, the robotic task takes a screenshot of the host machine after the action completes. If the action failed, the screenshot is taken immediately before the exception is thrown and cleanup is started. If the action completed successfully, the screenshot is taken immediately after the action is performed.

Refresh data

Use the Refresh data action to quickly refresh pivot tables and data connections by using a pivot table's name or Power Queries. This action also allows you to refresh all data connections at once. Depending on your specific needs and the data sources you're working with, you might want to refresh all data, only Power Queries, or exclusively PivotTables. Evaluate which sections of your data need updating and select one of the refresh type options.

Configuration

In the CONFIGURATION area of the action pane, configure the following parameters:

  • Refresh Type: Depending on your specific needs and the data sources you're working with, you might want to refresh All data, only Power Queries, or exclusively Pivot tables. Depending on the type you choose, additional parameters display.

    Refresh Type Additional Parameter(s)
    Power Queries All Power Queries in workbook

    Specific Power Query: This field identifies the specific Power Query you want to use to refresh the data. This field lets you enter a text string, choose a variable, or use the expression editor.
    Pivot Tables All pivot tables in workbook

    Specific pivot table: This field identifies the specific pivot table you want to use to refresh the data. This option refreshes a specific pivot table on the currently active worksheet. If there are other pivot tables on the same worksheet, they are also refreshed. Pivot tables with the same name might exist on different worksheets within the workbook, but they are not refreshed. This field lets you enter a text string, choose a variable, or use the expression editor.

After completion

In the AFTER COMPLETION area of the action pane, configure the following parameters:

  • Wait before executing next action (seconds): Enter the number of seconds the robotic task waits before it continues to the next action in the robotic task definition.
  • Take a screenshot: If you select this option, the robotic task takes a screenshot of the host machine after the action completes. If the action failed, the screenshot is taken immediately before the exception is thrown and cleanup is started. If the action completed successfully, the screenshot is taken immediately after the action is performed.

Usage considerations

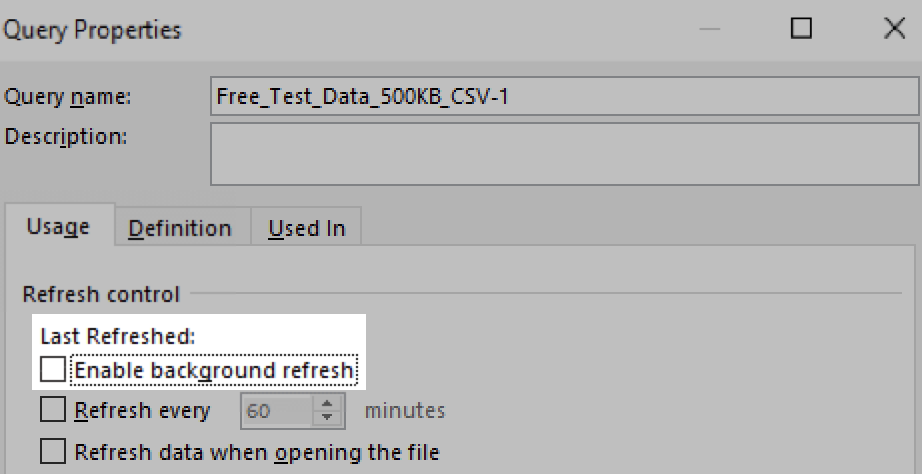
We recommend disabling the Enable background refresh option on all power queries in your Excel file to ensure your robotic tasks wait until the data refresh is complete before proceeding. This will help avoid errors with outdated information.

query-refresh.png

Run macro

The Run macro actions allows you to call macros in a workbook. This action is a powerful option that you can use to automate even the most complex Excel processes, work with formatted templates, and manipulate files with minimal manual effort. Macros are a great way for you to extend Excel's capabilities and expand what you can do with RPA. For example, if a function isn't supported, you can create a macro in Excel to perform the task instead. By executing predefined macros, Appian RPA enables you to standardize your processes and manage more data in less time with higher accuracy.

This action is compatible with XSLM and XSLB files.

Tip:  Before using the Run macros action, ensure that your Excel macro is predefined and working as intended. This includes testing your macro within Excel to confirm that it performs the desired tasks without errors.

Configuration

In the CONFIGURATION area of the action pane, configure the following parameters:

  • Macro name: The name of the predefined Excel macro you want to execute. This field lets you enter a text string, choose a variable, or use the expression editor.
  • Inputs: The input parameters or values that are passed into the macro function. To provide inputs, use an expression that supplies the VBA argument directly. Storing the input in a robotic task variable is only allowed if it is an array of primitive data types. Note that only primitive data types are supported. This field lets you enter a text string, choose a variable, or use the expression editor.

After completion

In the AFTER COMPLETION area of the action pane, configure the following parameters:

  • Wait before executing next action (seconds): Enter the number of seconds the robotic task waits before it continues to the next action in the robotic task definition.
  • Take a screenshot: If you select this option, the robotic task takes a screenshot of the host machine after the action completes. If the action failed, the screenshot is taken immediately before the exception is thrown and cleanup is started. If the action completed successfully, the screenshot is taken immediately after the action is performed.

Save workbook as

After a workbook is opened or created, this action saves the workbook with the name and to the location that you specify in the parameters. If the file name in the configuration is different than the opened file, the robotic task saves the workbook as a new file.

Note:  This action works with .xlsx and .xls files only.

Tip:  You can't use this action to rename an existing workbook. However, if you want to rename an existing workbook, you can use the Rename a file or folder File System action to do that.

Configuration

In the CONFIGURATION area of the action pane, configure the following parameters:

  • Folder: This is the path to the folder where the file is saved.
  • File name: The name that identifies the file being saved. This field lets you enter a text string, choose a variable, or use the expression editor.
  • Replace existing workbook: Check this box to replace an existing file in the specified folder when the file names are also the same.

After completion

In the AFTER COMPLETION area of the action pane, configure the following parameters:

  • Wait before executing next action (seconds): Enter the number of seconds the robotic task waits before it continues to the next action in the robotic task definition.
  • Take a screenshot: If you select this option, the robotic task takes a screenshot of the host machine after the action completes. If the action failed, the screenshot is taken immediately before the exception is thrown and cleanup is started. If the action completed successfully, the screenshot is taken immediately after the action is performed.

Select worksheet

This action selects a specific worksheet within an Excel file so that the robotic task can interact with it.

Configuration

In the CONFIGURATION area of the action pane, configure the following parameters:

  • Select Worksheet Name or Index: Choose whether you want to select the worksheet by using a specific Worksheet name or Worksheet index.
  • Worksheet Name: The worksheet name that identifies the sheet in the workbook being selected. This field lets you enter a text string, choose a variable, or use the expression editor.
  • Worksheet Index: The index number, a sequential number assigned to a sheet, that identifies the file being selected. The first worksheet is index 1. This field lets you enter a text string, choose a variable, or use the expression editor.

After completion

In the AFTER COMPLETION area of the action pane, configure the following parameters:

  • Wait before executing next action (seconds): Enter the number of seconds the robotic task waits before it continues to the next action in the robotic task definition.
  • Take a screenshot: If you select this option, the robotic task takes a screenshot of the host machine after the action completes. If the action failed, the screenshot is taken immediately before the exception is thrown and cleanup is started. If the action completed successfully, the screenshot is taken immediately after the action is performed.

Sort data

The Sort data action lets you arrange cell values in a range or table based on one column, making data organization swift and straightforward.

Configuration

In the CONFIGURATION area of the action pane, configure the following parameters:

  • Range or Table: Select whether you want to sort a specific Range or Table. Depending on the option you choose, additional parameters display.

    Option Additional Parameter(s)
    Range Starting Cell: This field identifies the row and column where your range starts. This field lets you enter a text string, choose a variable, or use the expression editor.

    Ending Cell: This field identifies the last row and column of the range you want to sort. This field lets you enter a text string, choose a variable, or use the expression editor.
    Table Table Name: The name of a specific table within the worksheet. This field lets you enter a text string only.
  • Sort By Column: Use this field to specify the column you want to sort by. You can use the column name or its reference like C. Ensure the column contains only text values.

  • Order: This field identifies the sort order for the column and includes the following options:

    • Ascending: This option sorts numbers from lowest to highest and letters from A to Z.
    • Descending: This option sorts numbers from highest to lowest and letters from Z to A.
    • Custom List: Choose this option to specify a unique sorting order using a list of text values, like the months of the year. For example: "Jan", "Feb", etc. This field lets you enter a text string, choose a variable, or use the expression editor.

After completion

In the AFTER COMPLETION area of the action pane, configure the following parameters:

  • Wait before executing next action (seconds): Enter the number of seconds the robotic task waits before it continues to the next action in the robotic task definition.
  • Take a screenshot: If you select this option, the robotic task takes a screenshot of the host machine after the action completes. If the action failed, the screenshot is taken immediately before the exception is thrown and cleanup is started. If the action completed successfully, the screenshot is taken immediately after the action is performed.

Switch workbook

The action allows you to switch between two open workbooks without needing to close either one, allowing actions to be performed across both workbooks. Remember, you can only switch to a workbook that was previously opened using the Open or create workbook action.

Configuration

In the CONFIGURATION area of the action pane, configure the following parameter:

  • File Path: This is the complete path to the workbook you want to switch to. For example, C:\Users\JohnDoe\Documents\FinancialReports\Q1_2023.xlsx. This field lets you enter a text string, choose a variable, or use the expression editor.

    Tip:  Save workbook paths in variables to easily switch workbooks without retyping the full path.

After completion

In the AFTER COMPLETION area of the action pane, configure the following parameters:

  • Wait before executing next action (seconds): Enter the number of seconds the robotic task waits before it continues to the next action in the robotic task definition.
  • Take a screenshot: If you select this option, the robotic task takes a screenshot of the host machine after the action completes. If the action failed, the screenshot is taken immediately before the exception is thrown and cleanup is started. If the action completed successfully, the screenshot is taken immediately after the action is performed.

Write into worksheet

This action writes data or a formula into a single cell or a range.

Configuration

In the CONFIGURATION area of the action pane, configure the following parameters:

  • Interaction Type: Select whether this action will Write Data or Write a Formula.
  • Value Array: The data, entered as a value array, to write to the worksheet. The values can be numbers, text, dates, maps, dictionaries (returned by a query to a DSE), or lists of CDTs. This field lets you enter a text string, choose a variable, or use the expression editor.
  • Formula: The Excel formula; e.g., SUM(A1+B1), to write to the worksheet. This field lets you enter a text string or array, choose a variable, or use the expression editor. If you want the formula to be dynamic, you can build a dynamic expression rule and use looping to generate the formula dynamically. Otherwise, you can utilize the Auto Fill feature to make the formula dynamic.
  • Exclude column headers: When you mark this checkbox, the robotic task does not write the header data (specified by the key in your value array) into the Excel file.
  • Starting Cell: This field identifies the row and column from which you want to start. This field lets you enter a text string, choose a variable, or use the expression editor.

After completion

In the AFTER COMPLETION area of the action pane, configure the following parameters:

  • Wait before executing next action (seconds): Enter the number of seconds the robotic task waits before it continues to the next action in the robotic task definition.
  • Take a screenshot: If you select this option, the robotic task takes a screenshot of the host machine after the action completes. If the action failed, the screenshot is taken immediately before the exception is thrown and cleanup is started. If the action completed successfully, the screenshot is taken immediately after the action is performed.

Usage considerations

  • Nested entries are not supported. Only use a flat table structure. If your data includes a nested column, that column will be written as an empty cell.
  • Map data types must have the same number of columns across entries.
  • If you're working with data from an array of CDTs, and each of those CDTs has a different number of fields, the order of that data may differ when writing that data to columns in the worksheet. For example, if your CDT array contains three CDTs with inconsistent fields, such as: {"id": 1, "name": "banana"}, {"id": 2, "name": "apple", "color": "red"}, {"id": 3, "shape": "round", "botanicalName": "hesperidium"}, RPA may not write the data in the column order you intended. To have more control over the column order, use the cast() function to convert the CDTs to a map before writing to the worksheet.
  • To write data from a record, you must first convert the record data into a map. To do this, you can use the cast() function with a!listType(type!Map) and a!queryRecordType as its arguments, and wrap it around the queryRecordTypes expression; e.g., cast(a!listType(type!Map), a!queryRecordType()).
  • If you want specific fields from a record query result, you can use Appian expressions to refine the data.
    • To refine the data, you need to define the function a!queryRecordType to select the fields you want to return.
    • To exclude IDs from a record query result, you can use the fn!remove() function as IDs are returned automatically with record queries.
    • If your query includes record relationships, you must flatten the data structure using a!flatten() and a!map() functions to ensure the output is in a flat structure suitable for writing into an Excel document.
    • Here is a pattern for refining the data.
      1
      2
      3
      4
      5
      6
      7
      8
      9
      10
      11
      12
      13
      14
      15
      16
      17
      18
      19
      20
      21
      22
      
      fn!with(
      local!dataWithoutIds: fn!remove(
        a!queryRecordType(
          recordType: recordType!Department,
          fields: {recordType!Department.fields.name,
            recordType!Department.relationships.employee.fields.status},
          pagingInfo: a!pagingInfo(
            startIndex: 1,
            batchSize: 100
          )
      ).data,
      {recordType!Department.fields.id, recordType!Department.fields.employeeId}
      ),
      a!flatten(
        a!forEach(
          items: local!dataWithoutIds,
          expression: a!map(
              name: fv!item [recordType!Department.fields.name],
              status: fv!item[recordType!Department.fields.status]
          )
        )
      )
      
Open in Github Built: Wed, May 01, 2024 (02:56:46 PM)

Excel License Required Actions

FEEDBACK