| Process Mining is deprecated with Appian 24.2 and will no longer be available in an upcoming release. Instead, we encourage customers to use Process HQ to explore and analyze business processes and data. |
Models are a visual representation of your current or ideal processes. Models help to identify common bottlenecks, deviations, and other impediments to successful and efficient completions. One of the primary forms of analysis in Process Mining is conformance checking, where differences between the discovered and target models are highlighted.
There are two model types:
To view the models for your processes, click the Model icon in the navigation menu. You can switch between the discovered and target models by clicking their respective tabs.
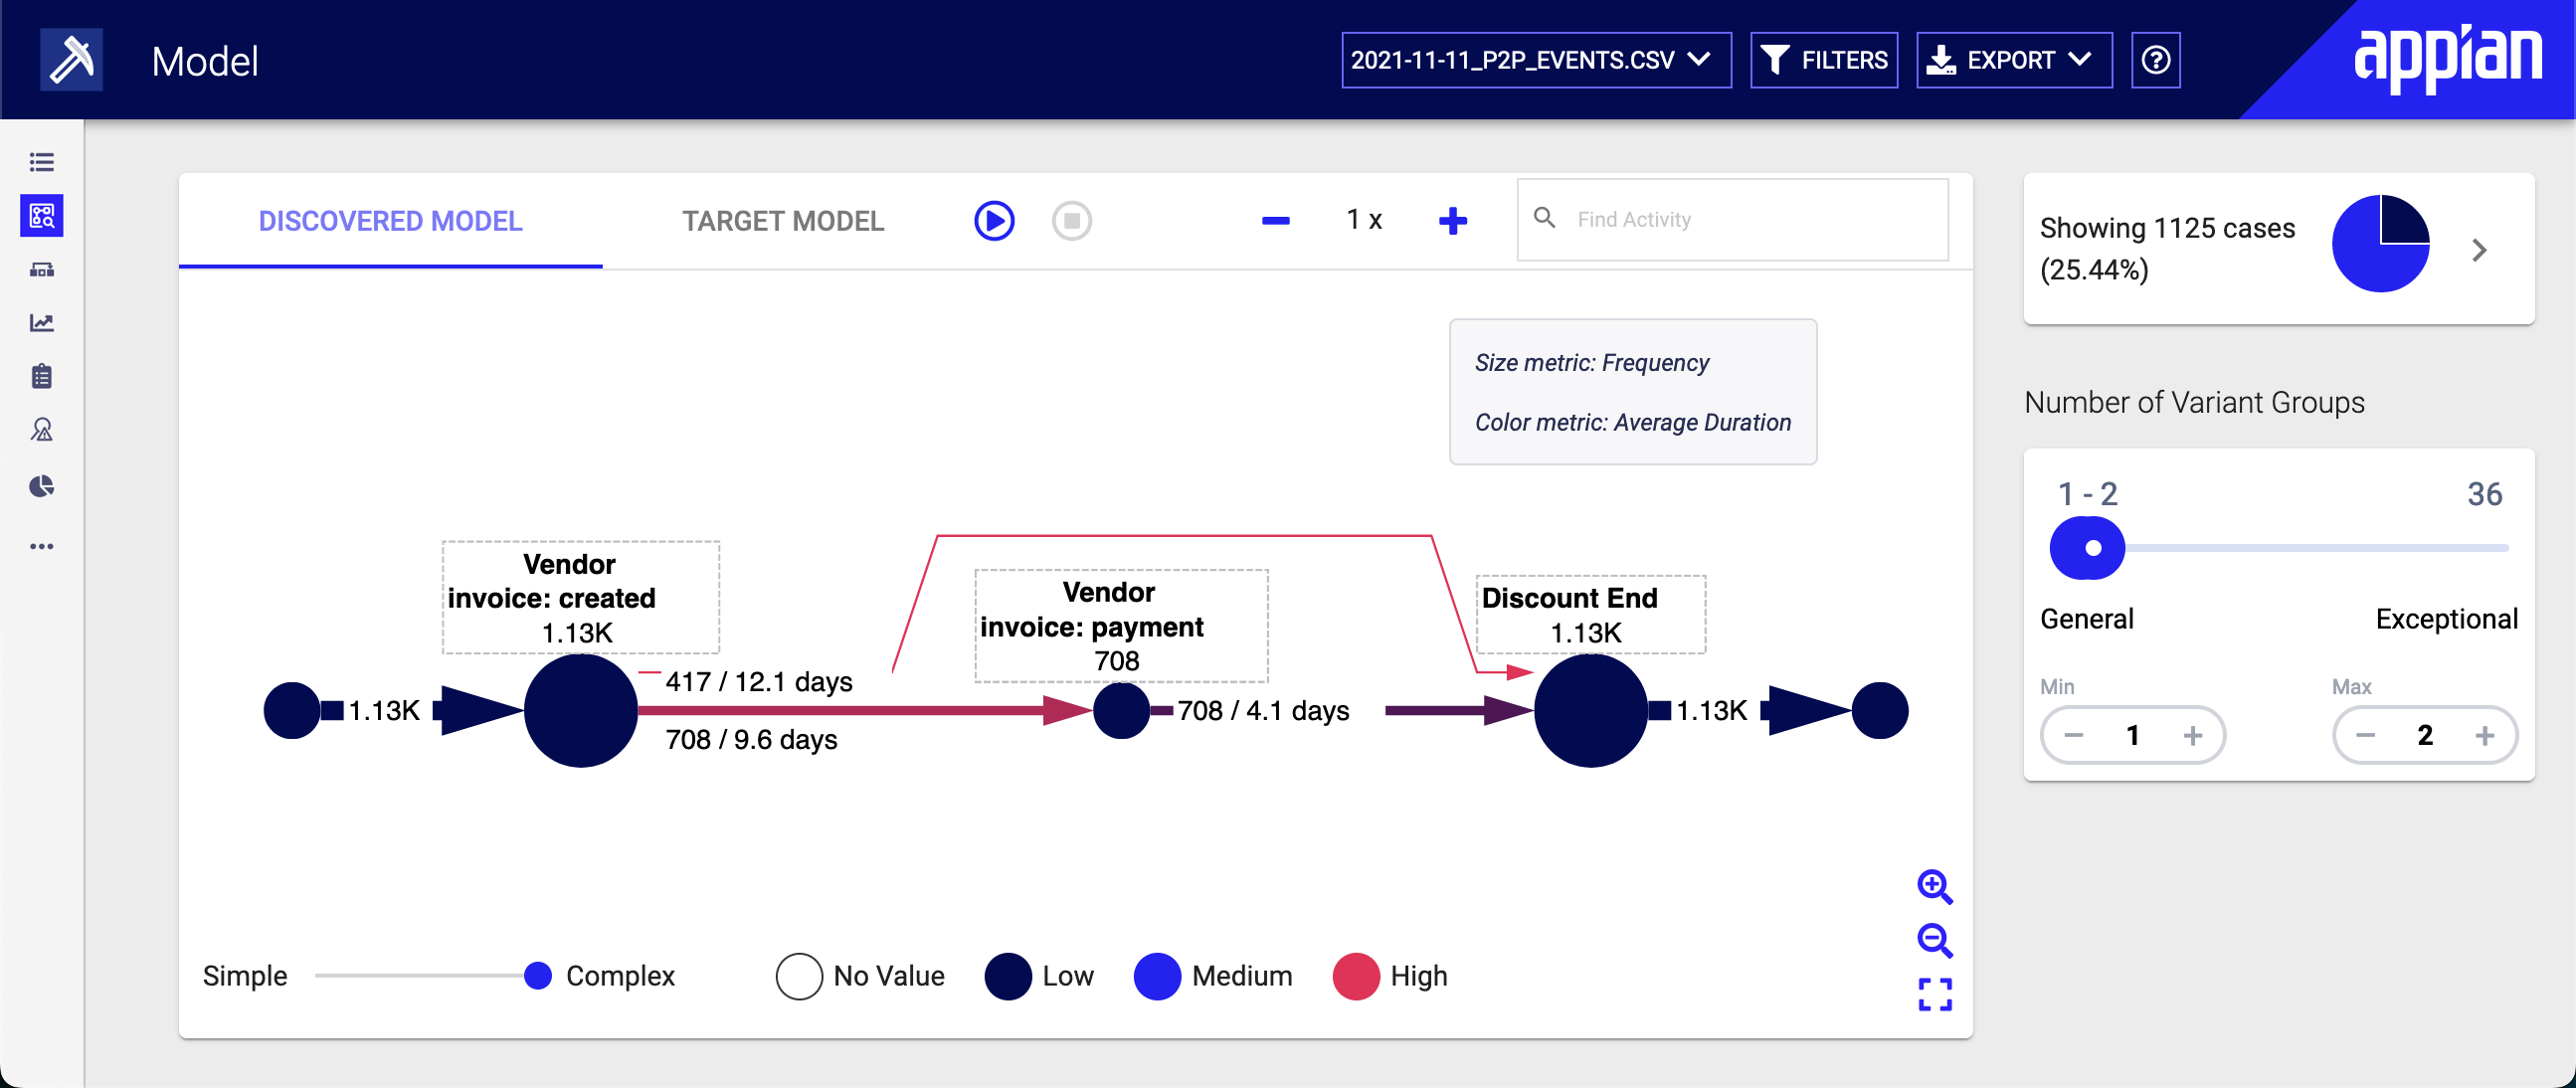
When you first sign in to Process Mining and select a log, Appian displays your discovered model. This is a visualization of your process based on the data in your event log.
The activities in your process are represented as nodes in the model. The connections between activities are represented as connectors.
By default, the size of activity nodes and the connectors between them represent the frequency the activity occurred. This helps you quickly see how often activities occur in relation to one another. For example, if one activity occurs 200 times and another occurs 100 times, the radius of the activity node that occurs 200 times is twice as large as the radius of the activity node that occurs 100 times.
The color of activity nodes represents the average duration of the activity based on minimum and maximum values in the event log. For example, connectors with an average duration closer to the minimum are blue, and connectors with an average duration closer to the maximum are red.
Tip: You must identify start and end time stamps in your event log to see activity duration metrics in your model.
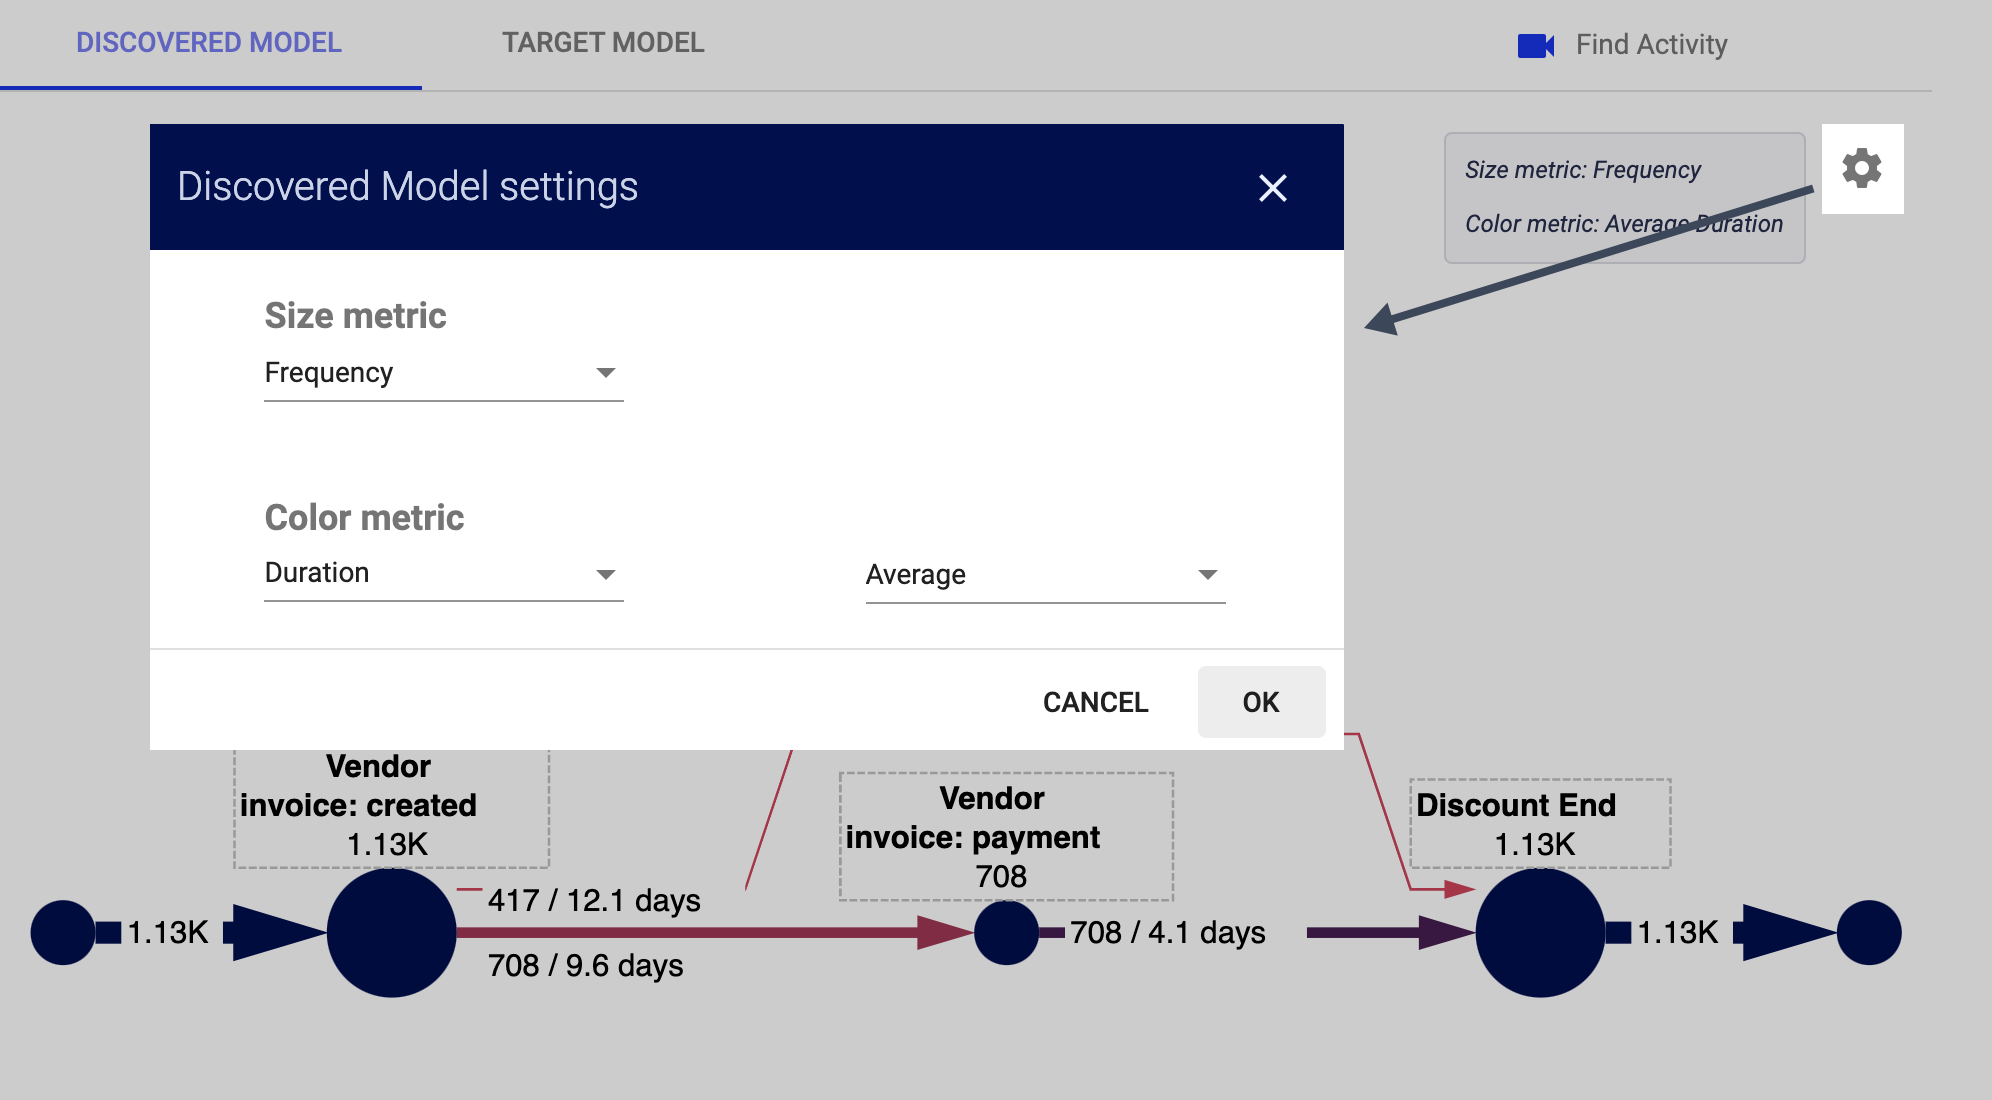
To change how your discovered model is visualized, you can adjust the visual settings.
There are many options to customize the appearance of your models. Adjust the model settings to gain new insights into your processes.
To change your discovered model settings:
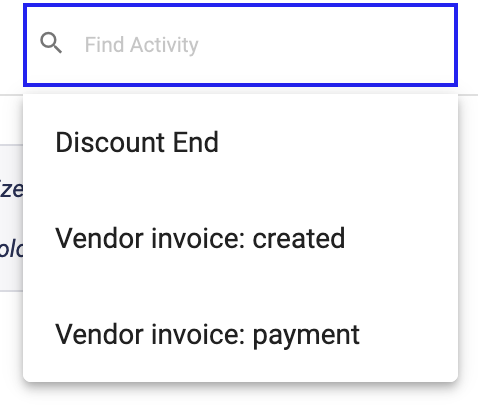
If your models are particularly complex, you may wish to hone in on a specific activity. Nodes represent activities in Process Mining models. Select an activity from the Find Activity drop-down, and your view will zoom into the respective node.
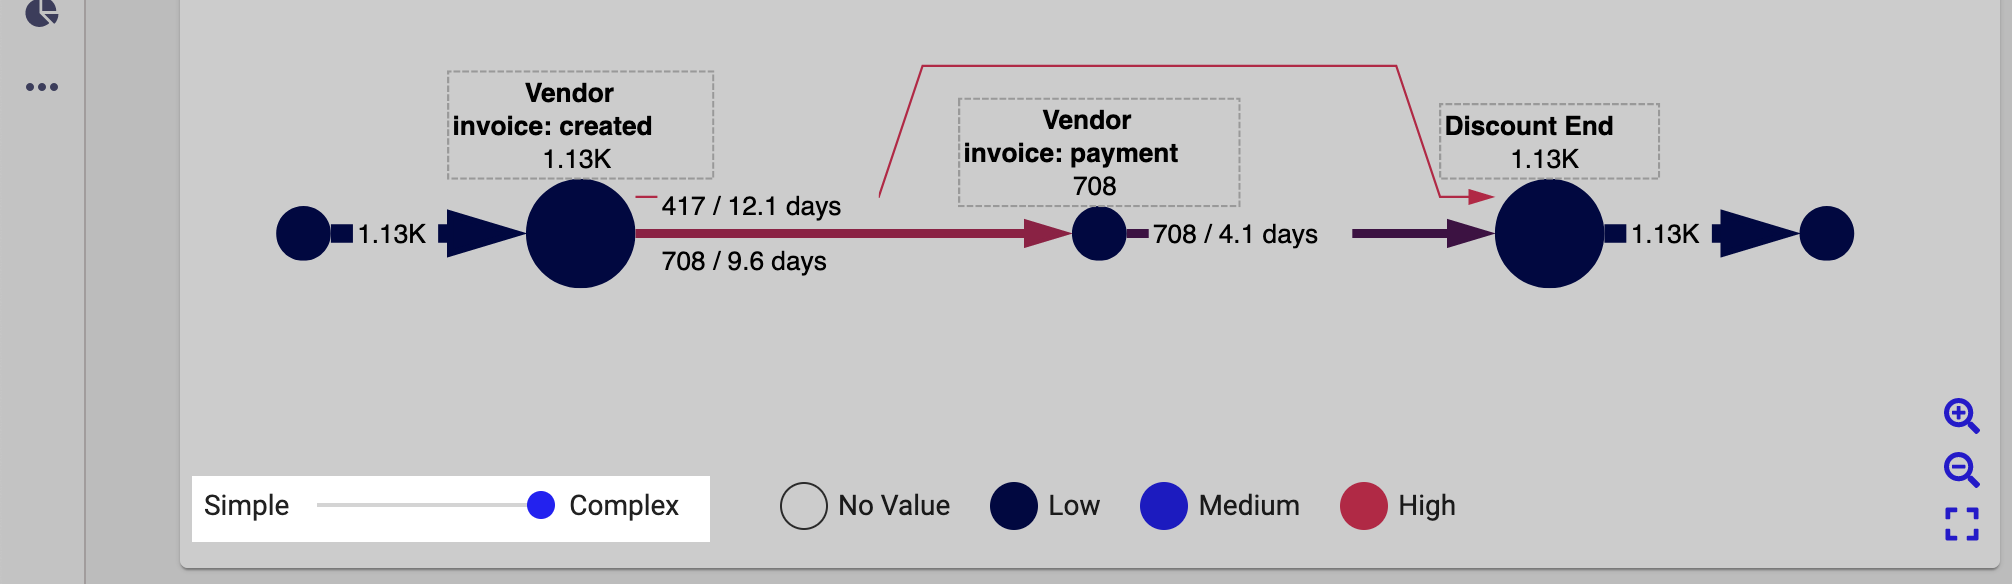
You can also simplify the discovered model with the complexity slider that is located in the bottom-left of the window. Drag the slider towards Simple and away from Complex, and the model automatically adjusts.
When you simplify the model, less frequent connectors between activities are removed. Reducing the complexity doesn't change or remove the activities themselves. This is especially useful if you want to visualize several variants of a model. By default, the process displays all of its follower relationships. In other words, it displays the model in its full complexity.
When you click on an activity node, Process Mining displays more detailed information, such as:
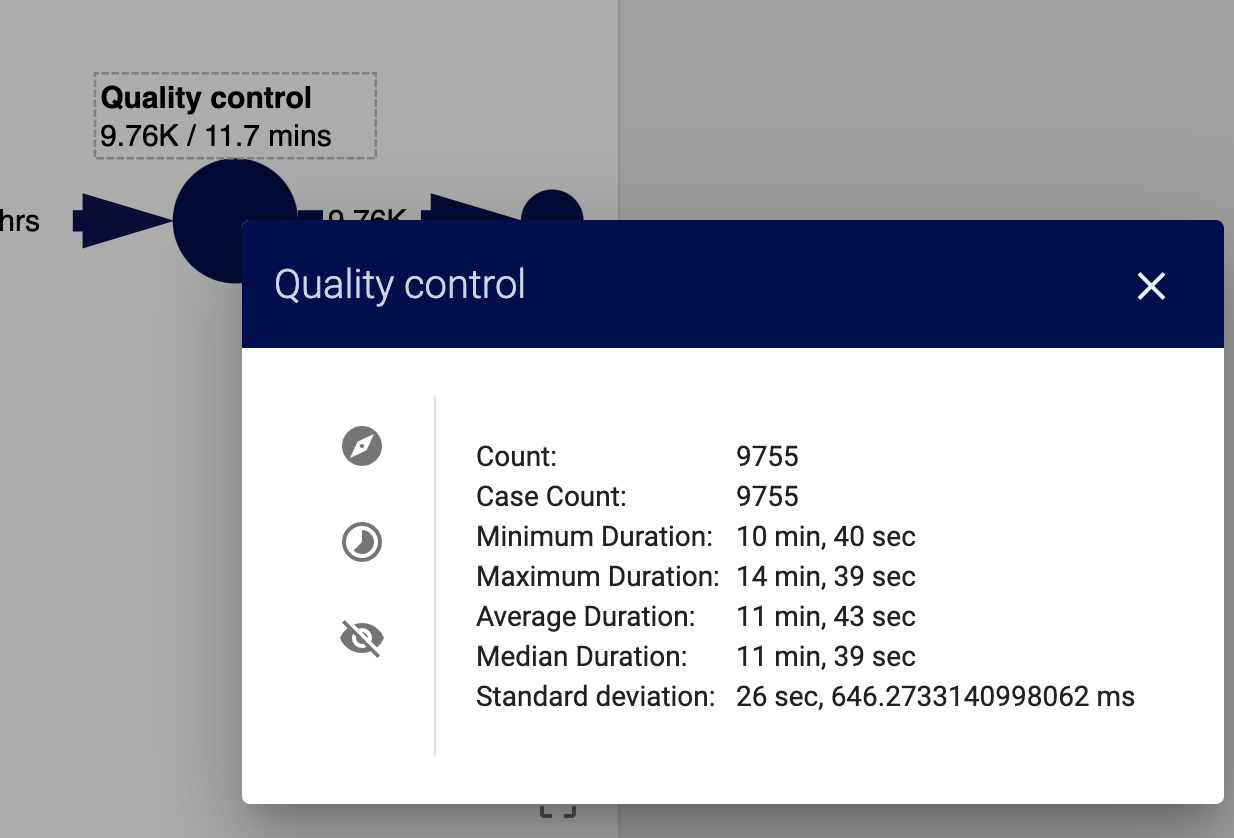
You can also select from a few additional options:
Target durations help you track and visualize how the durations of activities in your actual process compare with a goal, industry standard, or service-level agreement (SLA). For example, you might want to review the average response times in an incident management process to verify that you're following your SLA.
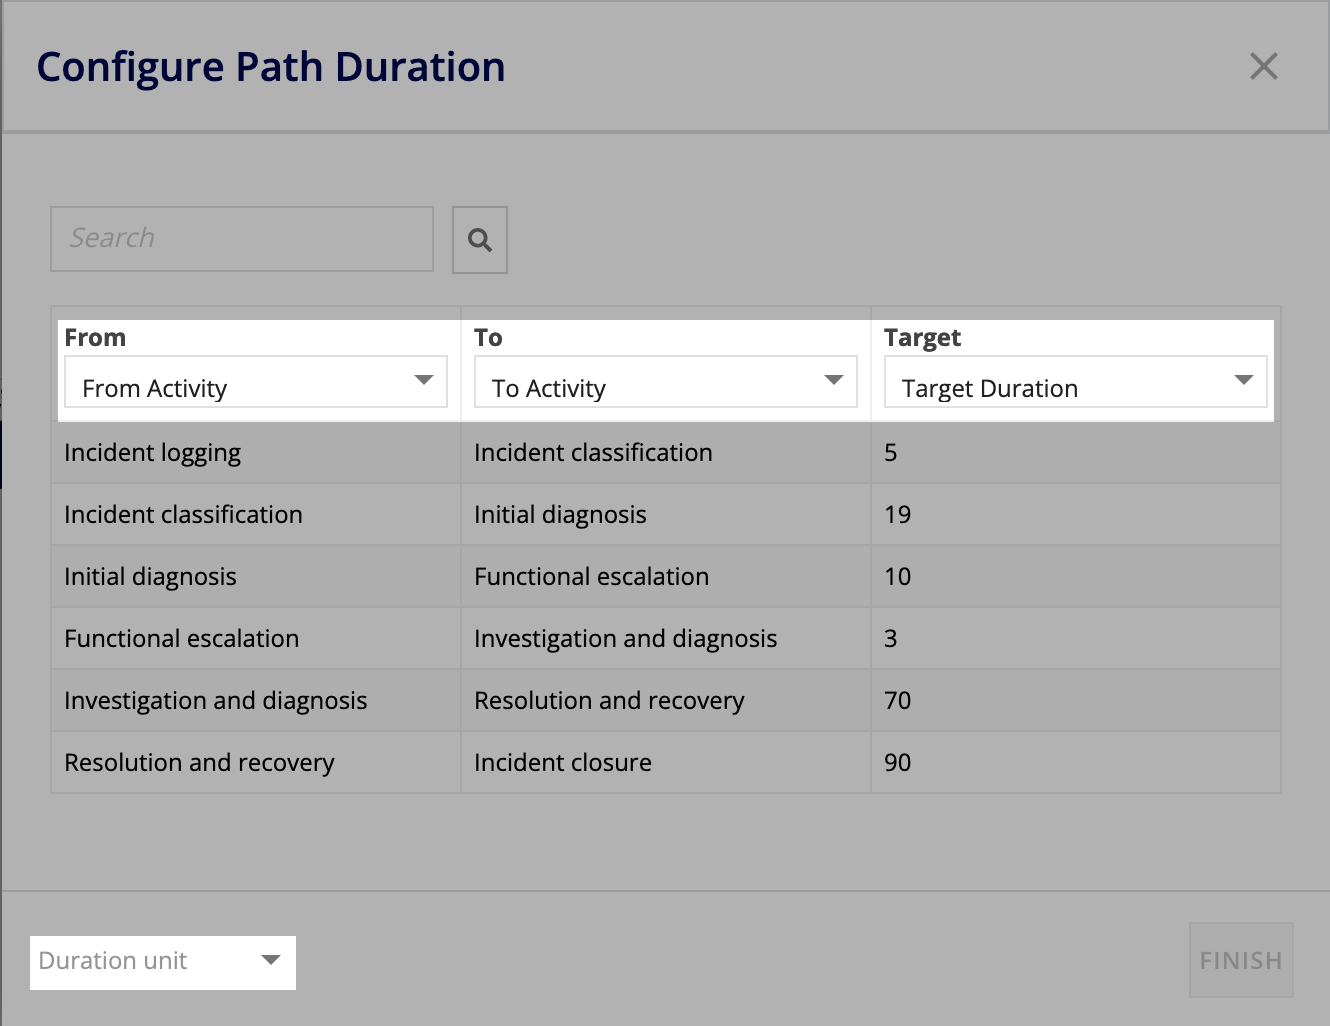
You'll need to create a CSV file that defines the target durations for specific activities or between activities. A Path Duration File defines target durations between activities. An Activity Duration file defines target durations for specific activities.
To create a Path Duration file, create a CSV that contains the following columns:
To create an Activity Duration file, create a CSV that contains the following columns:
Once you've created the file or files that define your target durations, you can add them to the discovered model.
To add target durations:
Tip: You can add Path Duration and Activity Duration at the same time.
Now, new visual settings are applied to the discovered model to visualize the target durations. The colors of the activity nodes and activity connectors change depending on the target durations you set.
From here, you can adjust the visual settings to track against minumum, maximum, average, median, or total durations.
Process Mining can animate the discovered model process. The animation shows how cases run through specific process variants.
To animate the discovered model:
1, the animation is scaled to display all log content in one minute.
The target model represents the ideal reference model for a process. You can upload the target model as a BPMN file or create it directly in Process Mining.
Note: To compare the duration of individual activities or the duration between activities with a target duration, add target durations to the discovered model.

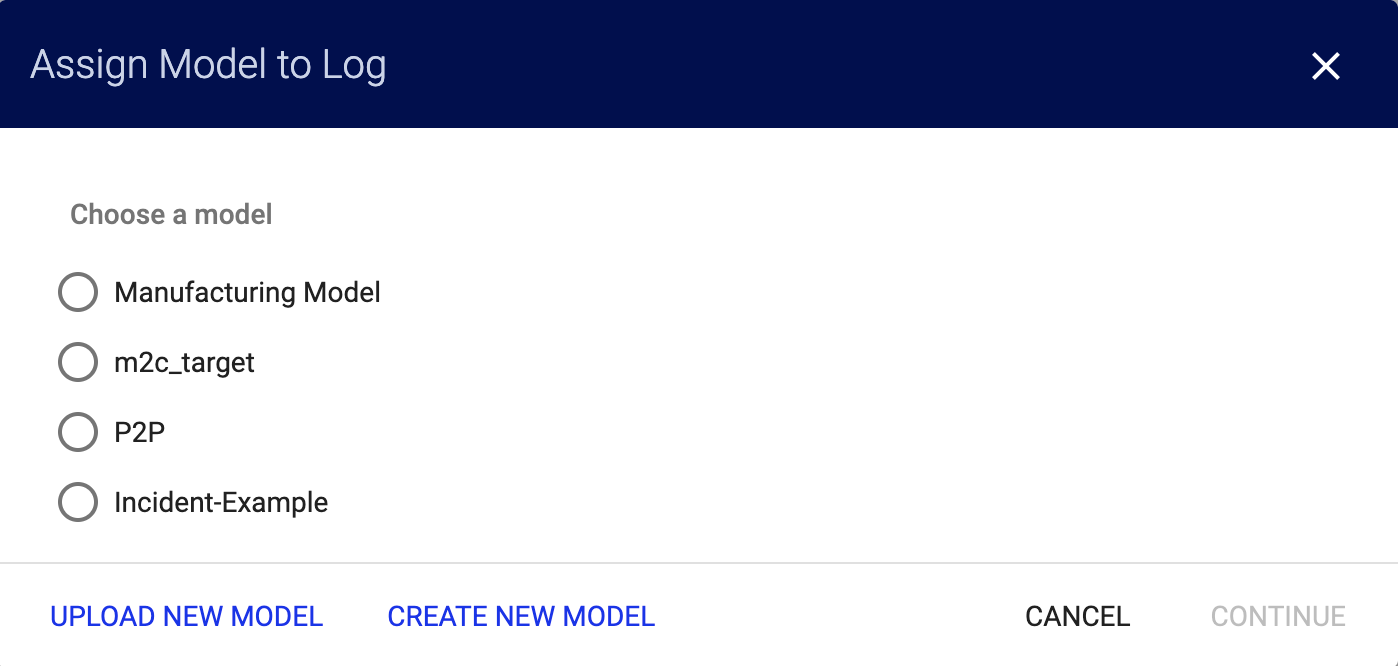
To see the target model, click the Target Model tab in Process Mining. If you haven't connected a target model yet, the first time you view the Target Model tab, Process Mining will prompt you to select an existing model, or:
Whether you choose an existing model, upload a new model, or create a new model, the target model activities must match the events in the discovered model. Process Mining matches activities by name, so make sure that the names of your activities in the discovered model and events in the target model match. If you try to connect a target model with activities that don't align with the discovered model, Process Mining displays the misaligned activities.
If you already connected a target model and you want to change it, go to Model Management.
To upload a new target model:
If the activities do not align, no data will be associated with the misaligned activities.
You can create or edit Business Process Model and Notation (BPMN) models right in the system using built-in bpmn.io functionality. Additionally, Process Mining can generate a model based on the discovered model.
To create a new target model:
BPMN Model displays by default.
The icons in the bottom-left of the window allow you to start a new model from scratch, return to the discovered model, upload a model, download the target model BPMN file, or save the target model to Process Mining.
By default, the target model darkens activity nodes based on activity duration and thickens the connectors between them based on the frequency they occur in your discovered process. Connectors that are thinner than others indicate that path occurs less frequently.
The color of activity nodes can range from:
For a more precise view, click an activity or connector to see the associated numeric attributes that can impact the visual representation.
To change your target model settings:
In addition to the size and color of activity nodes and connectors, you can also adjust the number of variant groups the model displays.
To adjust model variant groups, drag the Min and Max sliders in the Number of Variant Groups section to the number you want to display. If all variant groups are visualized by the model, the complete event log displays in the discovered model.
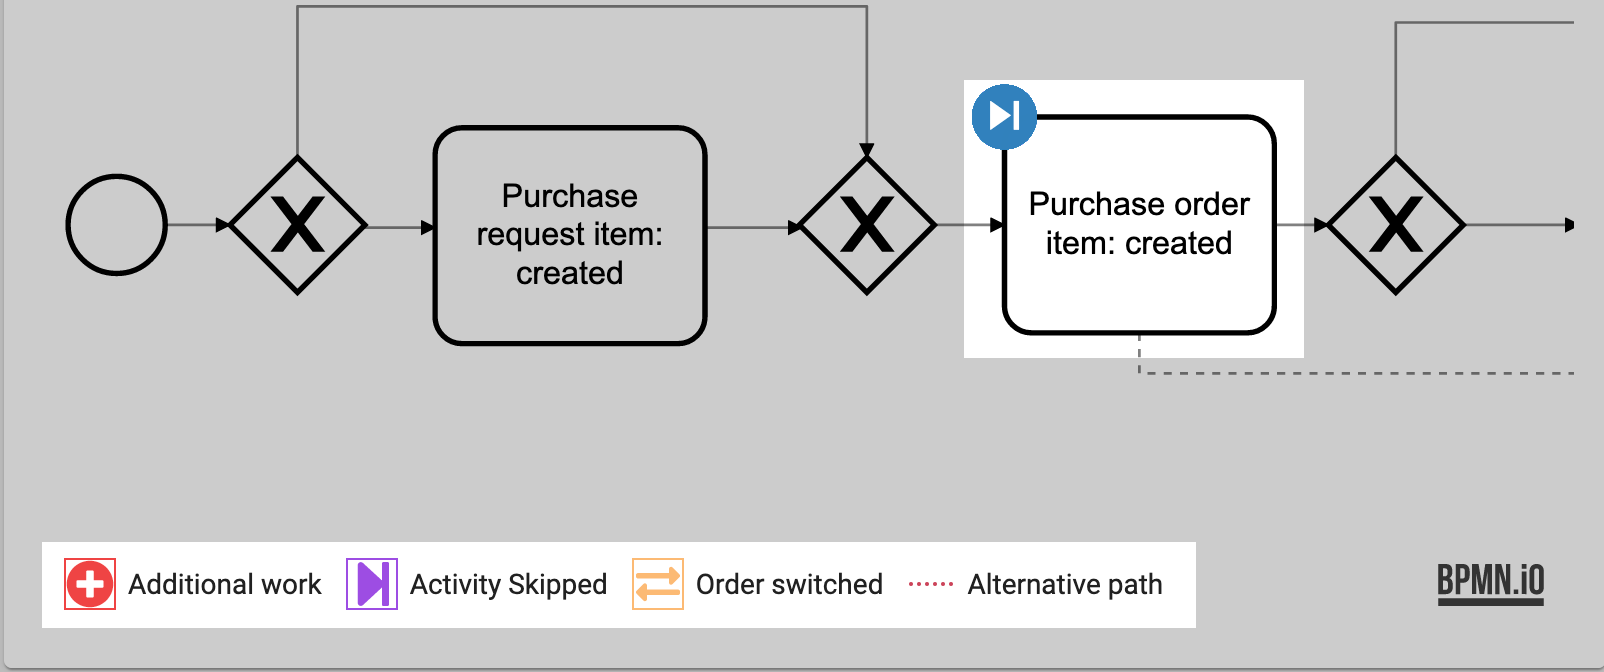
If several process variant groups are represented in the target model, process deviations are also visualized:
Note: You can filter by single variants on the Variants page.
You can add, share, edit, export, and delete target models from the management hub. The TARGET MODELS tab displays all of the target models that you've added to Process Mining or that have been shared with you.
Note: Discovered models are automatically generated from an event log, while target models are BPMN files you upload or create. Models in this section only relate to target models except for exporting discovered models.
To access target models:
You can upload target model to Process Mining as BPMN files.
To upload a model:
When you upload a target model, it isn't connected to an actual process. To connect an uploaded target model with a process, connect or update an event log on the LOGS tab.
You can also upload a target model on the Models page directly if one isn't already connected.
Process Mining supports viewing and editing BPMN files directly in the system.
To edit a model:
Tip: To edit the model directly from the Target Model tab, click Edit Model.
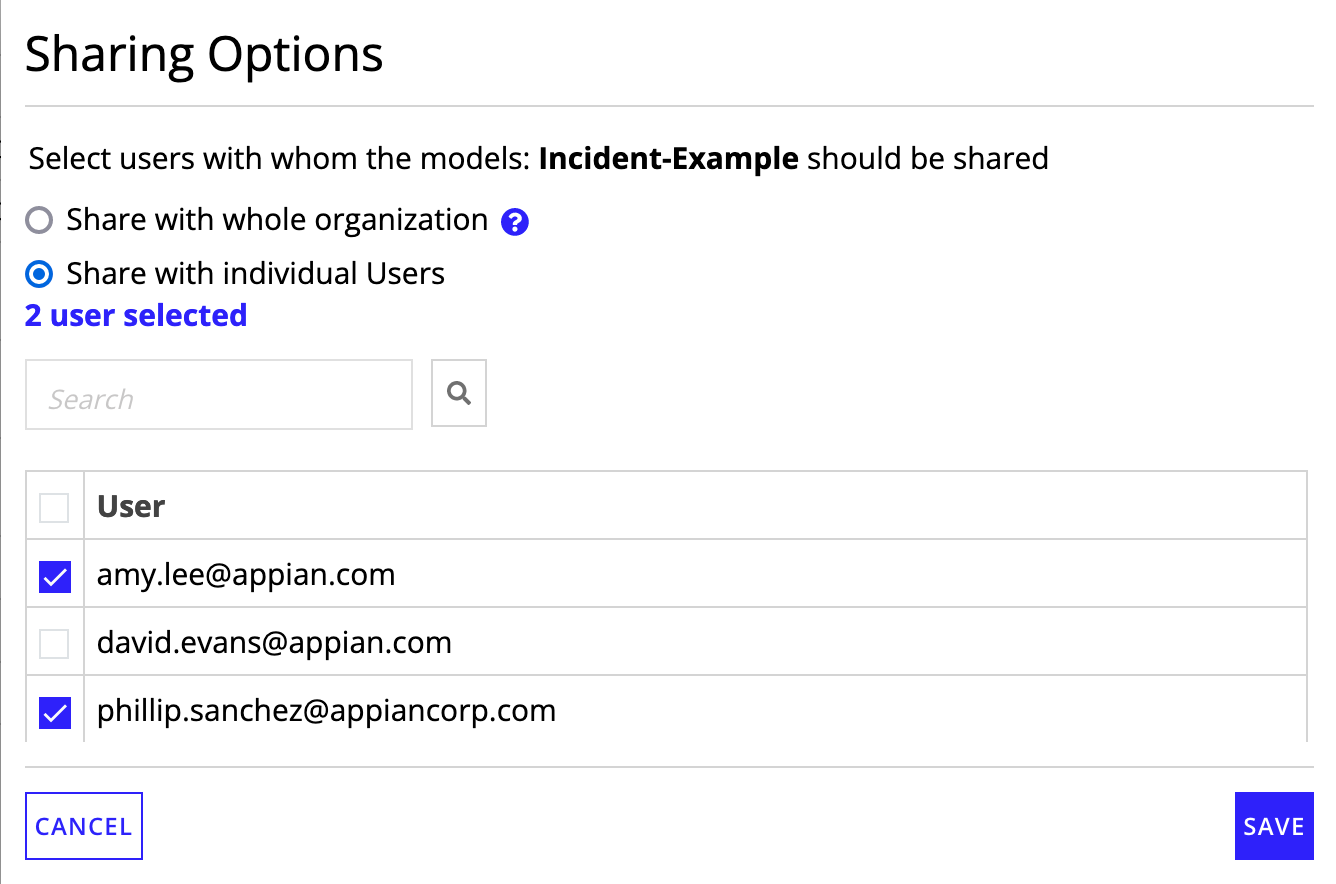
You may want to share a model with your entire organization or with specific users.
To share a model:
To stop sharing a model:
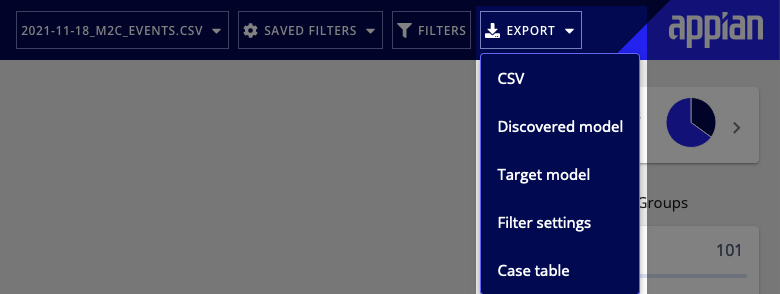
When you export a model from Process Mining, it downloads a file on your computer. Target models export as BPMN files and discovered models export as either BPMN, PDF, or SVG files.
You can either export target models from the management hub or export any type of model from the EXPORT dropdown in the header bar.
To export a target model:
Note: When you export a target model and have filter settings applied, the filter settings will also be exported.
The EXPORT dropdown displays in the header bar whenever an event log is active.
To export a target model:
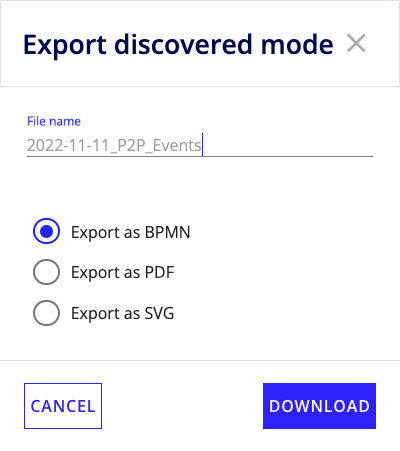
To export a discovered model:
To delete a target model:
If you delete a target model, this action cannot be undone.
